Make a robot platform (updated)
Welcome
The purpose of this tutorial is to give a hands-on experience with rapid prototyping and code. In this way it is a good idea to have some basic experience with programming (not required though).
First make sure you have all the components needed (see below) and then you can start the guide!
OBS! You might have the robot already - if this is the case go directly to step 5!
Background
Our robotics platform has been used in several workshops for high school and university students. Participants built a robot, gave it personality and experimented with the interaction between humans and technology. We provided laser cut robot parts, the Arduino open source rapid prototyping platform, electronics and programming building blocks. A single distance sensor and different behaviours coded as modular functions allow a range of behaviours to be combined. We provide the participants the possibility to think, experiment and express themselves through the material, the media of the behaviours, look and feel of a robot - rather than more well known, established media such as a film or a written report. Expression through the material itself, not through words in a pamphlet about it. The material is the media, we think through the material, the material is primary.
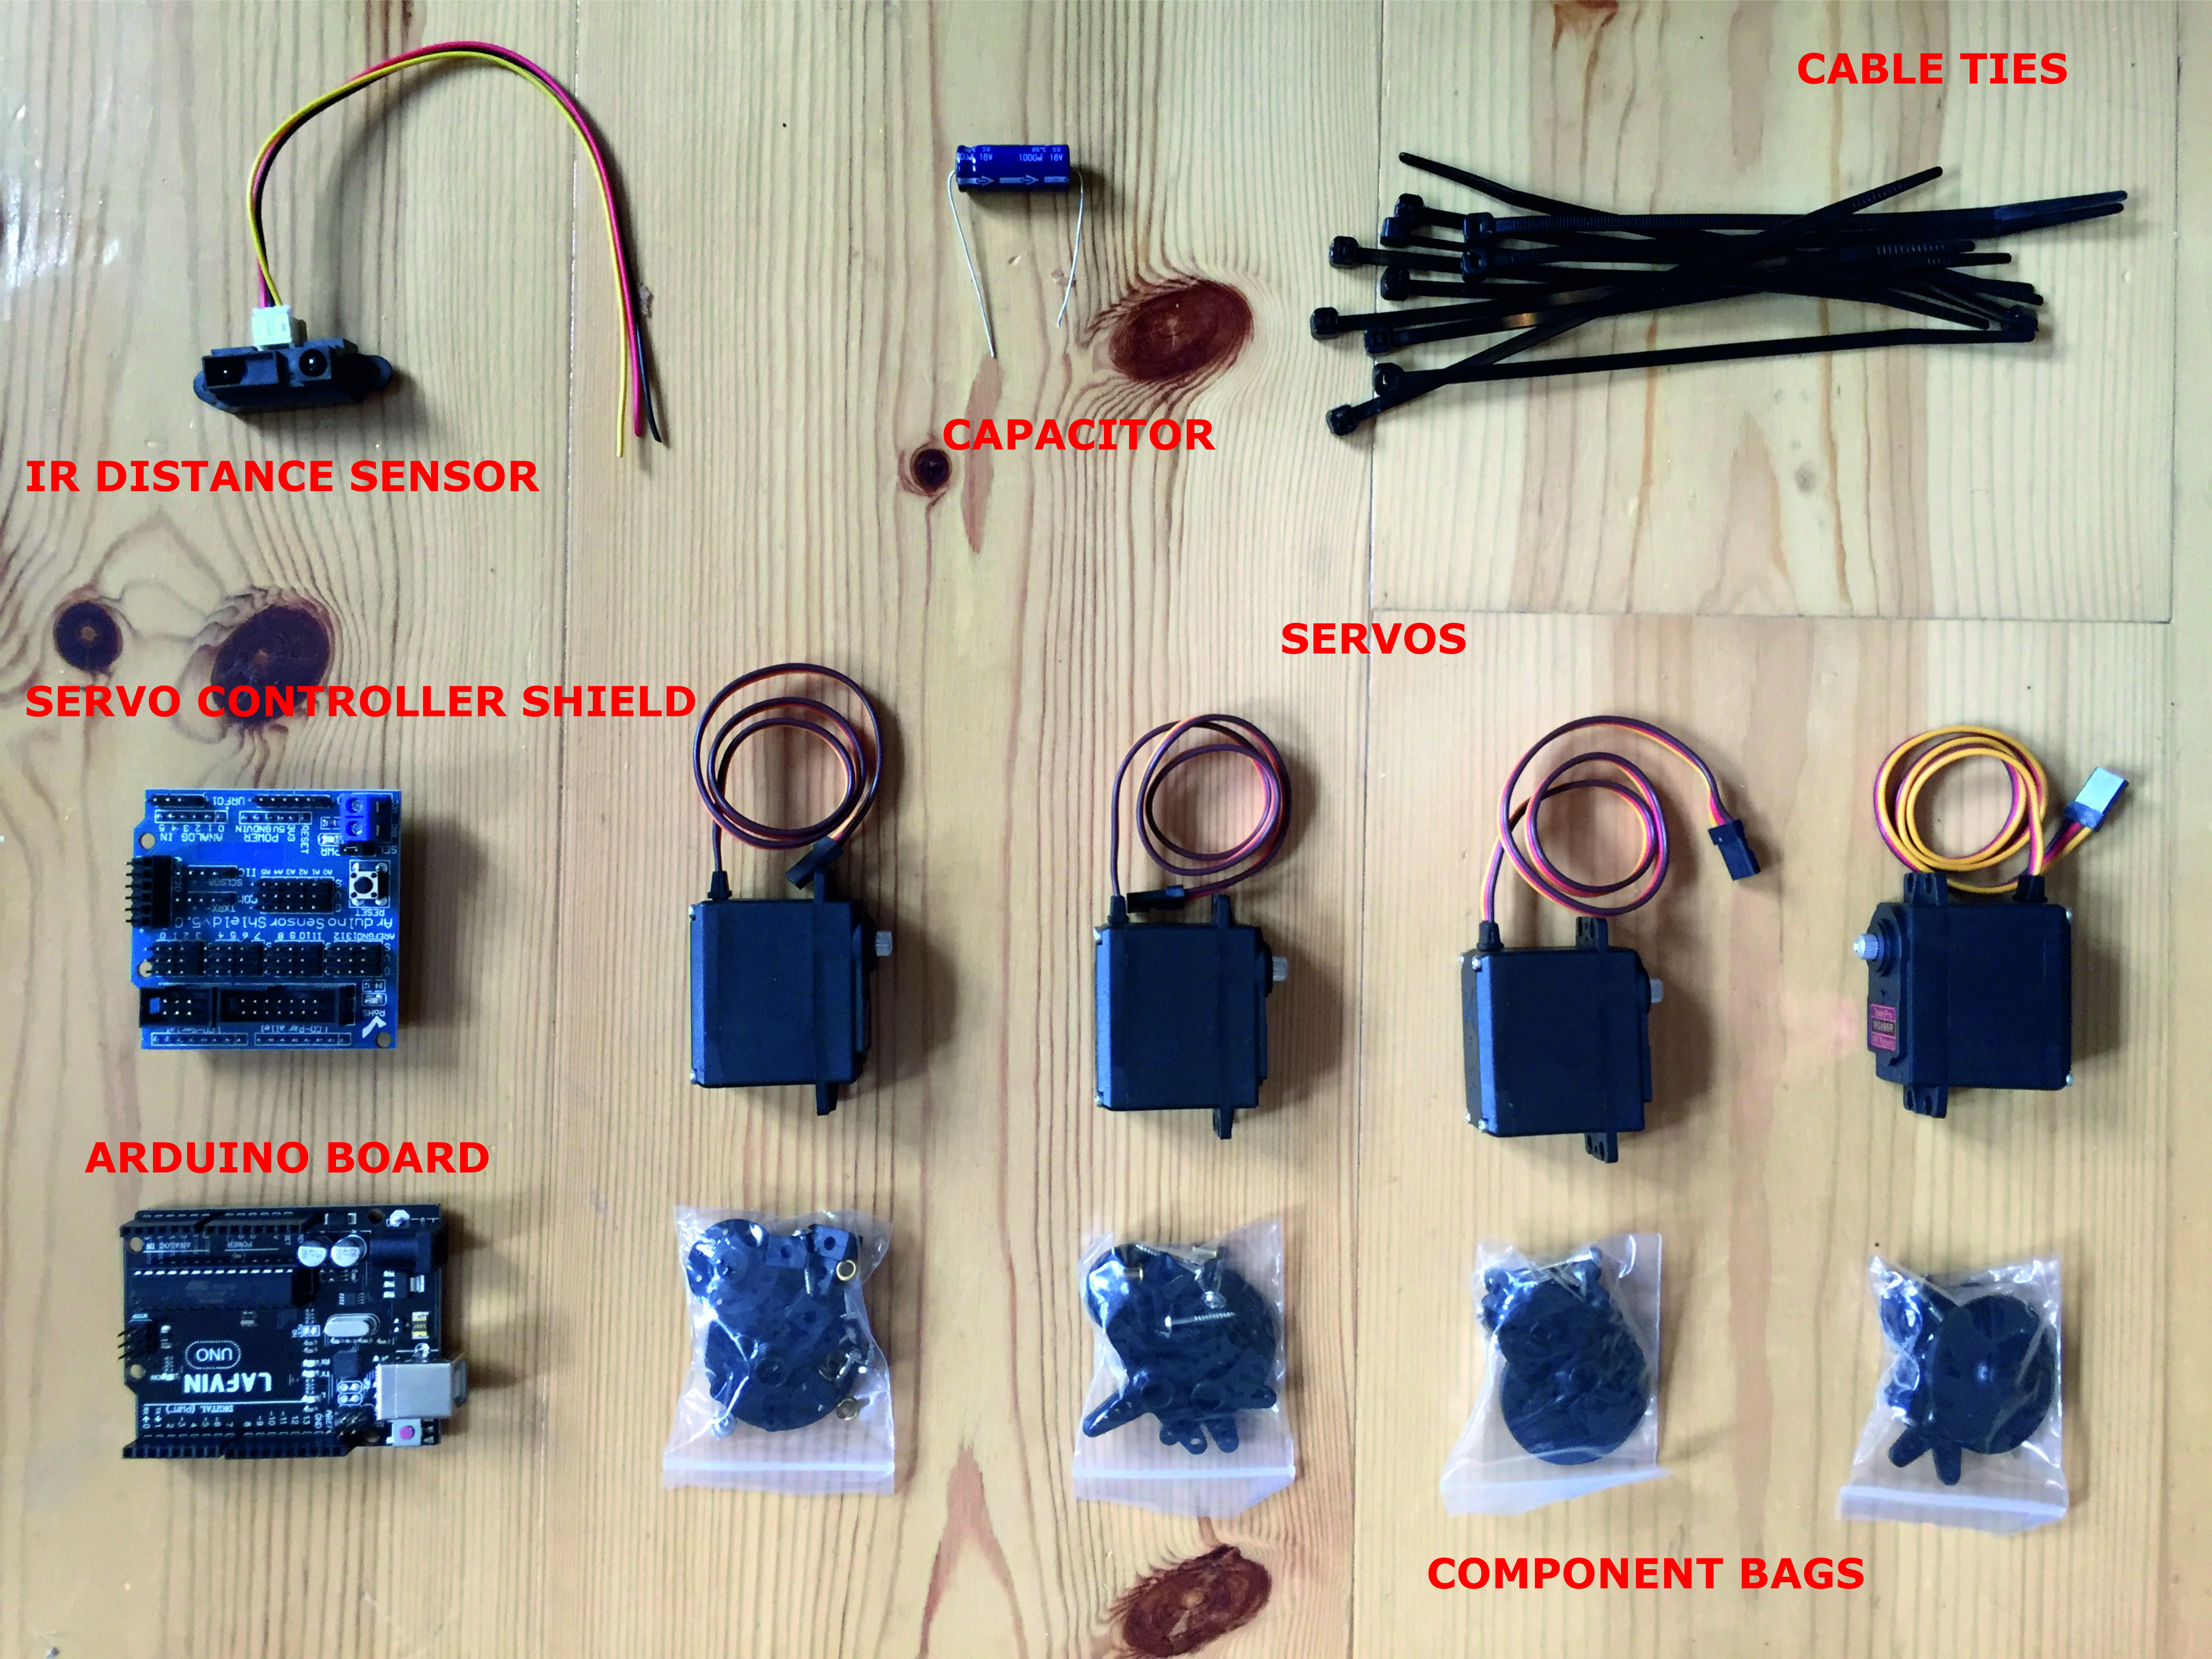
Components needed:
- Arduino board
- Servo controller shield or prototyping shield
- Component bags
- 4 Servos (2 continuous rotation if possible)
- About 200 micro farad capacitor.
- Infrared distance sensor
- Cable tiers
- Glue gun
- 4mm HDF material (this you must lasercut yourself, find out how when starting the guide)
Extra components
- USB Cable A to B (This is necessary when you are going to upload code to the robotplatform)
- Power supply (Only necessary if you want to test the robot without laptop)
Guide:
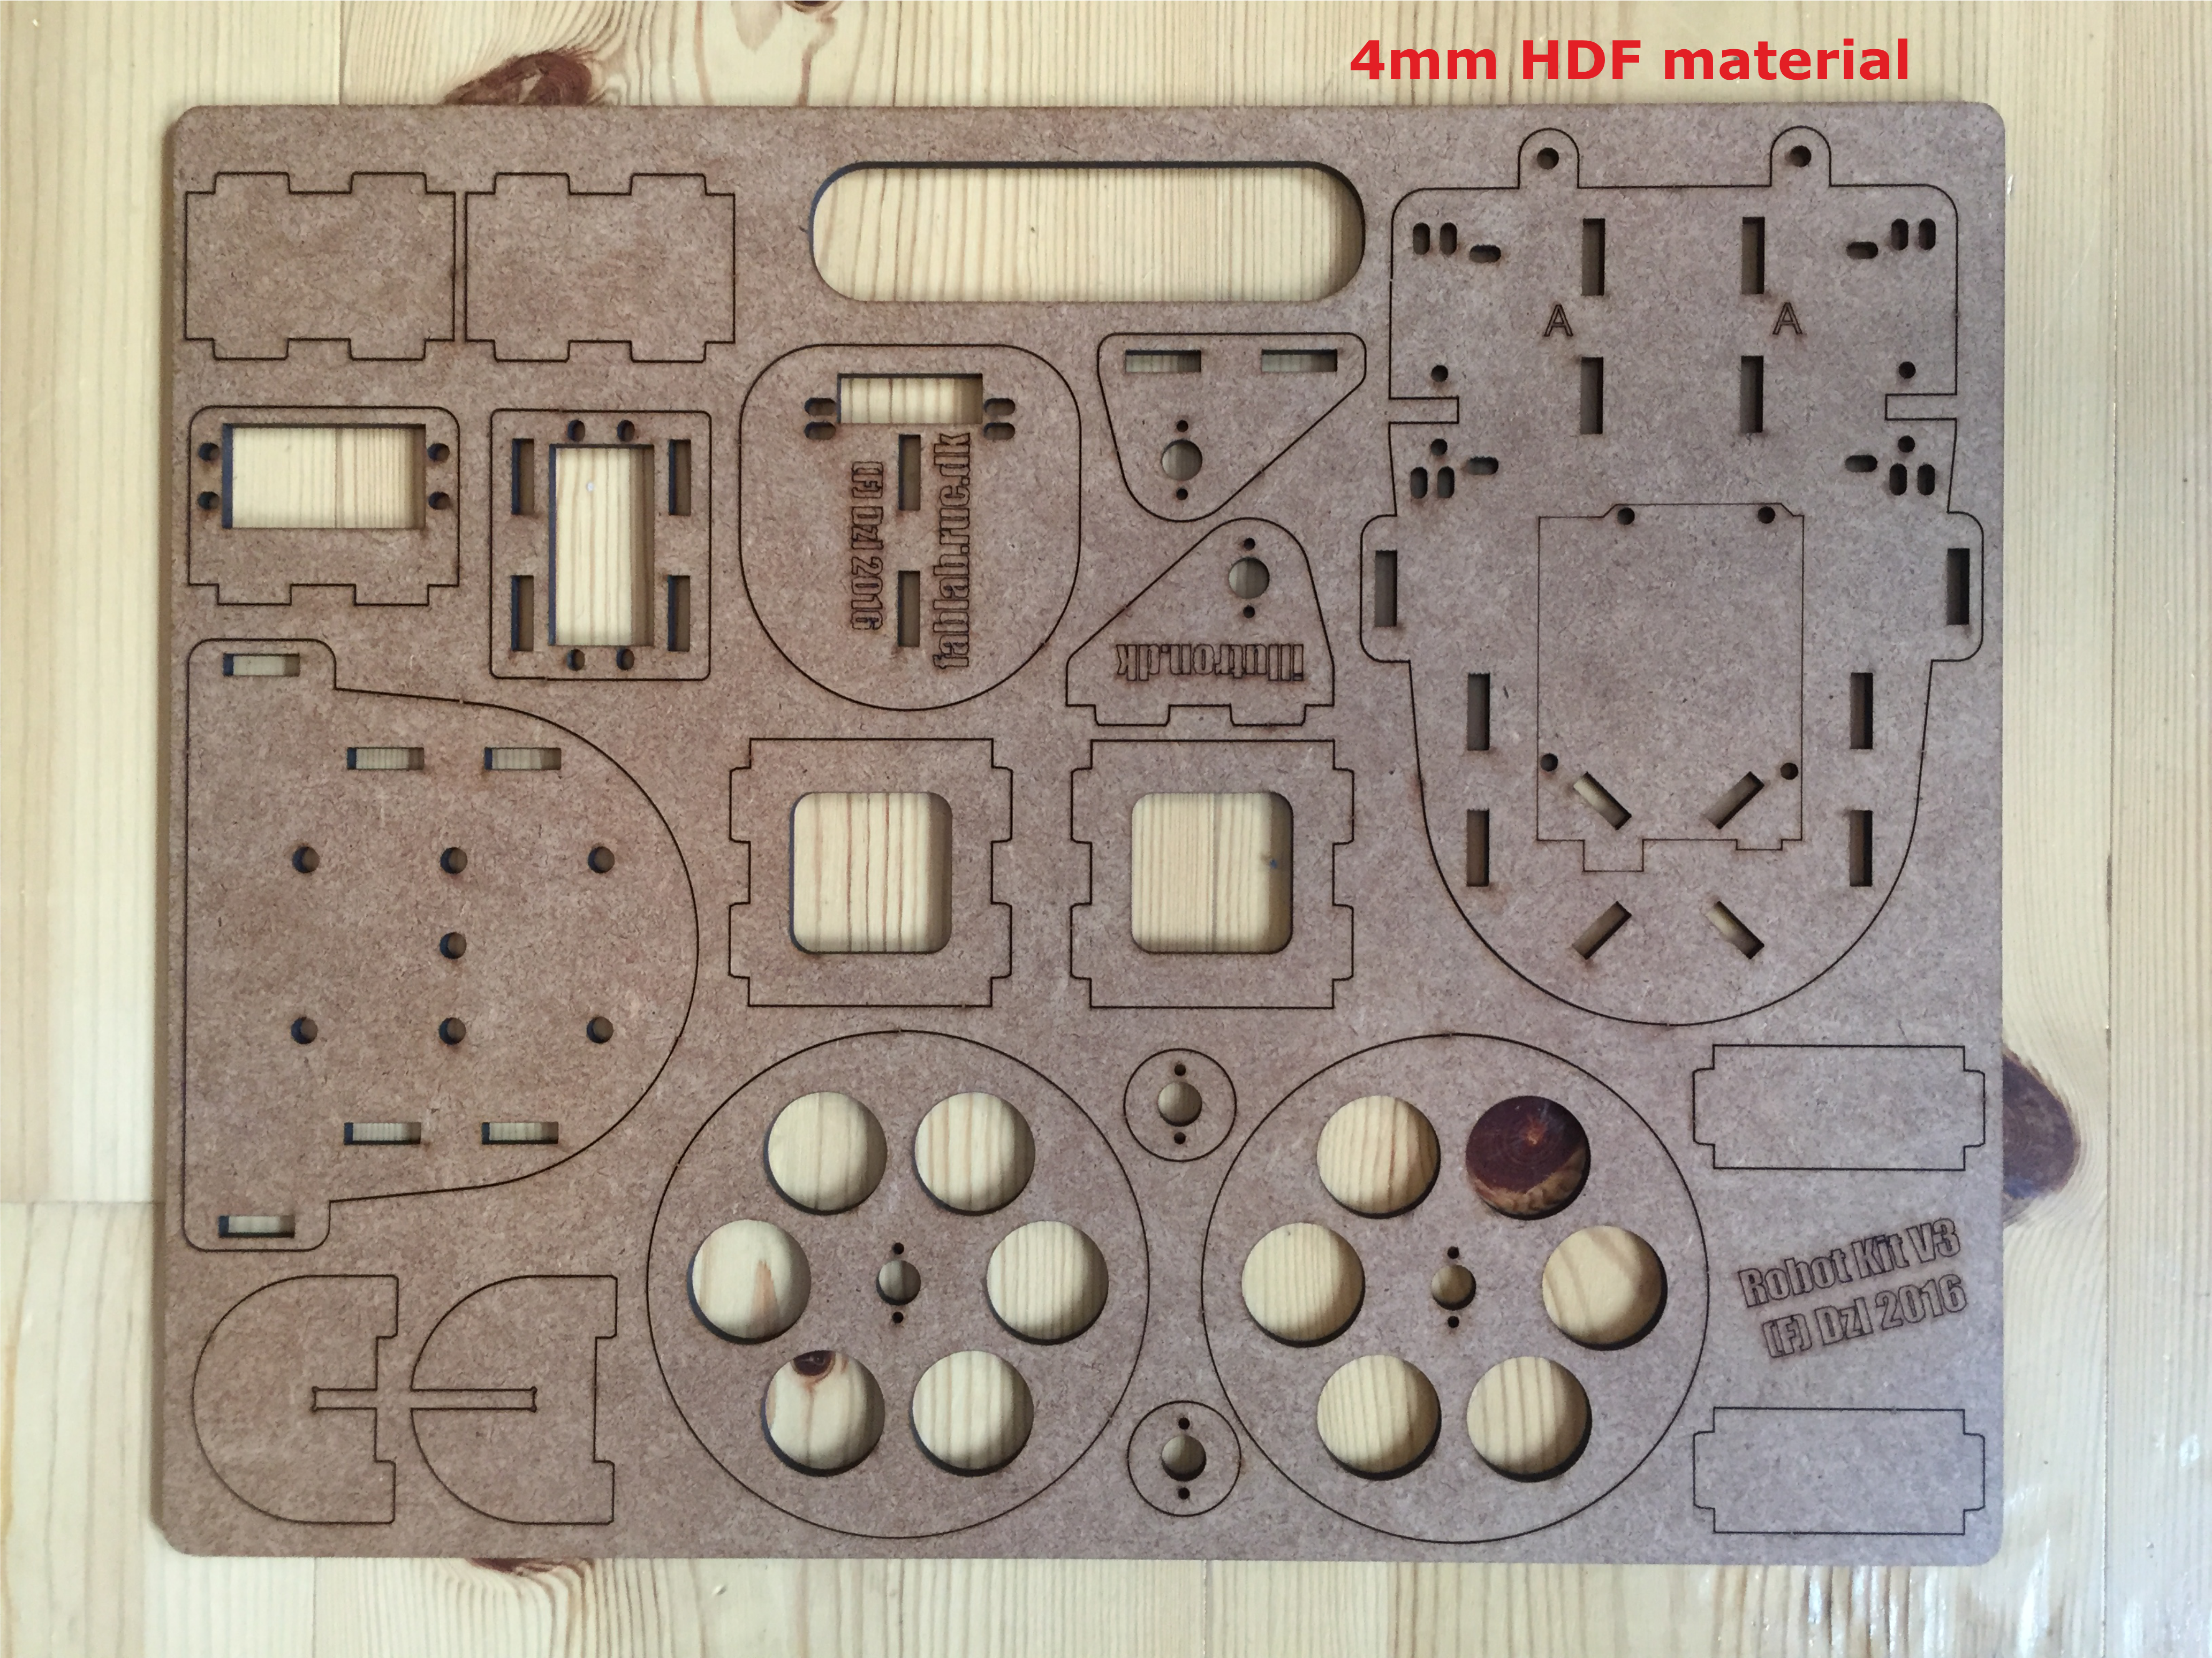
1. Lasercut material
Download the below elements and laser cut the vector drawing in 4mm HDF :
- Diagrams The vector files include components for different types of the robot. E.g. for a rubber band shooter. You will not need every extra component to build the basic version.
The settings of the laser cutter can be found next to each laser cutter. For a 100 watt laser cutter settings would be:
- Cut speed: 15 mm/s.
- Cut power: 100 watt.
- Corner power: 80 watt.
OBS! If you haven't done any laser cutting before, please follow link below and watch safety video and instructions for laser cutter.
Instructions lasercutter
2. Turn the wheel servos into continuous servos
In case you don't have any servos with continuous rotation, you will have to hack them, and turn them into servos that can work as wheels.
You can find a tutorial on how to do it here:
https://learn.adafruit.com/modifying-servos-for-continuous-rotation/overview
3. Make circuit for the four servos and sensor
The servos should be connected to the following digital pins on your arduino:
- left_motor: 6
- right_motor: 7
- neck_turn: 8
- neck_up: 9
- distance sensor: A0
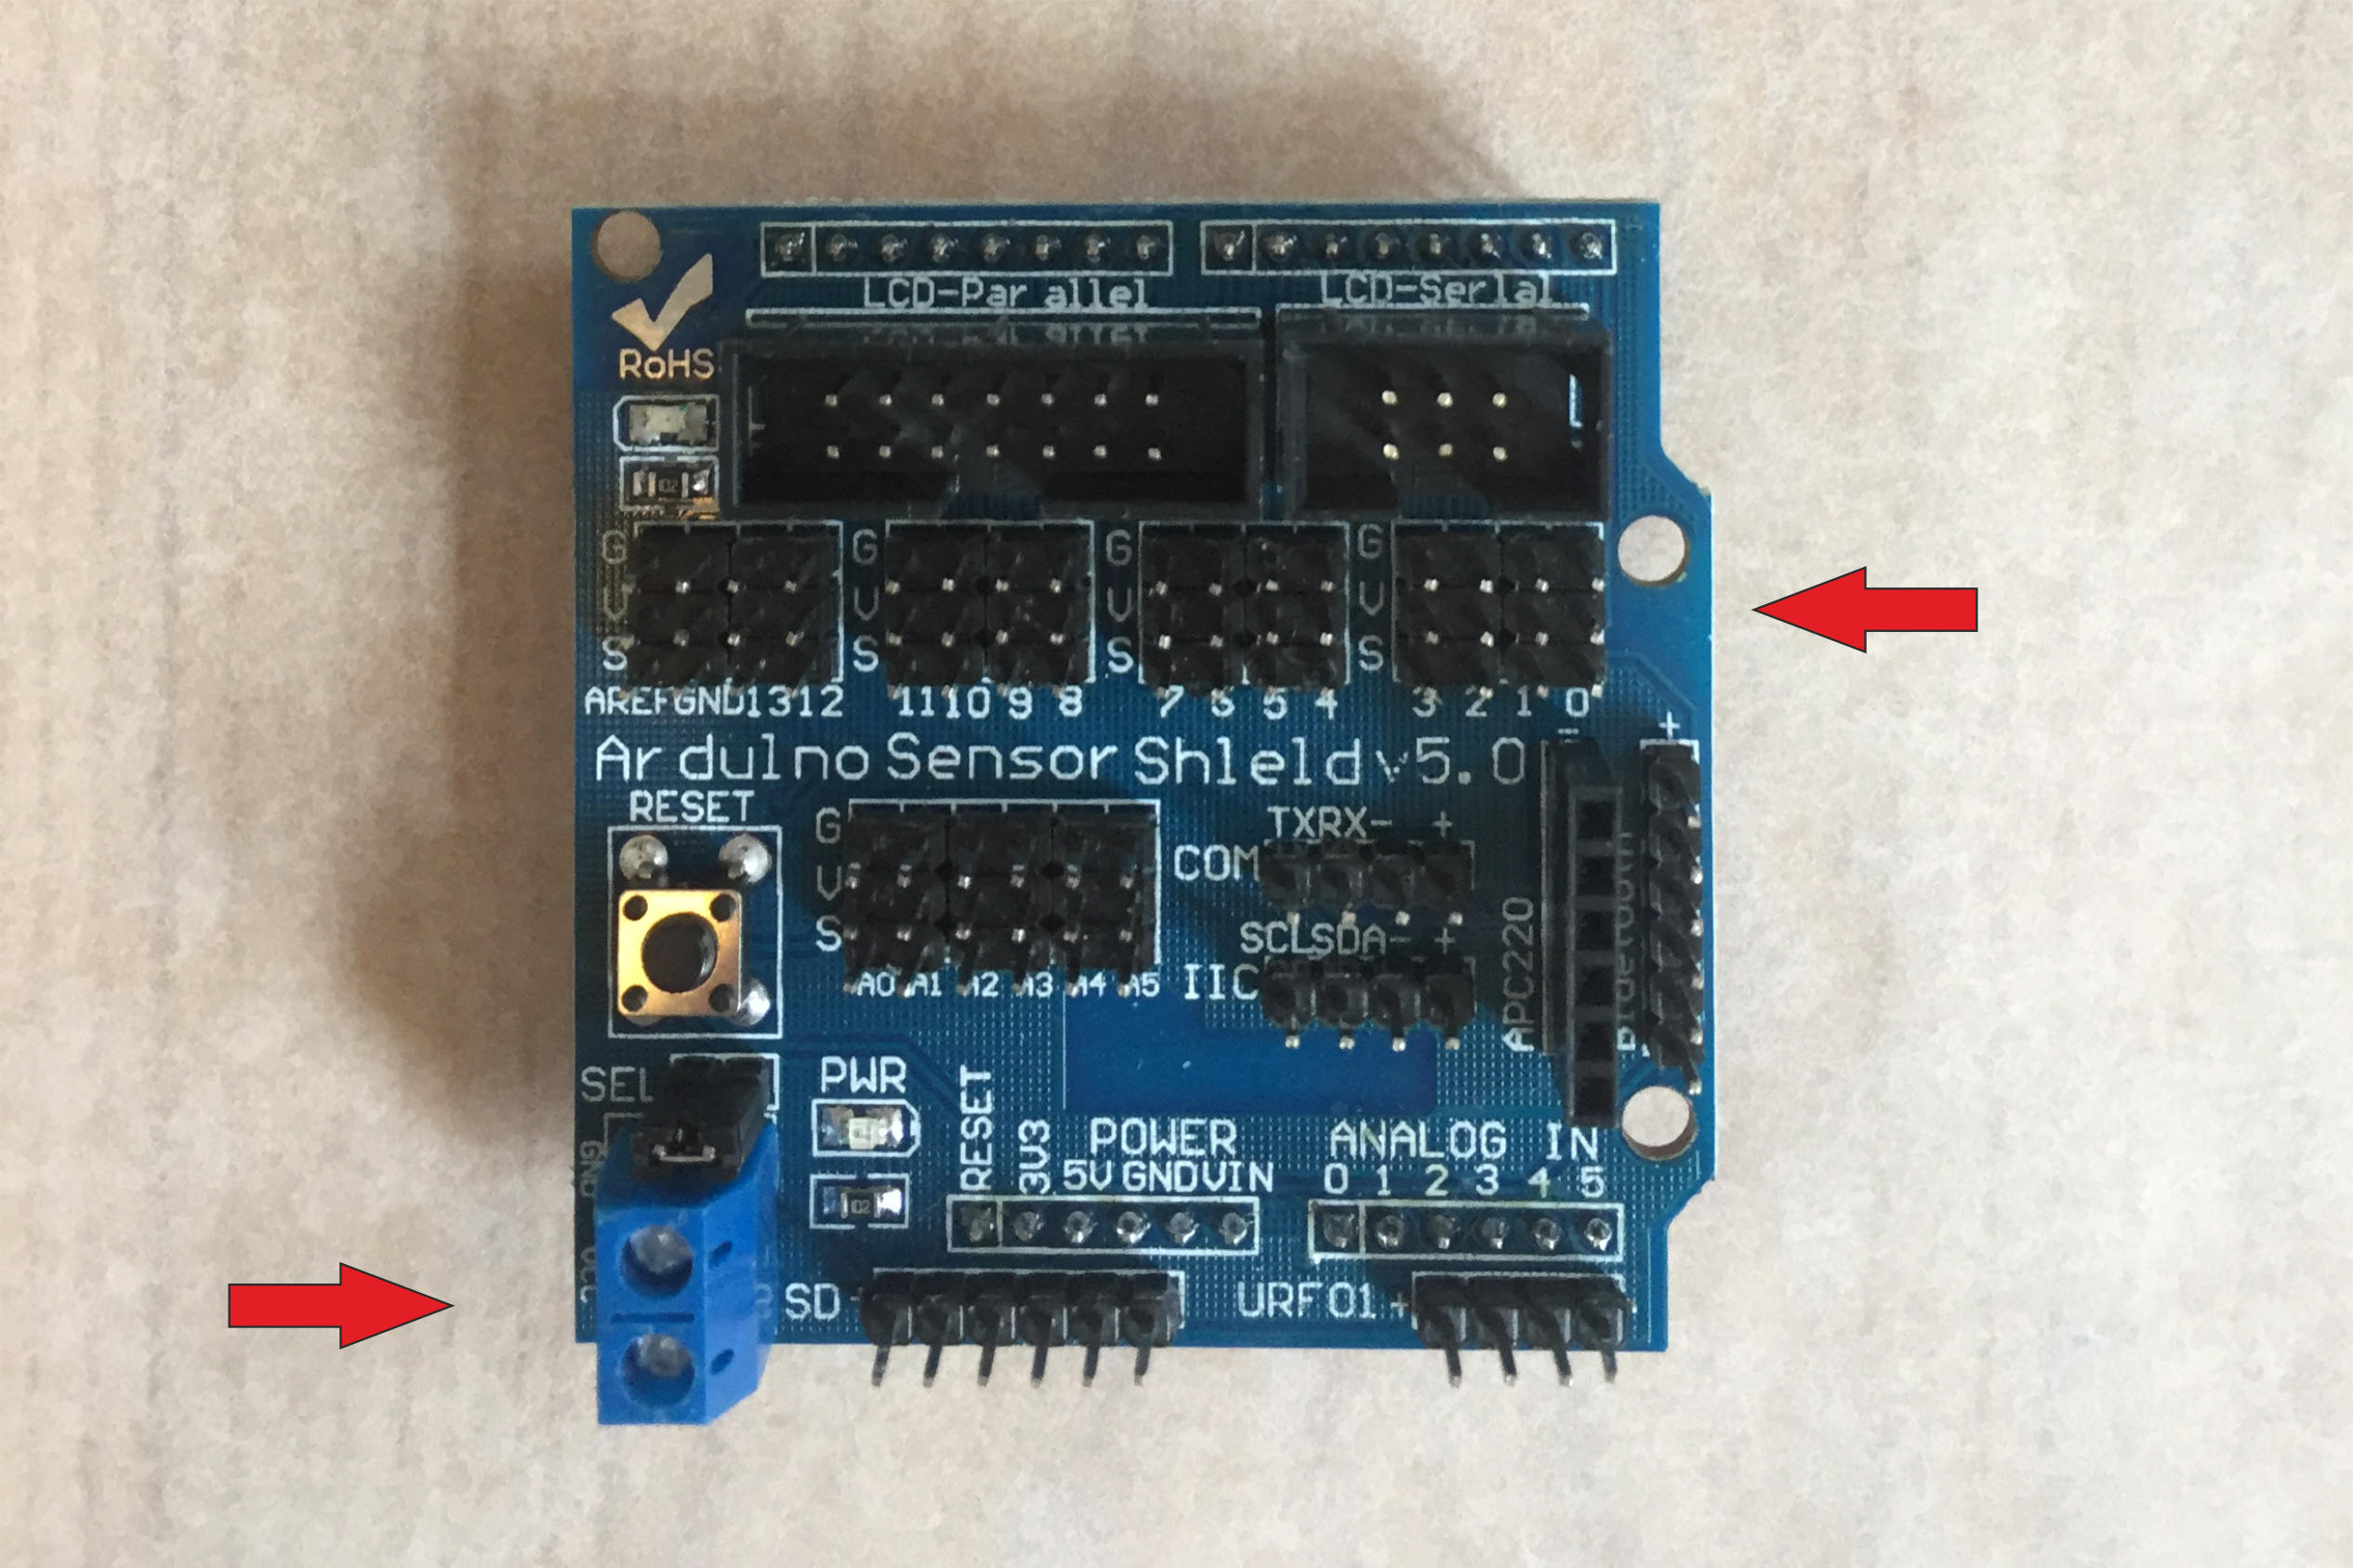
If you are using an Arduino Sensor shield (or other compatible shield) it's pretty easy to connect the servos. Simply find the digital pins on the shield (see right arrow) and connect the servo wires to ground (G), volt (V) and signal (S). You can now place the shield on top of the Arduino board.
It is advised to place a capacitor (at least/approximately 200 micro farad) in the external power plug on the board (see left arrow).
3. a) In case you don't have an Arduino sensor shield.
This means you will not have enough ground and volt pins available and you need to do something similar as the diagram below.
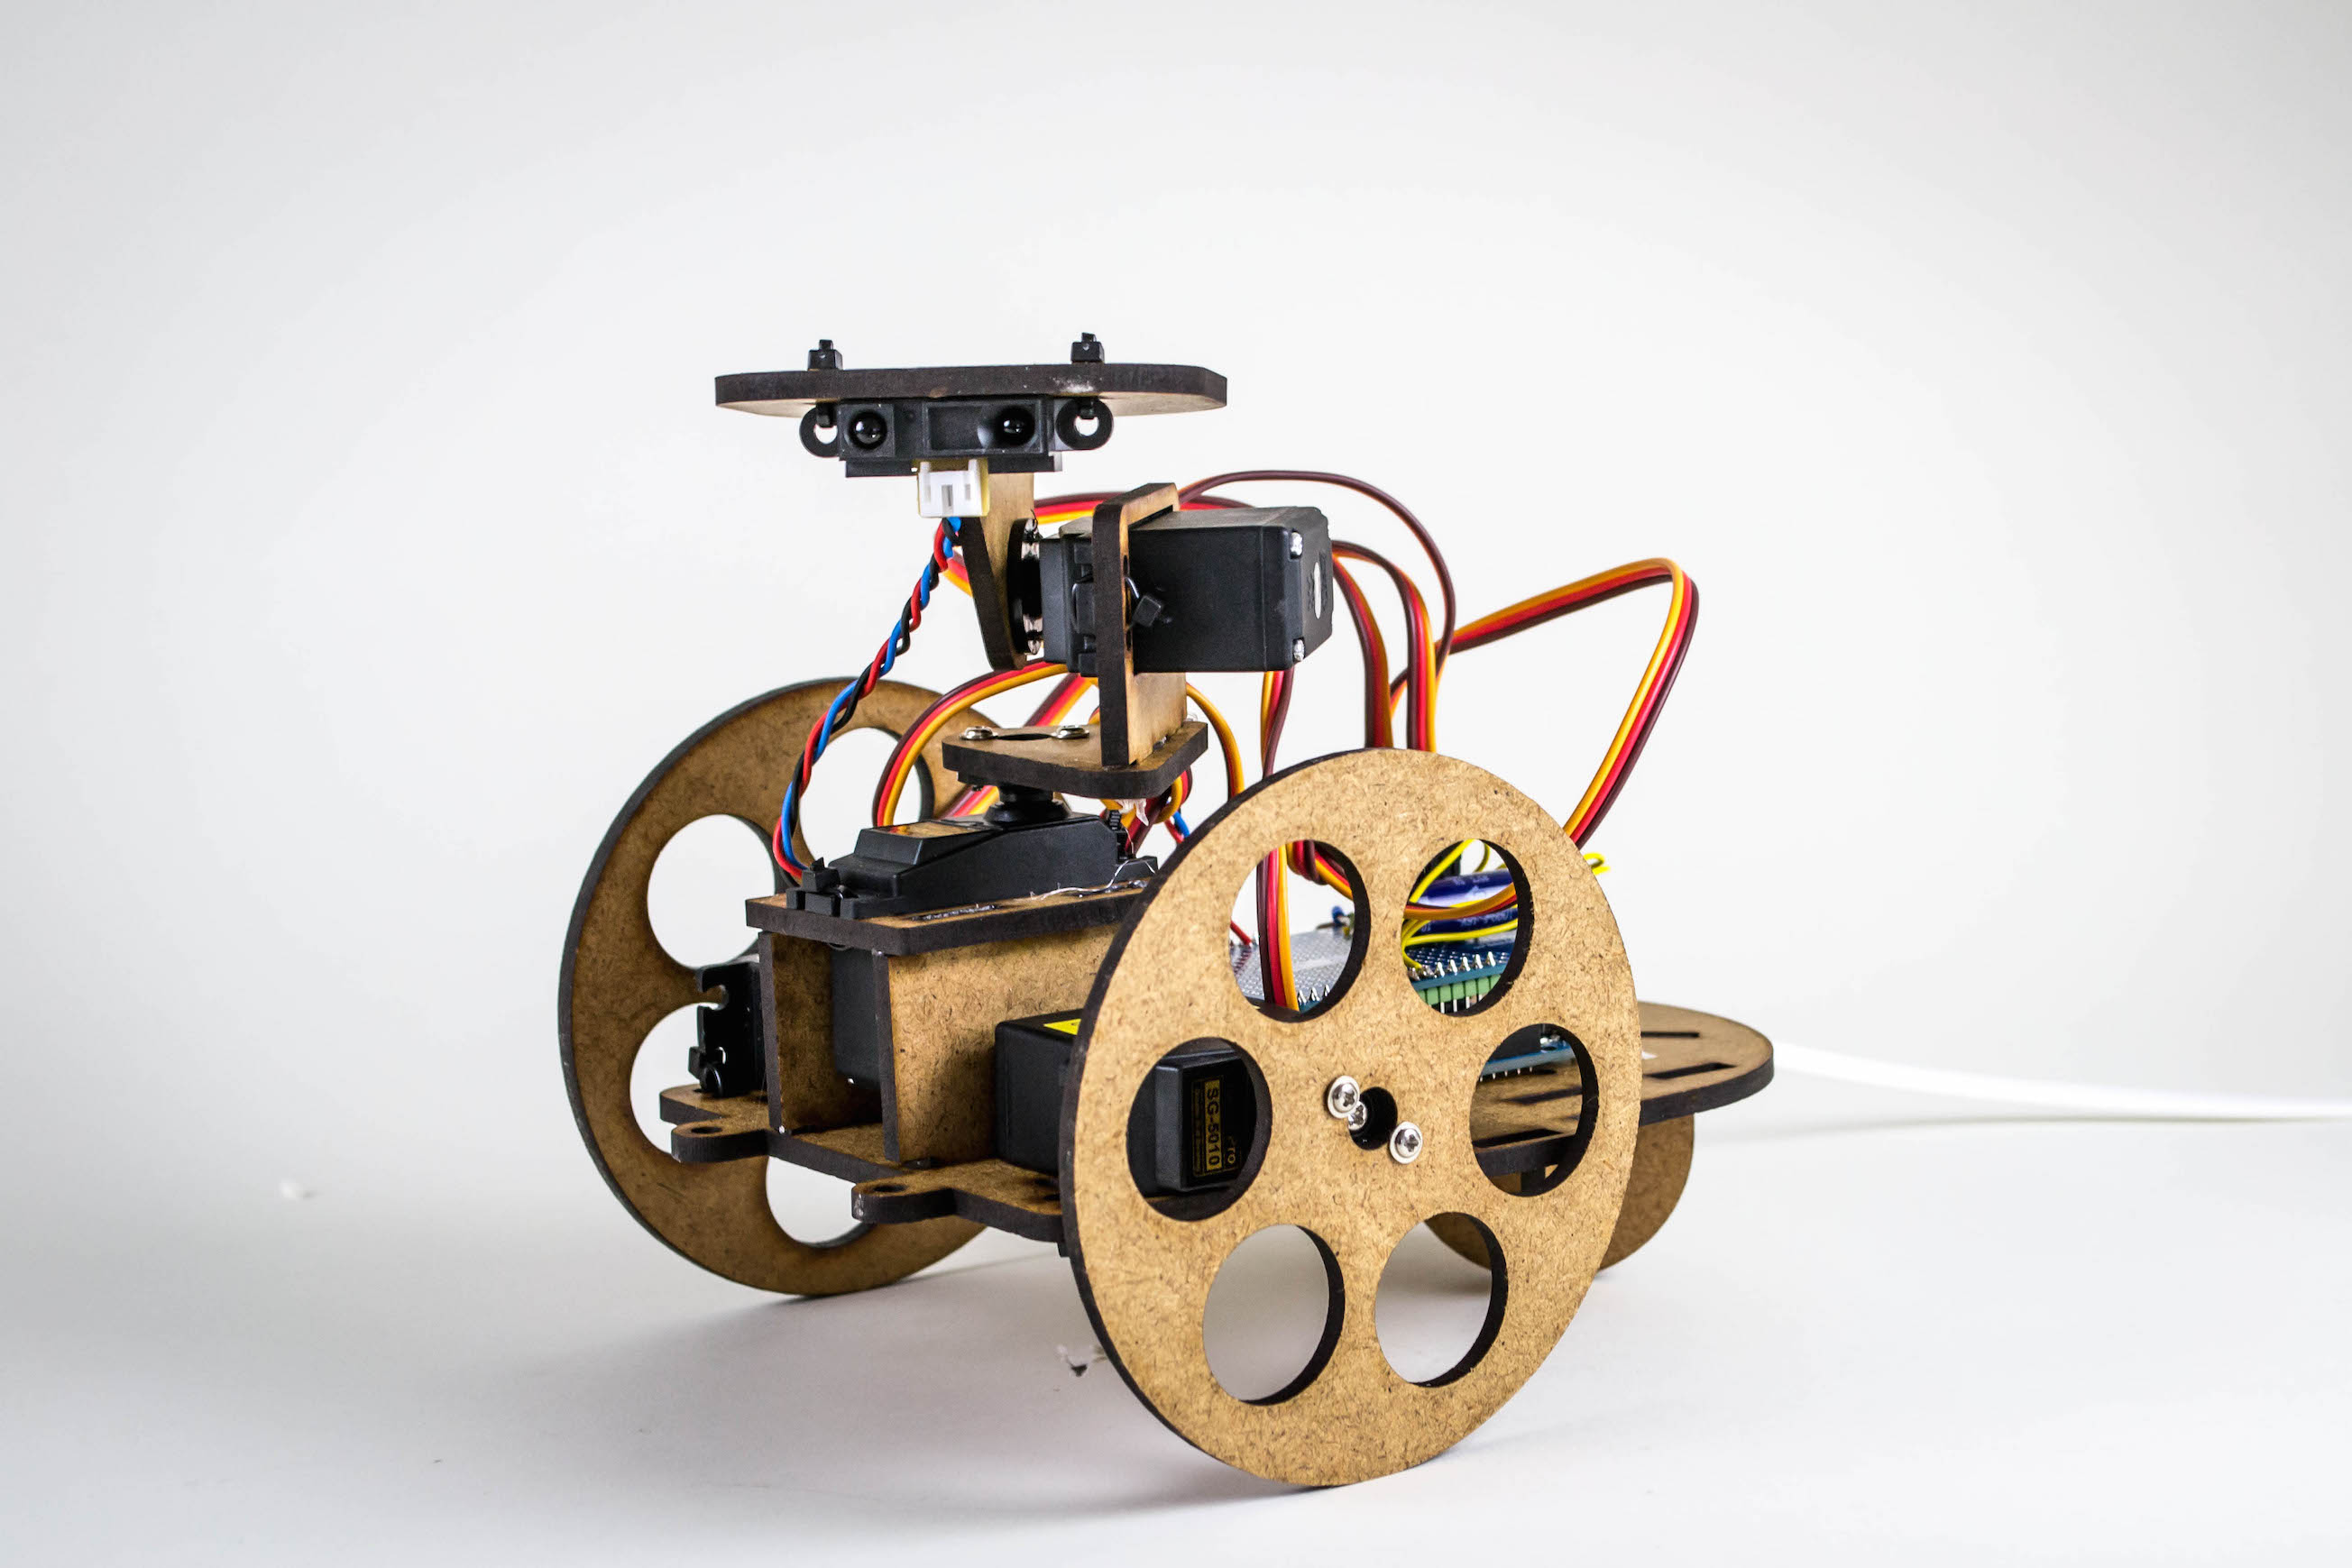
4. Assemble the parts
By following the images below you should be able to assemble the robot. To make sure all parts will stick, when the robot starts moving, you can use glue gun, cable tiers and screws etc. from component bags.
5. Upload the code
Go and find the code here and download the folder "animismbotserial".
The code should be uploaded through the Arduino interface. If you don't have the arduino software installed yet, go and download it here.
Here are the simple steps:
- Go ahead and open the Arduino software.
- Go to File and press open
- Navigate to the downloaded "animism_bot_serial (code)" folder and open the file "animism_ bot _serial". A prompt will offer to create a folder, which you can press OK.
- Connect Arduino to laptop with USB
- Go to the Tools tab to make sure the software knows which board and port you are using (see pictures below)

- Finally you are ready to upload the code. Upload button is placed at top menu bar of your Arduino window (see below)
OBS! Wheels might need to be calibrated
Sometimes it happens that center points of servos are not the same, which will cause the wheels to turn in different speed. In this case you will have to calibrate the center points. Have a look at the top of the program (just before the setup function), and adjust the servo with an off center point (85/95). The first value defines center point for the left motor and the second for the right motor.
int servos_calibration[] = {
  90,90,90,90}; // used for continuous rotation to calibrate center point
6. A quick overview of the code
When opening the code in the Arduino software, you might already have noticed how the program consist of two files. You are welcome to go have a look inside the file GenericServoController, but in order to hack the robot, all you really have to know is inside the file animism _ bot _ serial.
Inside animism_ bot _serial
An Arduino program will always consist of the functions void setup() and void loop()
Inside void setup() you will find all the presets that the program needs before it runs. This also means that this function only runs once!
All the code inside void loop() will be executed repeatedly as long as the Arduino is powered. This means that this is the place where we can tell the robot what to do and what constantly to look for. This we do by writing lines of executable code directly inside void loop() or by calling other functions we would like the program to execute.
Inside void loop()
Right now our variable distance is given the value of a function (read_distance(0)), which activates the pin that the IR sensor is connected to.
Now we can use the variable distance, where we want. For instance next line it is called inside Serial.println(distance). Because this is inside the void loop(), the program will constantly print out the value of distance.
Good first experiment would be to upload the code and open the monitor (see image below). When monitor window is open, try placing your hand in front of the sensor. Do notice how you are also calling the function experiment4() inside void loop(). For now, place a double // in front of experiment4(), and upload code.

The rest of the program
Now, besides void setup() and void loop() the program consist of 4 different experiment functions. In order for each of them to be executed, they need to be called inside void loop().
Go ahead and explore the program by calling different experiments from void loop(), and start experiment with different values (numbers) to get a better understanding of how things work.
Good luck !
(An alternative version exists in the dropbox folder. This version uses guino as its interface. Read more about guino here: http://www.instructables.com/id/Guino-Dashboard-for-your-Arduino/)
