Trigger action by sound with Arduino
You can trigger some action when a microphone registers a certain level of sound with a few cheap components. Read here how to connect the components, and how to modify the programming to suit your specific needs.
Hardware
You need the following components:
- Arduino UNO (Can be done with other arduino-like boards as well)
- Microphone MAX4466
- Diode 1N4148
- Resistor 1MOhm
- Capacitor 10 nF
You may change the resistor and capacitor to similar but different values, this can change how the device responds to different frequencies of sound. Notice that the microphone has a small screw you can twist to adjust sound volume, it's probably best to leave it as it was in the packaging.
Now wire the connections as shown on the diagram. The resistor and capacitor can be flipped either way, the diode must have the black end away from the microphone.
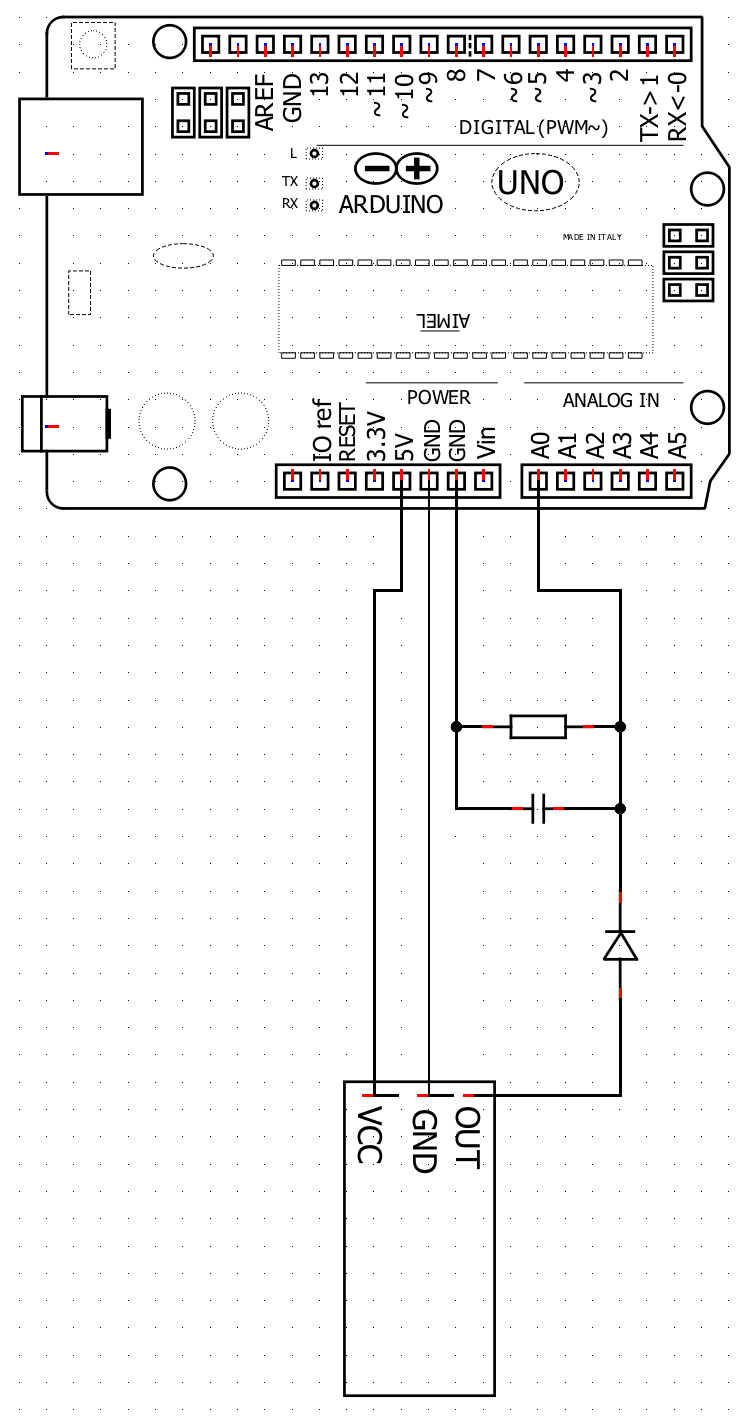
The quick and easy way to make it work is to use a small breadboard and jumper cables as shown. To plug the microphone into the cables you should solder the little three-legged connector from the package onto the holes. You can read about breadboards or watch a video.
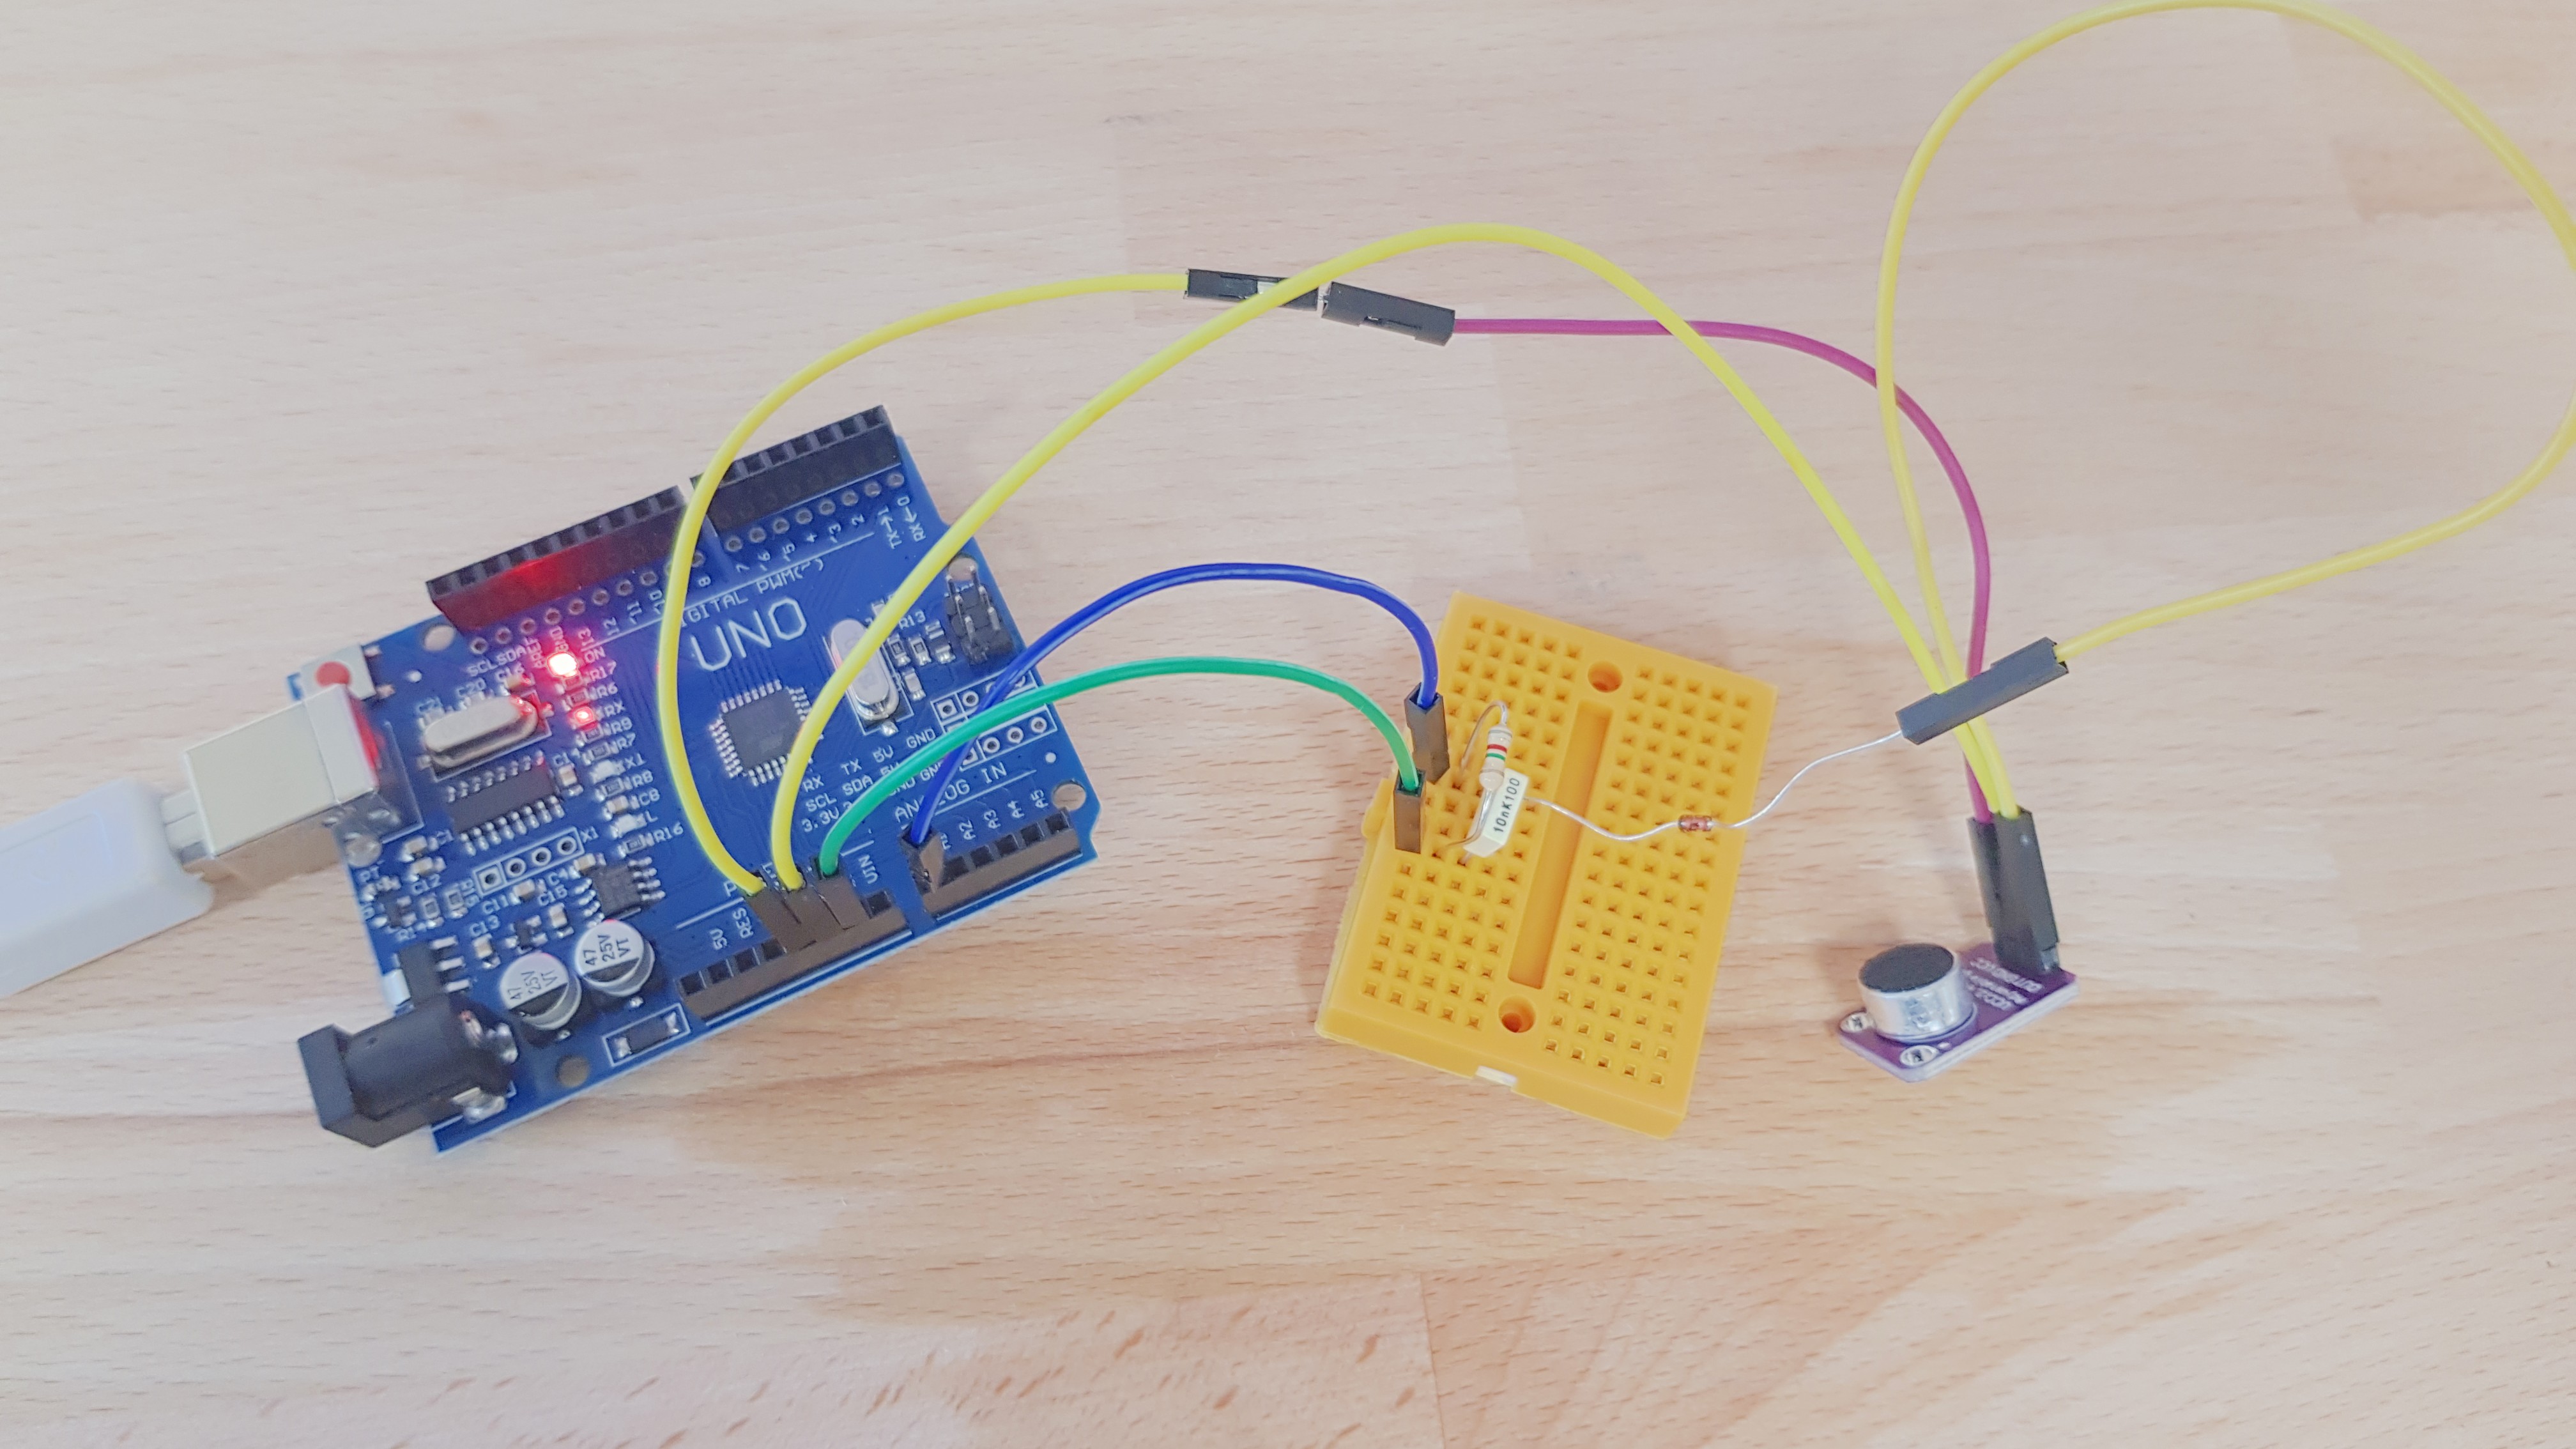
Later, if you want to make the device more robust you can hot glue the components to the breadboard, or solder them together without any breadboard at all. You can even shrink it.
Software
Now the hardware is done, time to set up the software. If it's your first time with Arduino, go through the first part of these instructions.
Open a new file in the Arduino editor, delete all the text and paste in the program from the bottom of the page, save it under the name SoundTrigger. Upload the program to the Arduino. Open Tools -> Serial Plotter (ctrl+shift+L), and you should see the output of the sound measurements. (You may have to switch to 115200 baud in the bottom left corner). If you make a loud noise the level should spike, and measurements pause while the LED on the Arduino blinks twice. If yes, congratulations, it's working :-)
Now you can modify the code to your needs. If you want to adjust what triggers the device, you can change the following values:
sampleTime- How often do you want to sample the sound level?averagingInterval- The code will calculate the average of the last X samples. If you want only sustained noise to trigger the device, you can set this to a high value.triggerLevel- This sound level triggers action. From 0 to 100.centerVoltage- It's complicated. If you're doing something quick and dirty, just leave it. Ideally, you should adjust it up/down to make the microphone output in silence as close to zero as possible.resetOnTrigger- Use eithertrueorfalse. If it'strue, the averaged sound level will be set to zero after each triggering, so it will take a new noise to trigger again.
Most importantly, you want the device to do something when triggered. This is done by changing the routine triggered(), so it doesn't just blink the LED. You must write your own code here that controls other hardware connected to the Arduino. You can make it turn on the light, open the door, fire a shotgun, call the police -- or all of the above, for maximum effect. Please post videos ;-)
SoundTrigger program
/*
  SoundTrigger

  Triggers some action when a microphone registers a certain level of sound
*/
#undef abs

// Edit these variables to tune the behaviour of your soundmeter
unsigned long sampleTime = 10; // in milliseconds (integer). Attempt to sample this often (might not always succeed)
unsigned long averagingInterval = 5;  // calculate sound level by averaging over this many samples
unsigned int triggerLevel = 50;  // This sound level triggers action. A number between 0 and 100
unsigned int centerVoltage = 468; // The microphone level corresponding to no sound
bool resetOnTrigger = false; // Reset average to zero when triggered?

// this routine runs if sound level reaches triggerLevel
void triggered(){
// This code blinks the Arduino LED, so you can see it works. Replace with your own effect
  digitalWrite(LED_BUILTIN, HIGH);   // turn the LED on (HIGH is the voltage level)
  delay(500);                       // wait
  digitalWrite(LED_BUILTIN, LOW);    // turn the LED off by making the voltage LOW
  delay(500);                       // wait
  digitalWrite(LED_BUILTIN, HIGH);   // turn the LED on (HIGH is the voltage level)
  delay(500);                       // wait
  digitalWrite(LED_BUILTIN, LOW);    // turn the LED off by making the voltage LOW
  delay(500);                       // wait

//  Serial.println("-30");   // Use to show on serial plotter when triggered
}


long timer;
long lastSample;
float soundLevel;

// the setup routine runs once when you press reset:
void setup() {
  // initialize serial communication at 9600 bits per second:
  Serial.begin(115200);
  // initialize digital pin LED_BUILTIN as an output.
  pinMode(LED_BUILTIN, OUTPUT);
  // start timer
  timer = millis();
  // ensure we sample first time loop() runs
  lastSample = timer - sampleTime;
}

// the loop routine runs over and over again forever:
void loop() {
  timer = millis();
  if ((timer - lastSample) >= sampleTime) { // It's time for a new sample
    // print out time since last sample
    // Serial.println(timer - lastSample);
    lastSample = timer;
    // read the current sound level on analog pin 0. (gives number between 0 and 100)
    float soundNow = float(abs(analogRead(A0)-centerVoltage))*100/(1023-centerVoltage);

    // average over requested interval
    soundLevel = soundLevel*(averagingInterval-1)/averagingInterval + soundNow/averagingInterval;

    // print out sound level
    Serial.println(soundLevel);

    // check for trigger
    if(soundLevel >= triggerLevel) {
      if (resetOnTrigger) soundLevel = 0;
      triggered();
    }
  }
}
