Wazer water jet cutter
Now we have a small water jet! And this is how to use it!
See this video to get an overview of how to use it:
https://youtu.be/lsskdAkYm1o
Materials
Practically all materials can be cut using the water jet, but since we have machines for cutting metal and plastic which is way faster than the Wazer, the primary material which are smart to cut is Glass and Tile, but metal such as Aluminium and Steel can be cut as well, but please first consider using the Fiber laser for that.
Cut area: ~30x45 cm (12*18 inches) Maximum sheet that can fit in (not cutting area) ~36x54 cm
Model
WAZER DESKTOP
Files
Please output a DXF from Inkscape/Fusion/Rhino our your preferred cad software.
Generating the cut file
There are three options:
Lightburn: see here:
https://github.com/ChrisAnd1998/Lightburn-config-for-Wazer-waterjet
Fusion 360: see here:
https://www.youtube.com/watch?v=jgc45KeJdRU
Wazers own WAM online software:
We have a problem logging on at wazer at the moment - we are working on it.
* Go to http://wam.wazer.com
* username: fablabuser
* password: ask us (e.g. by emailing fablab@ruc.dk)
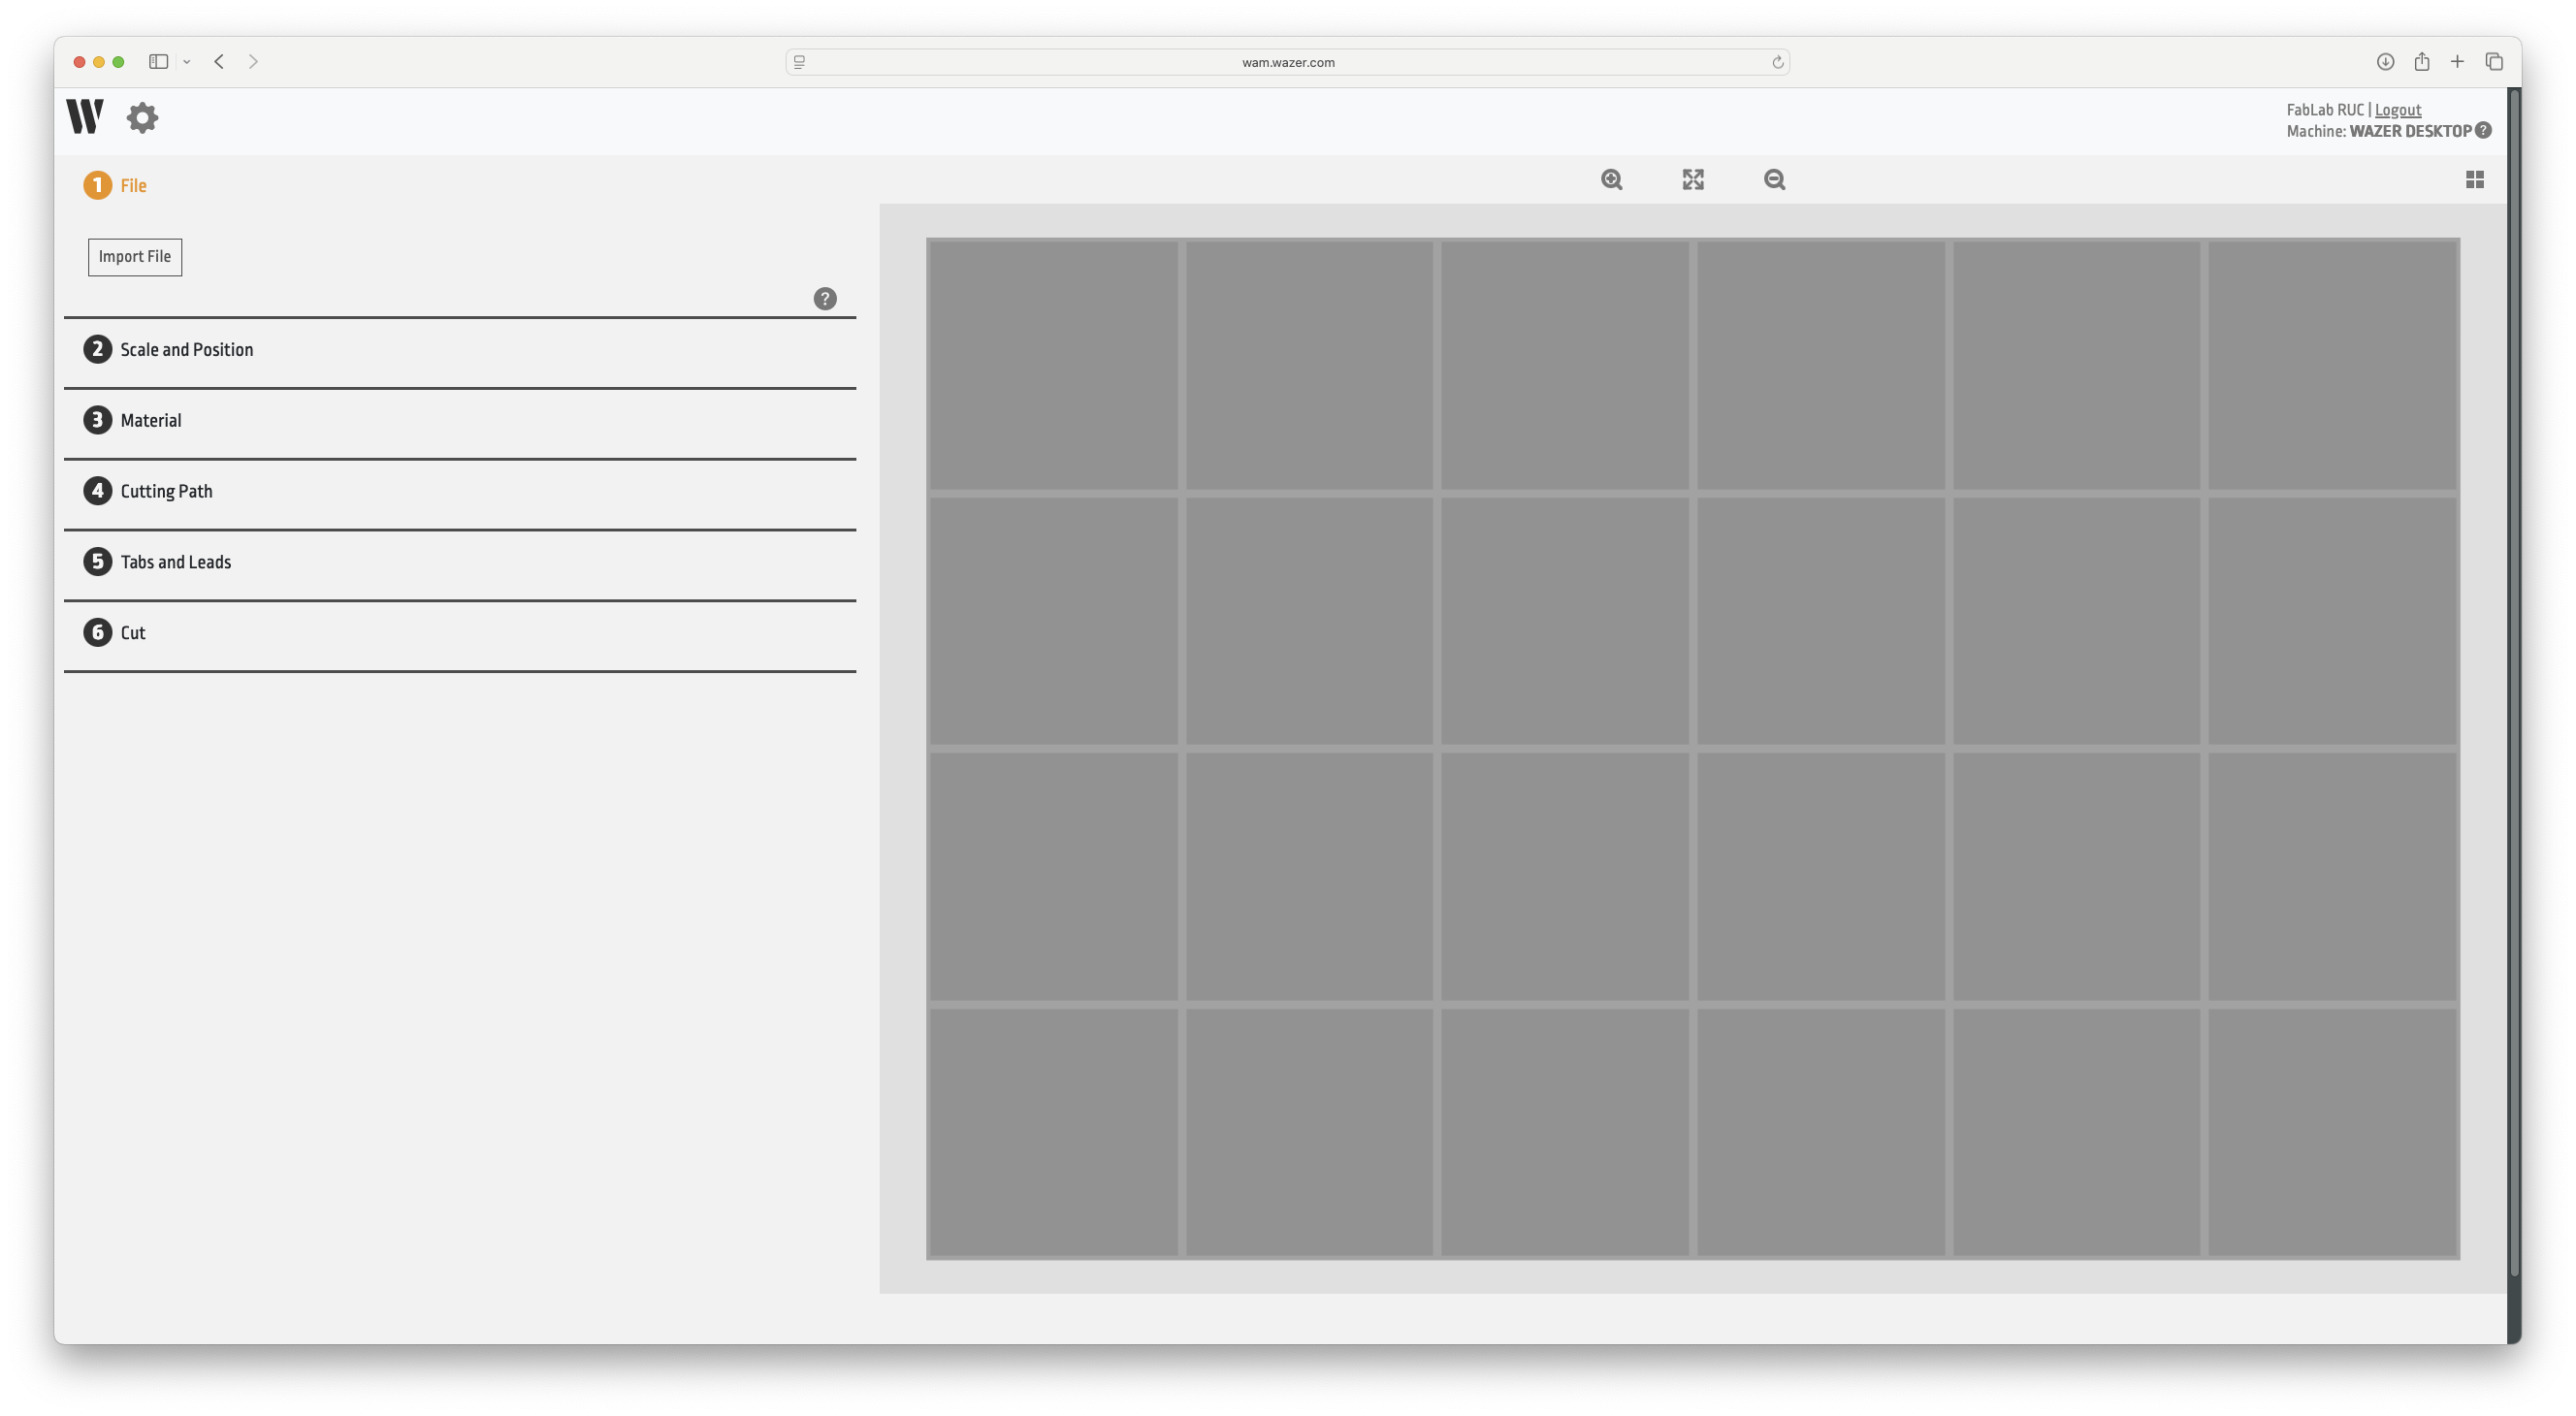
'Import File'
Upload your design as DXF. Be aware that when you import your design it is probably not the desired size.
'Scale and Position' to resize your design by setting the correct width or height.
'Cutting path' please select if you want your design to be cut from the inside, outside or center on the line. (If you are cutting a shape which outer dimensions are important please select 'Outside' if you are cutting a shape into another object and the inside dimensions are important select 'Inside'.
This is done in order to compensate for the width of the jet stream coming out of the nozzle of the machine. (Like when you use a cnc router where you have to compensate for the tool diameter)
'Material' Select your desired material, note that some materials are defined in inches. (1 inch =25,4 mm)
Tabs and Leads Here you can select how many tabs you want, and if you want lead-in and out.
Cut Here you can select your quality of cut, the finer the cut the longer time it takes. Press 'Generate Job File' in order to download your file.
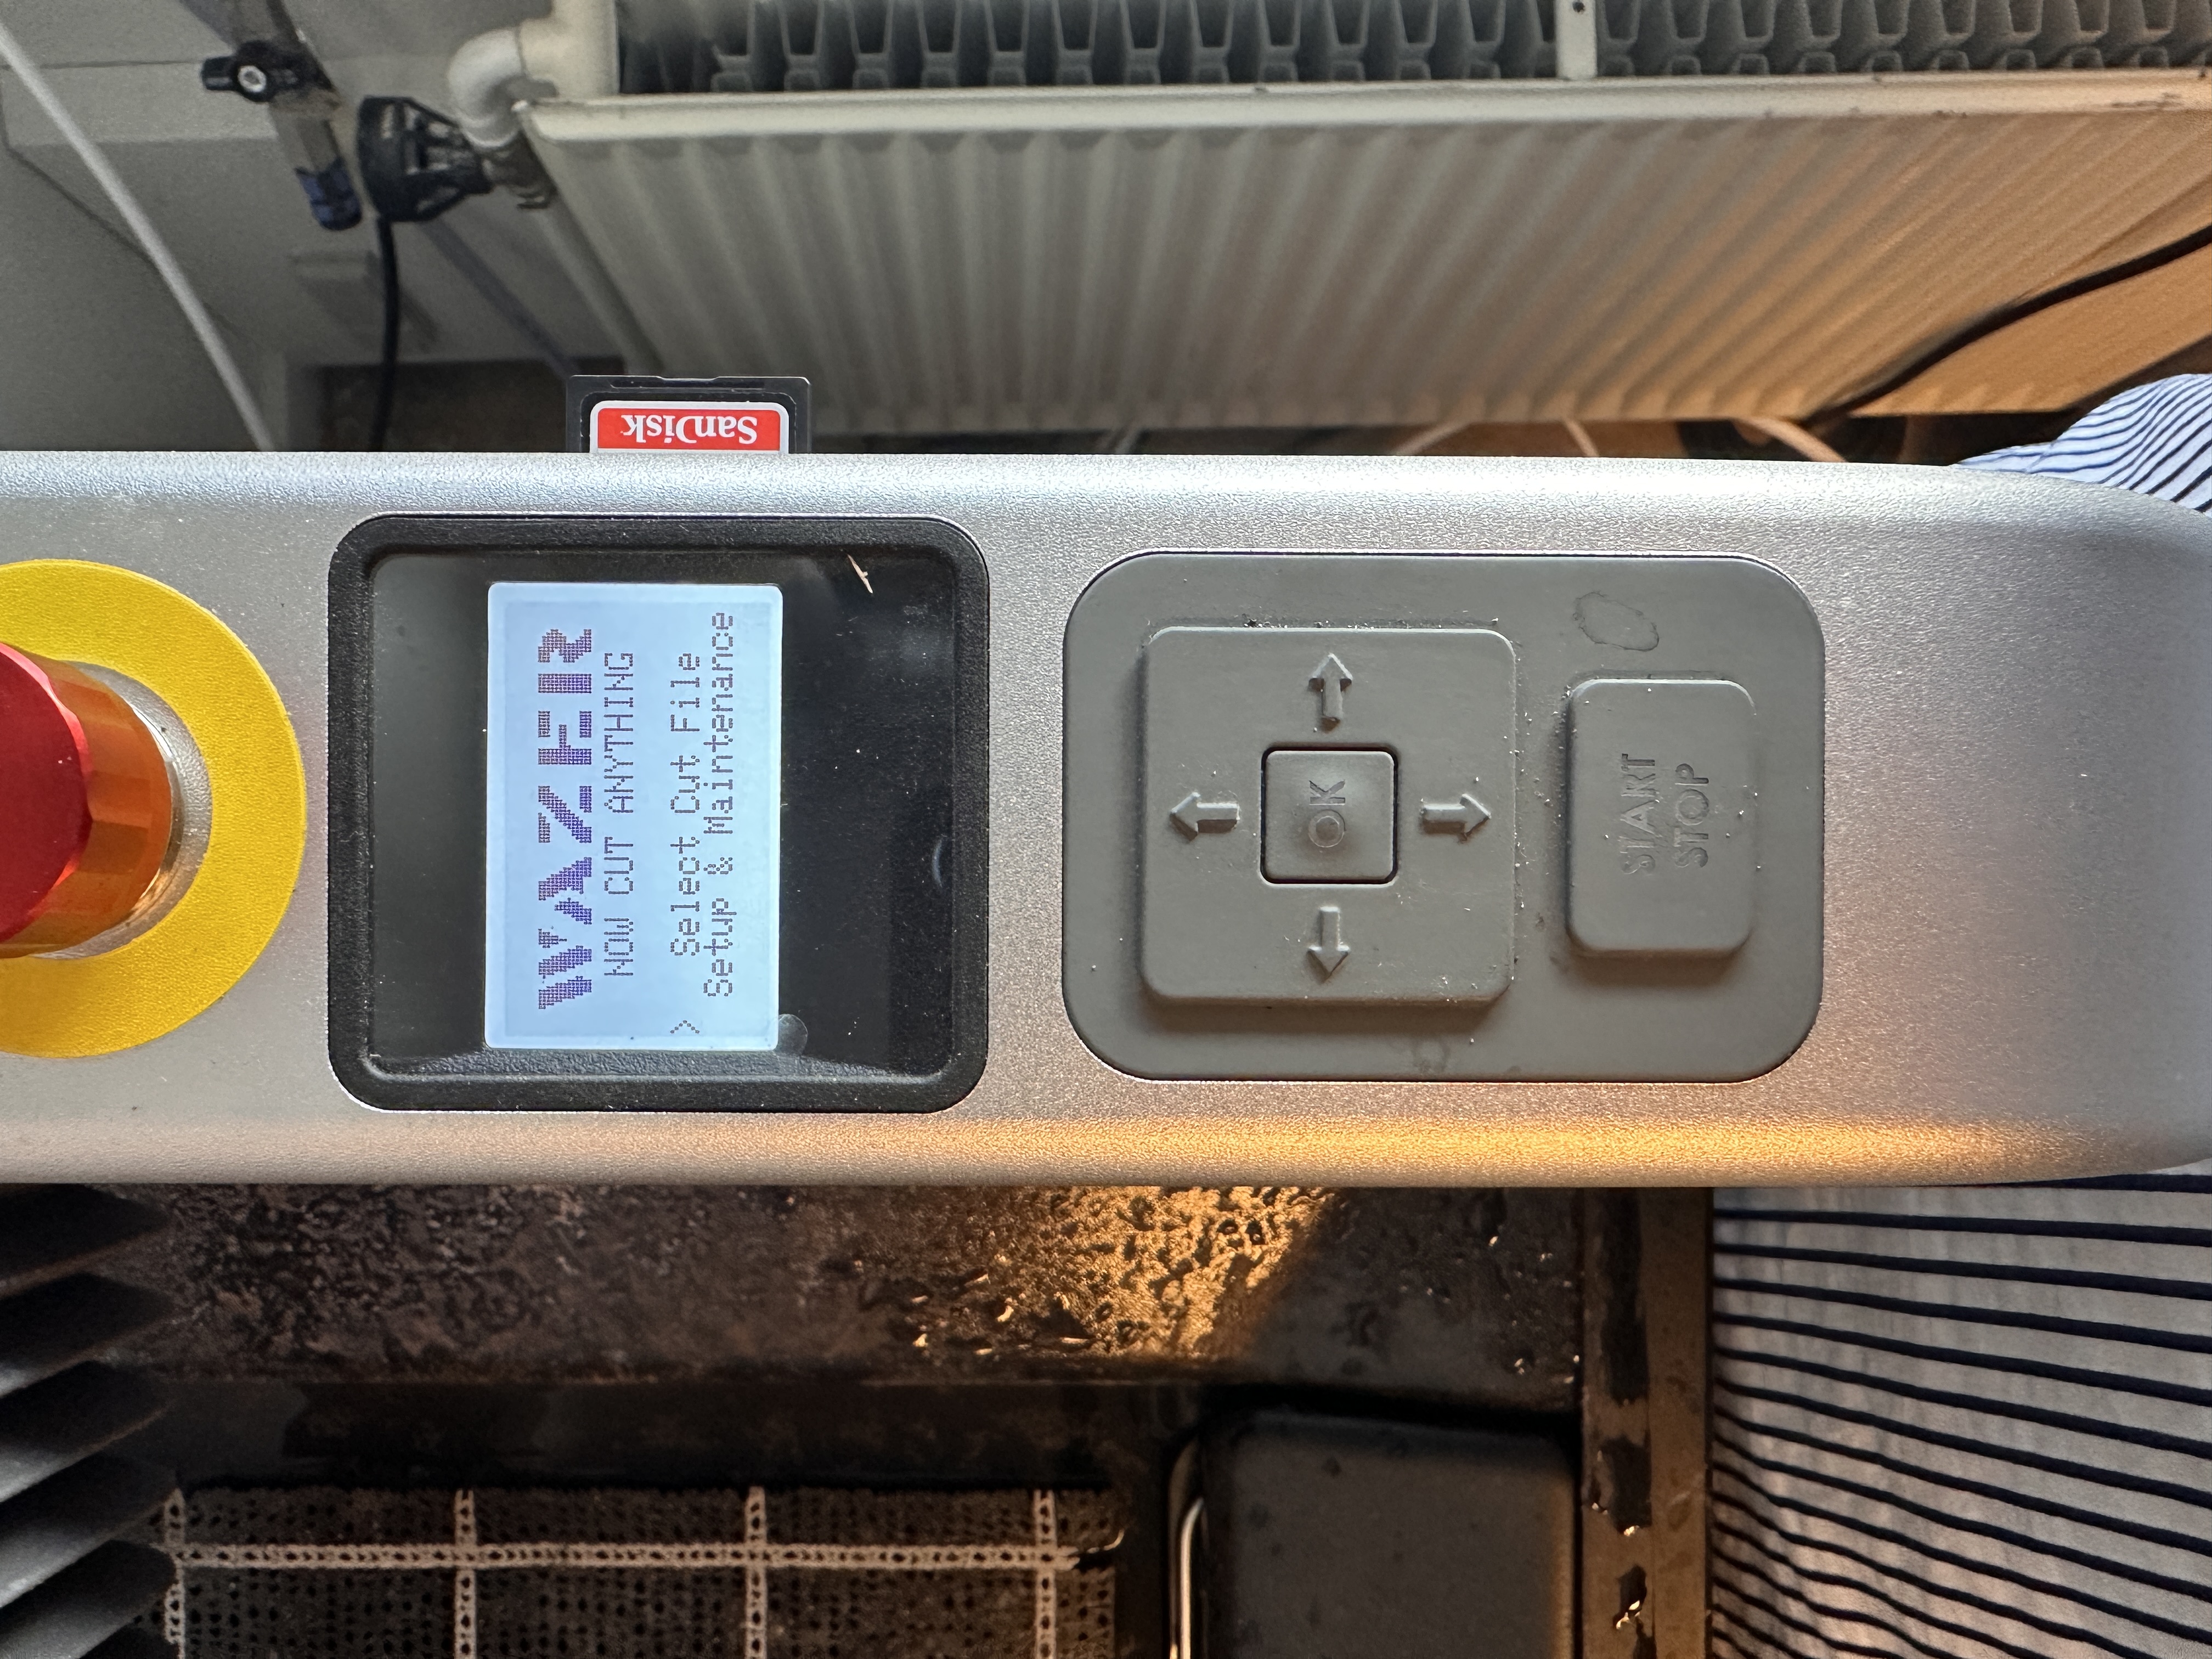
Cutting on the Machine
With your file ready please transfer it to the SD card on the machine. We have an SD card.
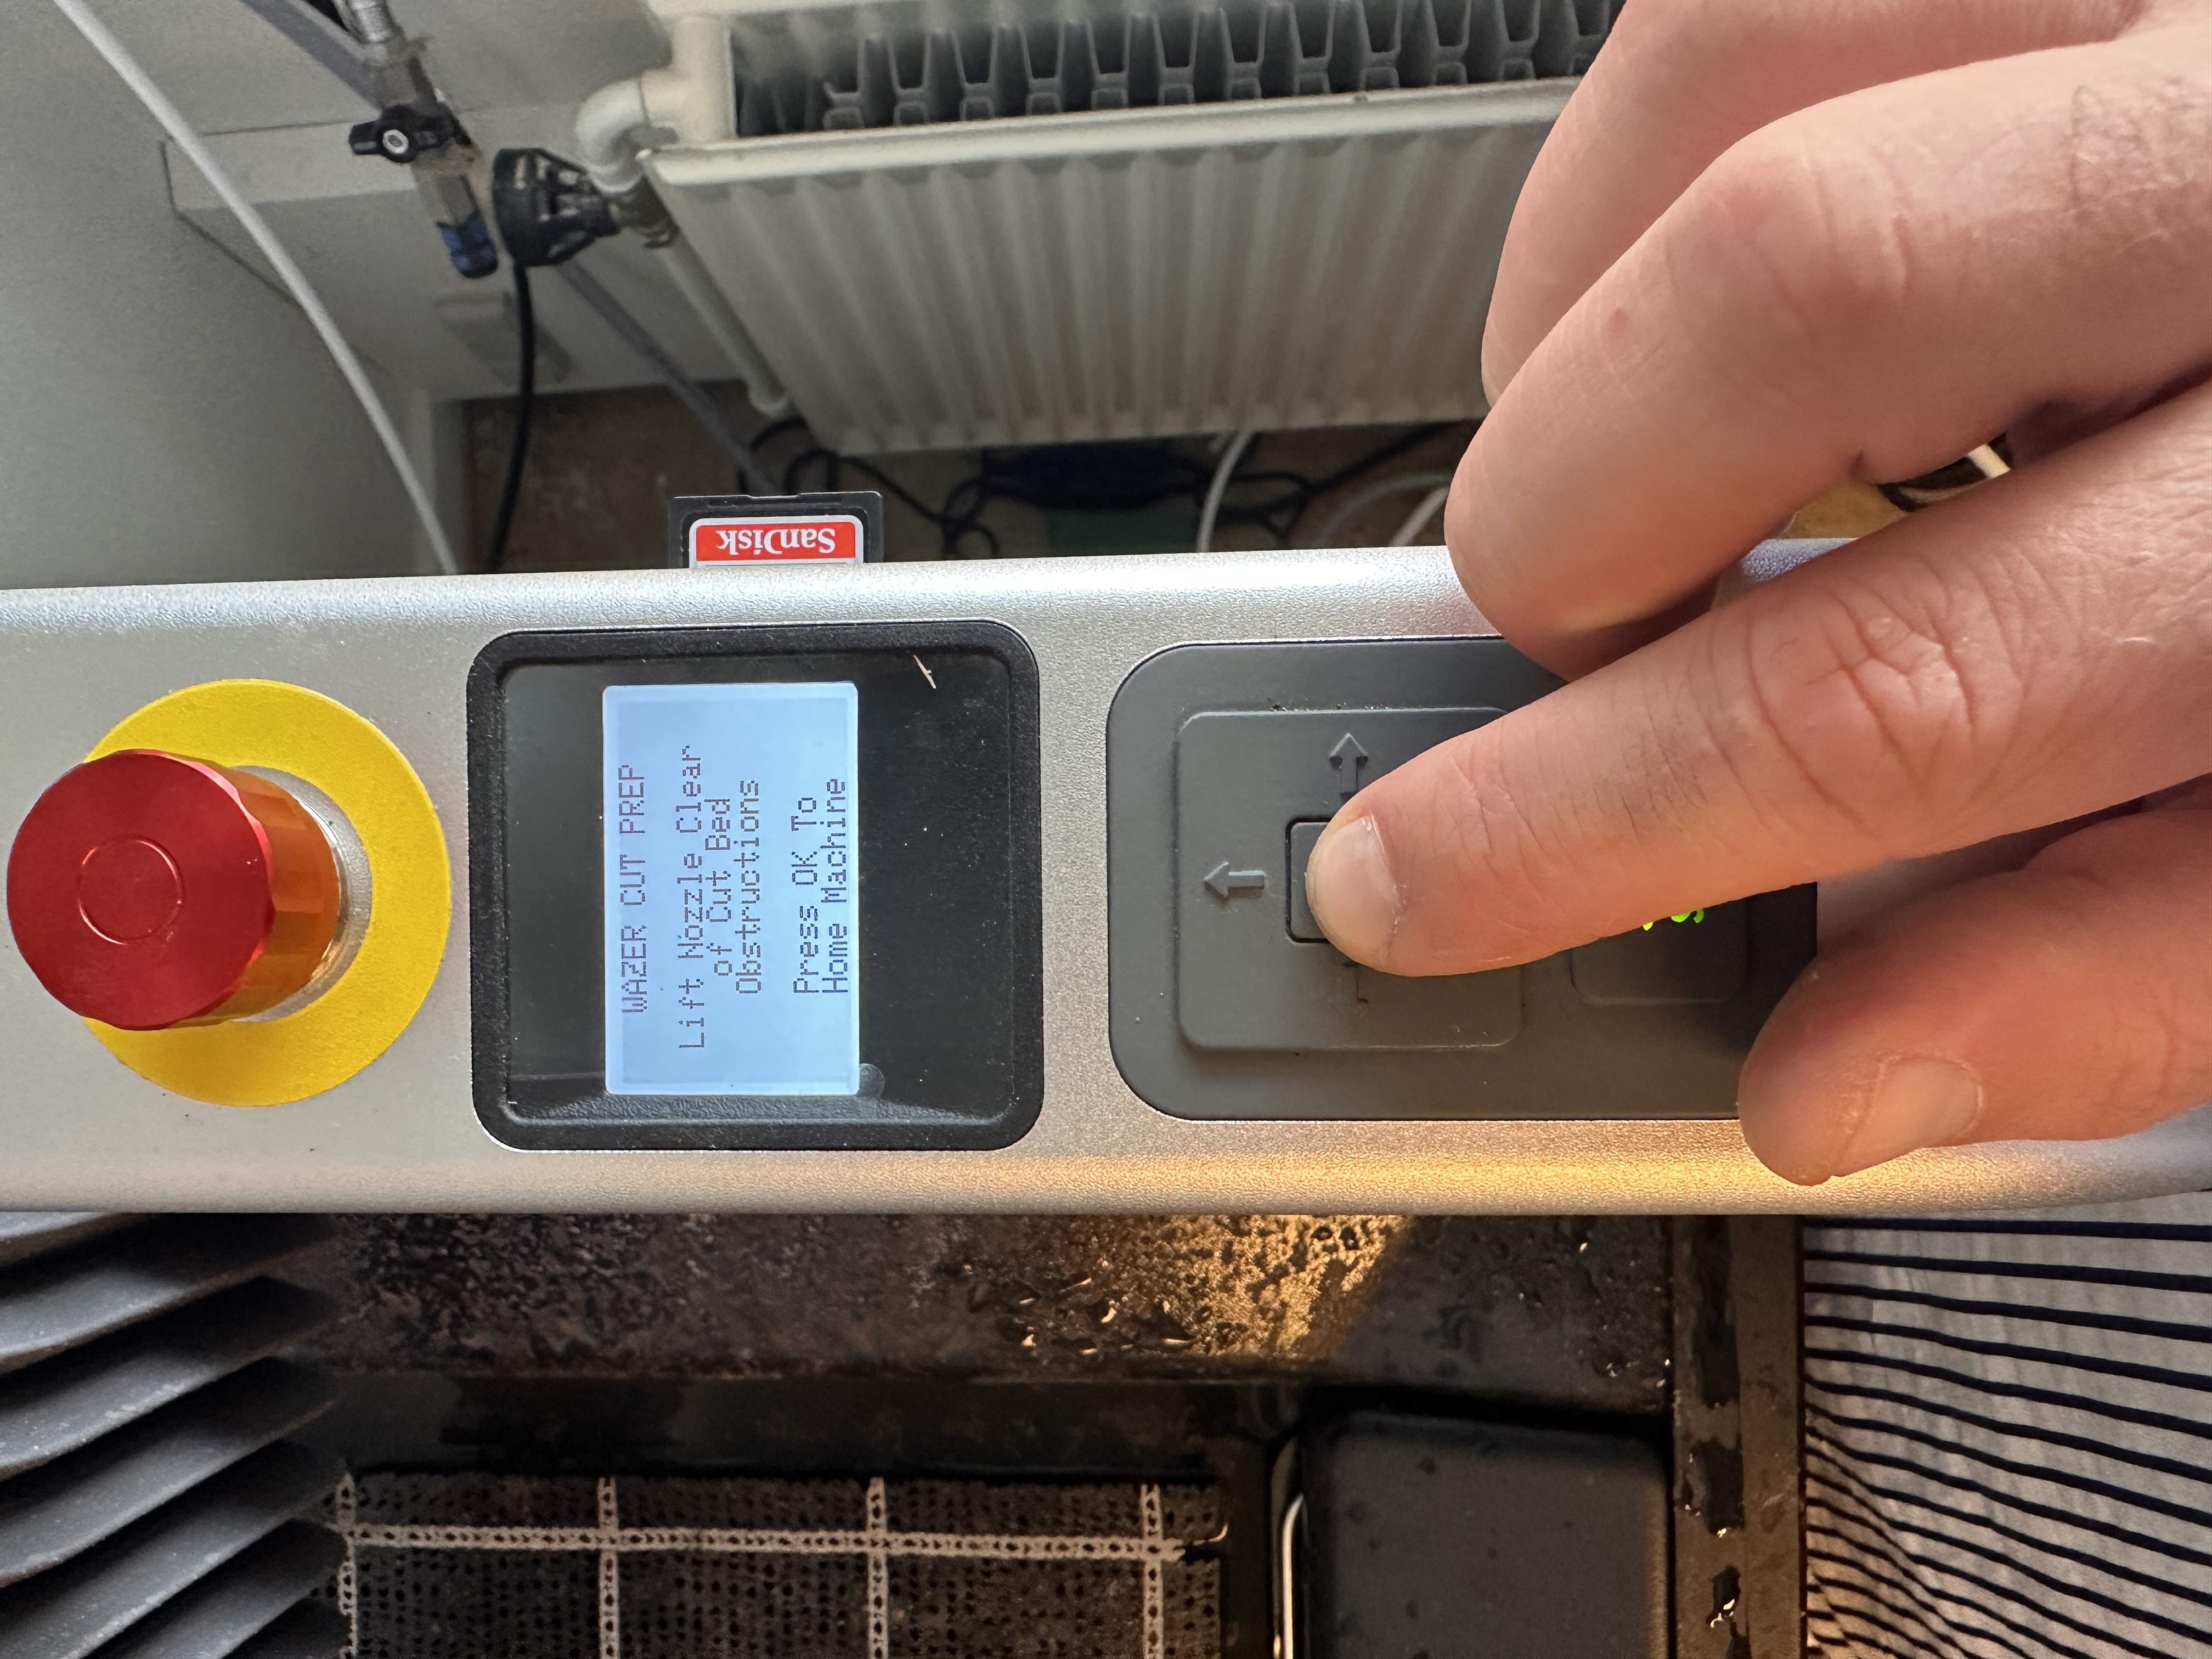
Turn the machine on by releasing (Turning) the 'Emergency Stop Button'
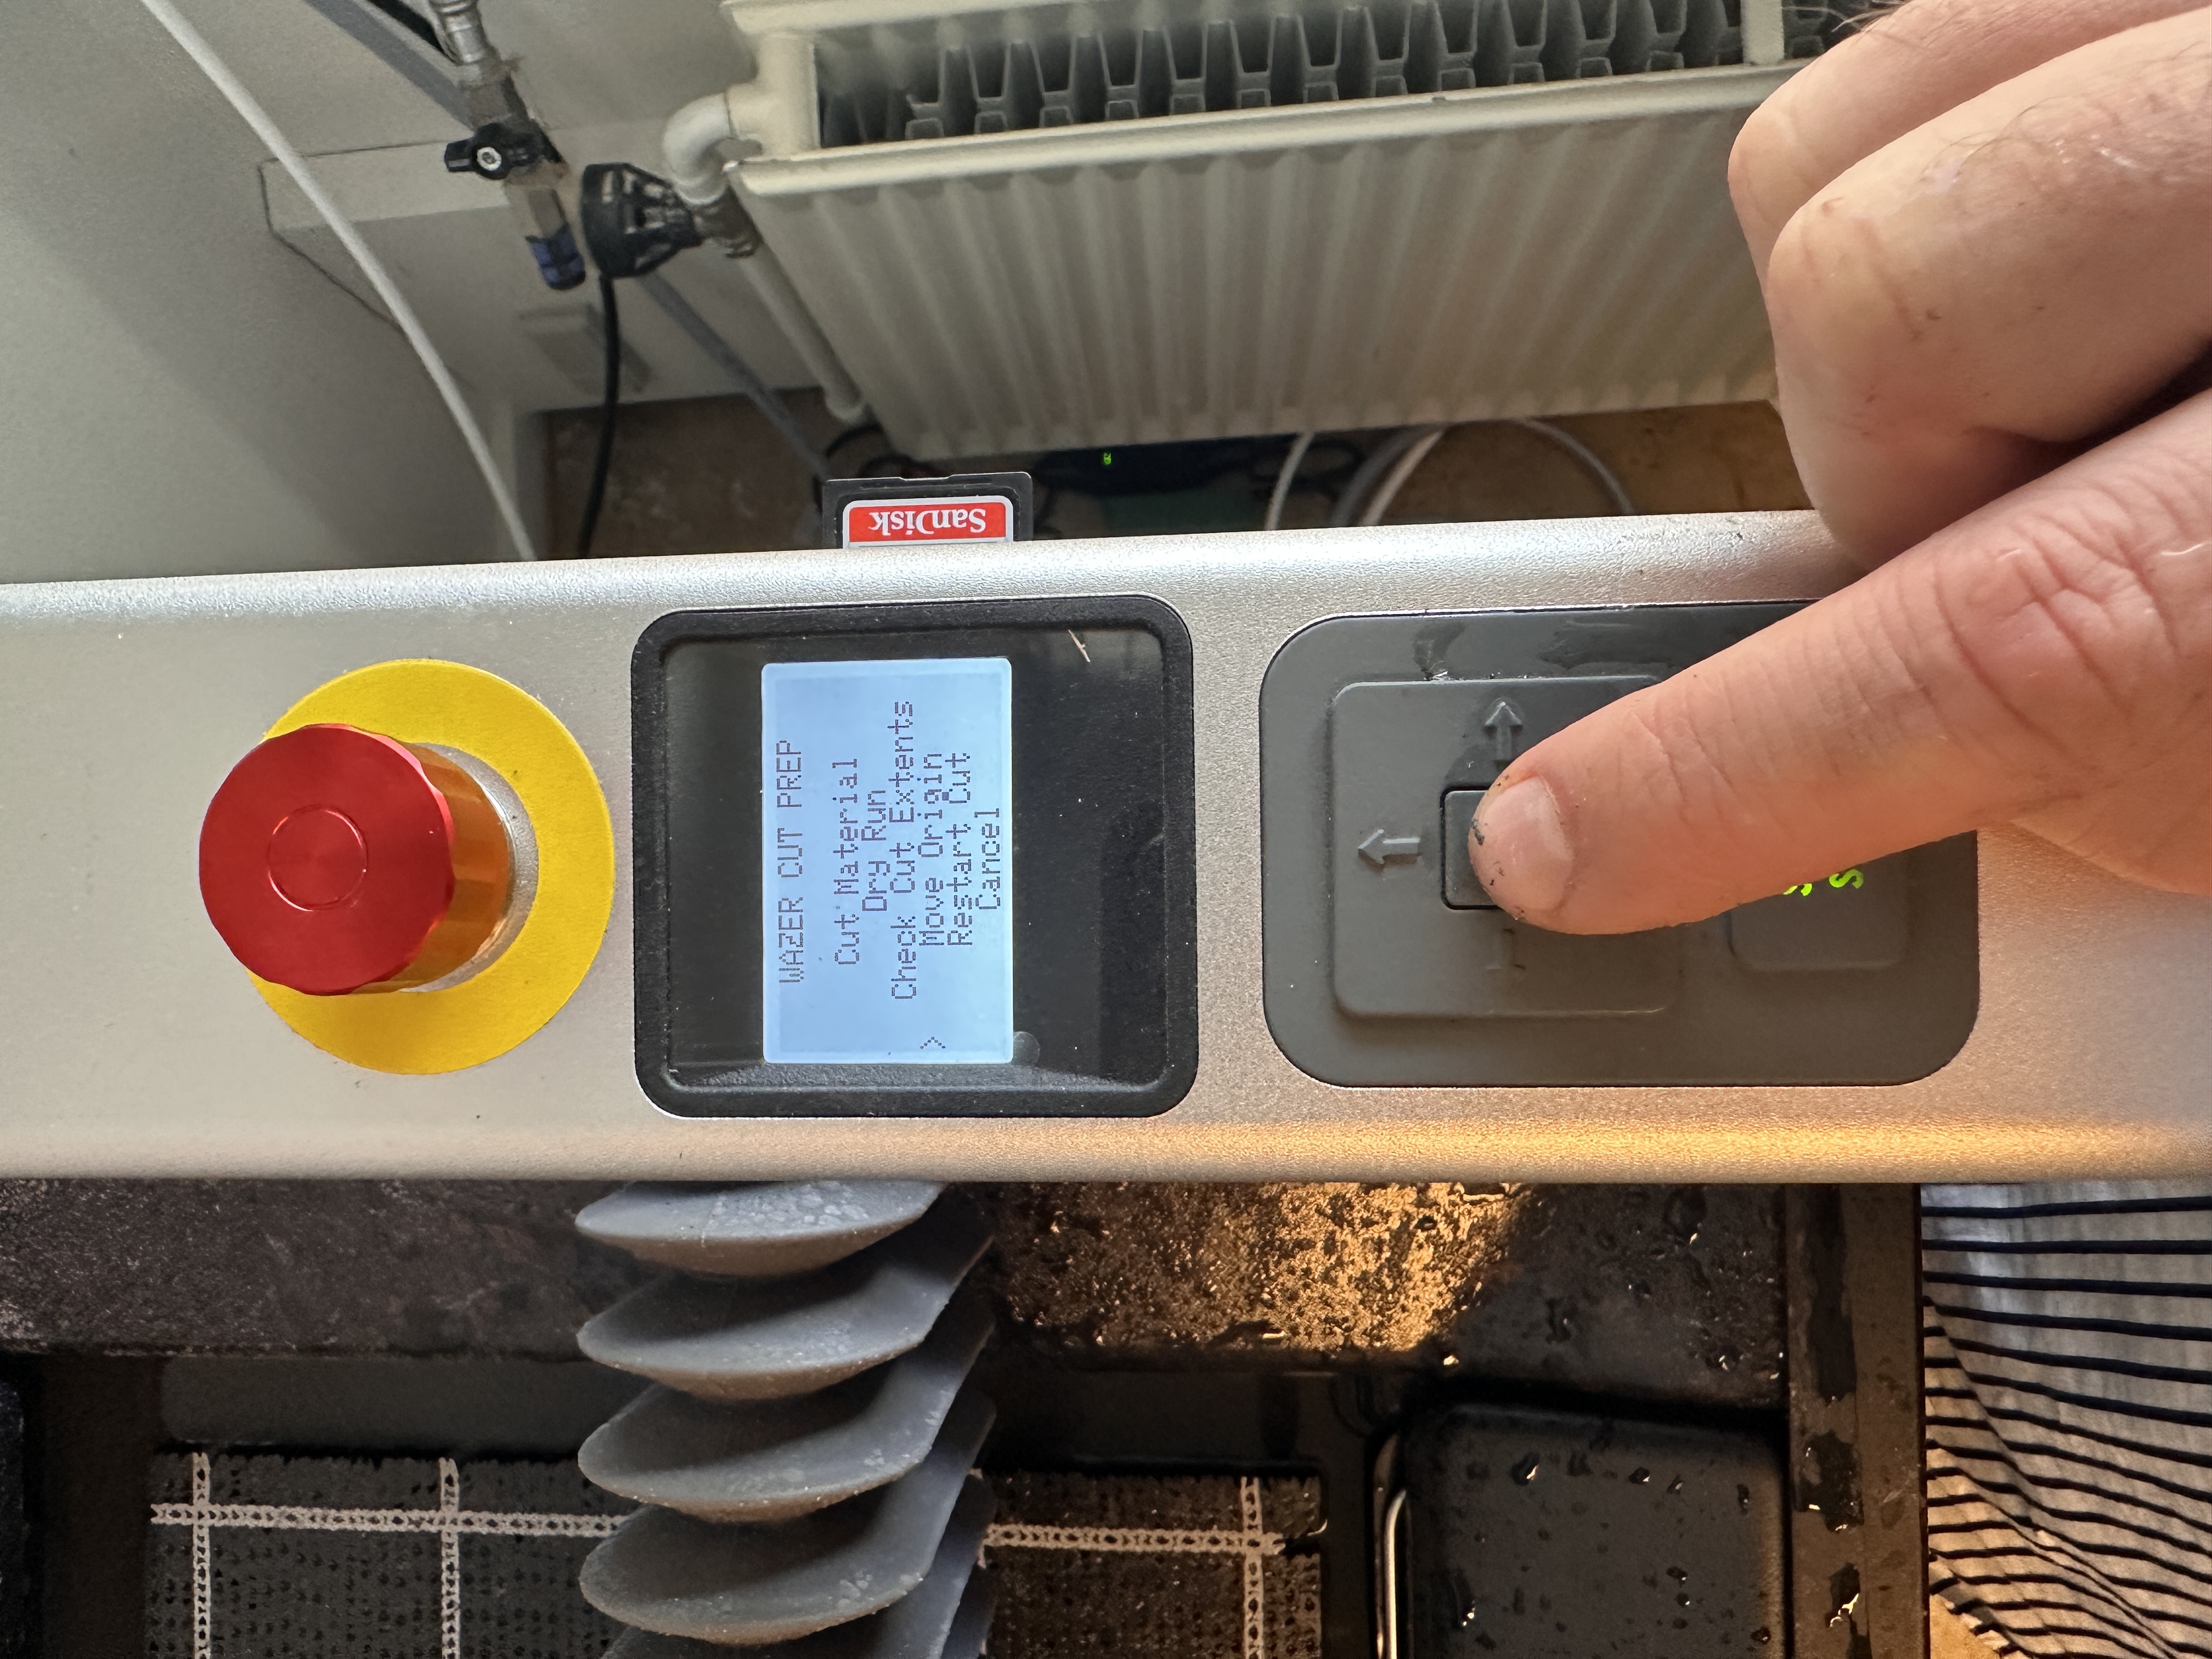
Press 'Select Cut File'
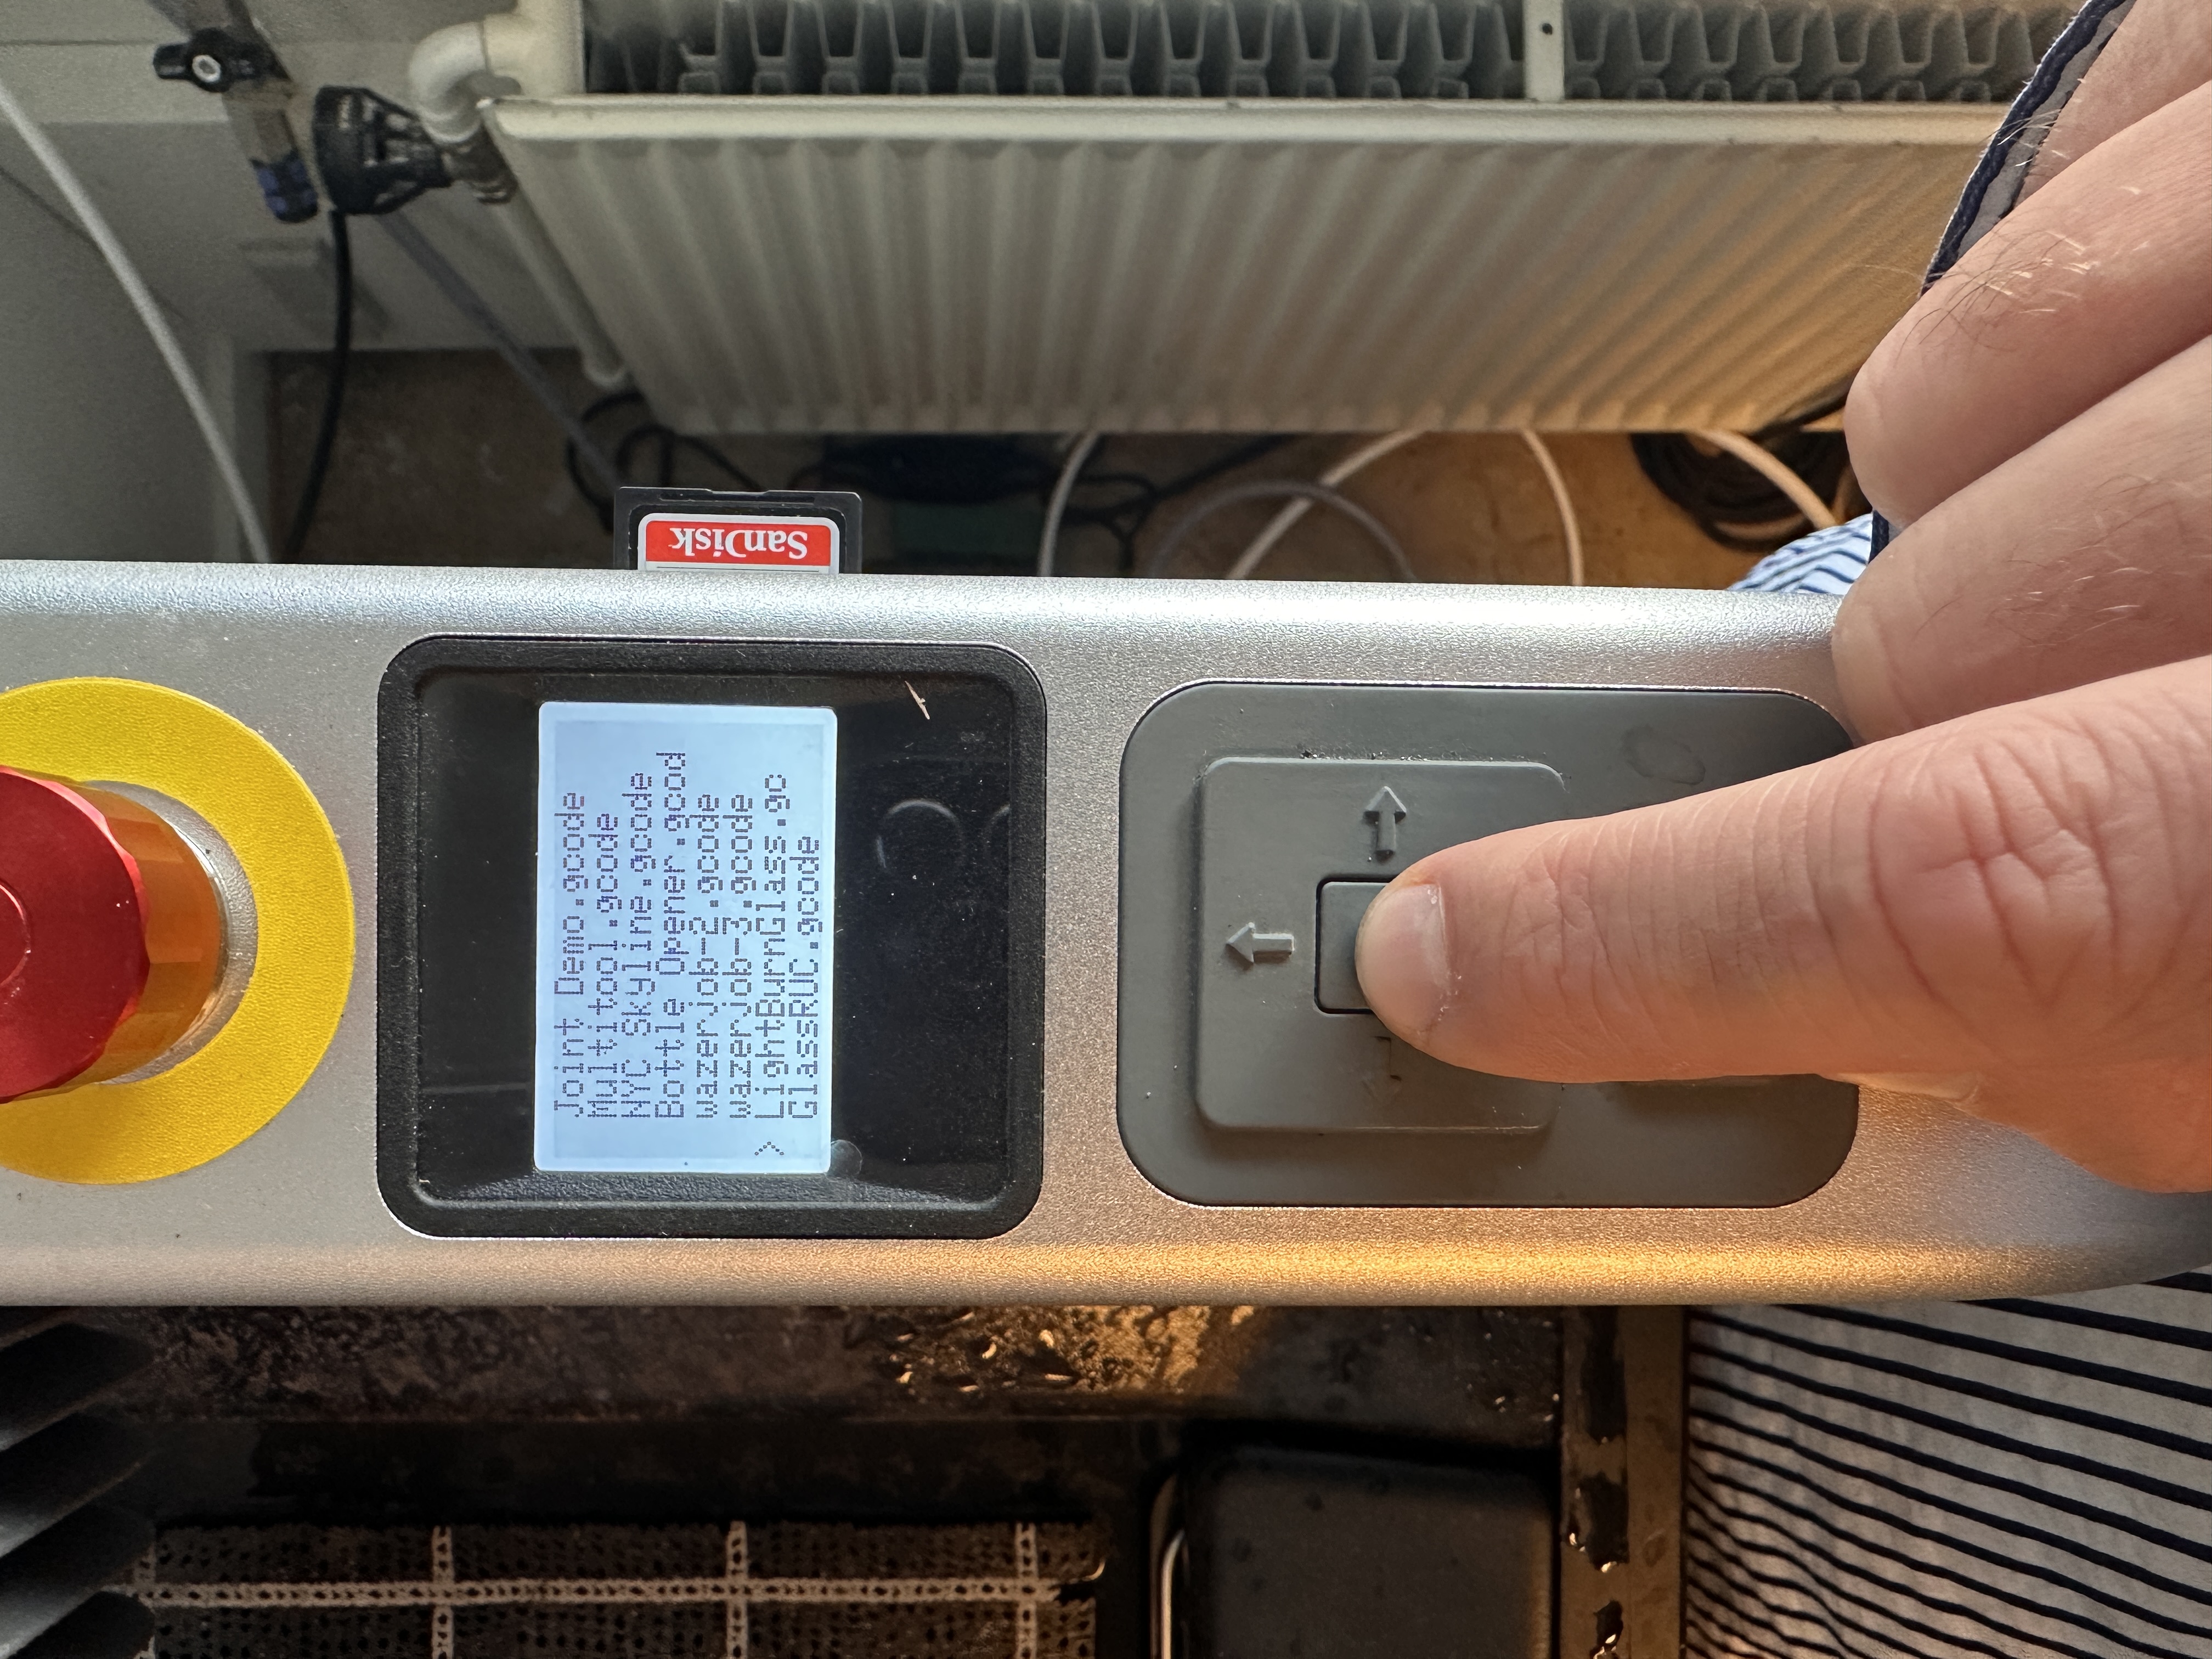
Select your File and press 'Ok'
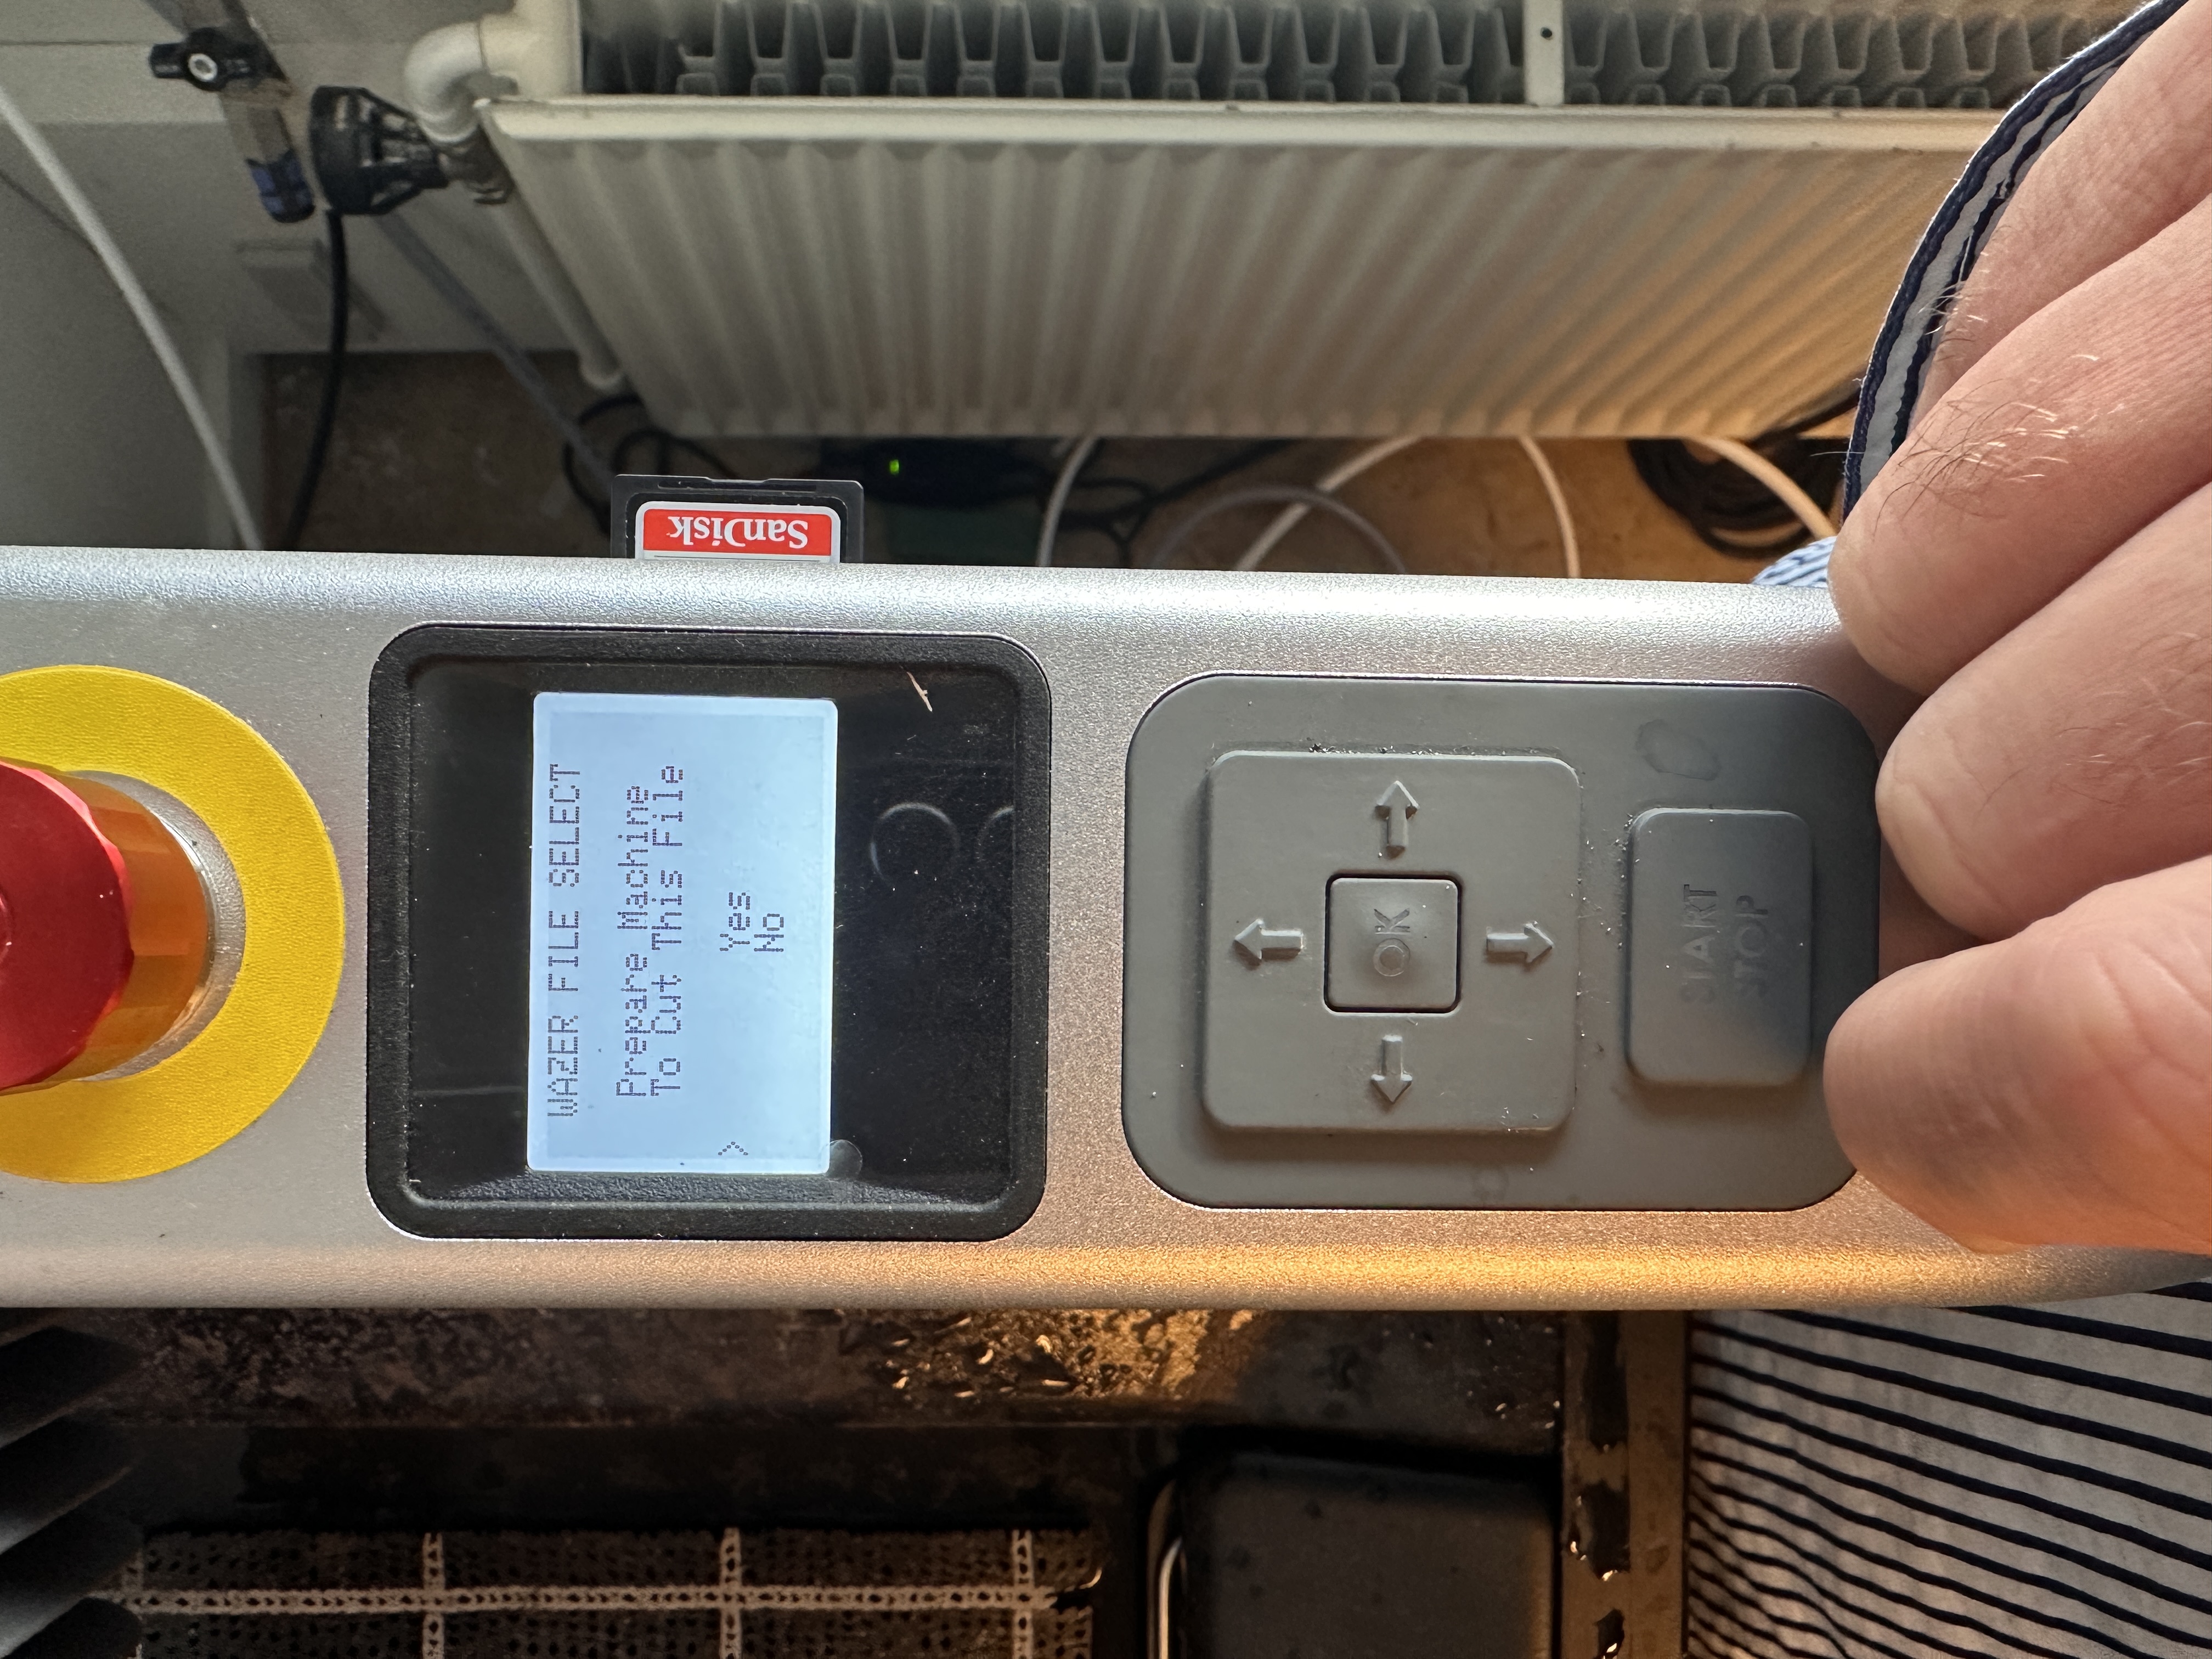
Prepare to cut this file, click yes.
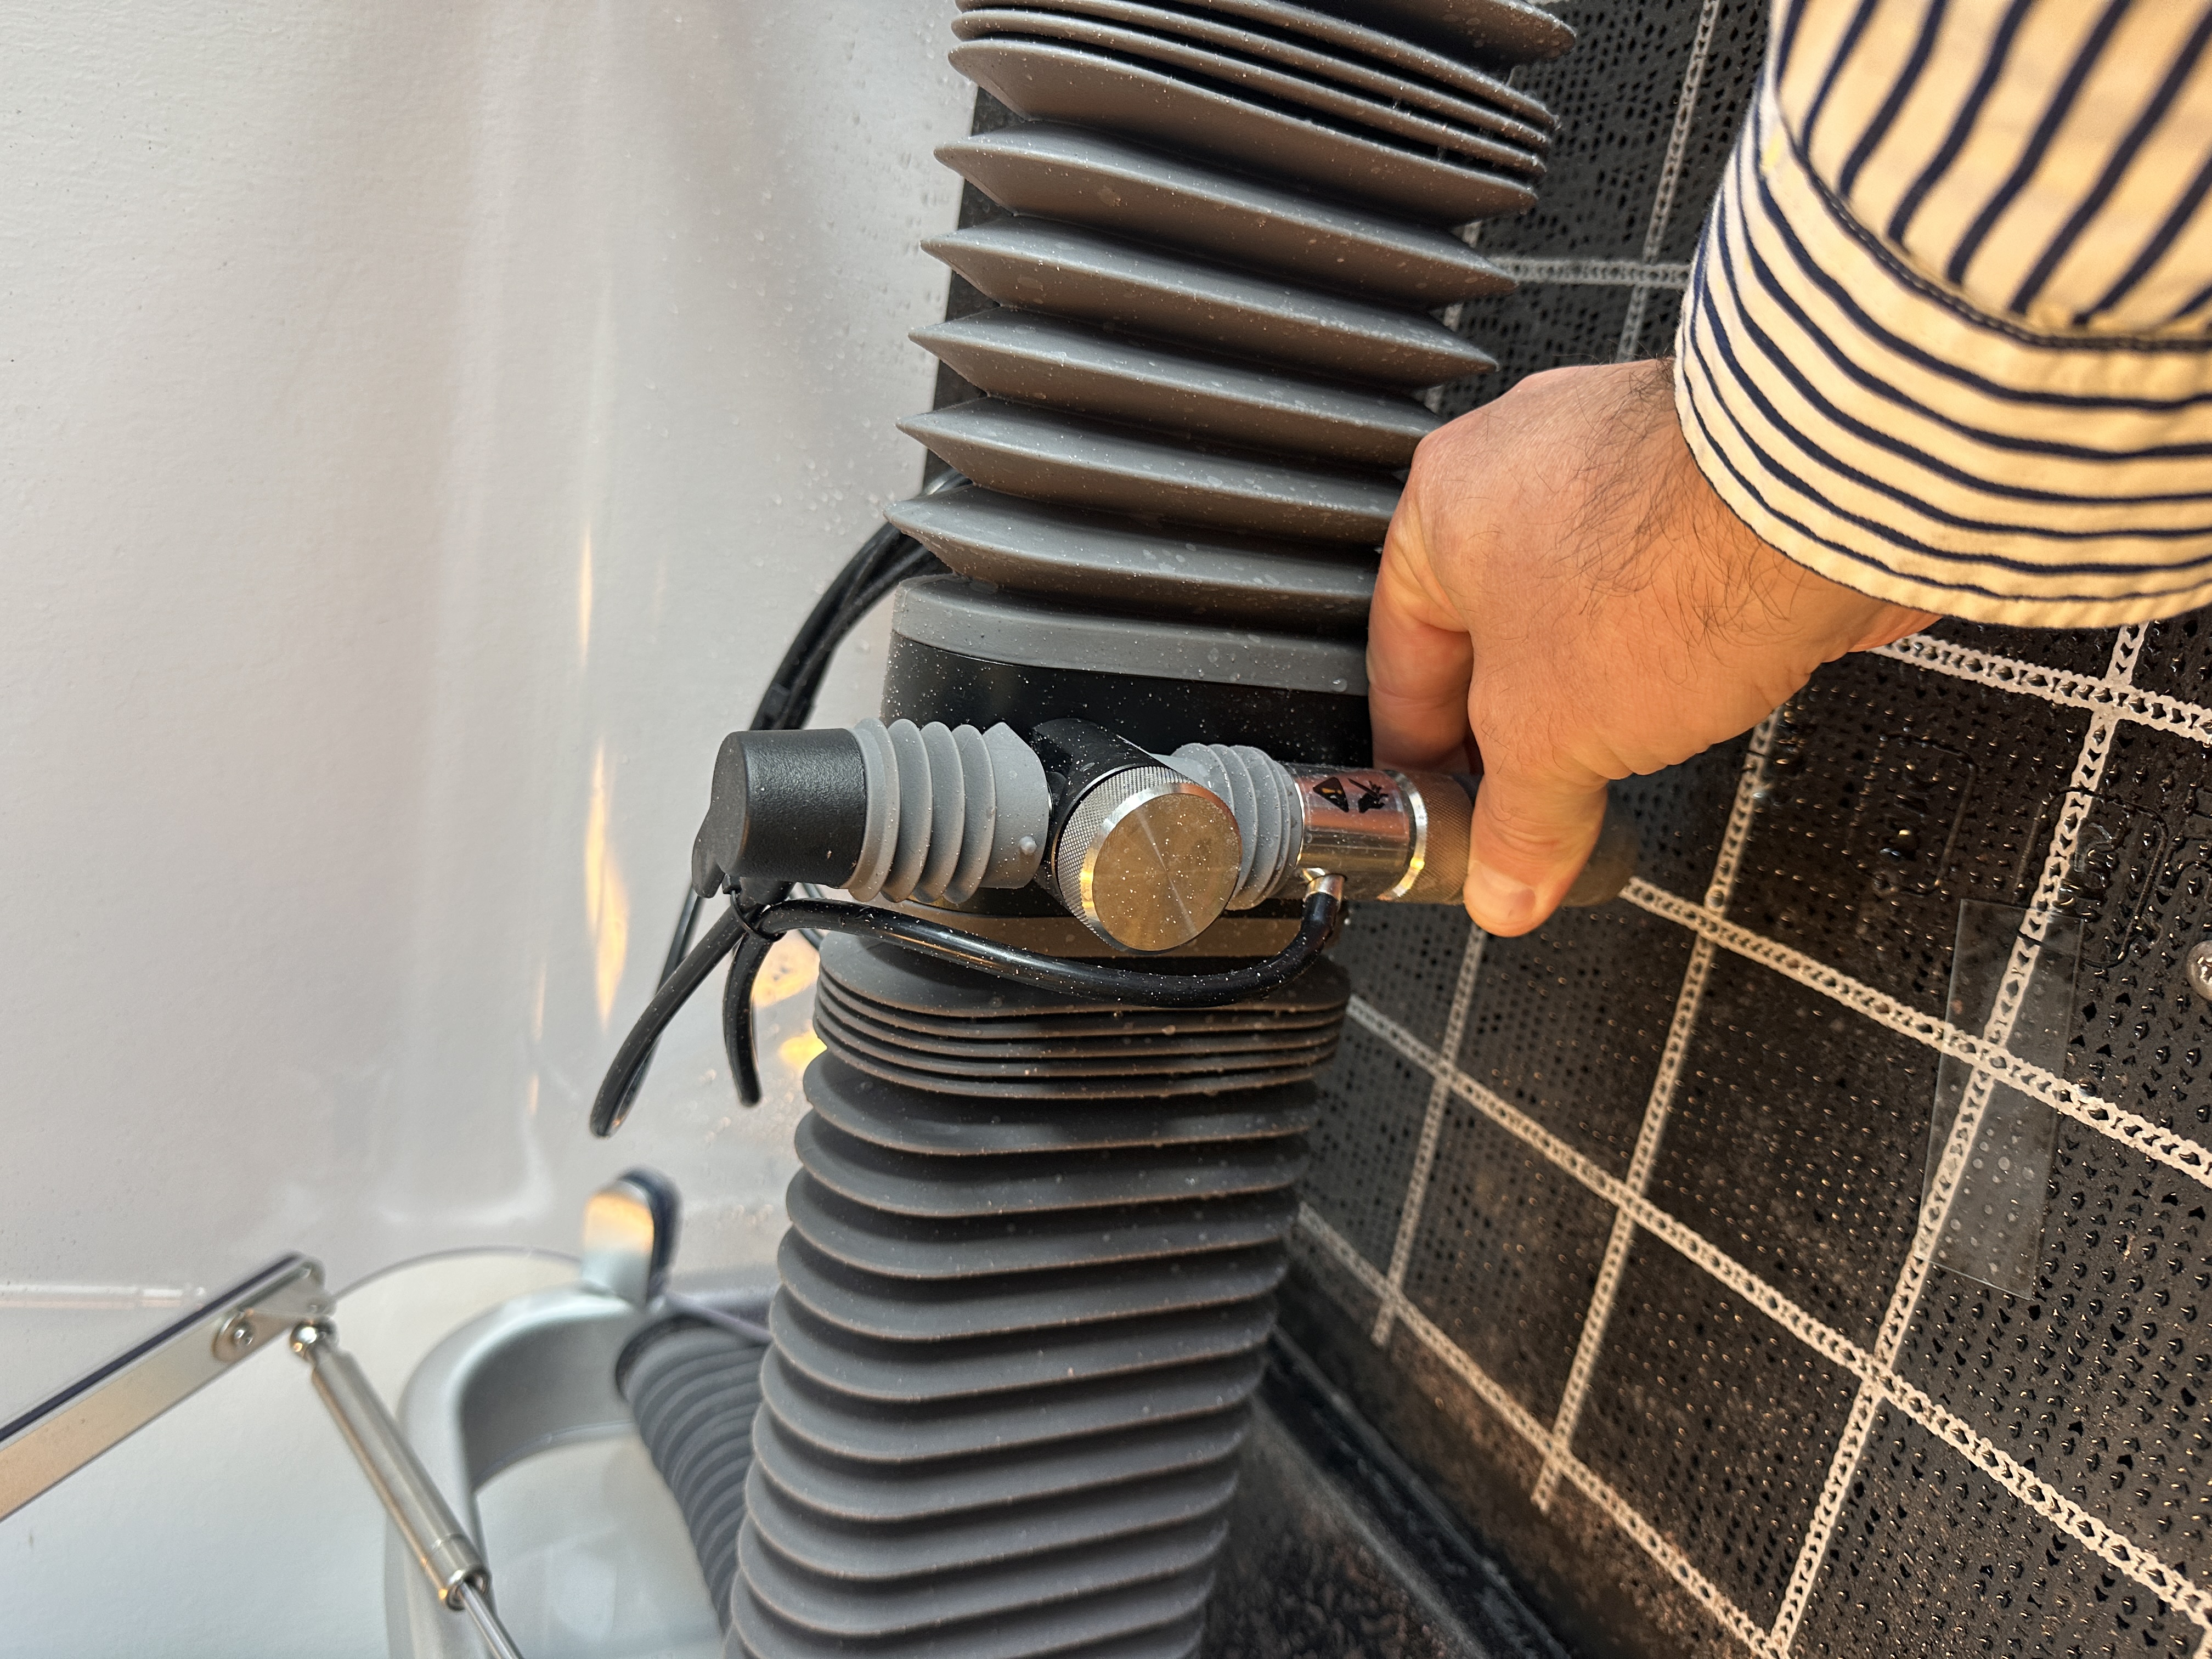
Turn the silver knob on the nozzle to move it up and clear of obstructions.
Turn the knob
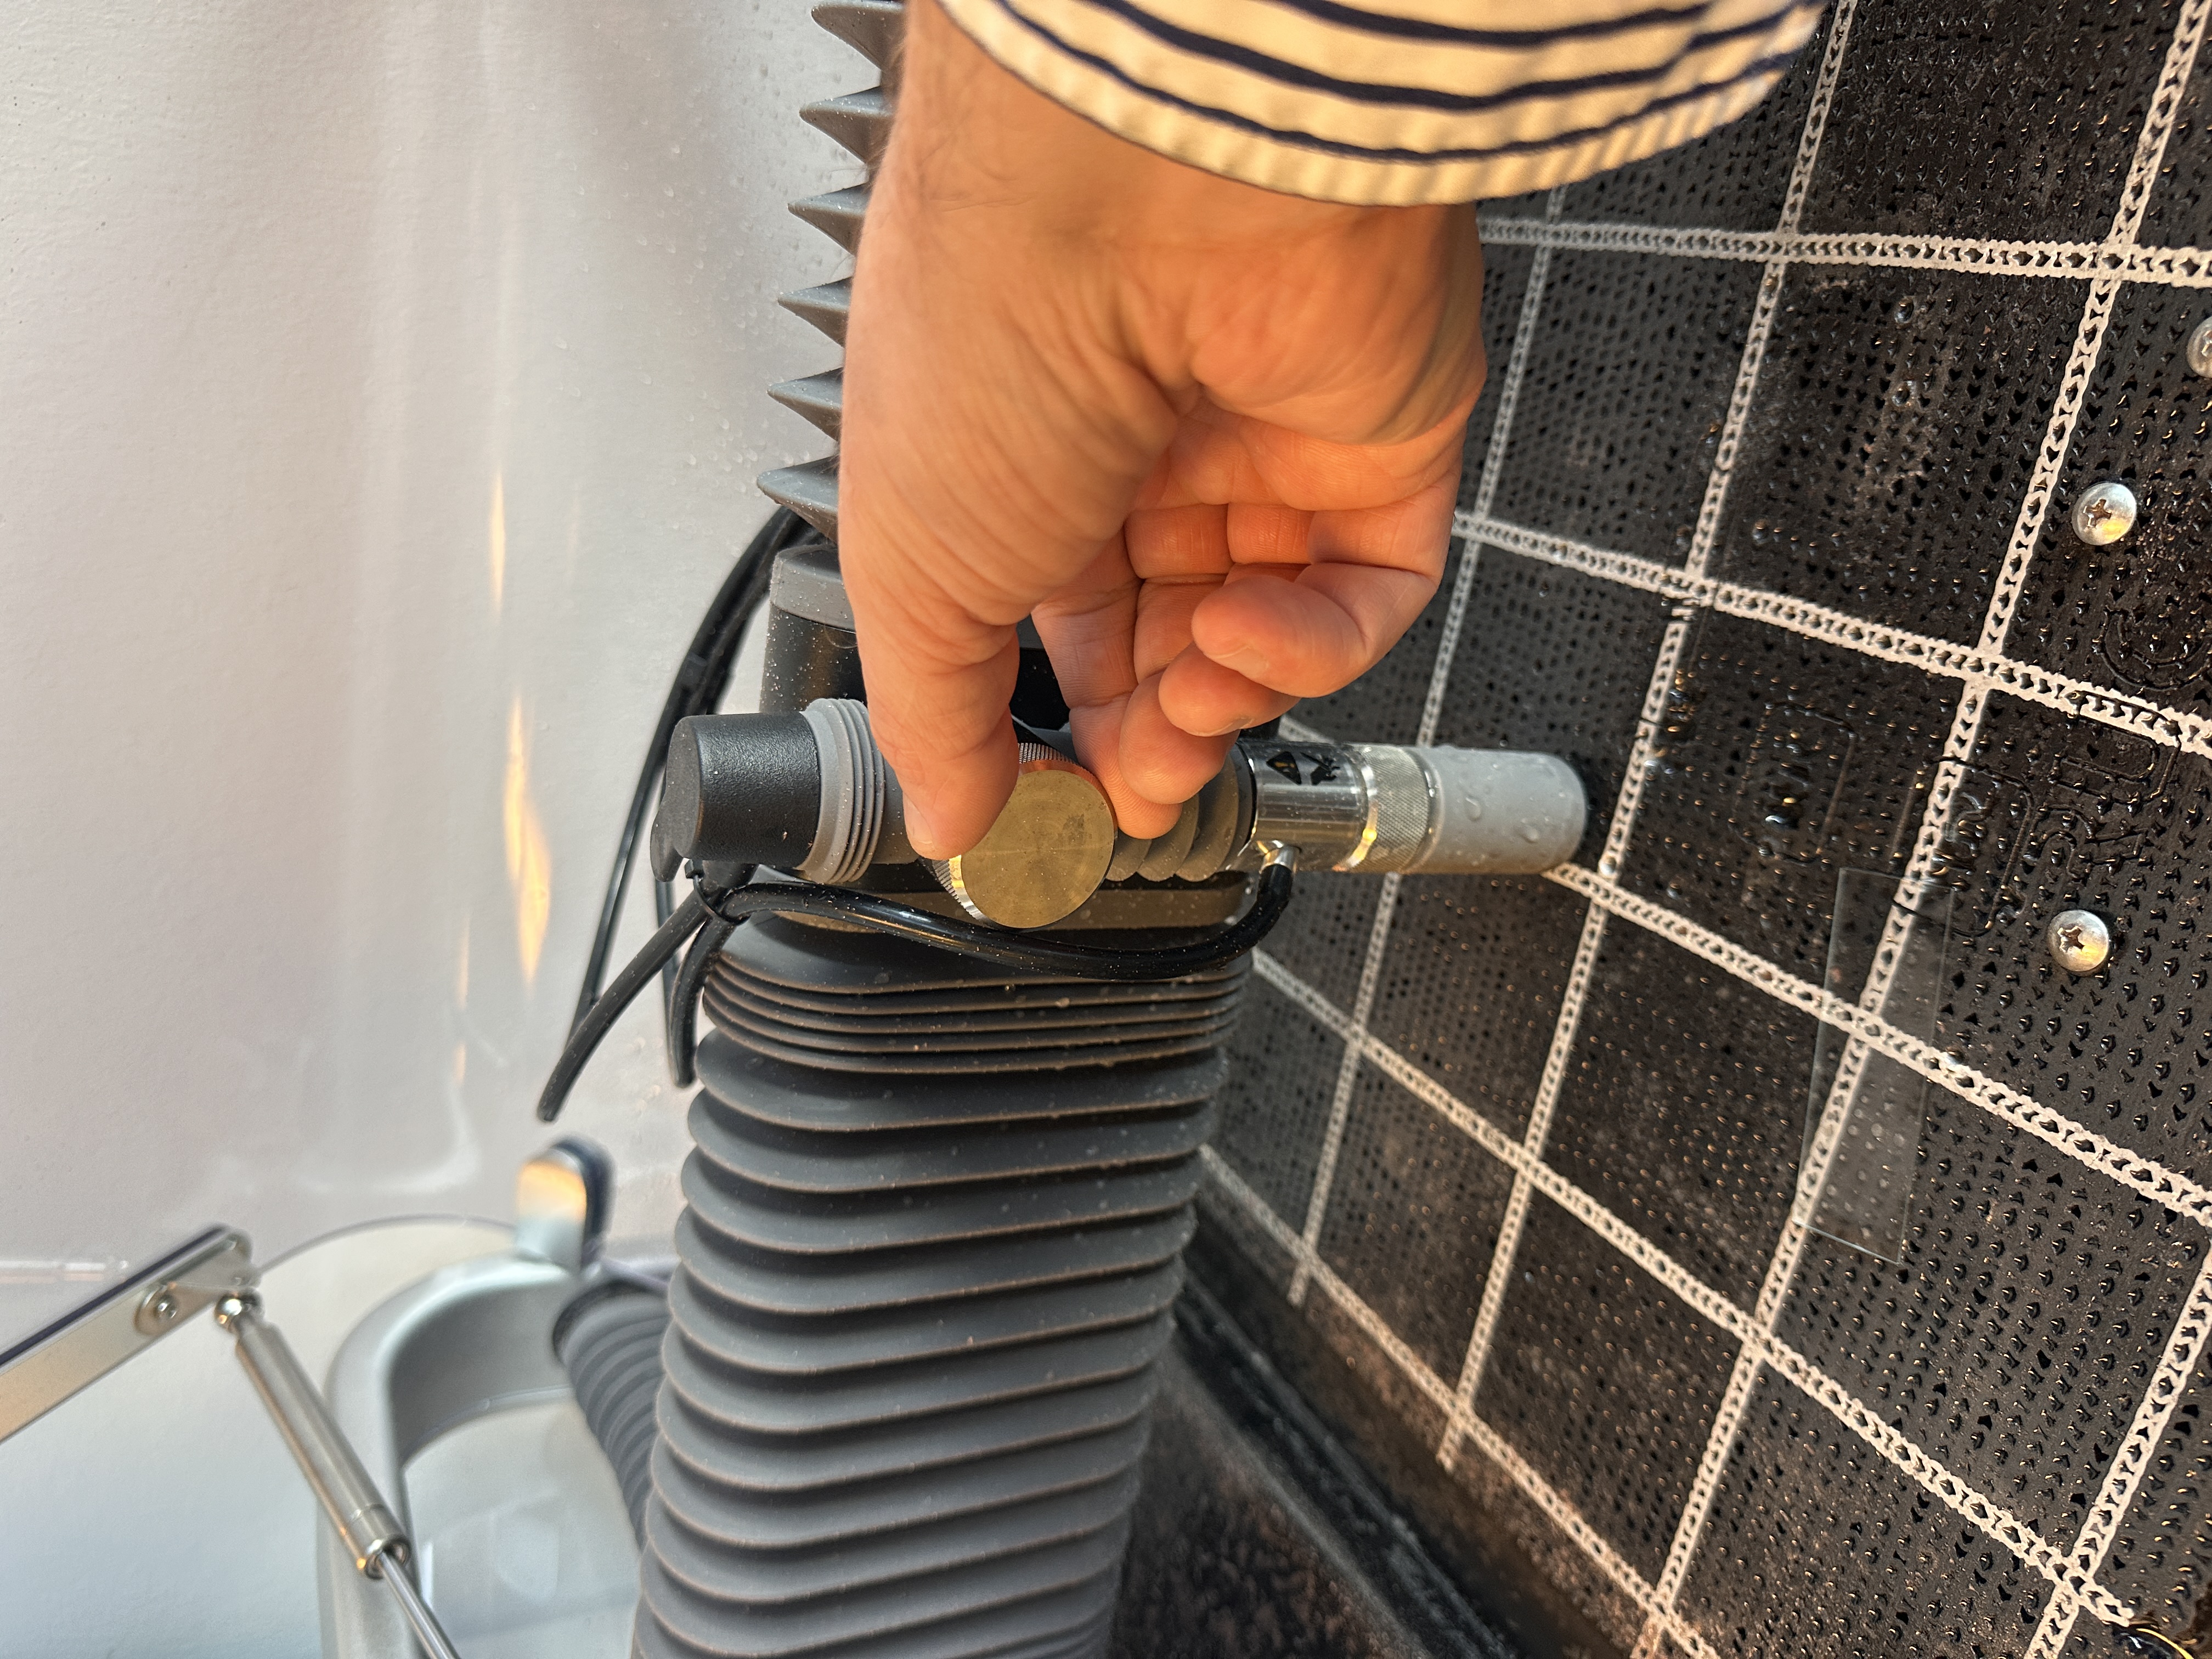
Lift the nozzle and tighten the silver knob gently. Do not over tighten! No tools required.
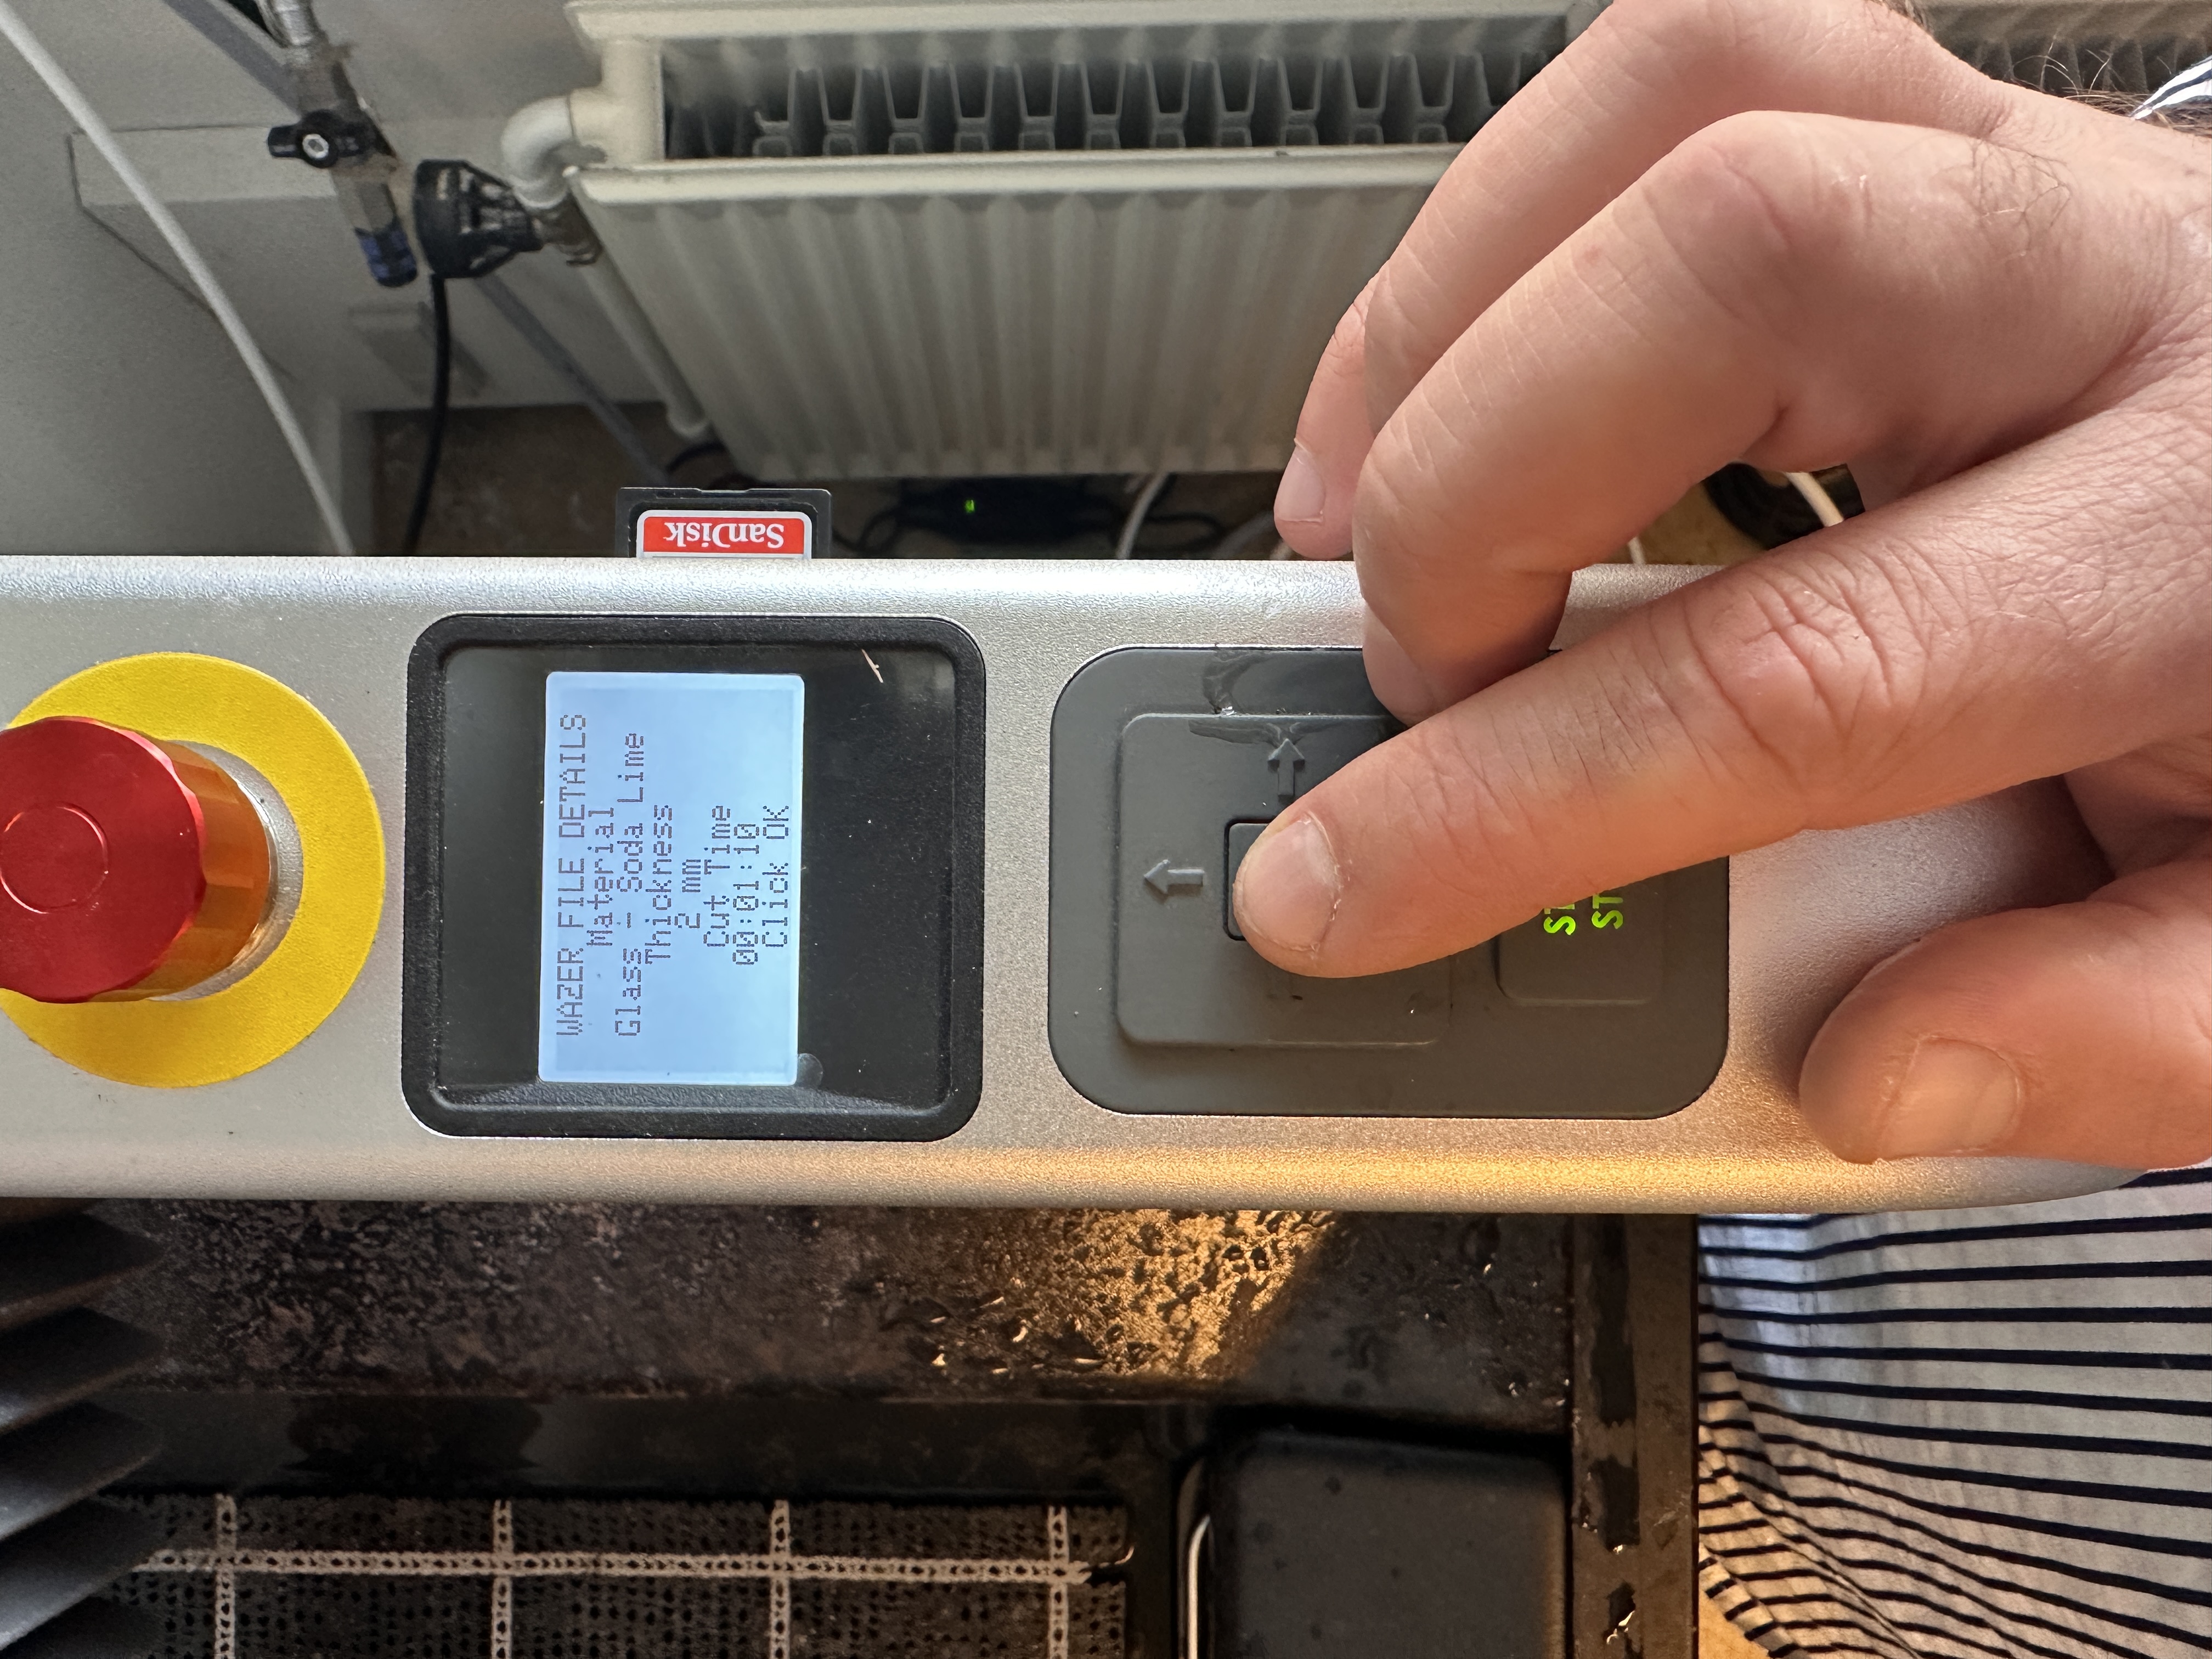
An overview of your file will be displayed, please ensure that the material is correct and the thickness is as expected.
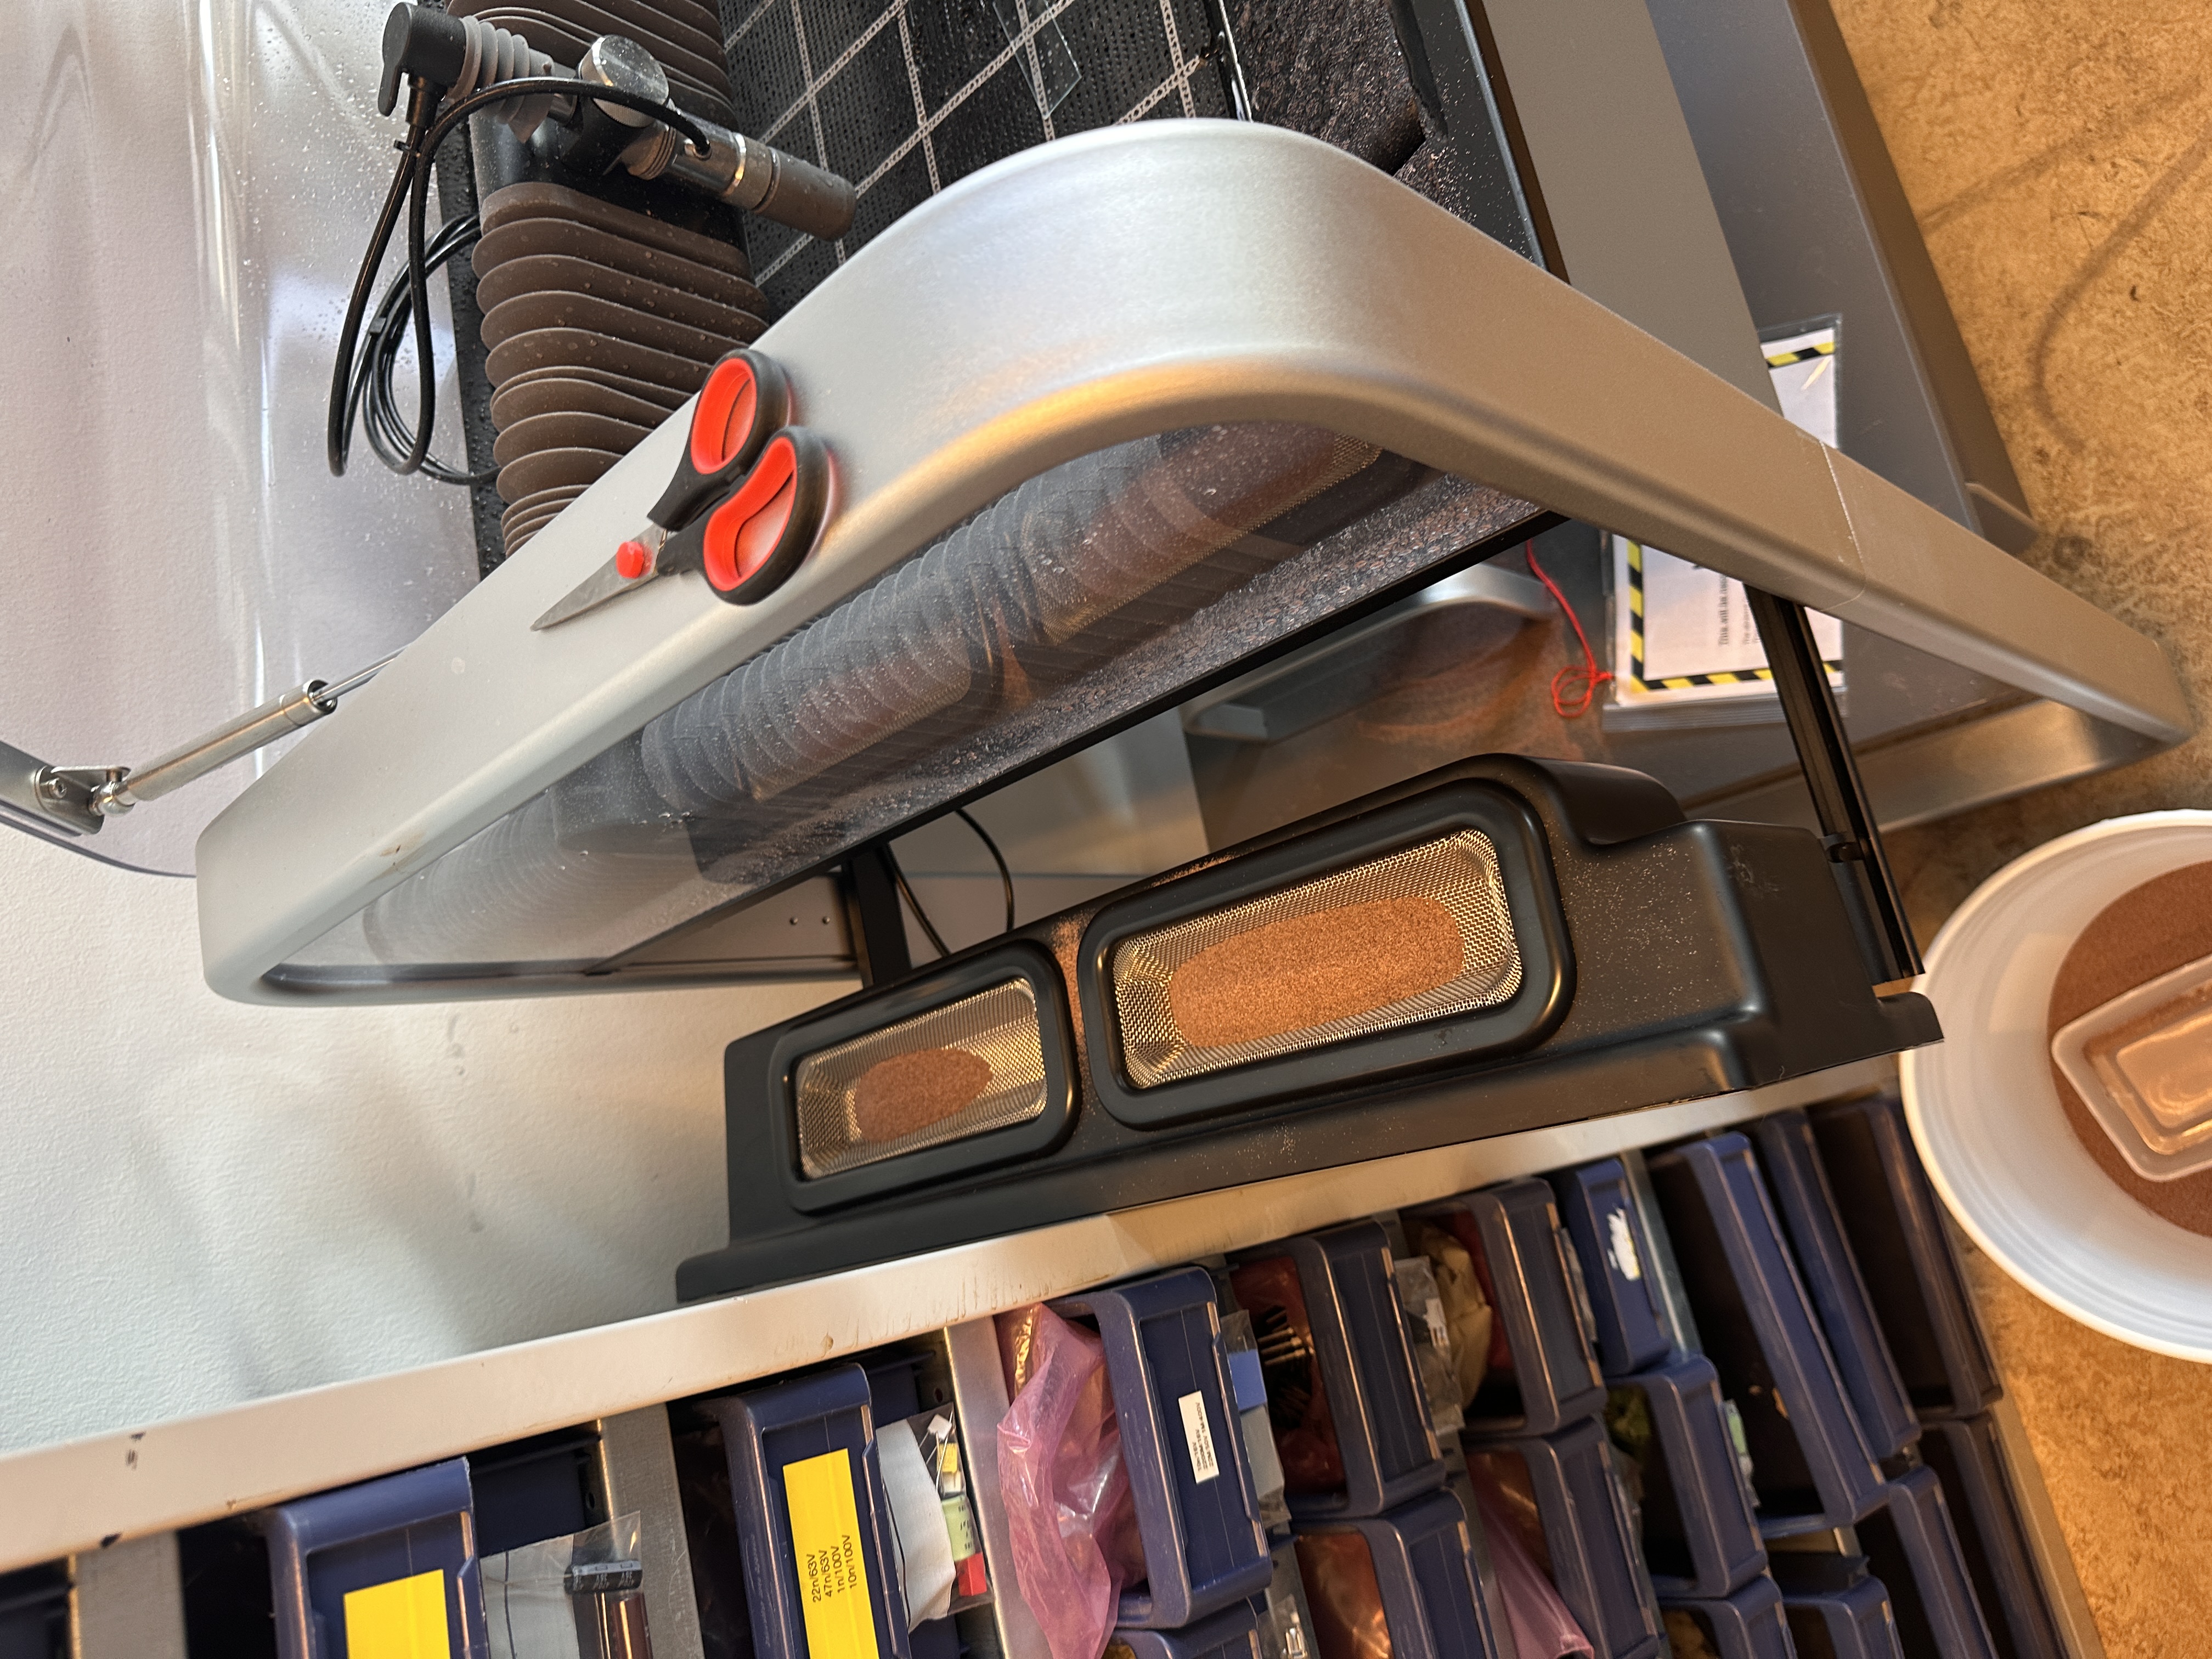
The machine will now ask you to empty the used abrasive baskets, and fill the hoppers with abrasive.
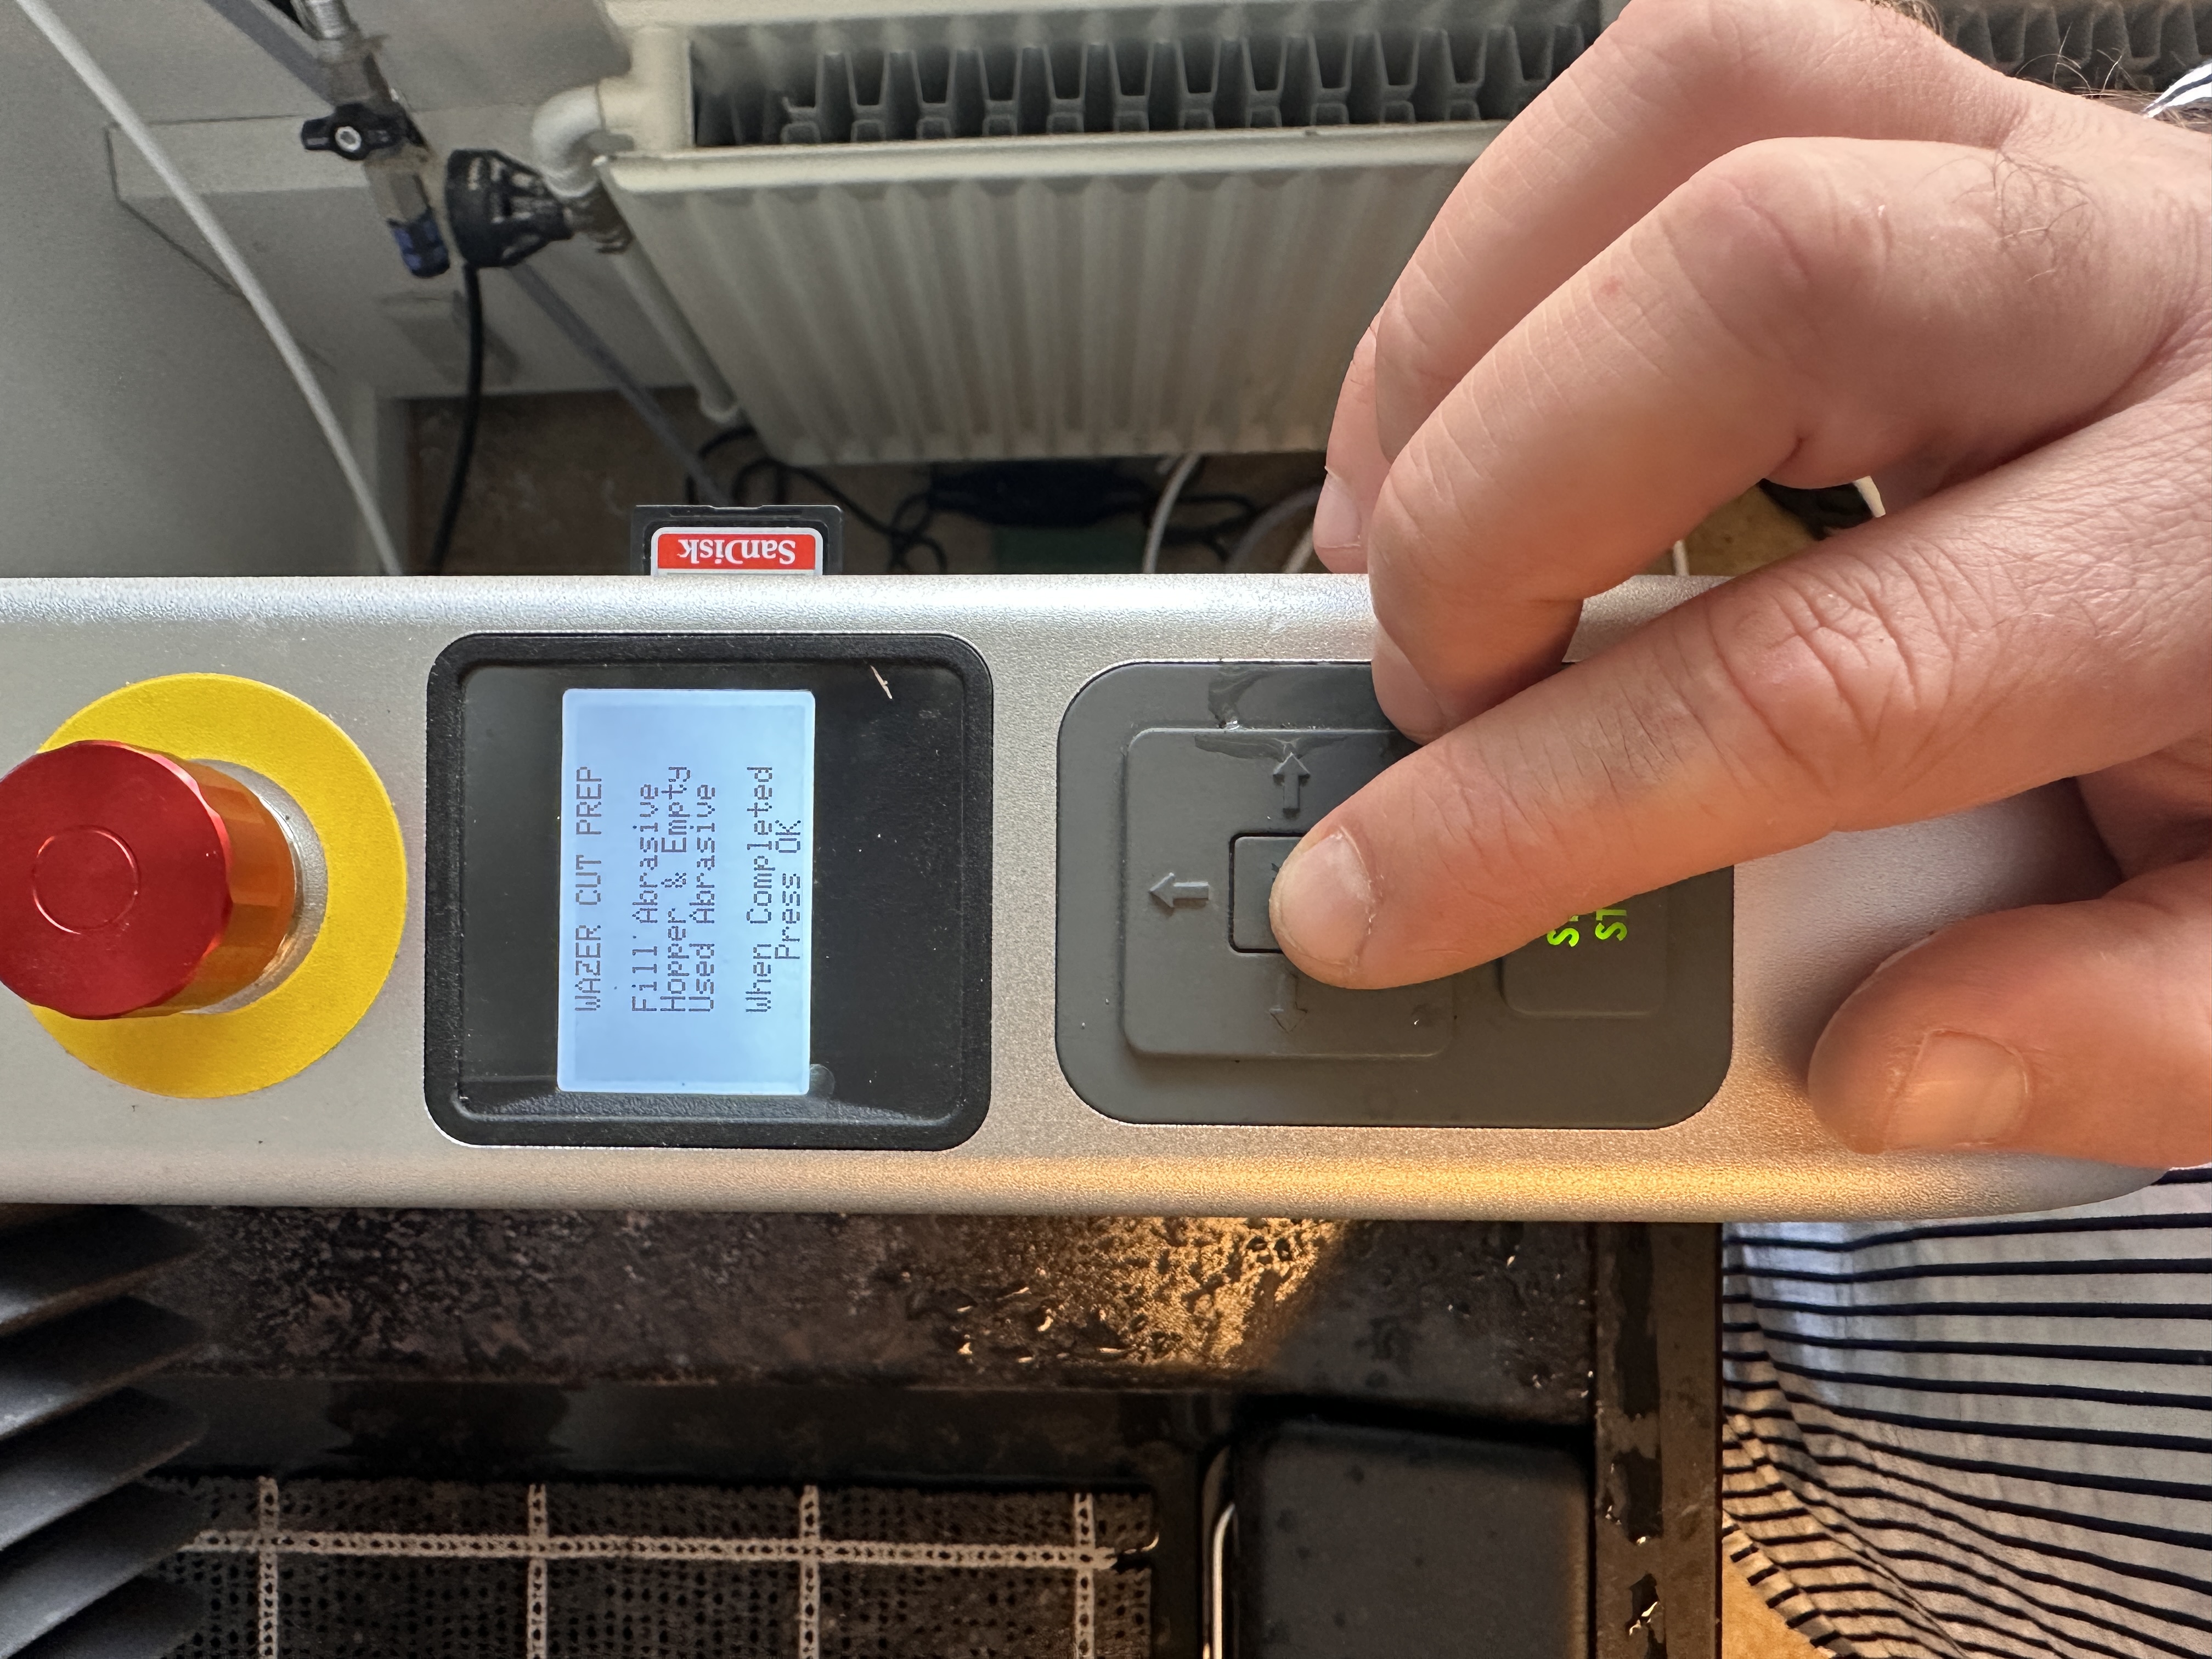
Fill the hopper to this level, so a bit of abrasive is on top of the hopper
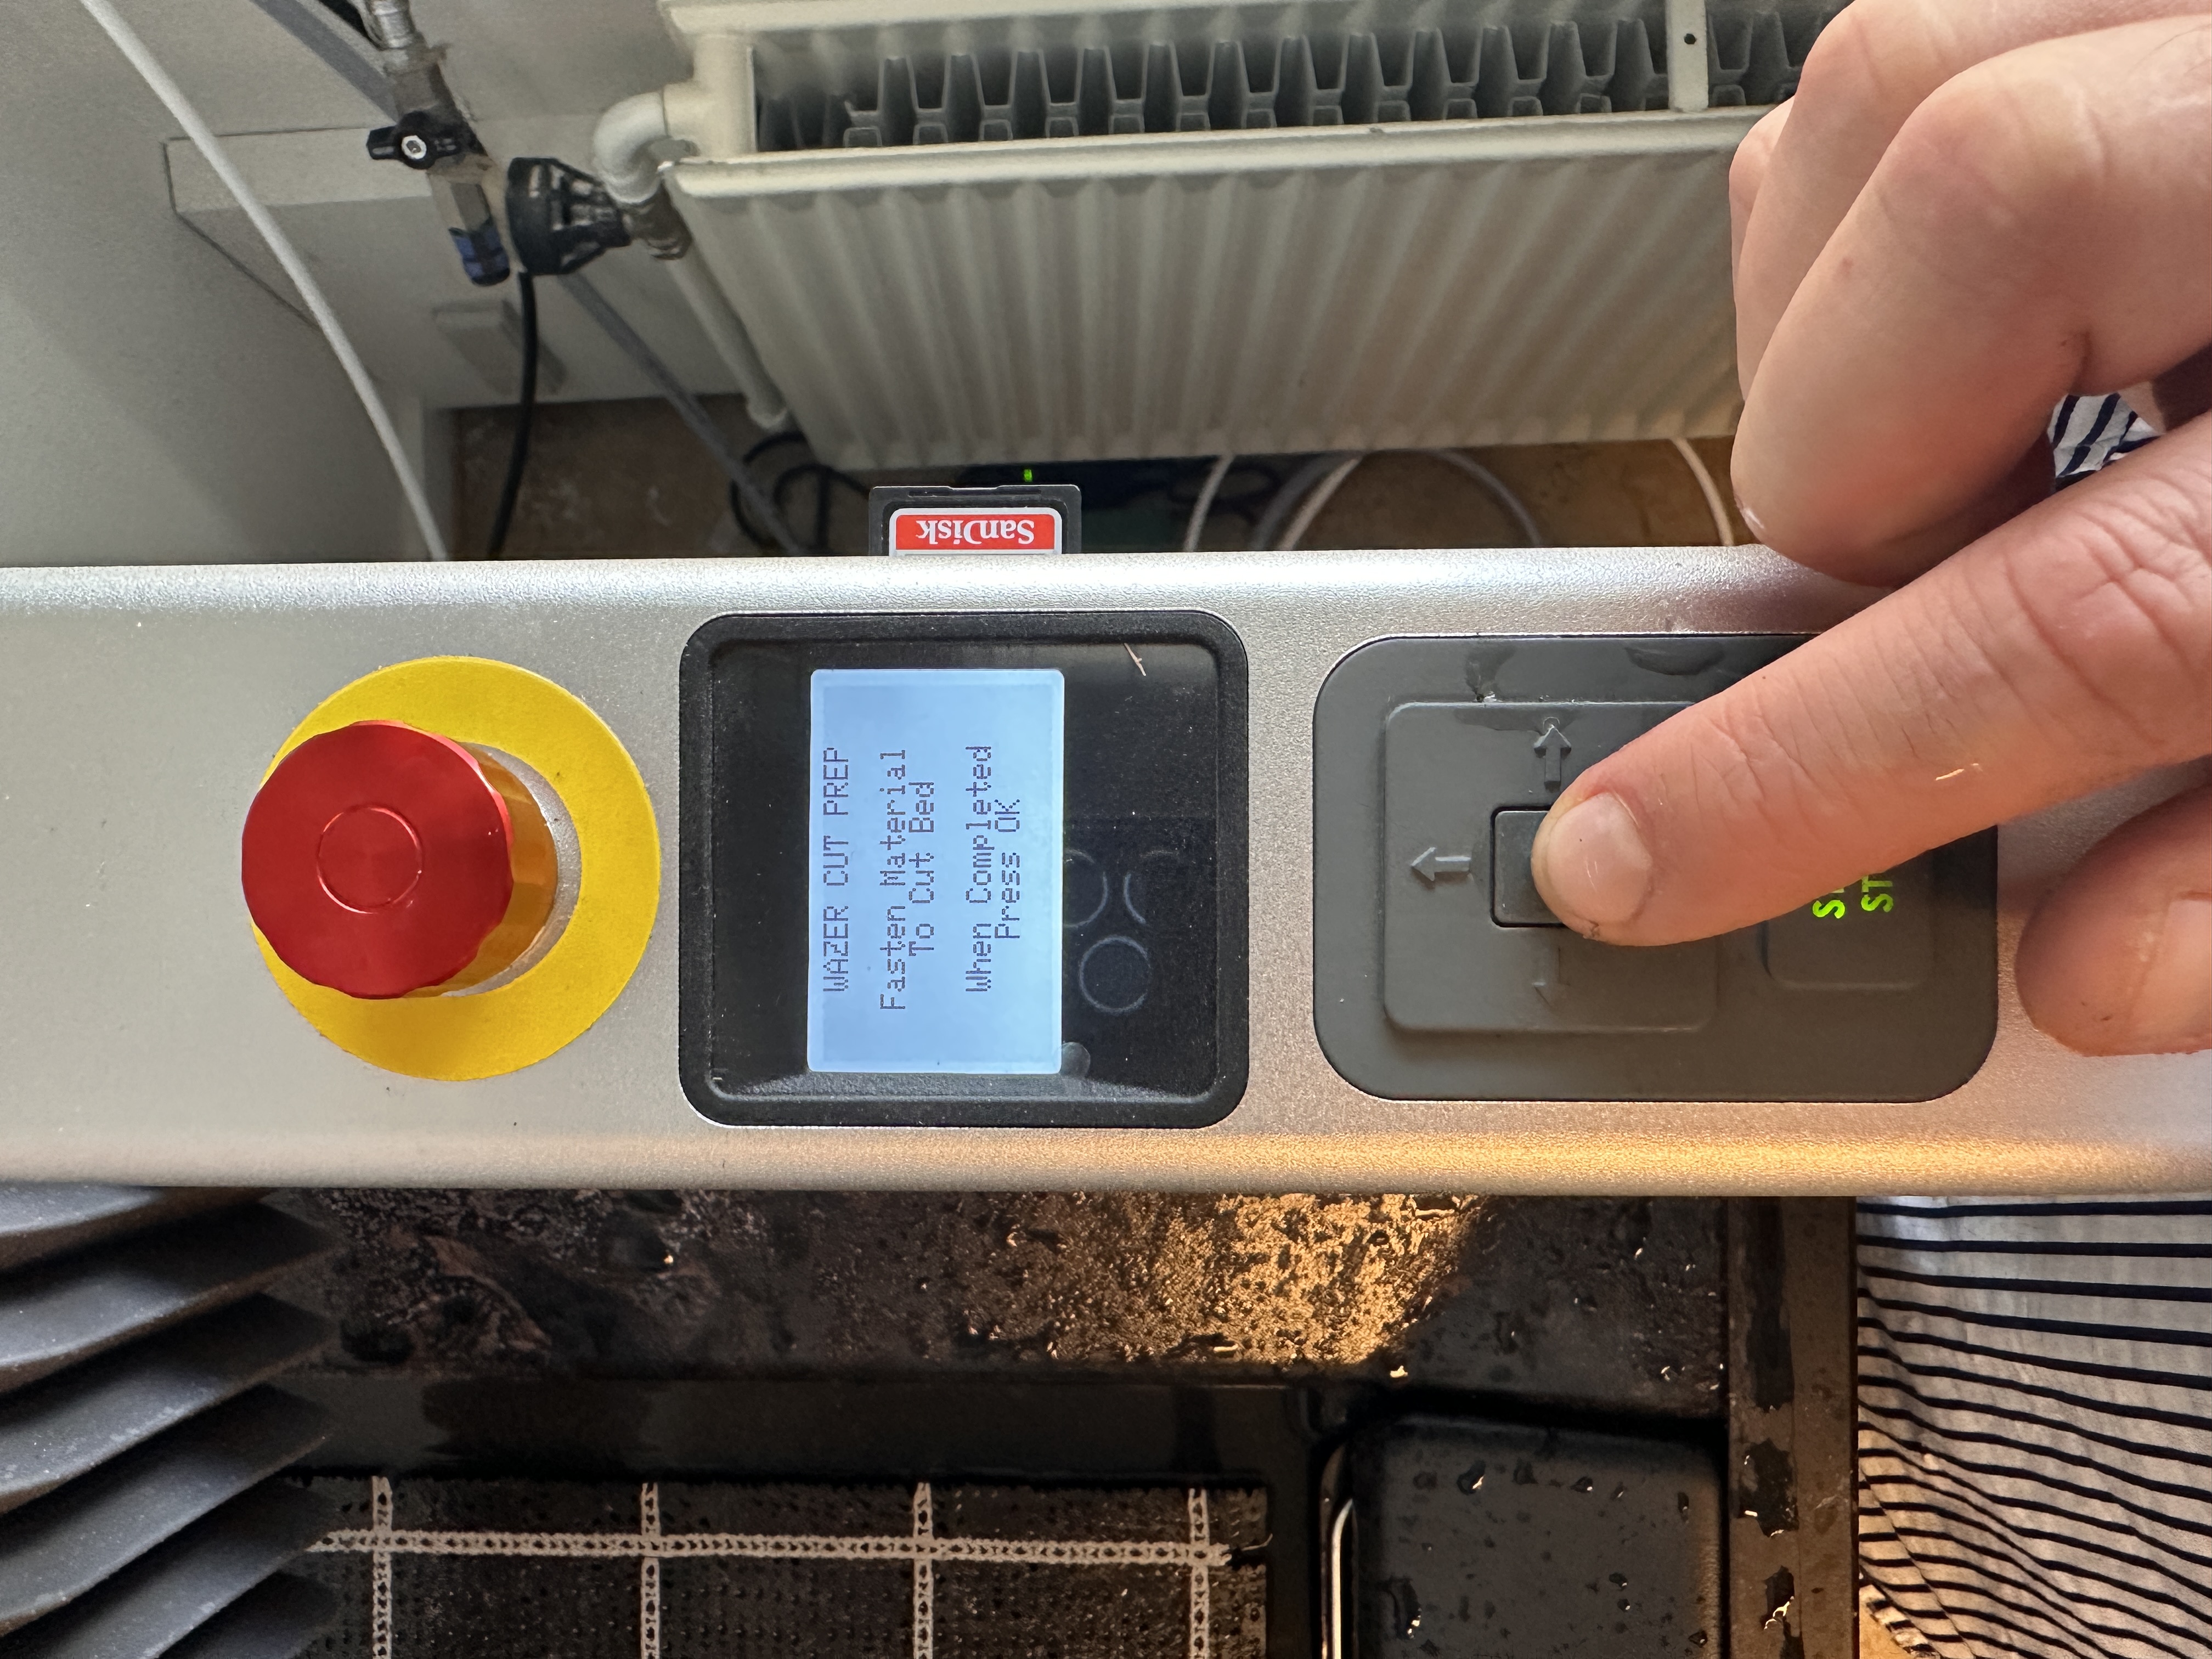
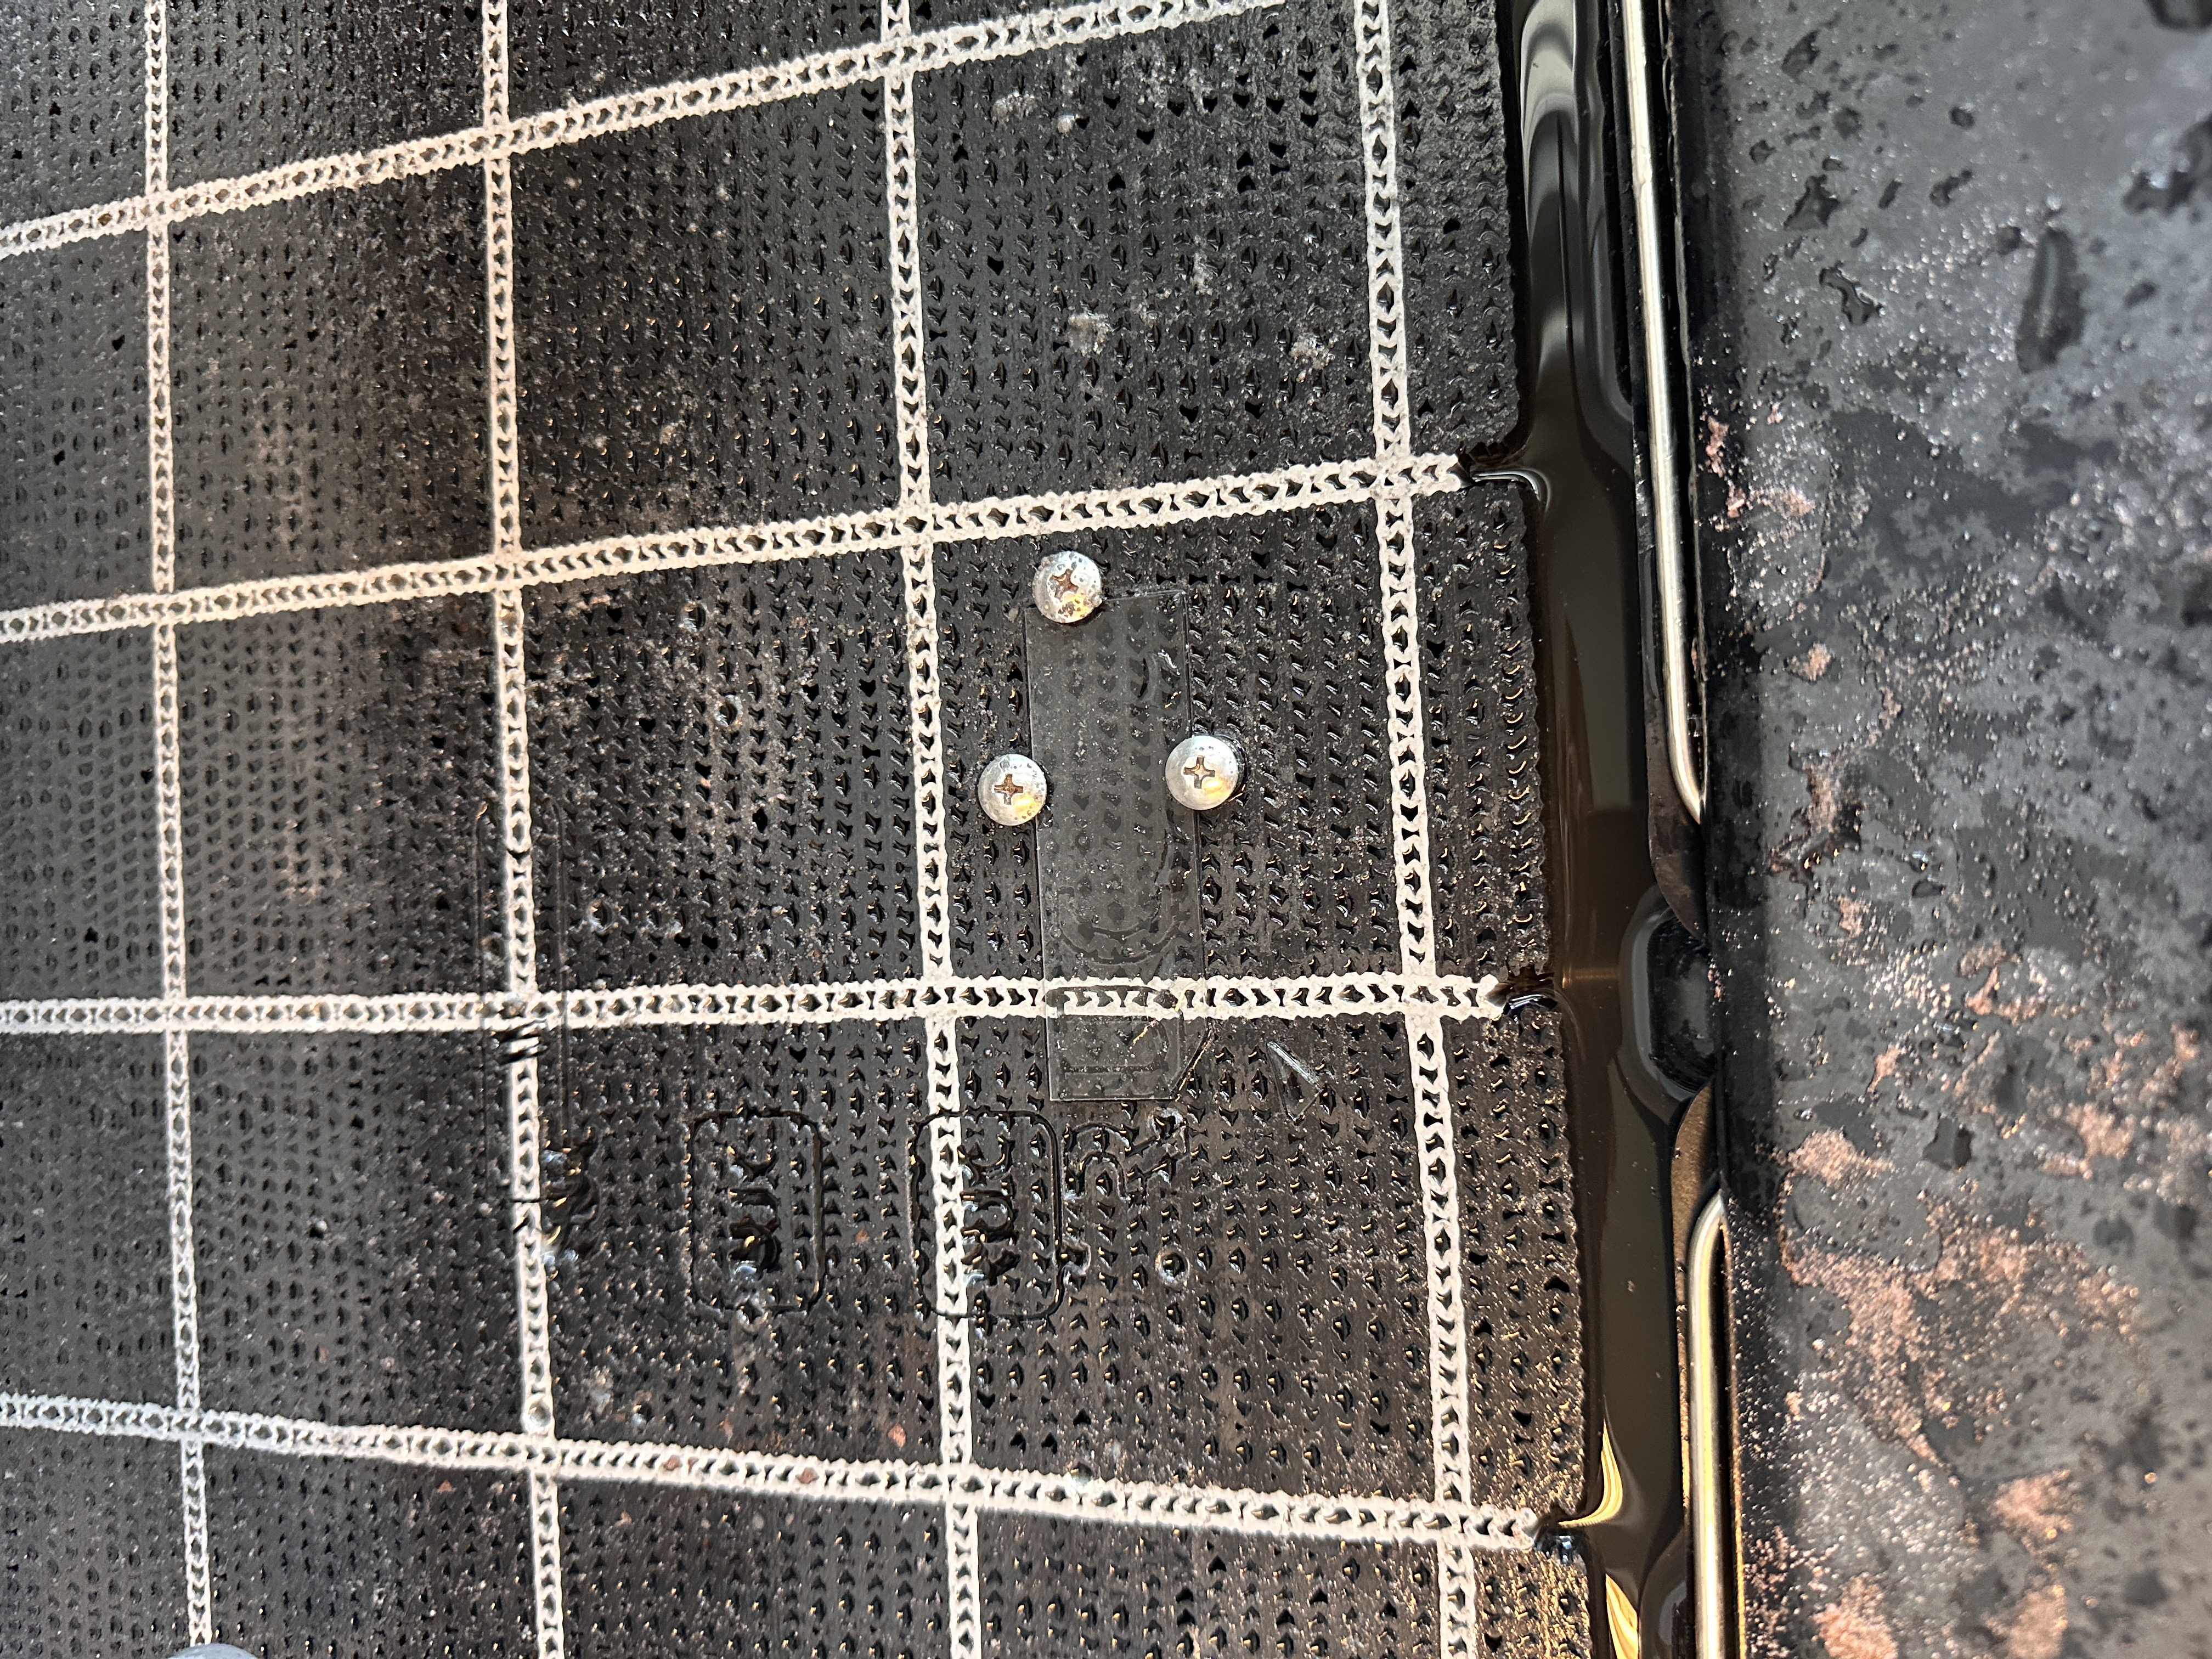
Fasten the material to the Cut Bed.
Fasten the material with screws.
Press 'Move Origin' and place it at the top left corner of material.
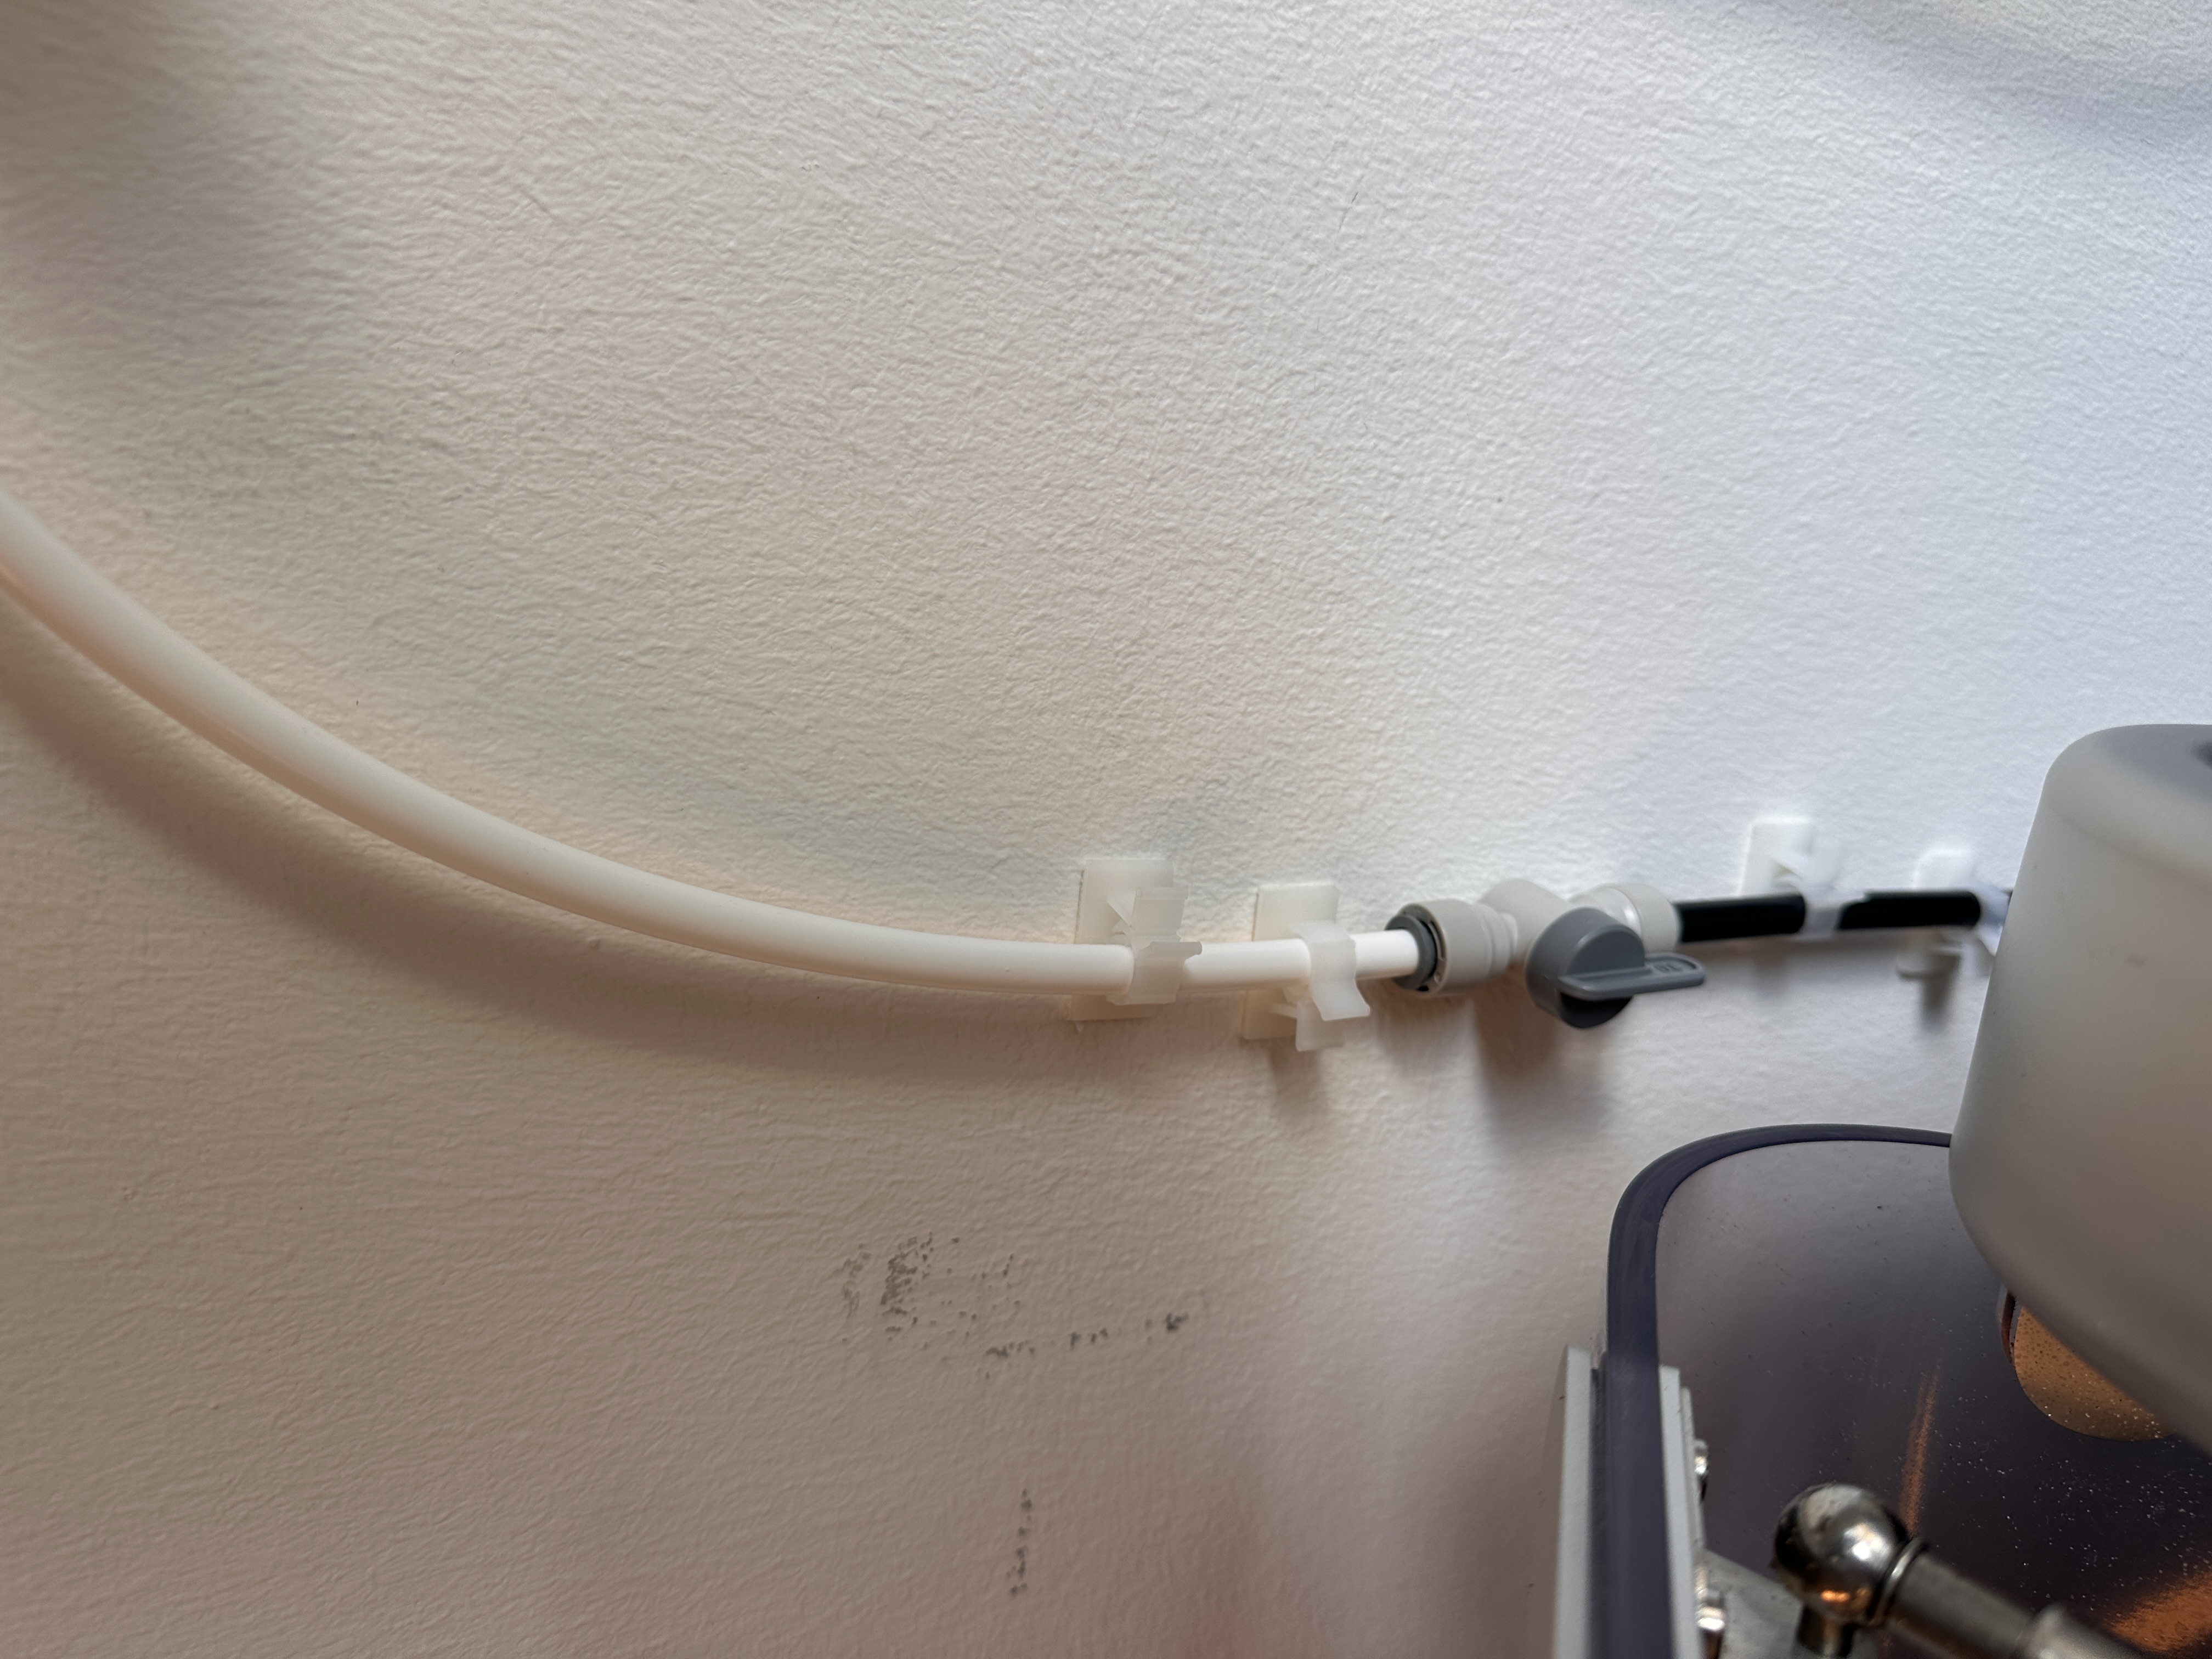
Please make sure that the water supply is on. This is behind the machine and the handle should be parallel to the hose in order for it to be on.
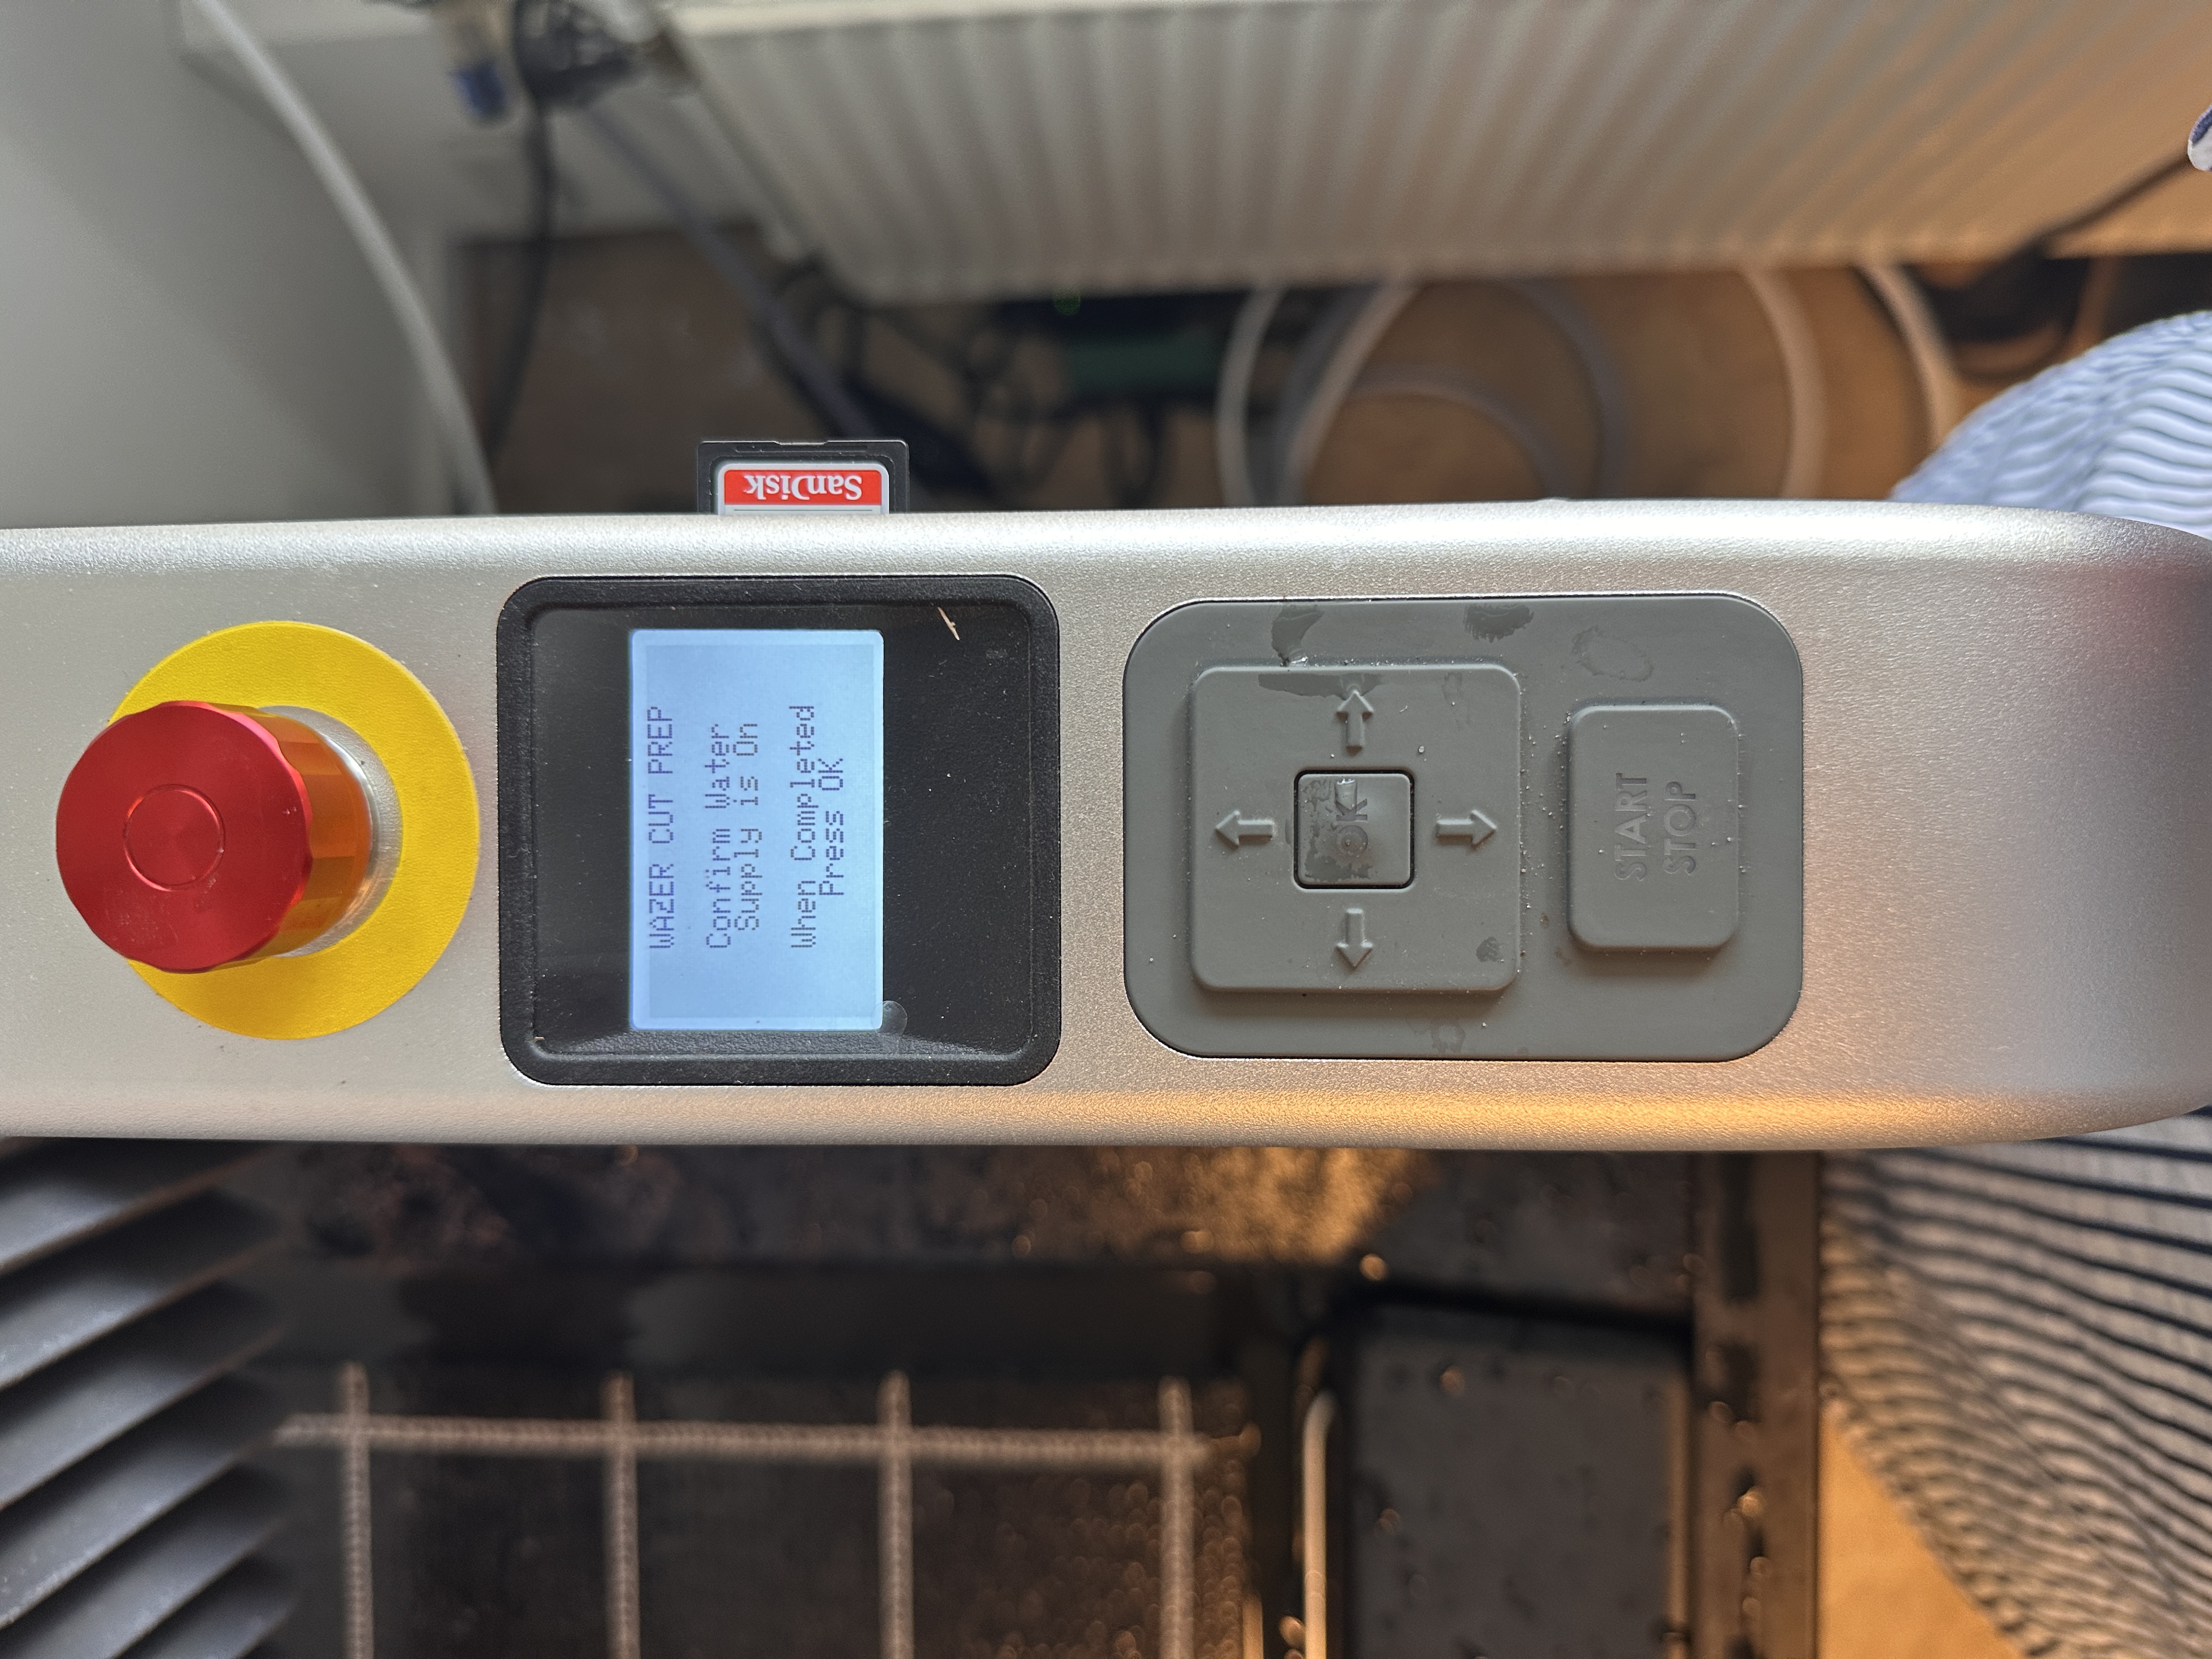
Water supple 'On'
Cut Material and press start
