IoT Talk!
In this guide you learn how to make two or more devices communicate with each other over the network, using ESP32 micro-controllers, input and output components, the MQTT protocol and shiftr.io.
- Setting things up
- MQTT & Shiftr.io
- Platform
- Input Device
- Output Device
- Code Examples
- Button, Ir Sensor Distance, Led and Servo motor
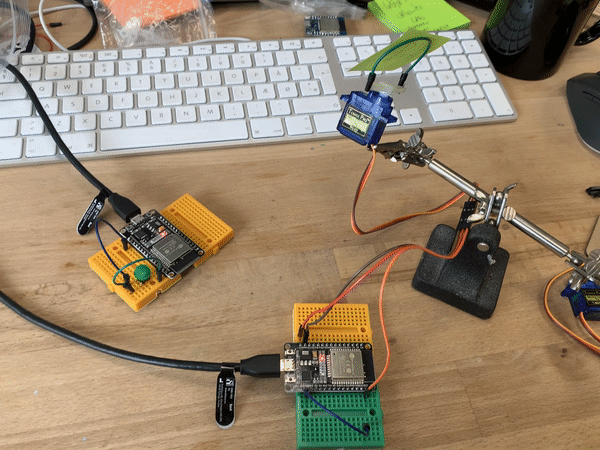
In this example we are working with a button and a IR distance sensor as inputs, and a led and a servo as outputs. You can find example code for every component under "Code Examples".
Setting things up
Arduino IDE & ESP32 Micro Controller
If you haven't yet installed the Arduino IDE do so and make sure you install the ESP32 board as explained bellow:
Download and install the Arduino IDE
You can find the Arduino IDE software here: https://www.arduino.cc/en/software
Installing ESP32 Add-on in Arduino IDE
In your Arduino IDE, go to File > Preferences
Copy the following text into the “Additional Board Manager URLs” field:
https://raw.githubusercontent.com/espressif/arduino-esp32/gh-pages/package_esp32_index.json

Press OK
Now go to Tools > Board > Boards Manager
Search for esp32 and install the esp32 boards by Espressif Systems
MQTT and Shiftr.io
We are using the MQTT protocol for device-to-device communication and shiftr.io as a broker.
FabLab RUC has it one shiftr.io cloud and that is what we are using in this example. Go to https://fablabruc.cloud.shiftr.io/ to see data being sent back and fourth.
MQTT is a lightweight, publish-subscribe, machine to machine network protocol. [...] The MQTT protocol defines two types of network entities: a message broker and a number of clients. An MQTT broker is a server that receives all messages from the clients and then routes the messages to the appropriate destination clients. An MQTT client is any device (from a micro controller up to a fully-fledged server) that runs an MQTT library and connects to an MQTT broker over a network. (Wikipedia, 2022)
To read more about it and learn how it works with Arduino look into their documentation here:
https://www.shiftr.io/docs/manuals/arduino/
You need to install the MQTT library by Joel Gaehwiler for ESP32 to be found in the library manager or here
IoT Talk! platform
I have developed an Arduino sketch, with 'built-in' methods, that can be used as a platform and makes it easier to get the devices up and running.
You can find the code here:
https://drive.google.com/drive/folders/1s-Ztvf48MukBck5nFUfnNZQr_DrU09Gp
Device Input
Guide:
1 - Change pin numbers according to your circuit
2 - Write your wifi-credentials
//////////////////////////////////////////////////////////////////
////:::::::: CHANGE PIN NUMBERS AND WIFI CREDENTIALS ::::::::////

#define SENSOR_PIN 34
#define BUTTON_PIN 23
const char ssid[] = "your ssid";
const char pass[] = "your password";

////::::::::::::::::::::::::::::::::::::::::::::::::::::::::::////
//////////////////////////////////////////////////////////////////
3 - Choose an input: Methods that sense an input and are ready to use:
buttonPressed() - returns true if the button has been toggled.
irActivated(1000) - returns ture when it detects something at distance 1000 - this number can be changes between 0-4095. For this sensor used in this kit the value can be translated to 10-80cm
//////////////////////////////////////////
////:::::::: CHANGE CODE HERE ::::::::////

//Choose an input: Methods that sense an input and are ready to use:
//buttonPressed(); irActivated(1000)
//Insert the topic and payload to send


void messageSend() {

  if (buttonPressed() == true) {

    client.publish("/fablabrucinput", "button_pressed"); //Choose topic (first argument) and payload (second argument)

  }

  if (irActivated(1000) == true) { //argument is the proximity to sensor for activation

    client.publish("/fablabrucinput", "IR_active");  //Choose topic (first argument) and payload (second argument)

  }
}

////::::::::::::::::::::::::::::::::::////
//////////////////////////////////////////
Device Output
Guide:
1 - Change pin numbers according to your circuit
2 - Write your wifi-credentials
3 - write the topic your want to listen to.
////:::::::: CHANGE PIN NUMBERS, WIFI CREDENTIALS & TOPIC ::::::::////

#define SERVO_PIN 23
#define LED_PIN 13
const char ssid[] = "your ssid";
const char pass[] = "your password";

const String mytopic = "fablabrucinput";
4 - Insert the payload you want to listen to. In the example I'm listing to "button_pressed" and a method to run when the chosen payload is received.
//Methods ready to use:
- servoWave(); - Servo goes from position 0 to 180 and back to 0;
- servoWave(3); - Servo goes from position 0 to 180 and back to 0 3 times;
- led_turnonoff(); - Led turns on if its off, and off if its on.
- led_blink(10); - Led blinks 10 times.
//////////////////////////////////////////
////:::::::: CHANGE CODE HERE ::::::::////

//Insert the payload you want to listen to and a method to run when the chosen payload is received.
//Methods ready to use: servoWave(); servoWave(3); led_turnonoff();led_blink(10);

void messageReceived(String &topic, String &payload) {
  Serial.println("incoming: " + topic + " - " + payload);

  if (payload == "button_pressed") {

    servoWave();

    //servoWave(3); //Argument - How many waves?


  }

  if(payload = "IR_active"){

    led_turnonoff();

    //led_blink(10); //Argument - How many blinks?

    }
}

////::::::::::::::::::::::::::::::::::////
//////////////////////////////////////////
Code examples
Button

Wiring
one button pin -> Ground (GND) ob ESP32
The other button pin -> PIN 23
Example code:
#define BUTTON_PIN 23 // the number of the pushbutton pin

// Variables will change:
int lastState = HIGH; // the previous state from the input pin
int currentState;    // the current reading from the input pin

void setup() {
  // initialize serial communication at 9600 bits per second:
  Serial.begin(9600);
  // initialize the pushbutton pin as an pull-up input
  // the pull-up input pin will be HIGH when the switch is open and LOW when the switch is closed.
  pinMode(BUTTON_PIN, INPUT_PULLUP);
}

void loop() {
  // read the state of the switch/button:
  currentState = digitalRead(BUTTON_PIN);

  if(lastState == LOW && currentState == HIGH)
    Serial.println("The state changed from LOW to HIGH");

  // save the last state
  lastState = currentState;
}
IR Distance Sensor

Wiring
red wire on sensor -> VIN on ESP32
black wire on sensor -> GND on ESP32
yellow wire on sensor -> Pin D34
Example code
#define SENSOR_PIN 34                // analog pin used to connect the sharp sensor
int val = 0;                 // variable to store the values from sensor(initially zero)

void setup()
{
  Serial.begin(9600);               // starts the serial monitor
}

void loop()
{
  val = analogRead(SENSOR_PIN);       // reads the value of the sharp sensor
  Serial.println(val);            // prints the value of the sensor to the serial monitor
  delay(400);                    // wait for this much time before printing next value
}
Led
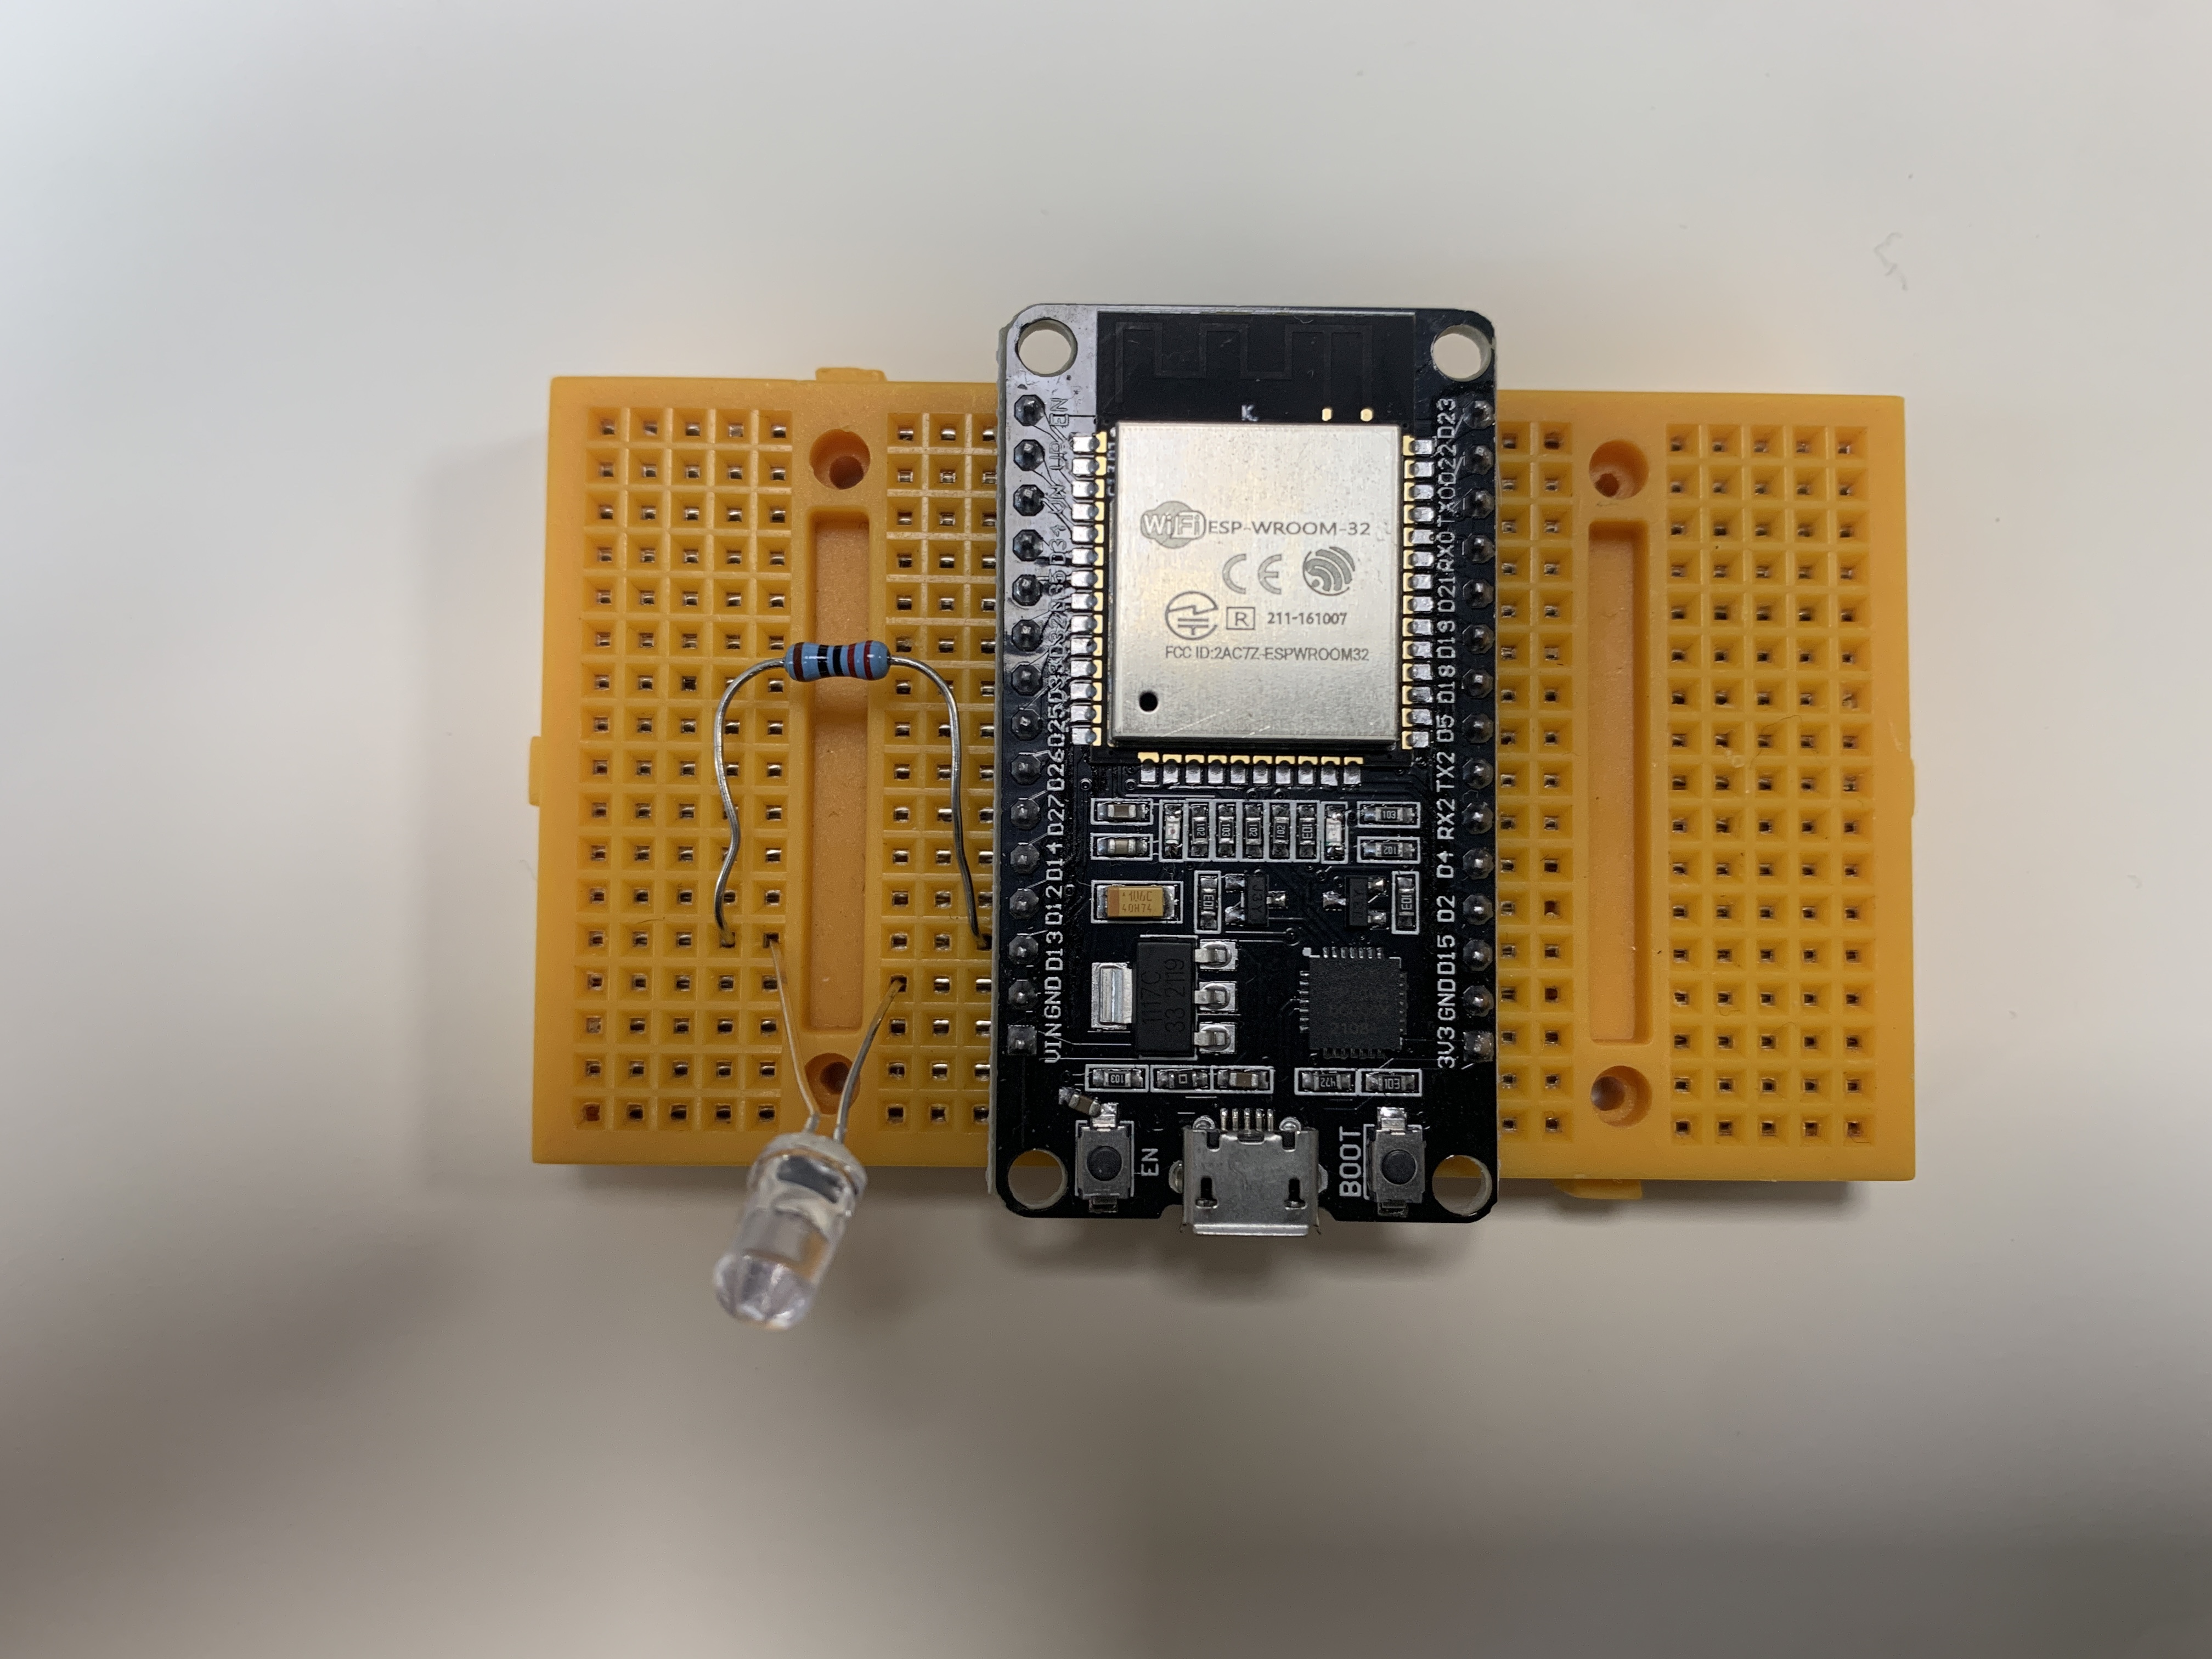
Wiring
short pin on led -> GND on ESP32
long pin on led -> 220 ohm resistor -> Pin D13 on ESP32
Example code
#define LED_PIN 13
// the setup function runs once when you press reset or power the board
void setup() {
  // initialize digital pin LED_BUILTIN as an output.
  pinMode(LED_PIN, OUTPUT);
}

// the loop function runs over and over again forever
void loop() {
  digitalWrite(LED_PIN, HIGH);   // turn the LED on (HIGH is the voltage level)
  delay(1000);                       // wait for a second
  digitalWrite(LED_PIN, LOW);    // turn the LED off by making the voltage LOW
  delay(1000);                       // wait for a second
}
Servo motor
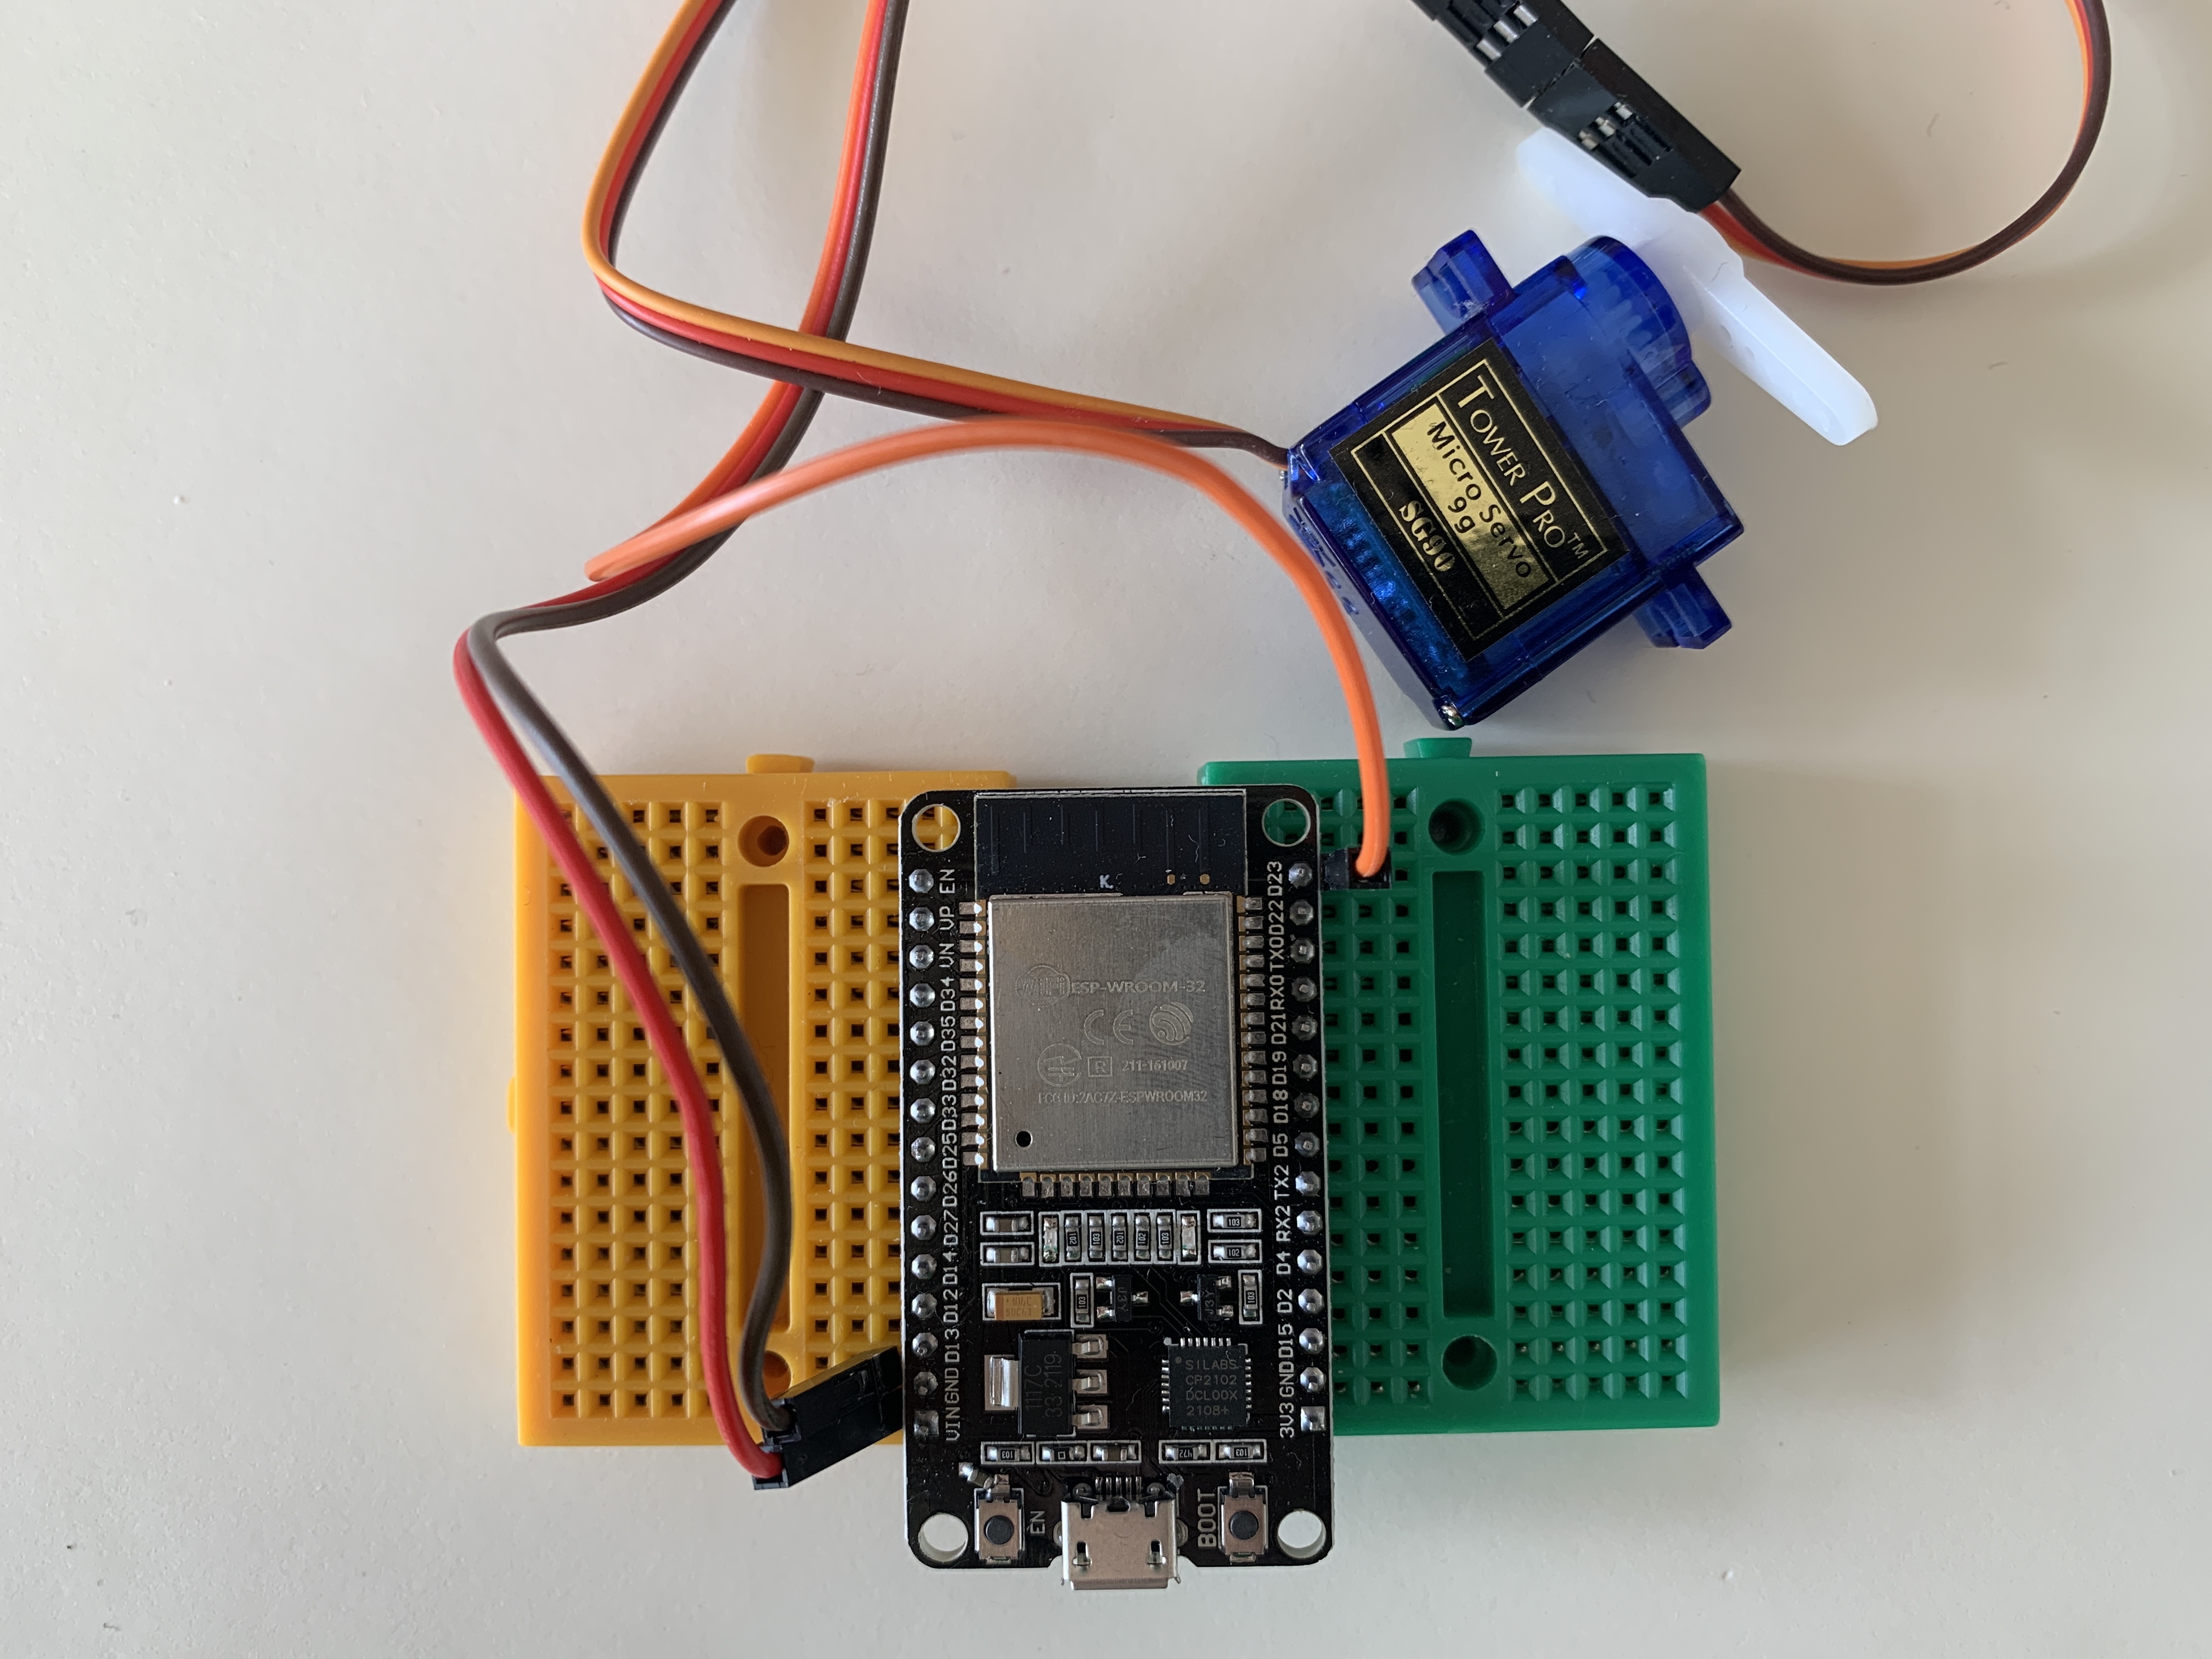
Wiring
orange wire on motor -> Pin D23 on ESP32
red wire on motor -> VIN on ESP32
brown wire on motor -> GND on ESP32
Example Code
NOTE: You need to install a servo library for ESP32
In the Arduino IDE go to
Sketch > Include library > Manage libraries > Search for ESP32 > Install ESP32Servo library by Kevin Harrington.
// include the Servo library
#include <ESP32Servo.h>
Servo myservo;  // create a servo object

#define SERVO_PIN 23
void setup() {
  myservo.attach(SERVO_PIN); // attaches the servo on pin 9 to the servo object
  Serial.begin(9600); // open a serial connection to your computer
}

void loop() {

  // set the servo position
  myservo.write(175);
  // wait for the servo to get there
  delay(500);
    // set the servo position
  myservo.write(0);
  // wait for the servo to get there
  delay(500);
}
