Fusion 360 to laser cutter
To get from Fusion 360 to one of our laser cutters, there are two ways
Simpler - create a sketch on a surface and export it as dxf
More advanced - install a laser cutter machine definition and post processor in Fusions machine library, and select contours to cut with a laser cutter tool. This allows kerf compensation and other more advanced things. This guide is split in two: how to set up the machine in Fusion, and how to select contours to cut and export the dxf file.
Jump to advanced method setup guide (only needs to be done once)
Jump to advanced method cut guide
Simple
Right click on a surface and choose "Create sketch"

A sketch will be created, with all the geometry on the surface already in. Immediately click on "finish sketch".

In the object tree, unfold sketches and rename the sketch you just created "export" or similar. This is to avoid accidentally later forgetting it is just for exporting to laser cutter - it is not for editing and working in.
 Right click on the sketch name ("export") and choose Save as DXF.
 Finished. Save the DXF on a USB stick and take it to the laser cutter computer.
Advanced setup
How to set up a laser cutter machine in Fusion 360 - you only need to do this once. Go to the "Manufacture" workspace.
Download the machine definition file "Generic_Lasercutter.mch" from
Google Drive folder
(if for some reason you do not want to, or have a different laser cutter, the machine definition is super simple and easy to manually create yourself - all that is required is name and size of cutting area)
 In the manufacture workspace, choose "Manage", then "Machine library"
 Go to "My machines" "local" and press the plus to add a machine.

 Select "Cutting" as type of machine.
 Press "Load".
 Select the "GenericLasercutter.mch" file you previously downloaded.
 Press "Ok".
 You can now see the machine, but the DXF post processor is missing. Click on the folder icon to find the DXF post processor file.
 Look in "My posts" "Fusion 360 library".
 In "My posts" "Fusion 360 library" and enter "dxf" in the search field. Select "Autodesk AutoCAD DXF"
 Click on "use anyway".
 Now there should be a green check mark by the postprocessor for the laser cutter machine. Click "Close".
 Next you have to install some tools for the machine to use. Open Tool Library next to the Machine Library. Right-click on "Local" on the left side and select "Import libraries". Select the "LaserTools.tools file you downloaded. Click "Close"
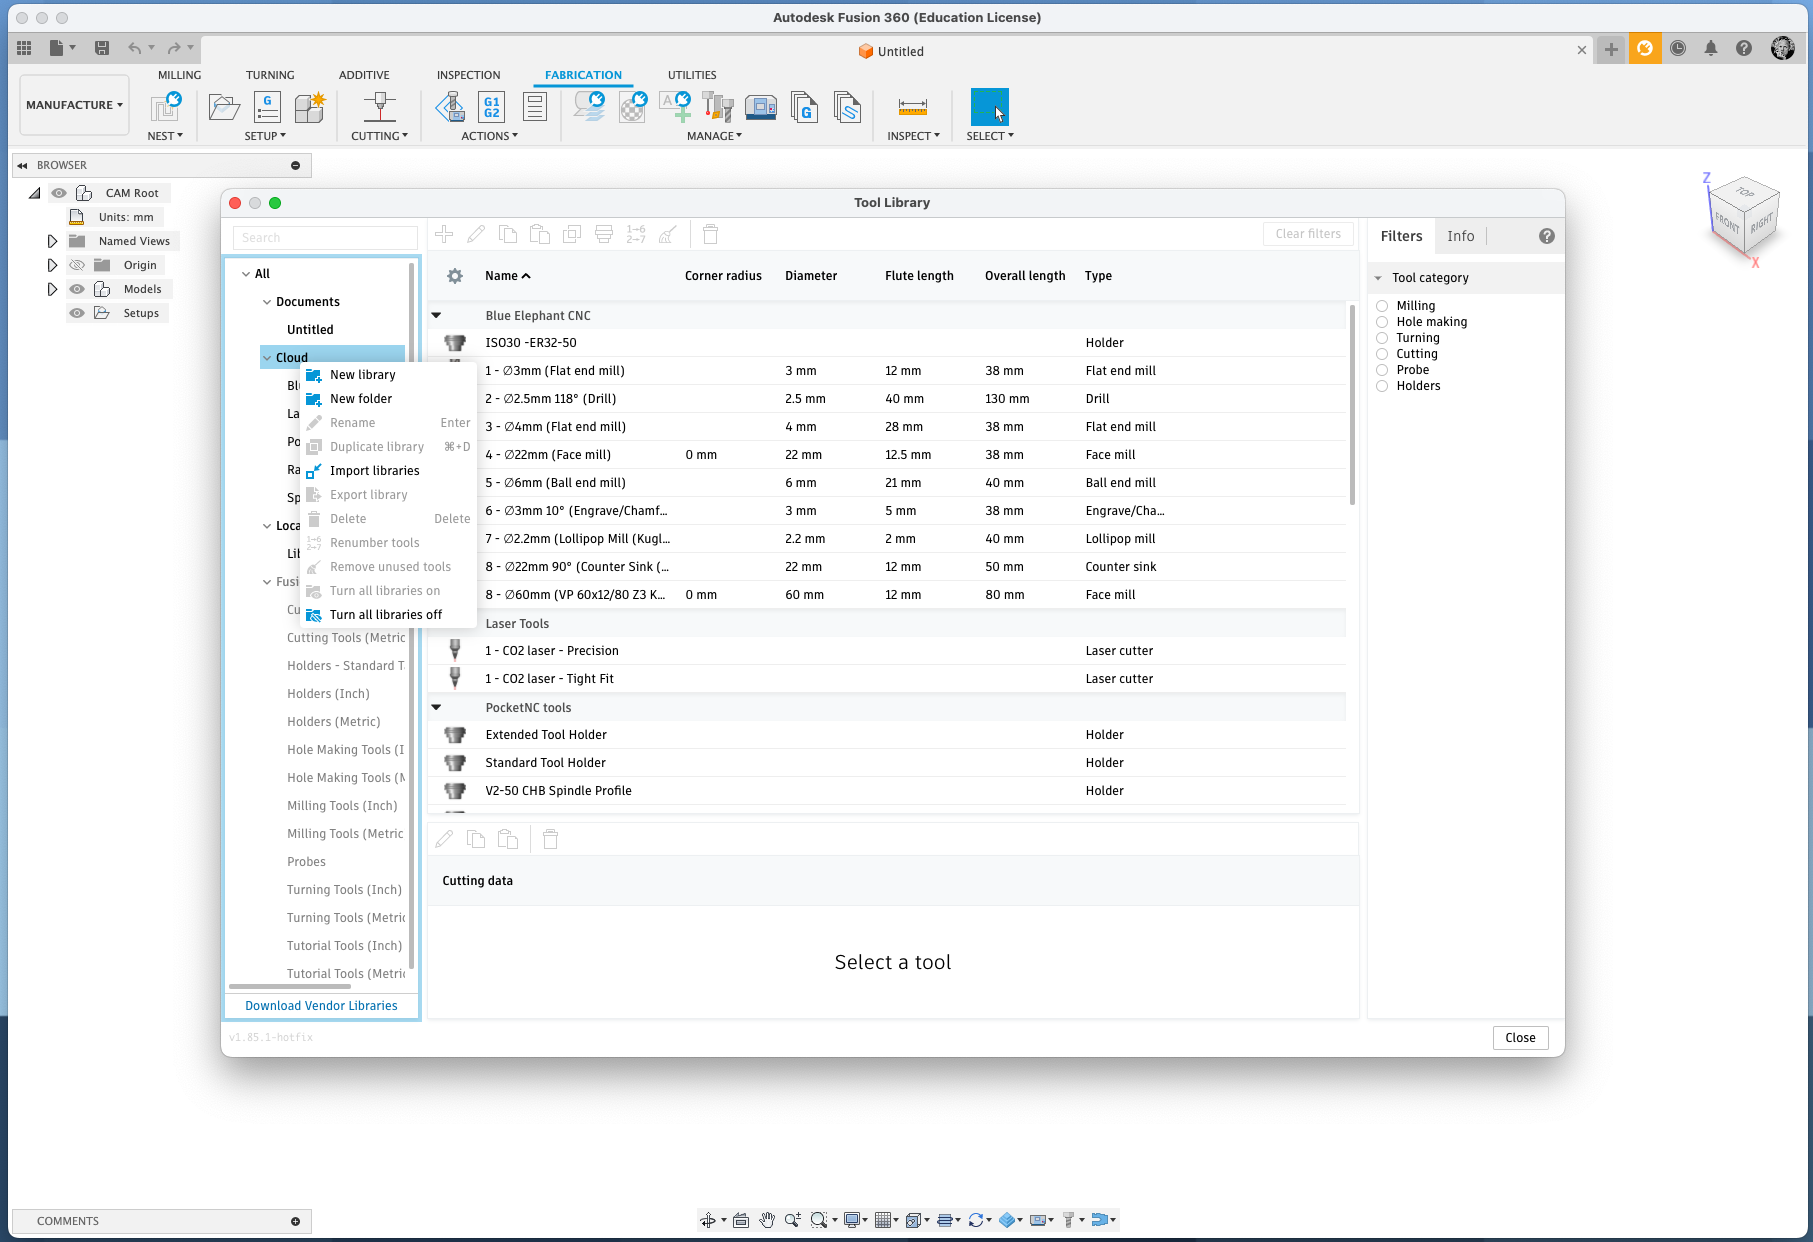
You are done installing the laser cutter machine, post processor and tools in Fusion 360. Now you can use it.
Advanced cutting
Now you have the laser cutter machine installed in Fusion 360, you can use it. Using it is similar to using a CNC machine - and just as complex, in the sense that just as if you were CNC cutting, you will need to select each contour you want cut, and select a "tool" for each. The "tool" is just a generic laser cut. Of course you can handle many contours at once. The main advantages seem to be only: a) similar process to CNC b) kerf compensation c) possibility to simulate.
Go to the "Manufacture" workspace.
 In the "Manufacture" workspace, select "Fabrication" "Cutting" "2D profile".
 Click on the contours you want cut.
 When you click on ok, or if you click on the first tab, tool tab, Fusion will ask what "tool" you want to use. You need to find the generic laser cut tool.
In "All", "Cutting", "Laser cutter", select "Laser cutter" in Metric.
 Click "Select"
 Now you have a NC job, and you can do things like simulate it (under "actions"). You are ready to create the NC job file for export to the laser cutter. In the object tree, right click on "Setups" "Create NC program"
 The first time, the post processor may default to the wrong one.
 In the dropdown, change the post processor to "AutoCAD DXF" Check the filename and folder are as you want. Click on "Post" (not "Ok") and the dxf file is saved.
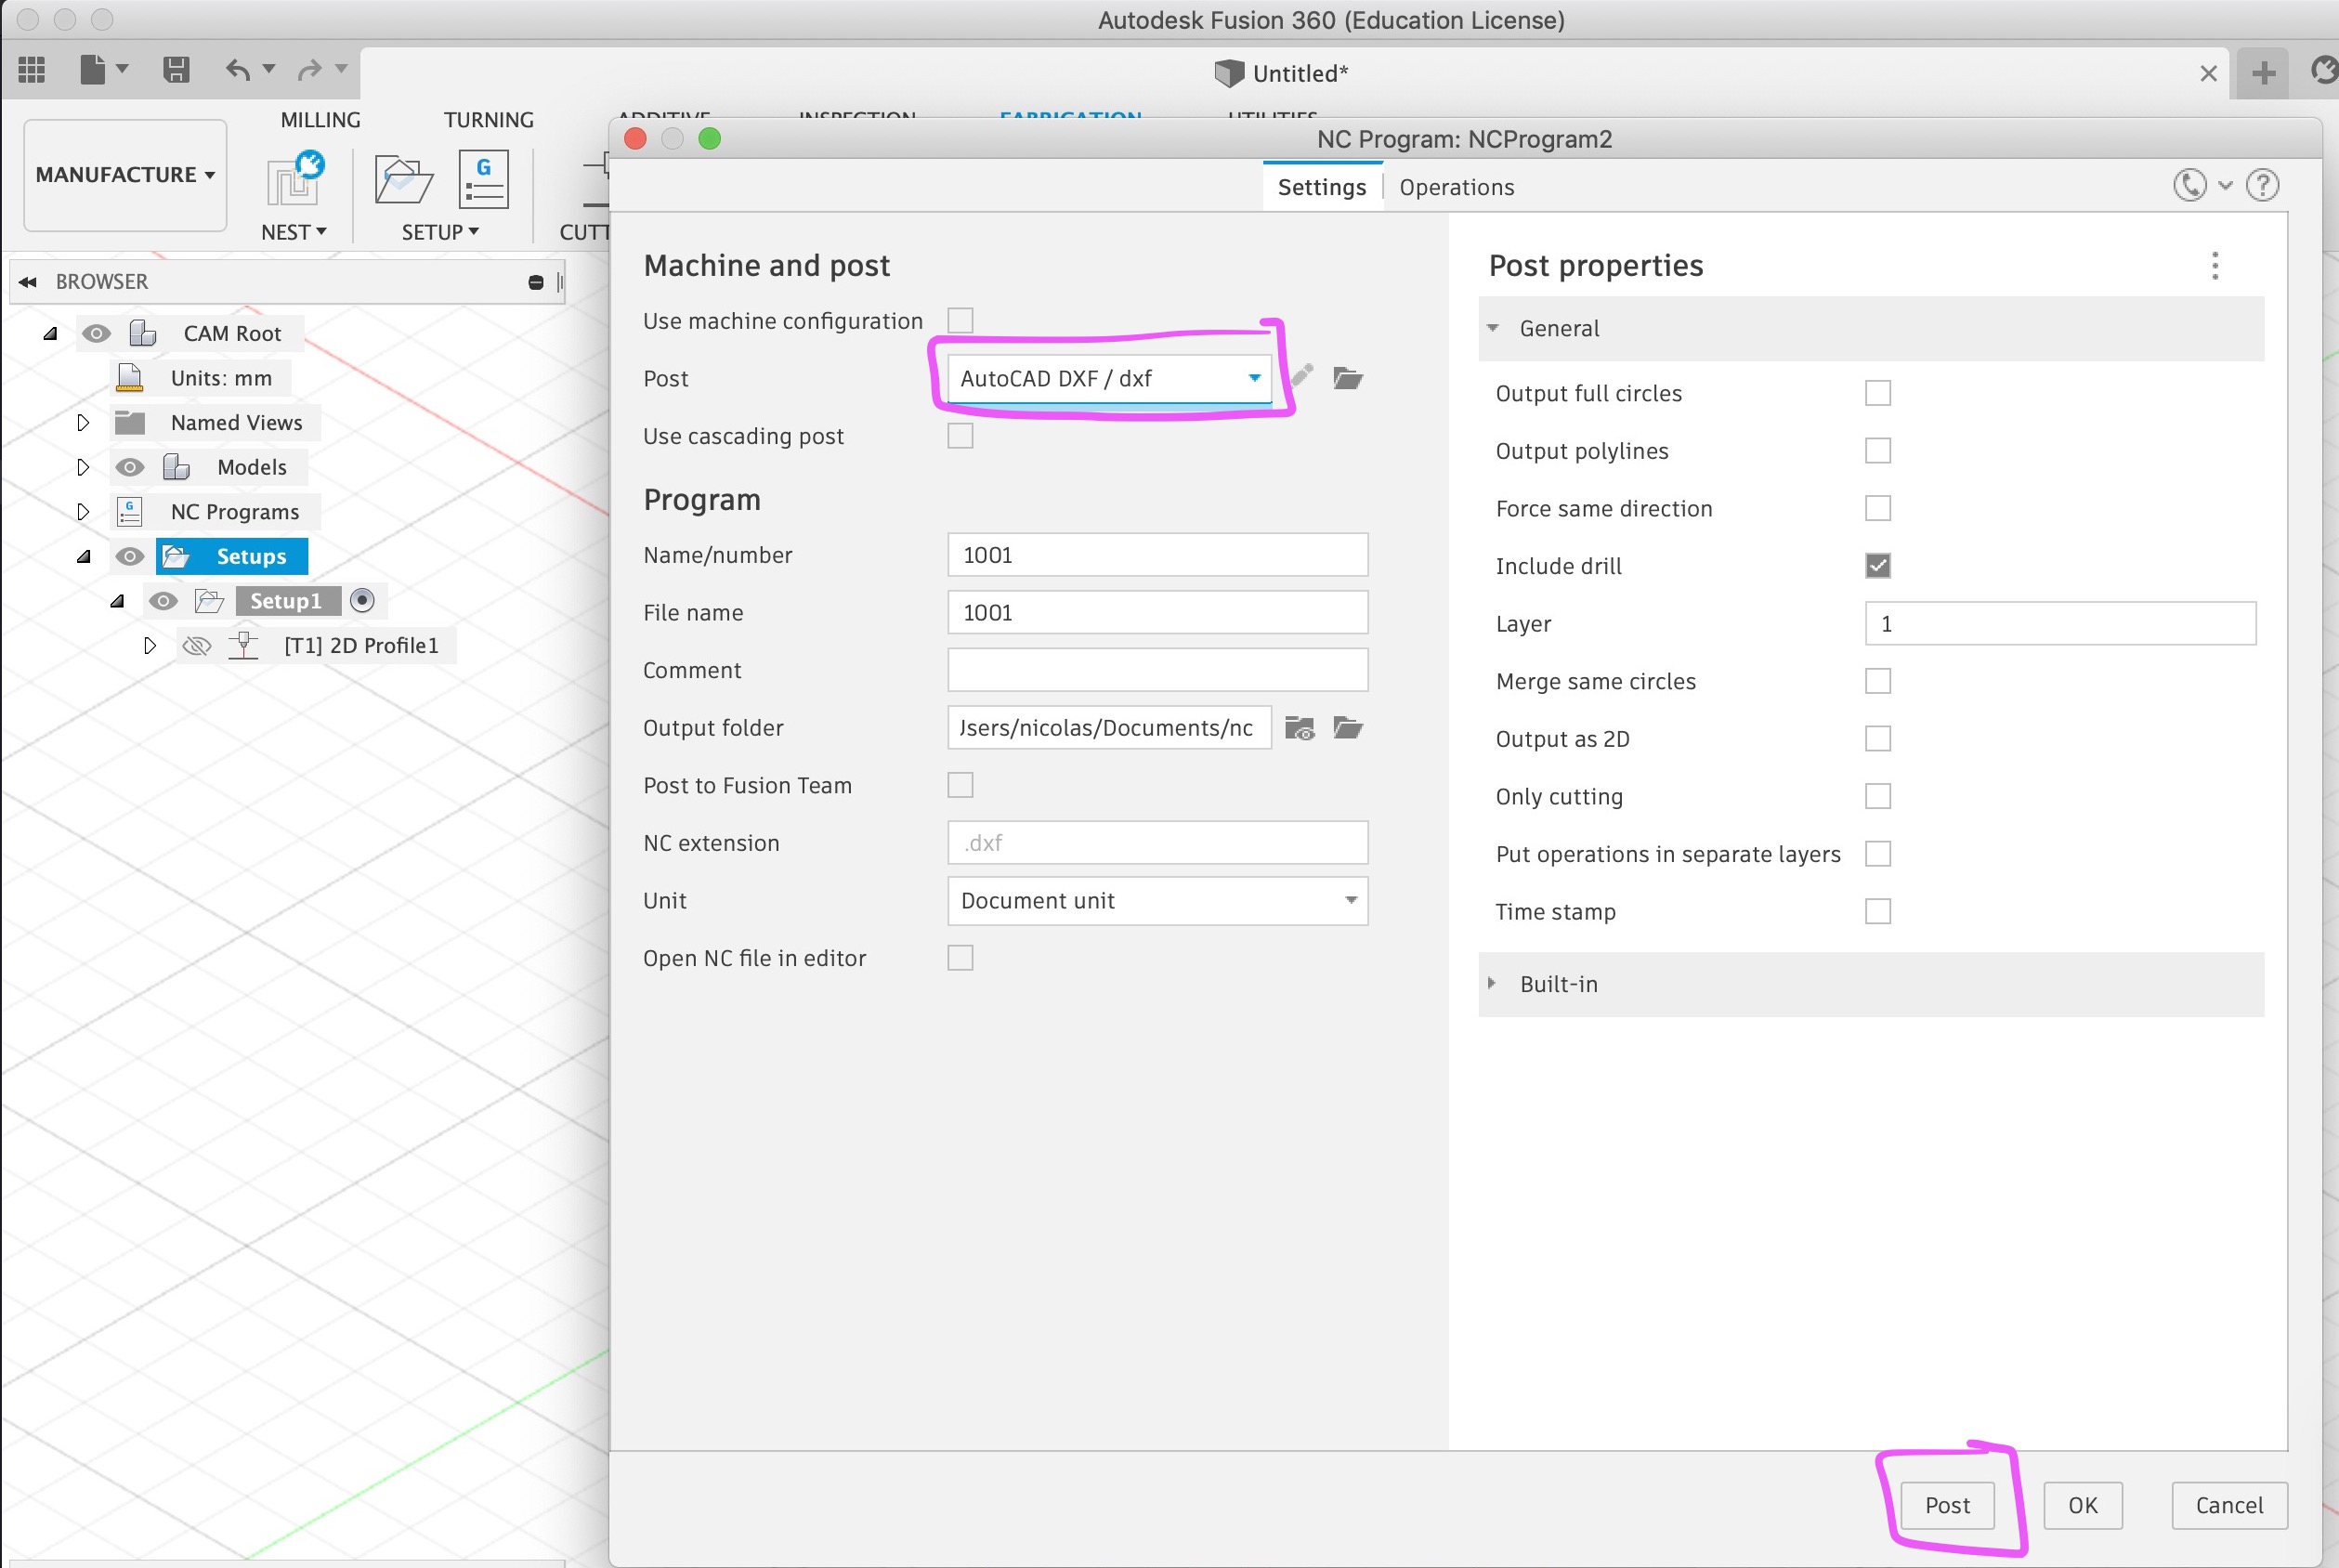
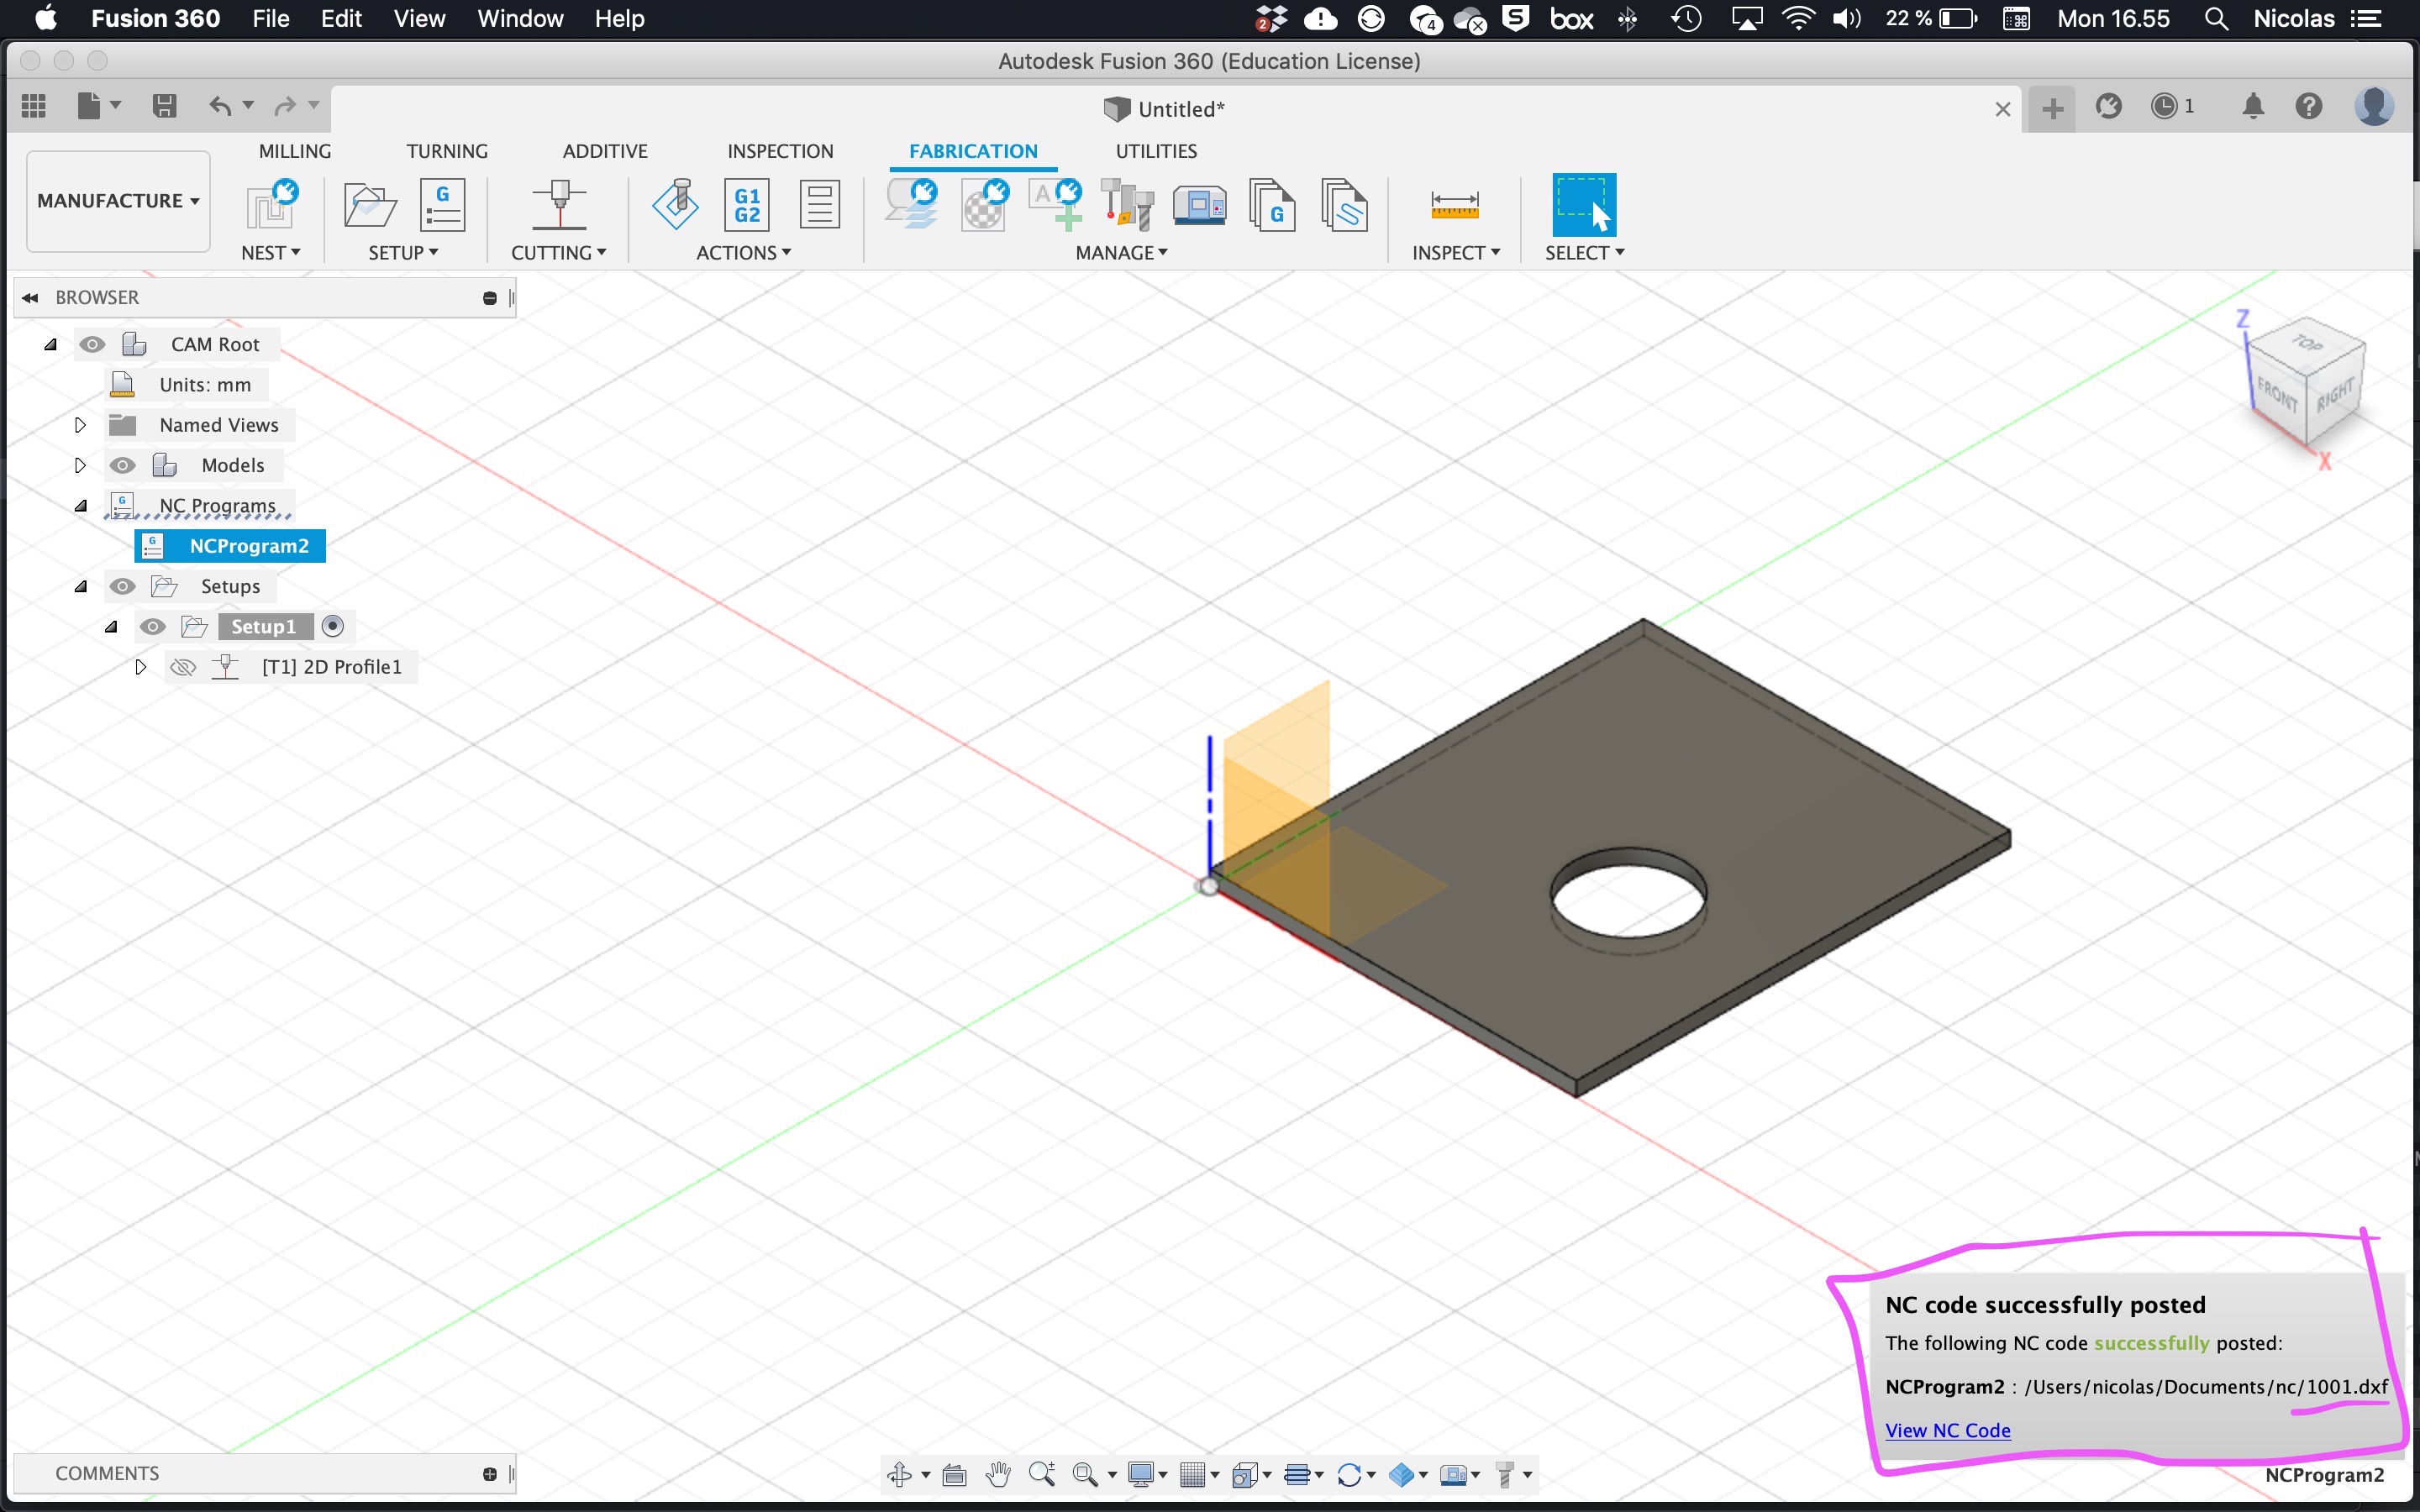 Done. Save the dxf file on a USB stick to take to the laser cutter.
