Full sheet CNC
OBS setup change:
in fusion, select top line not bottom line
Bottom height: choose "from: stock bottom", offset -0.5 mm
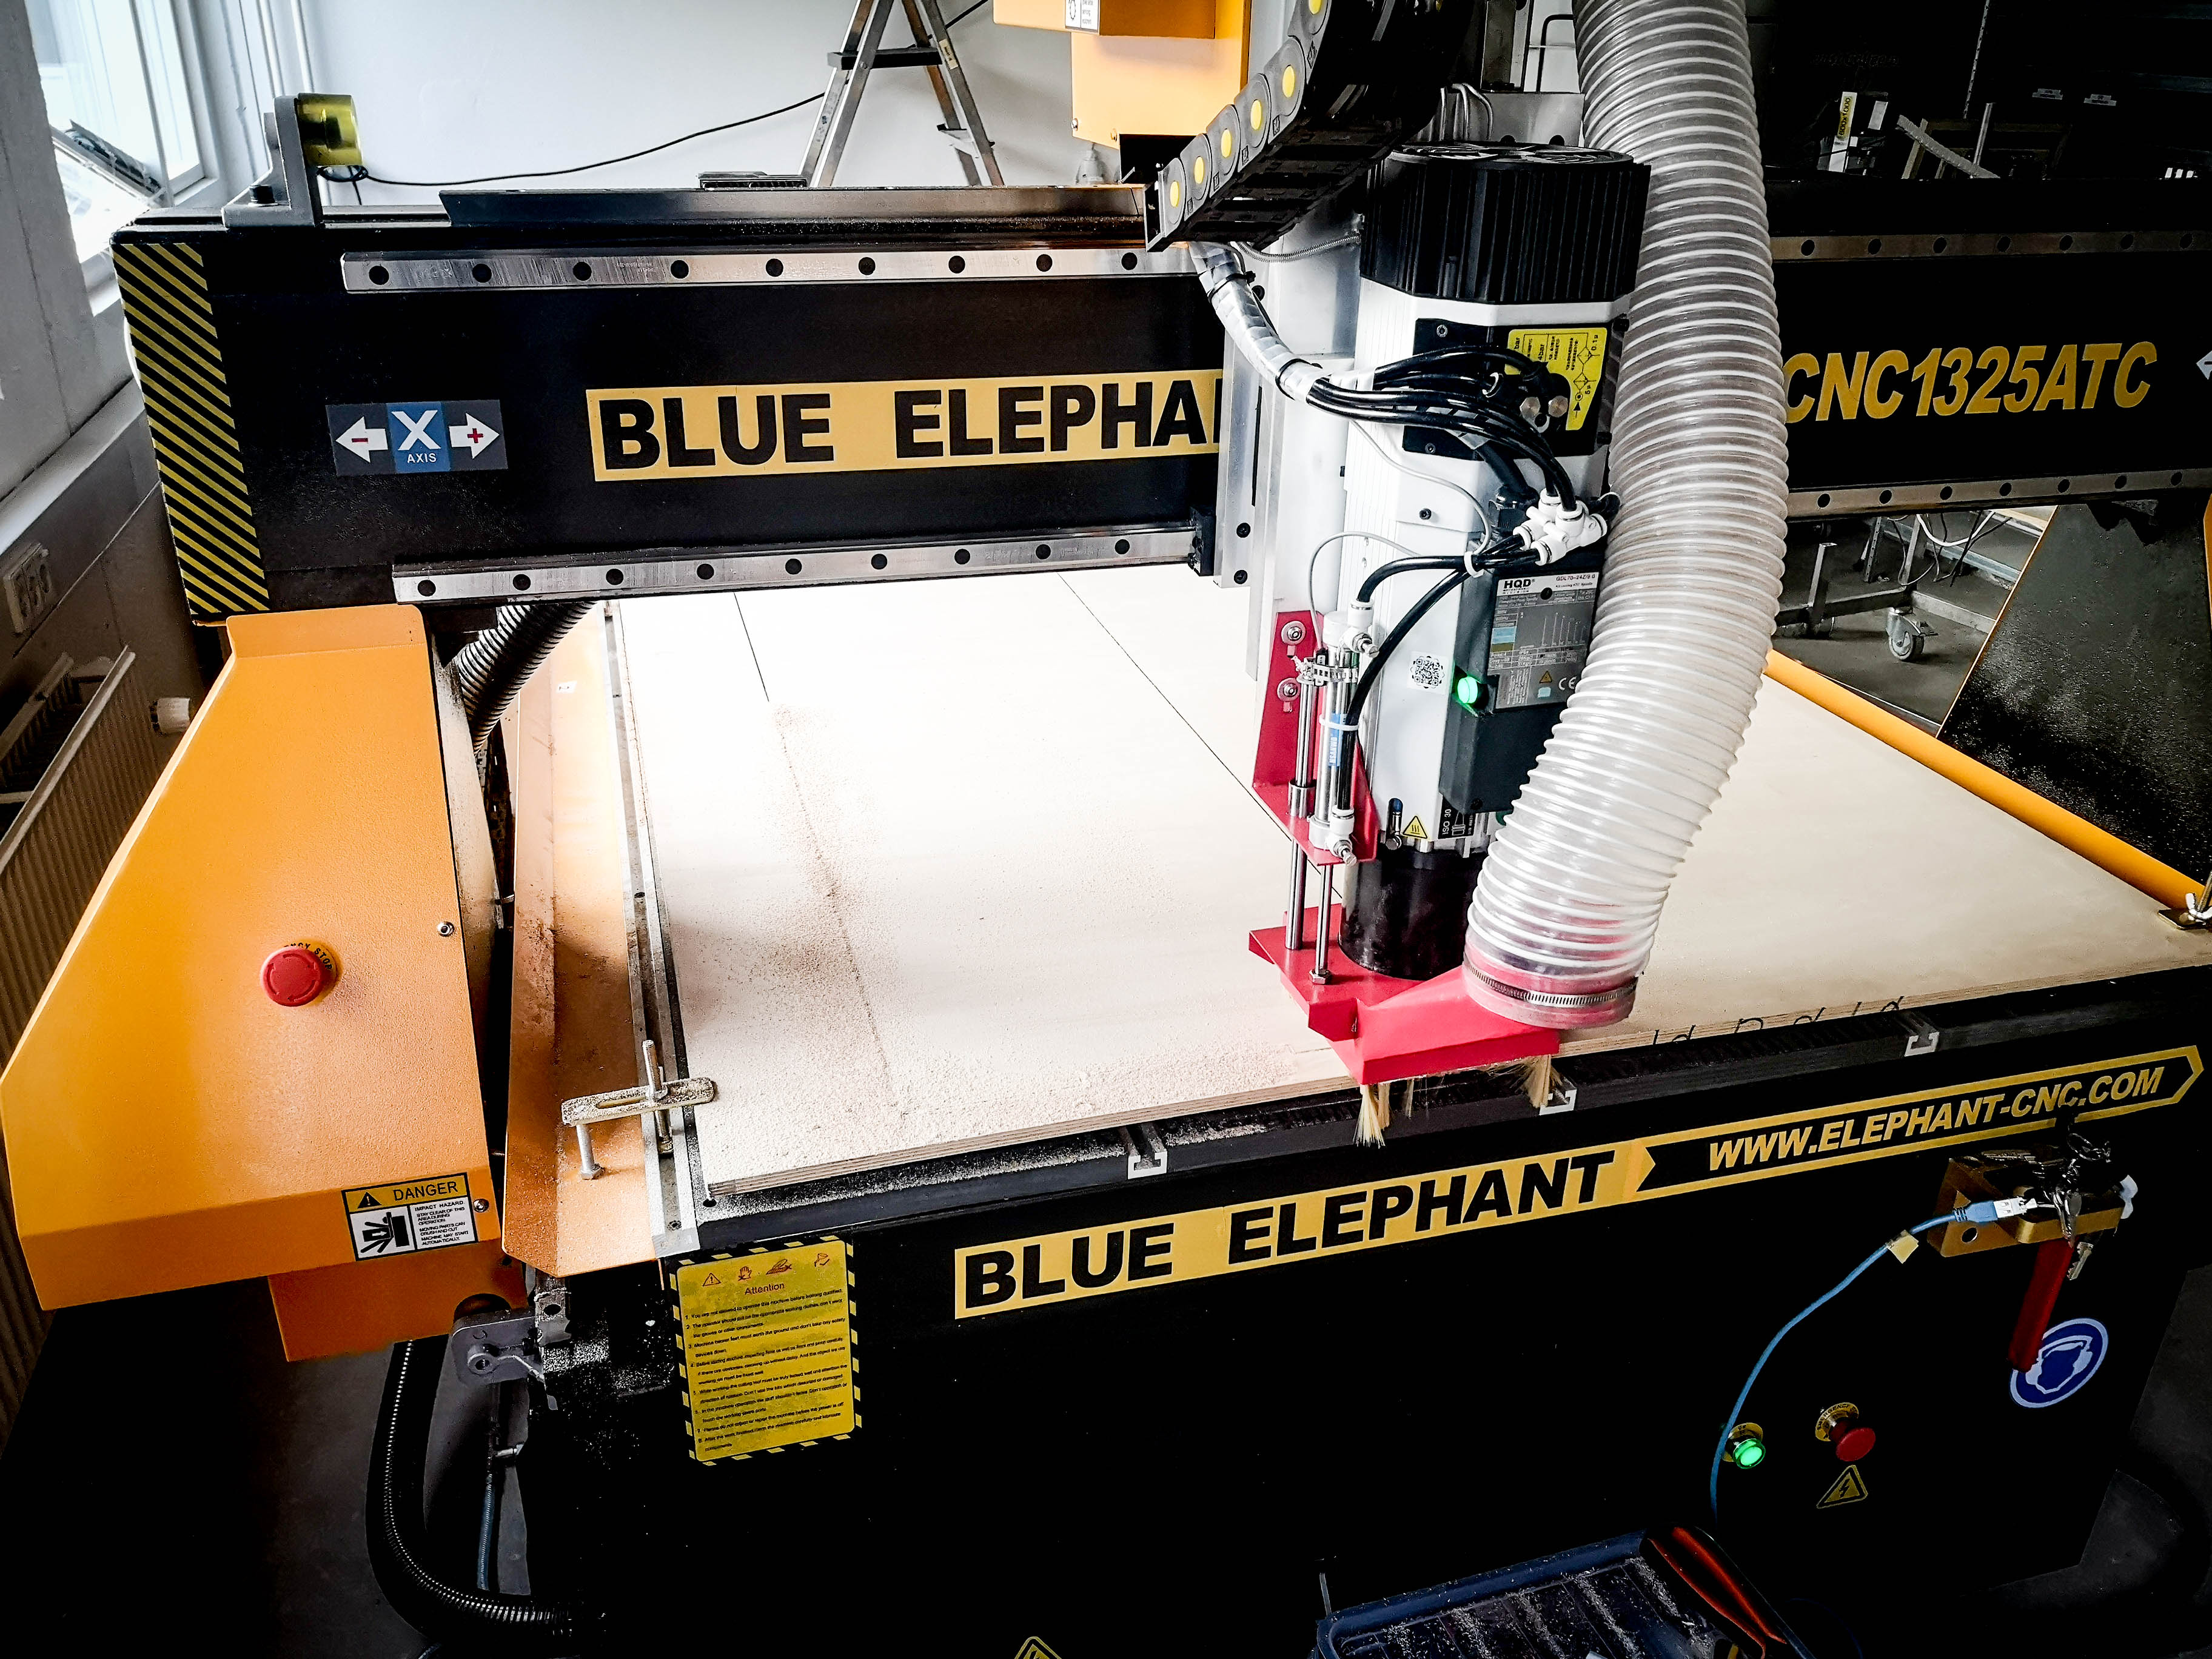
We now have a full sheet CNC machine, capable of cutting lightweight materials such as plywood, wood, MDF, plastics, nylon, aluminium, and whole plywood sheets 1220x2440mm. This machine is in building 37.
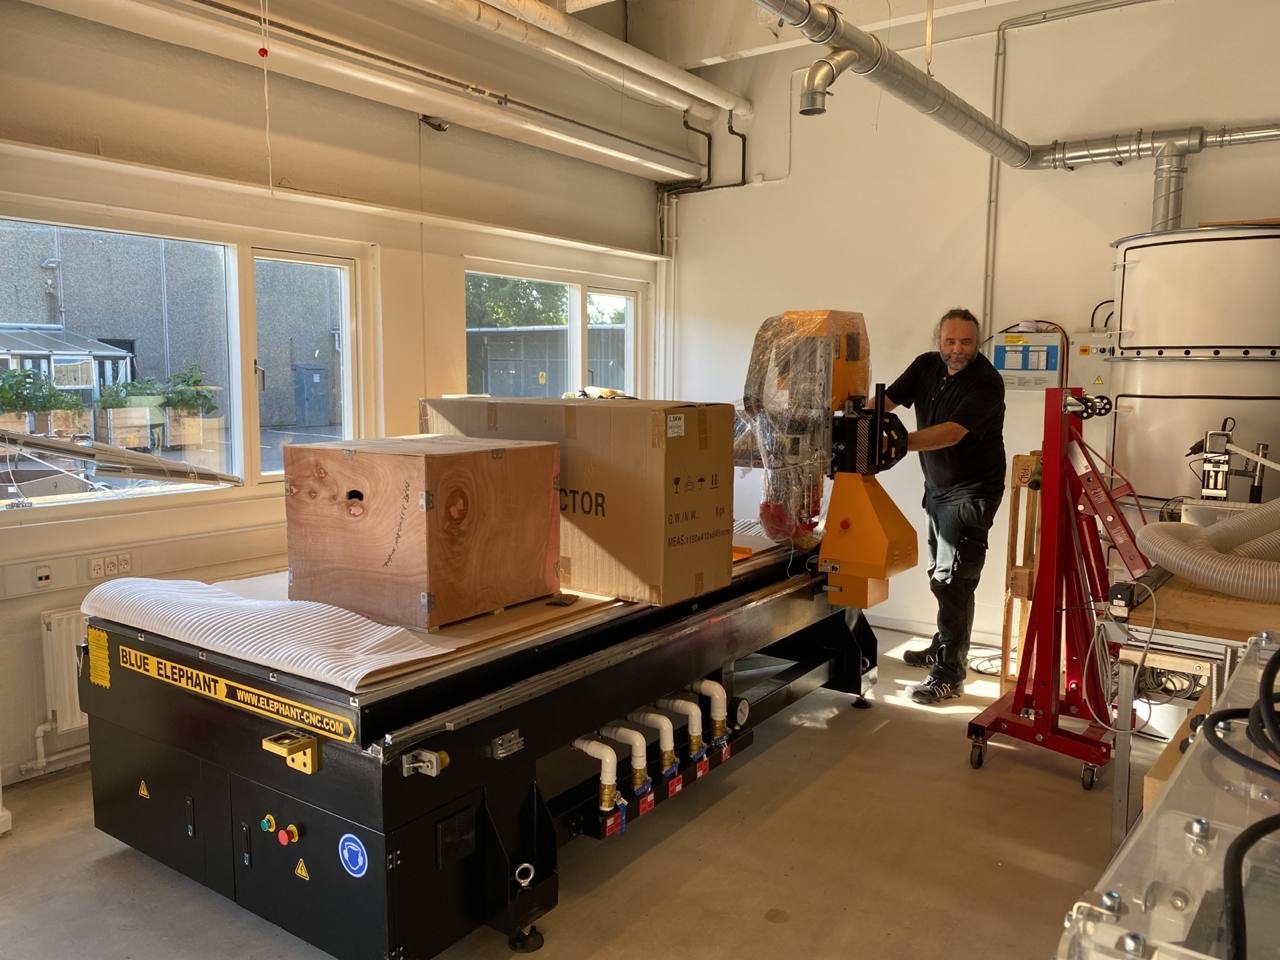
Model: Blue Elephant ELECNC1325ATC. It has a vacuum table for sucking down the wood so no screws are needed for for complicated fixturing.
The machine is equipped with an automatic tool changer (ATC) it can hold up to 8 tools and the machine can automatically change tools to e.g. use a large cutter for cutting out material, change to a drill for screw location or get an engraving bit for fine details.
Our recommended and supported workflow is CAM/G-code generation in Fusion 360
OBS budget 15 mins for cleaning up and vacuuming the machine and room when you are finished. Budget 30 mins for polystyrene. Budget 45 mins for black MDF.
To get going, follow the
- "setup - once only" guide (about 10 mins)
- the design and CAM in Fusion 360 video below (9 mins)
- the starting the machine video below (8 mins)
Setup - once only:
1) If you have not already, install Fusion 360 (free for students and hobbyists) https://www.autodesk.com/campaigns/education/student-design
2) Download two files: Tool library for Fusion 360; machine definition; here:
https://drive.google.com/drive/folders/1ot5npPj6KK-7_-uZt0z5reBkLp9IYNTE?usp=sharing )
This zip file also includes machine definition and tools for the Raptor X CNC machine in building 9.1, if you want to use that.
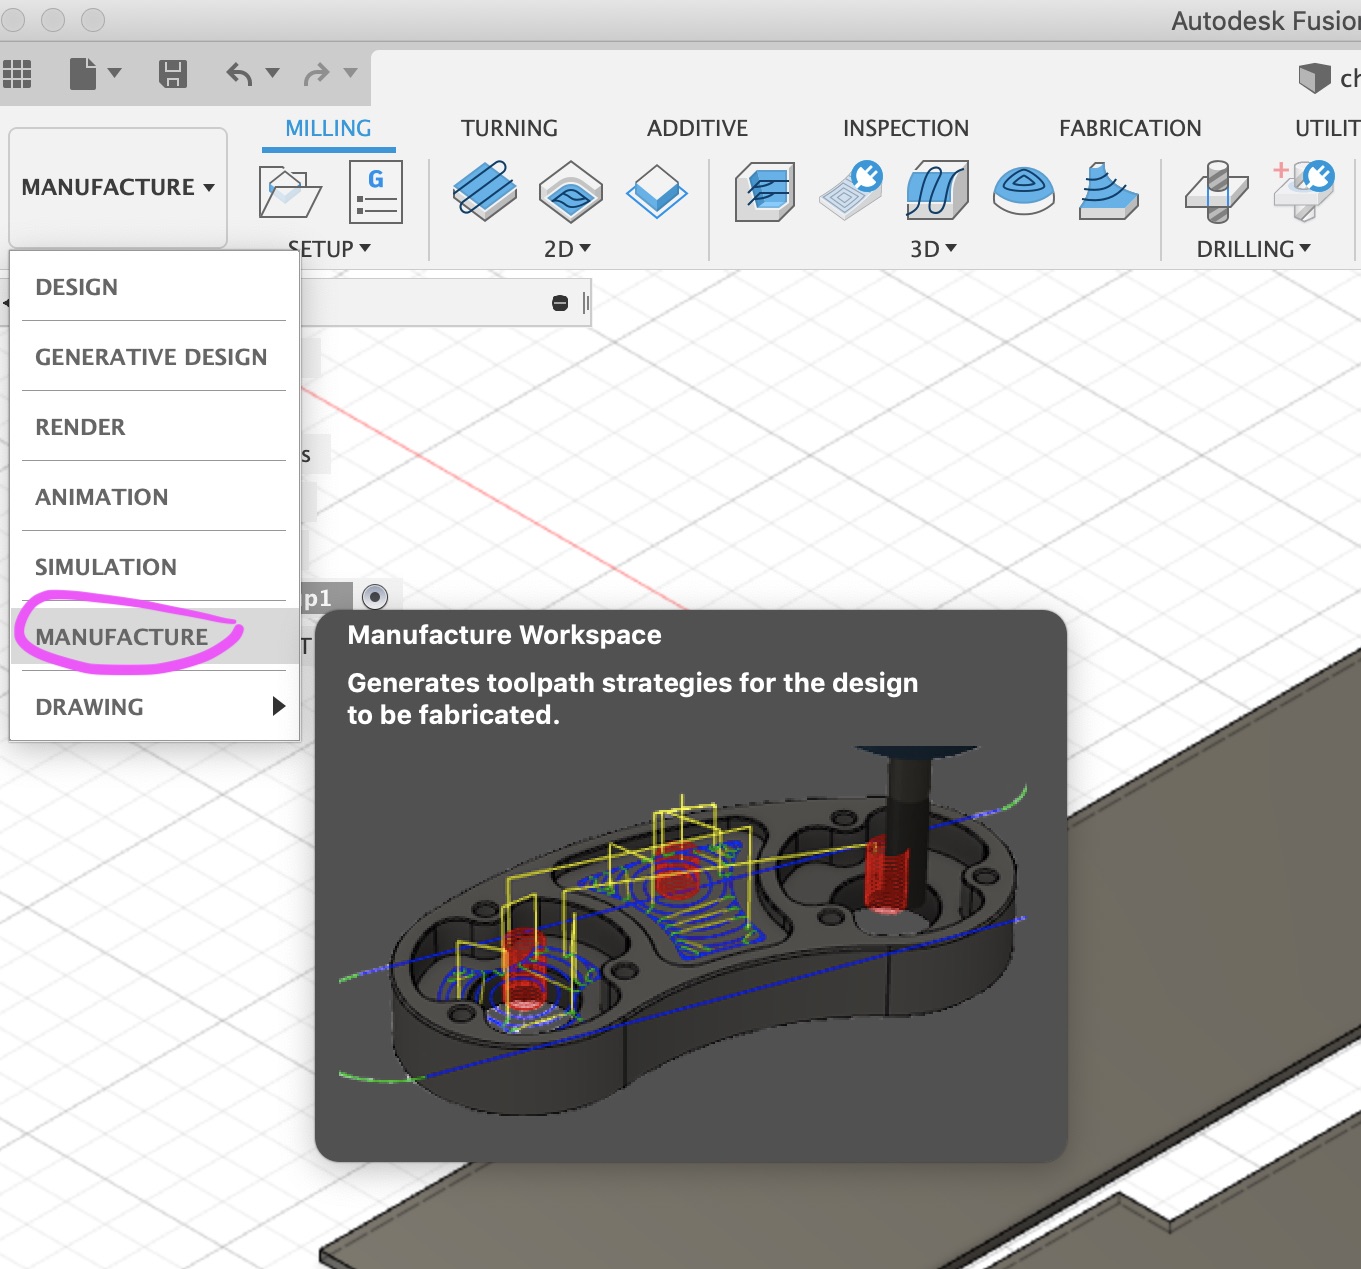
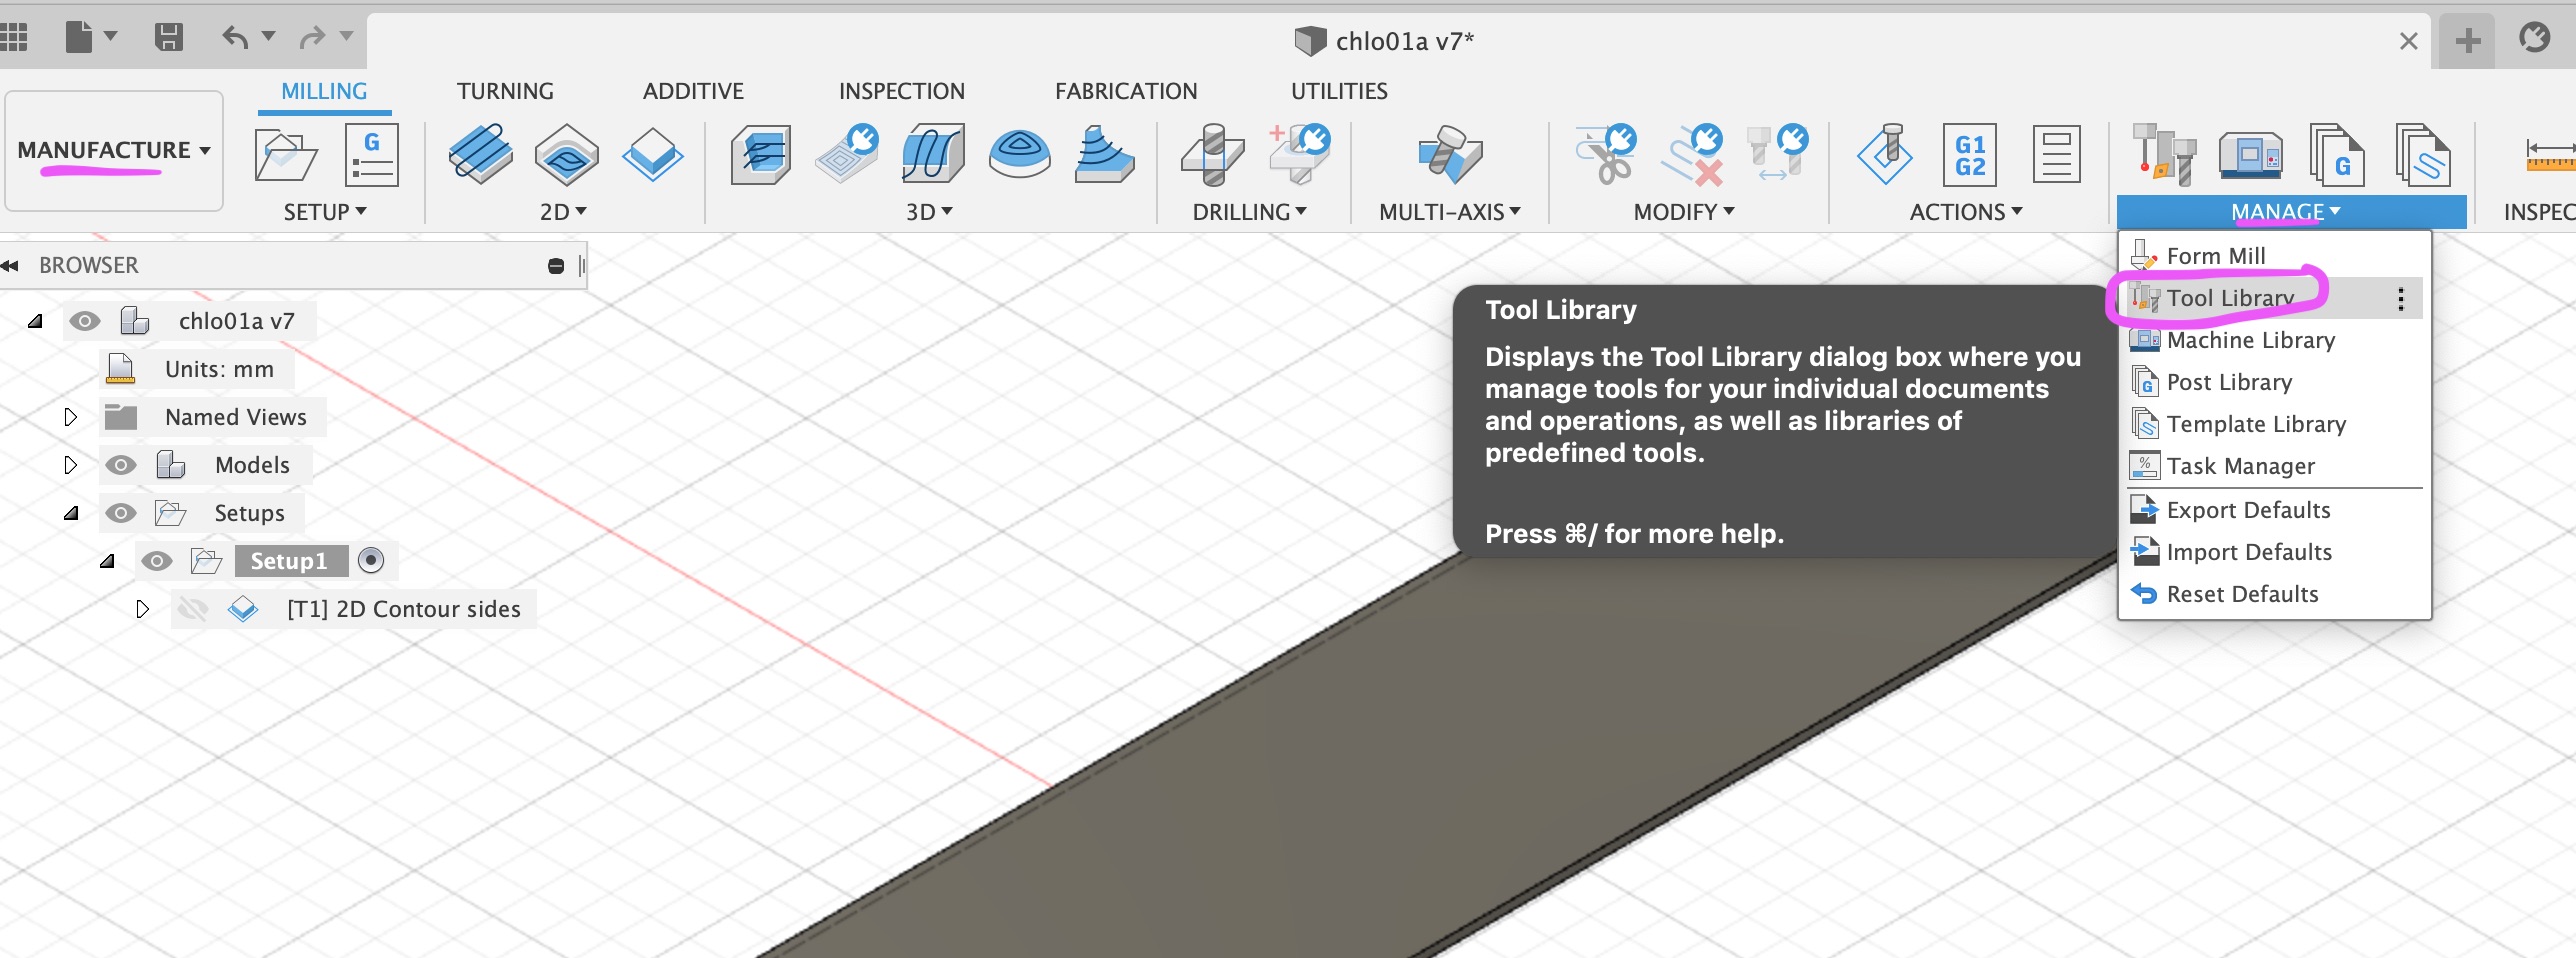
3) In Fusion, click on the main drop-down menu and select the MANUFACTURE workspace ↓
4) Within the MANUFACTURE workspace, click on the ribbon menu MANAGE. Select "Machine library" ↓
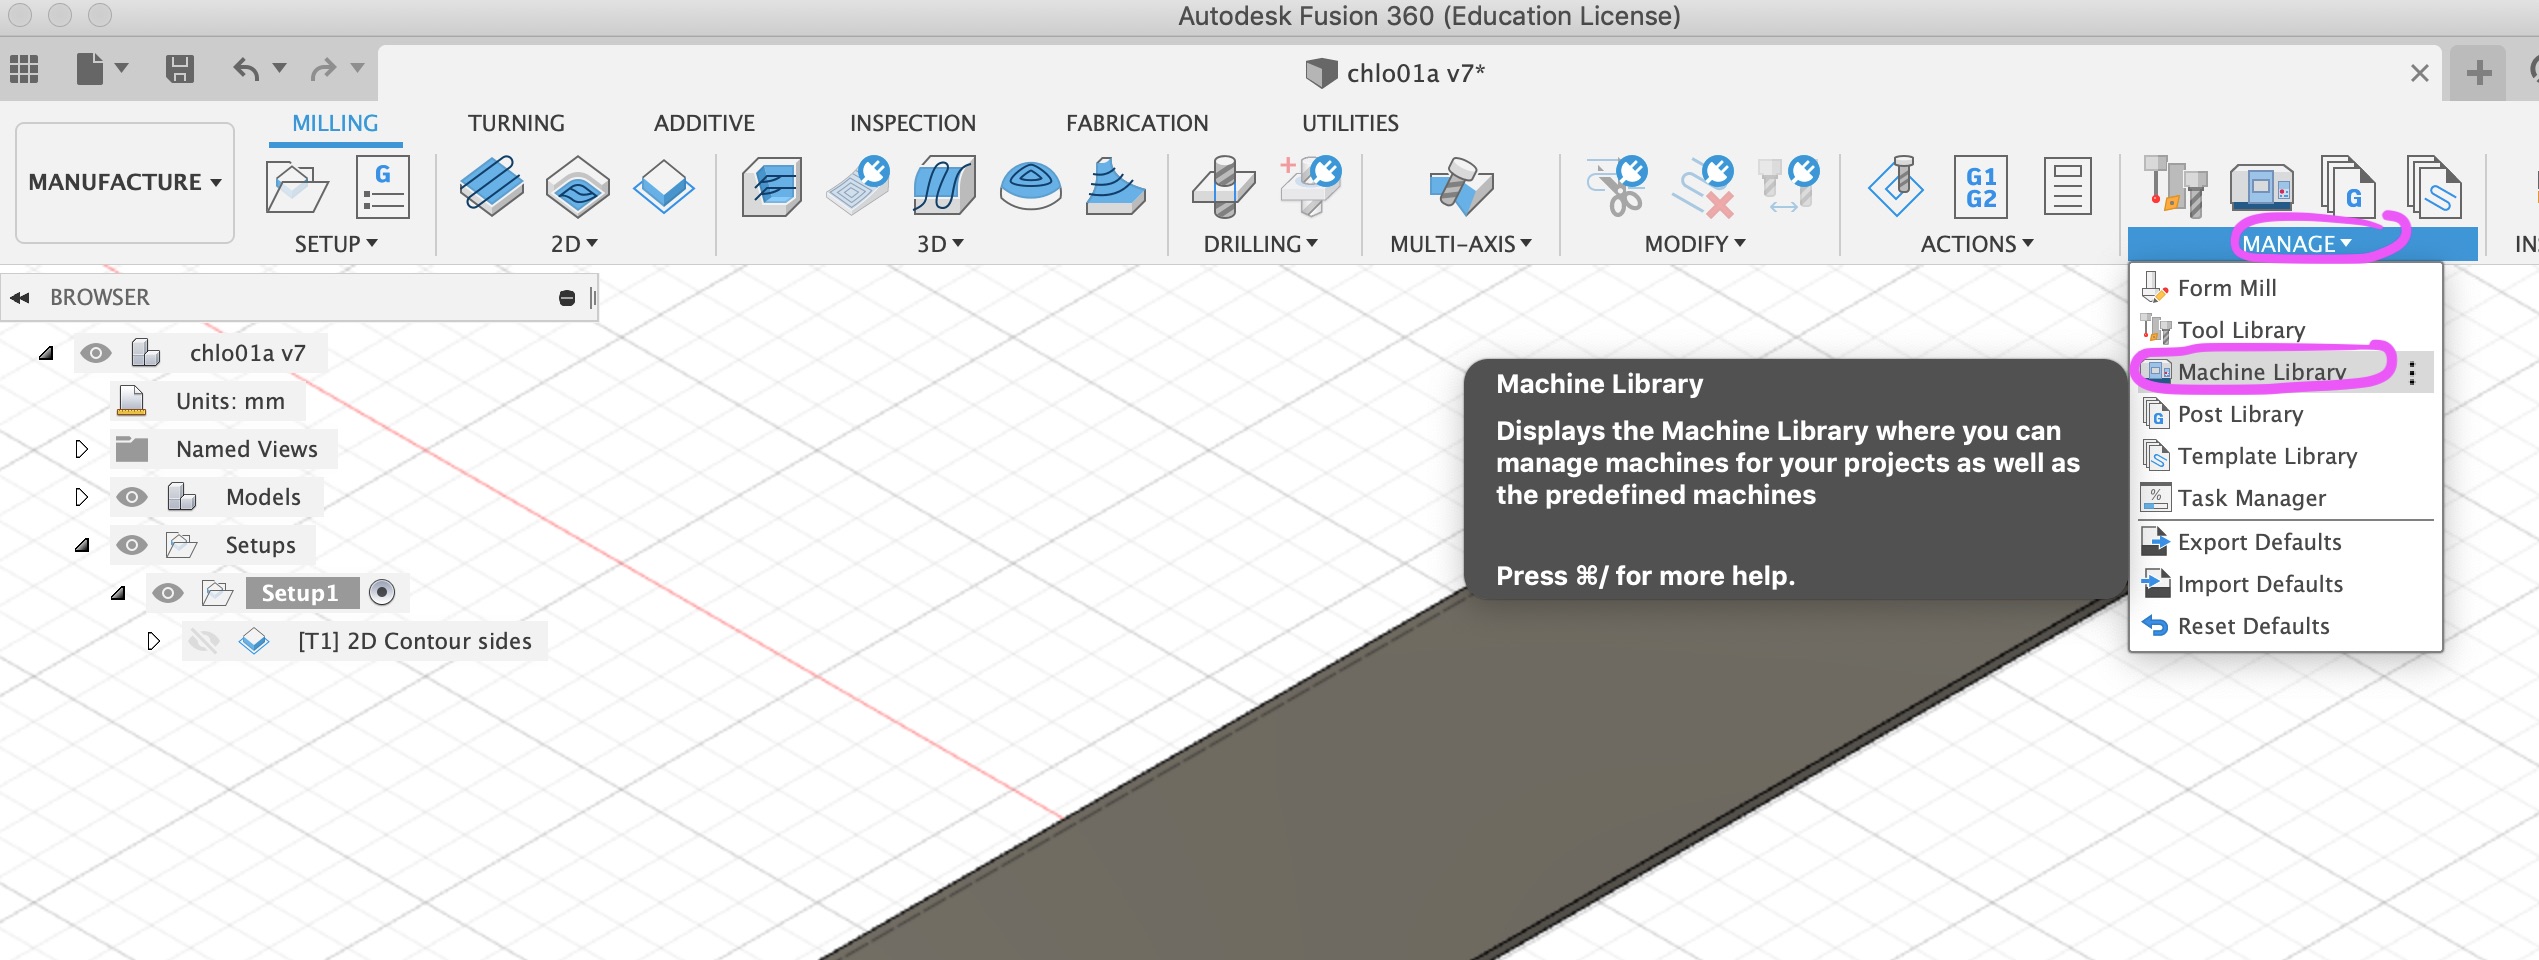
5) Click on My machines > local, and then click on the Import icon as shown ↓
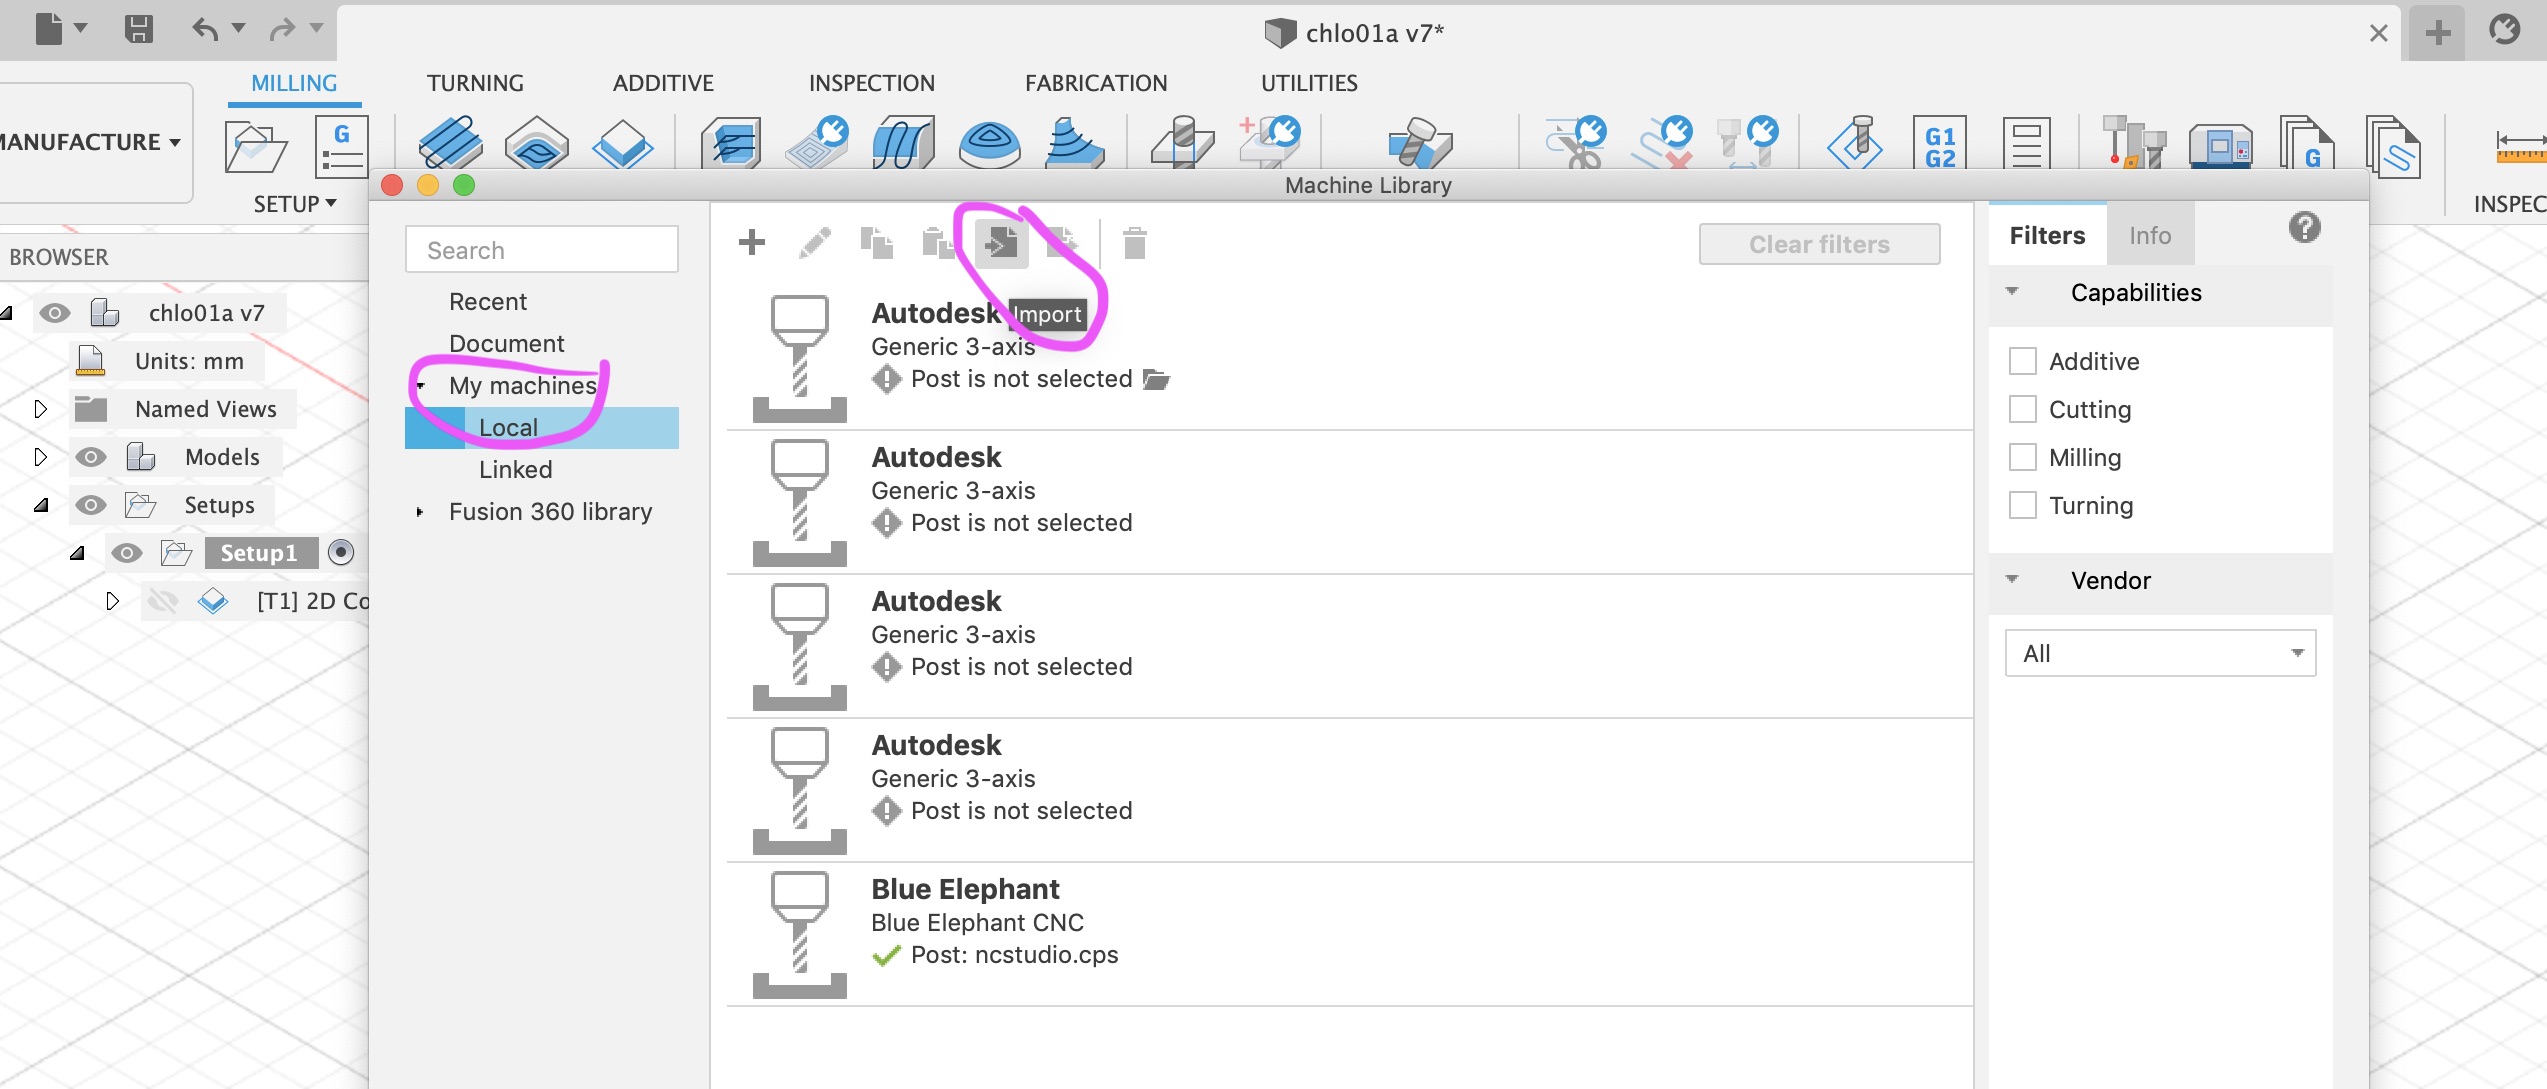
Import the machine definition file you downloaded.
Fusion will/may show a warning that it cannot find the post processor file.
Click on the little folder icon by the machine definition. A window with postprocessor options will open. Search for NcStudio and install it.
6) Within the MANUFACTURE workspace, click on the ribbon menu MANAGE again. Now select "Tool library" ↓
7) Right click on "local", then click on "Import libraries", and choose the previous downloaded library "BlueElephantToolLib.tools"
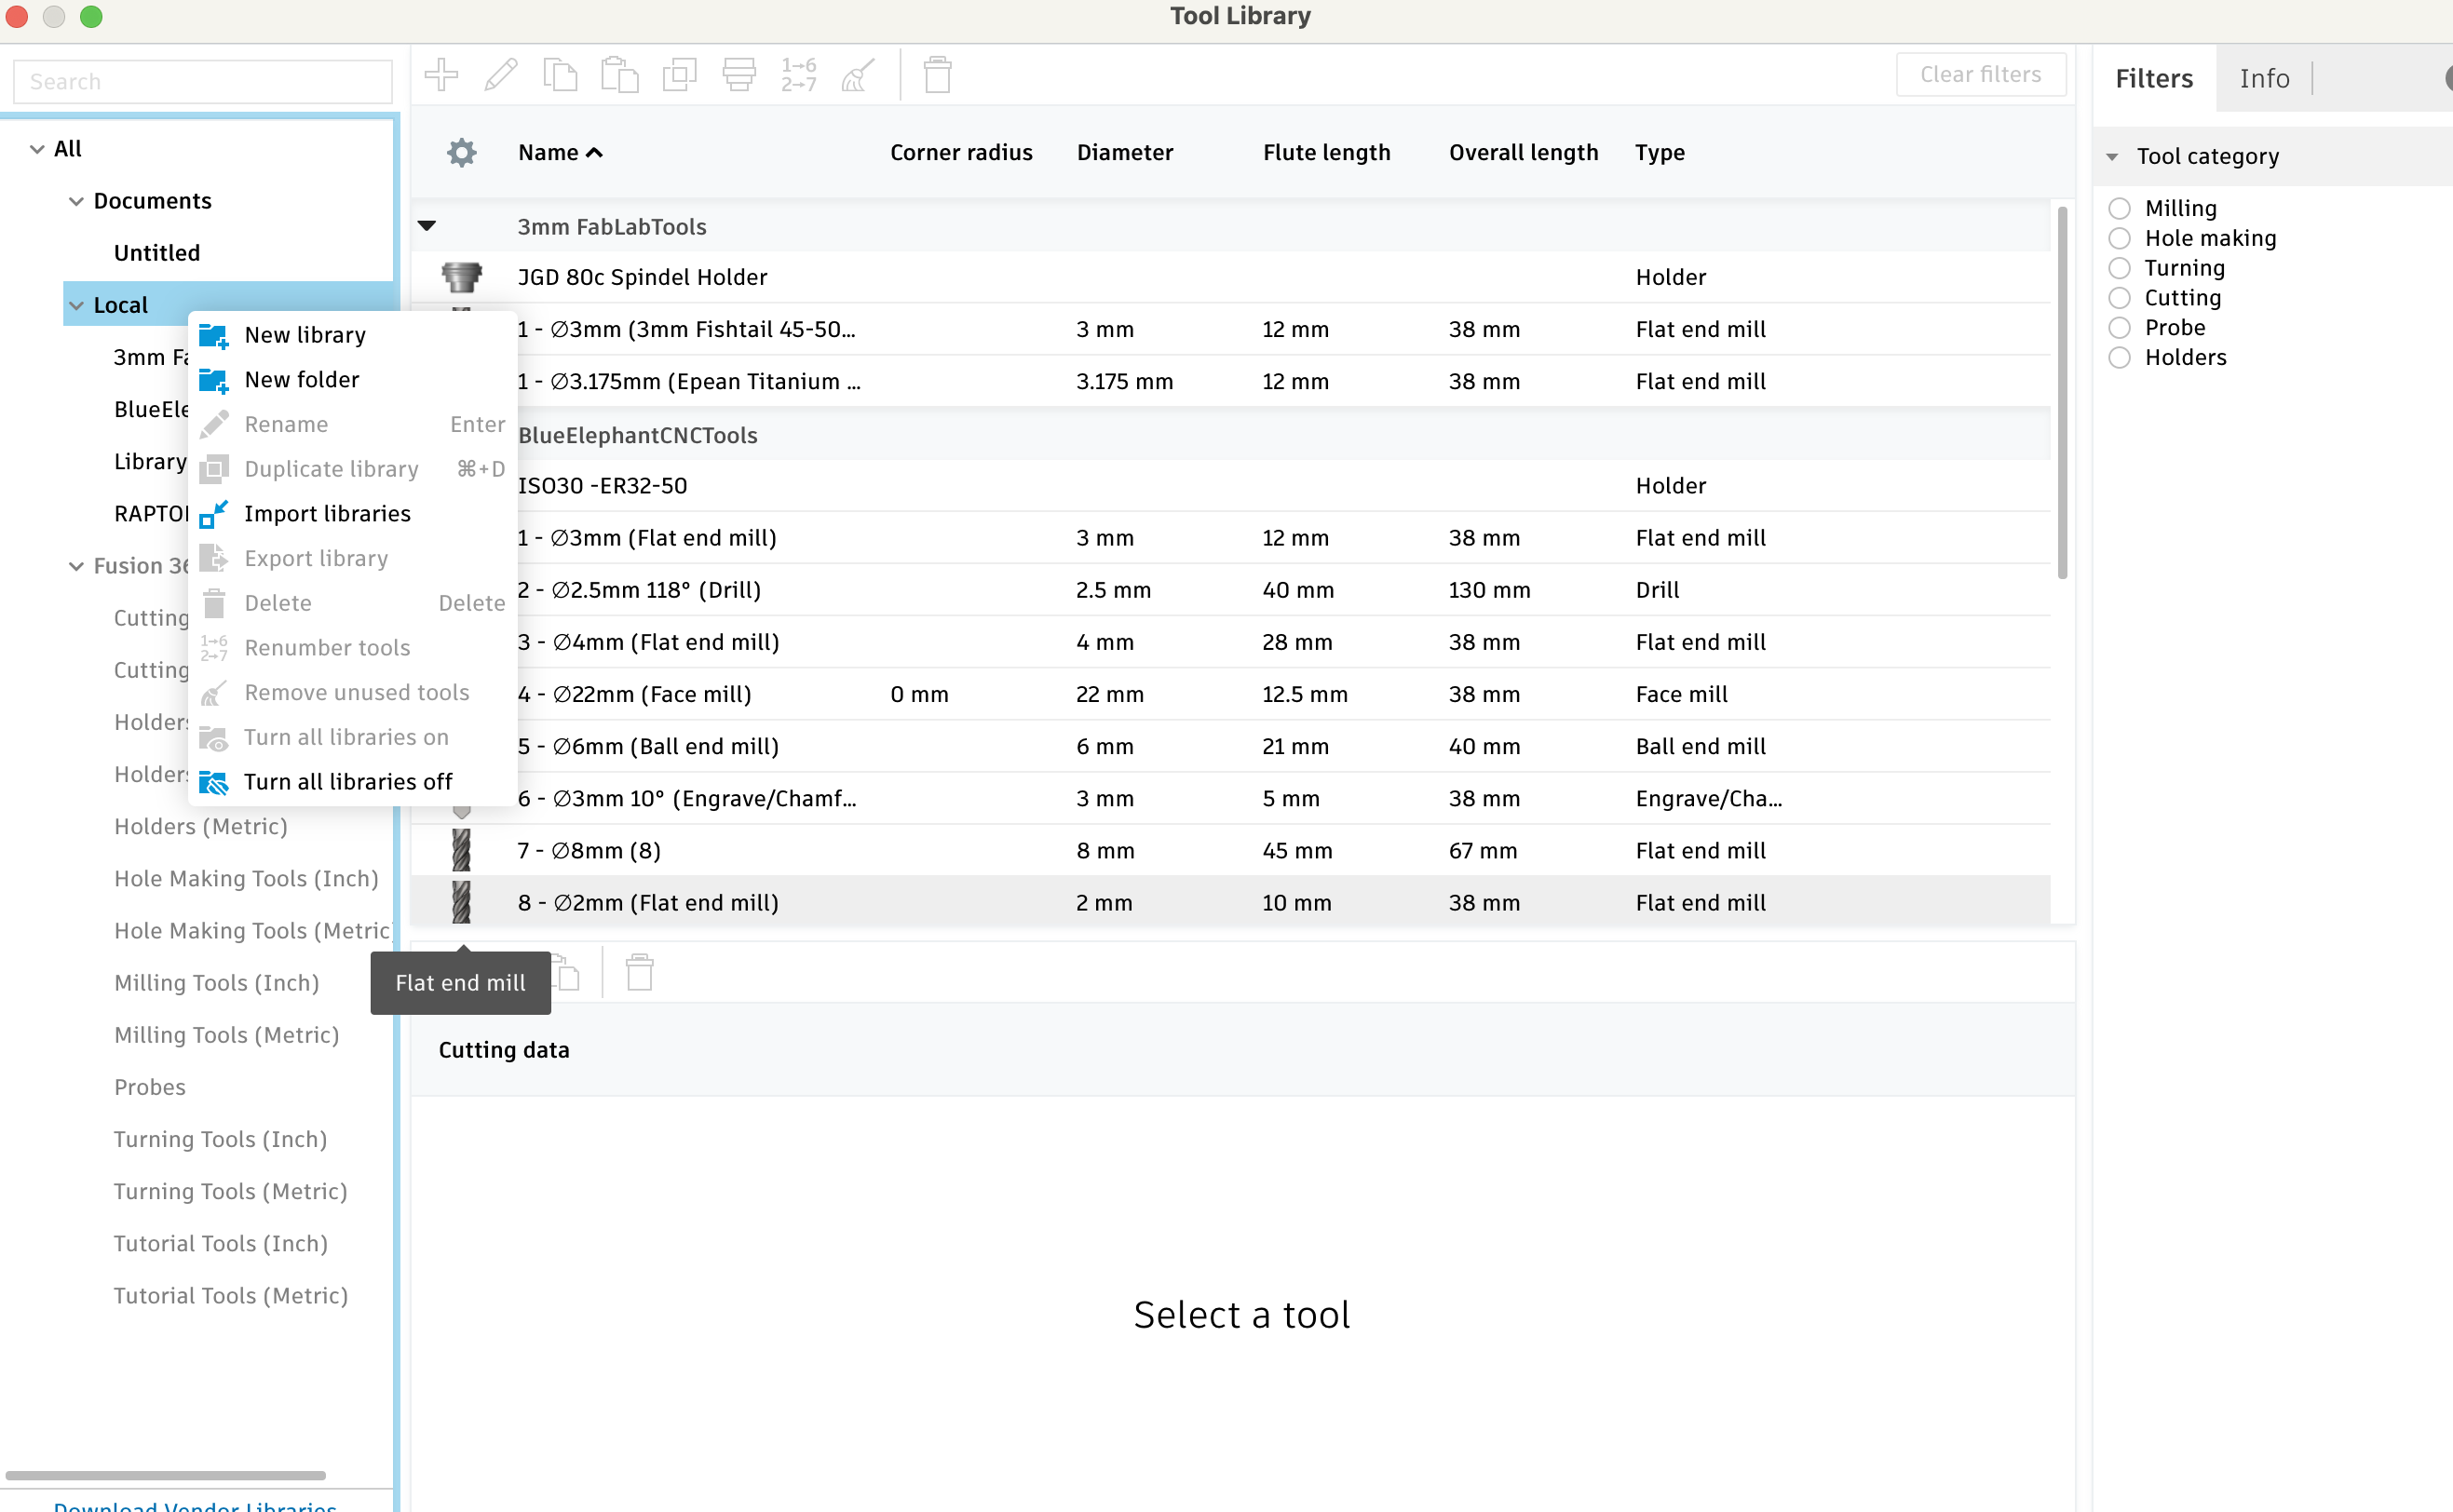
The loaded tools are currently:
- T1 3mm fishtail end mill (12mm depth)
- T2 2.5mm drill
- T3 4mm single flute end mill (28mm depth, but not in a single pass)
- T4 22mm (max 12mm per pass, max depth 25mm)
- T5 6mm ball end mill (depth 21 mm)
- T6 engraving bit
- T7 empty
- T8 empty
Now you are ready to design something in the DESIGN workspace, and plan the CAM (Computer Aided Manufacturing) job in the MANUFACTURE workspace.
Video guide - designing something and doing CAM in Fusion 360 (10 minutes):
Note if you only have the free personal version of Fusion, you cannot make one g-code file with two tools in it as I do - you will have to make a g-code file per tool. The edu version supports multiple tools in one file.
https://youtu.be/KC8oSvowJsk or
https://video.ruc.dk/media/t/0_8da5krru/332677 or
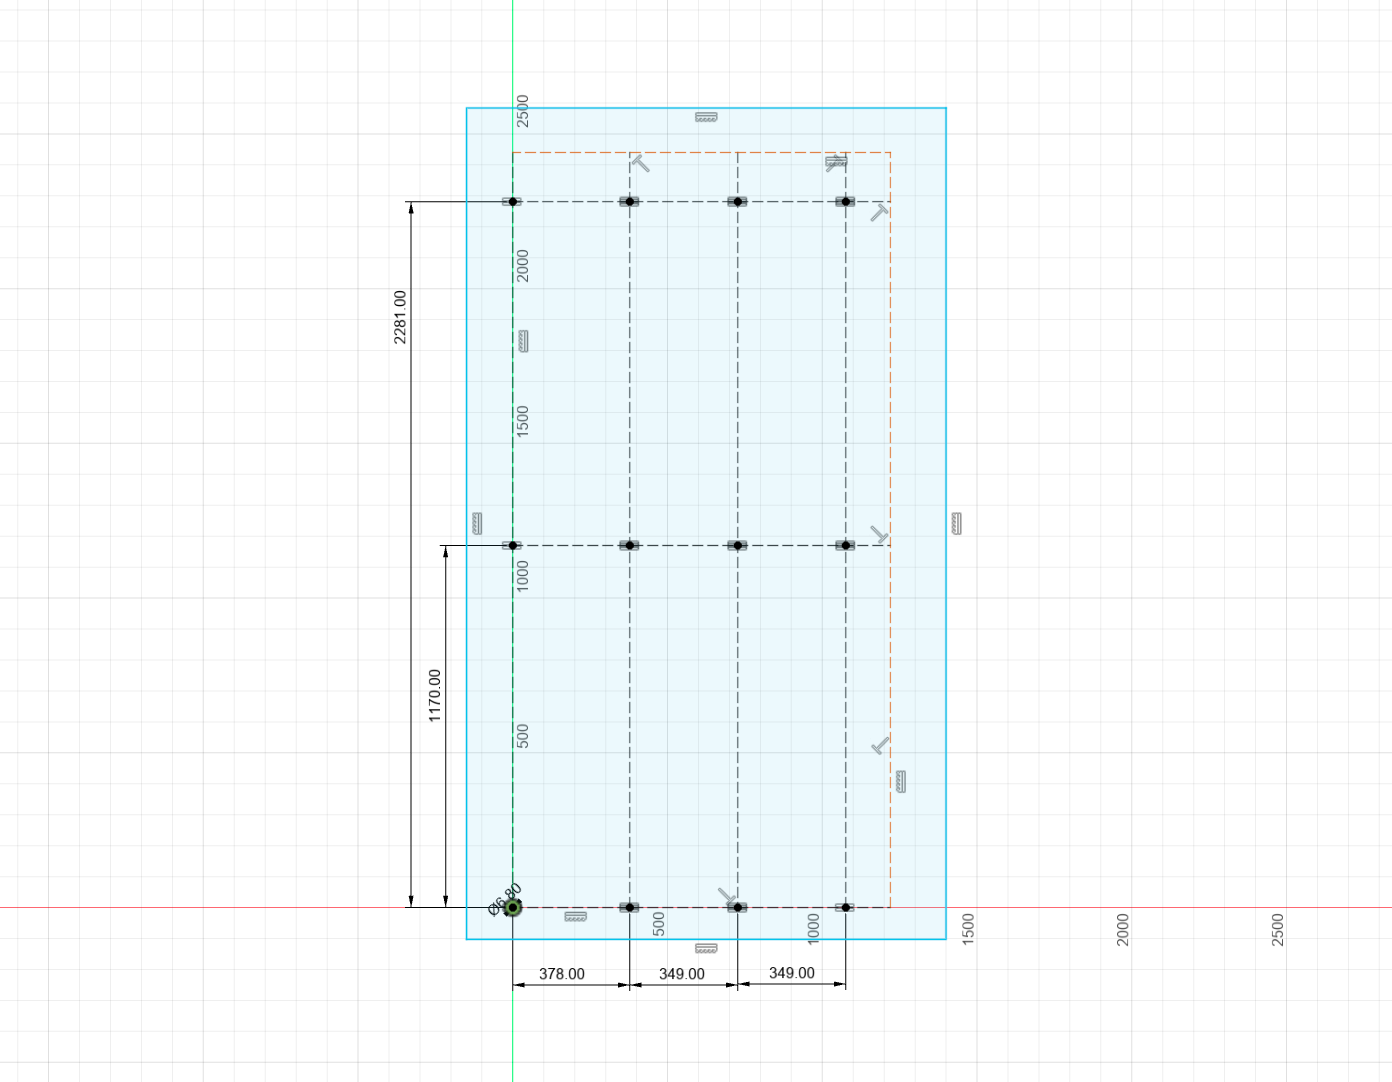
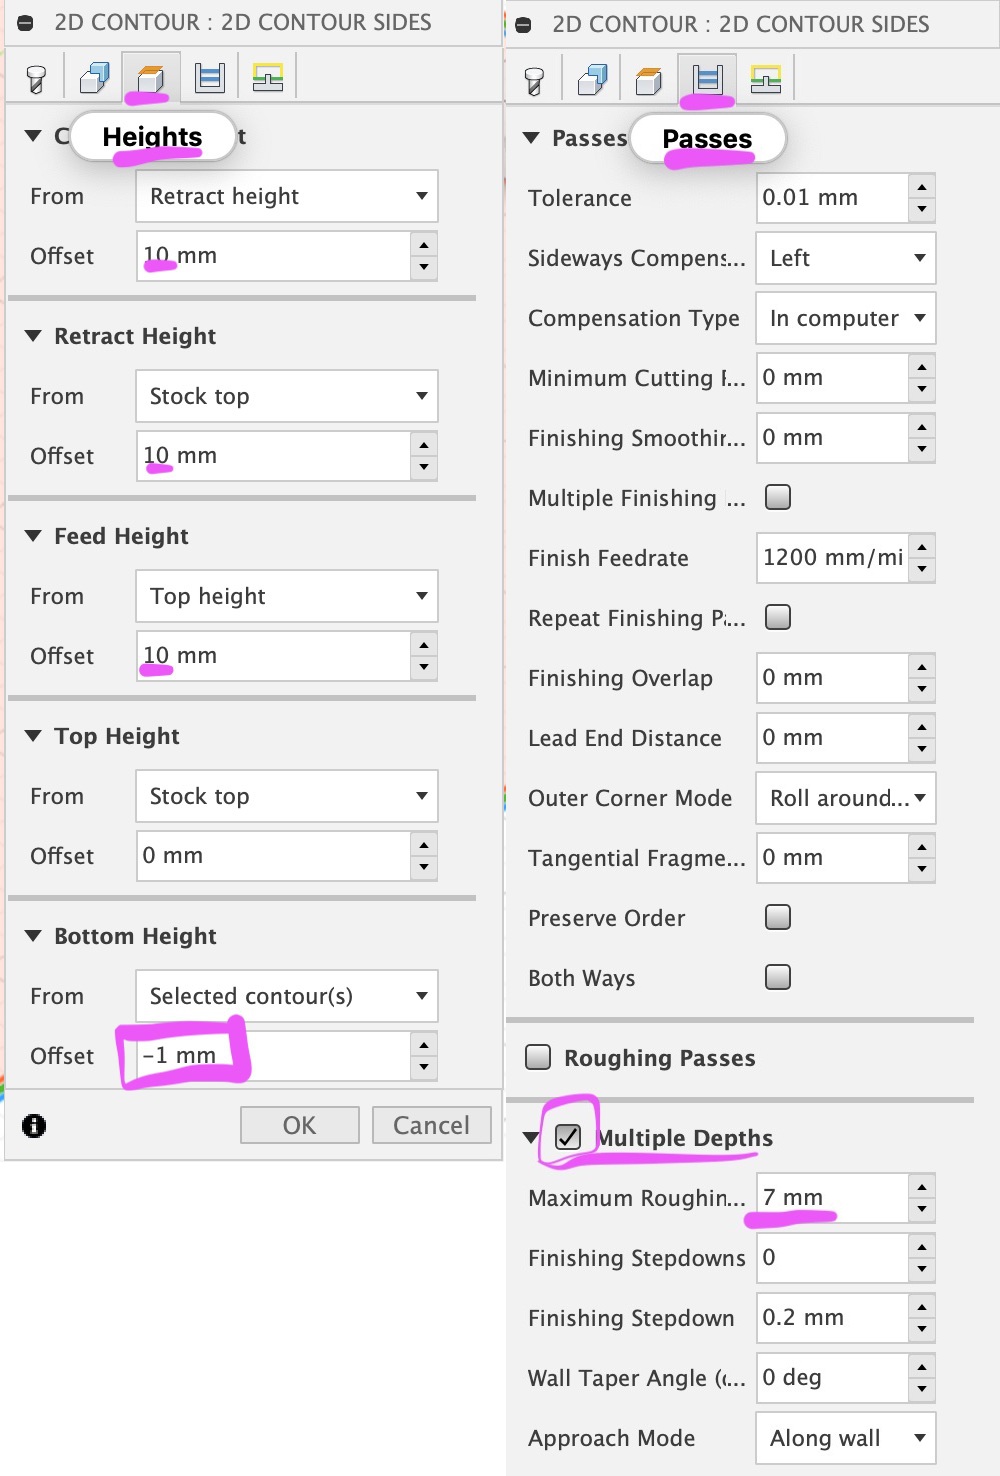
To repeat three things that are important and easy to forget in your 2D contour:
Select the bottom contour, not the top.
In the Heights tab, all rapid moves should be 10mm over the workpiece (to avoid marring it if it is not super flat), and the bottom height should be -1mm (or maybe -0.5mm), so you actually cut all the way through ↓↓
In the Passes tab, "Multiple Depths" should be ticked, and a suitable number entered in Maximum roughing stepdown - e.g. 7mm ↓
If you need to lay several components out on a flat sheet, this video is useful: https://www.youtube.com/watch?v=PN4bd4rr4z8 Remember each part must be in its own component.
Video of turning machine on, zeroing machine, setting workpiece zero point, putting G-code file in machine, running it (8 mins)
https://youtu.be/RUZy9y8qZY8 or https://video.ruc.dk/media/t/0_bvrc649u or
Specs:
Blue Elephant ELECNC1325ATC
The controller is Weihong NK 105 with hand controller NK105G3 - it will accept most generic G-code.
Vacuum pump 5.5kW
Spindle HQD GDL70-24Z/9.0 9kW with VFD
Tool holders ER32: FX ISO30-er32-50
Known problems and solutions:
If you change a tool in a collet, remember to press shift+6 to get the machine to measure the new tool length.
If the machine takes a new tool, and then stops with no error message, it probably means the toolchanger does not think it is holding the tool properly. Check that the dark fitting on the TOP of the toolholder is properly tight and not loose. Check there is not debris on the toolholder or in the toolchanger that prevent it properly gripping the toolholder.
Going from Corel Draw to Fusion: Lines and rectangles work fine, circles appear but are not usable for extrude etc. Solution/workaround: Combine all elements in Corel Draw (Object->Combine) and then export at DXF version R9 (very old. R13 or newer do not work).
CNC machine starts job, cutting head moves towards start, but then stops with message in hand controller display "arc/circle radius error" (press arrow keys to read the whole error message, one cannot read it all at once)

Solution/workaround: in Fusion 360, in manufacture, right click/two-finger click on the setup, select "Post process".
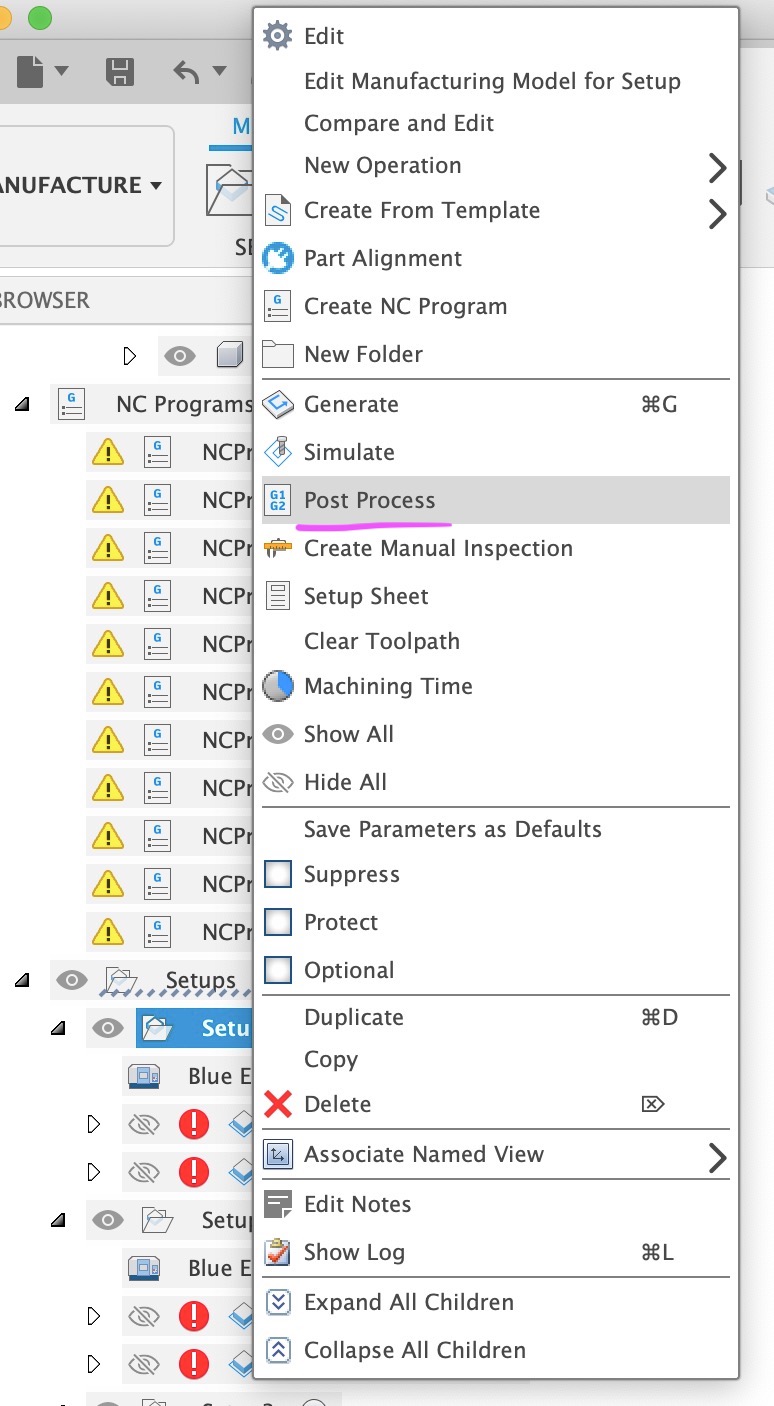
This dialog appears:
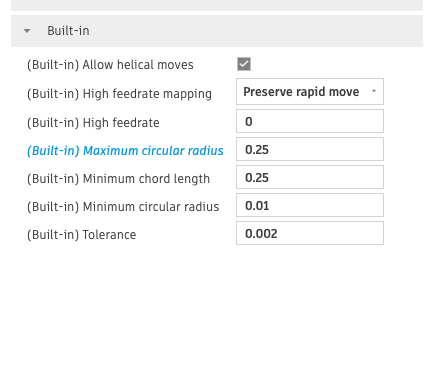 Unfold "built in".
In "Maximum circular radius", write .25 instead of 1000.
Servo controllers are leadshine L5-850Z-DK digital ac servo drive
UPDATE 5/11-2025
The spoilboard on the CNC is now attached to the bed of the machine with nylon bolts, the ensures a better vacuum for your material. The file for making a new spoil board can be found here (NC-File)
The STEP-file for how the spoil board should be is here (step file)