Embedded programming kit
Install Arduino
https://www.arduino.cc/en/software
For a brief intruduction to arduino watch:
https://youtu.be/09zfRaLEasY?list=PLZfay8jtbyJt6gkkOgeeapCS_UrsgfuJA
Kit:
- Arduino
- Led
- Button
- Servo
- Potentiometer
- Breadbord
- 220ohm resistor
Code Examples
LED
Try to run the Blink example from the arduino library
Go to File -> Examples -> 01.Basic -> Blink
Read more here:
https://docs.arduino.cc/built-in-examples/basics/Blink
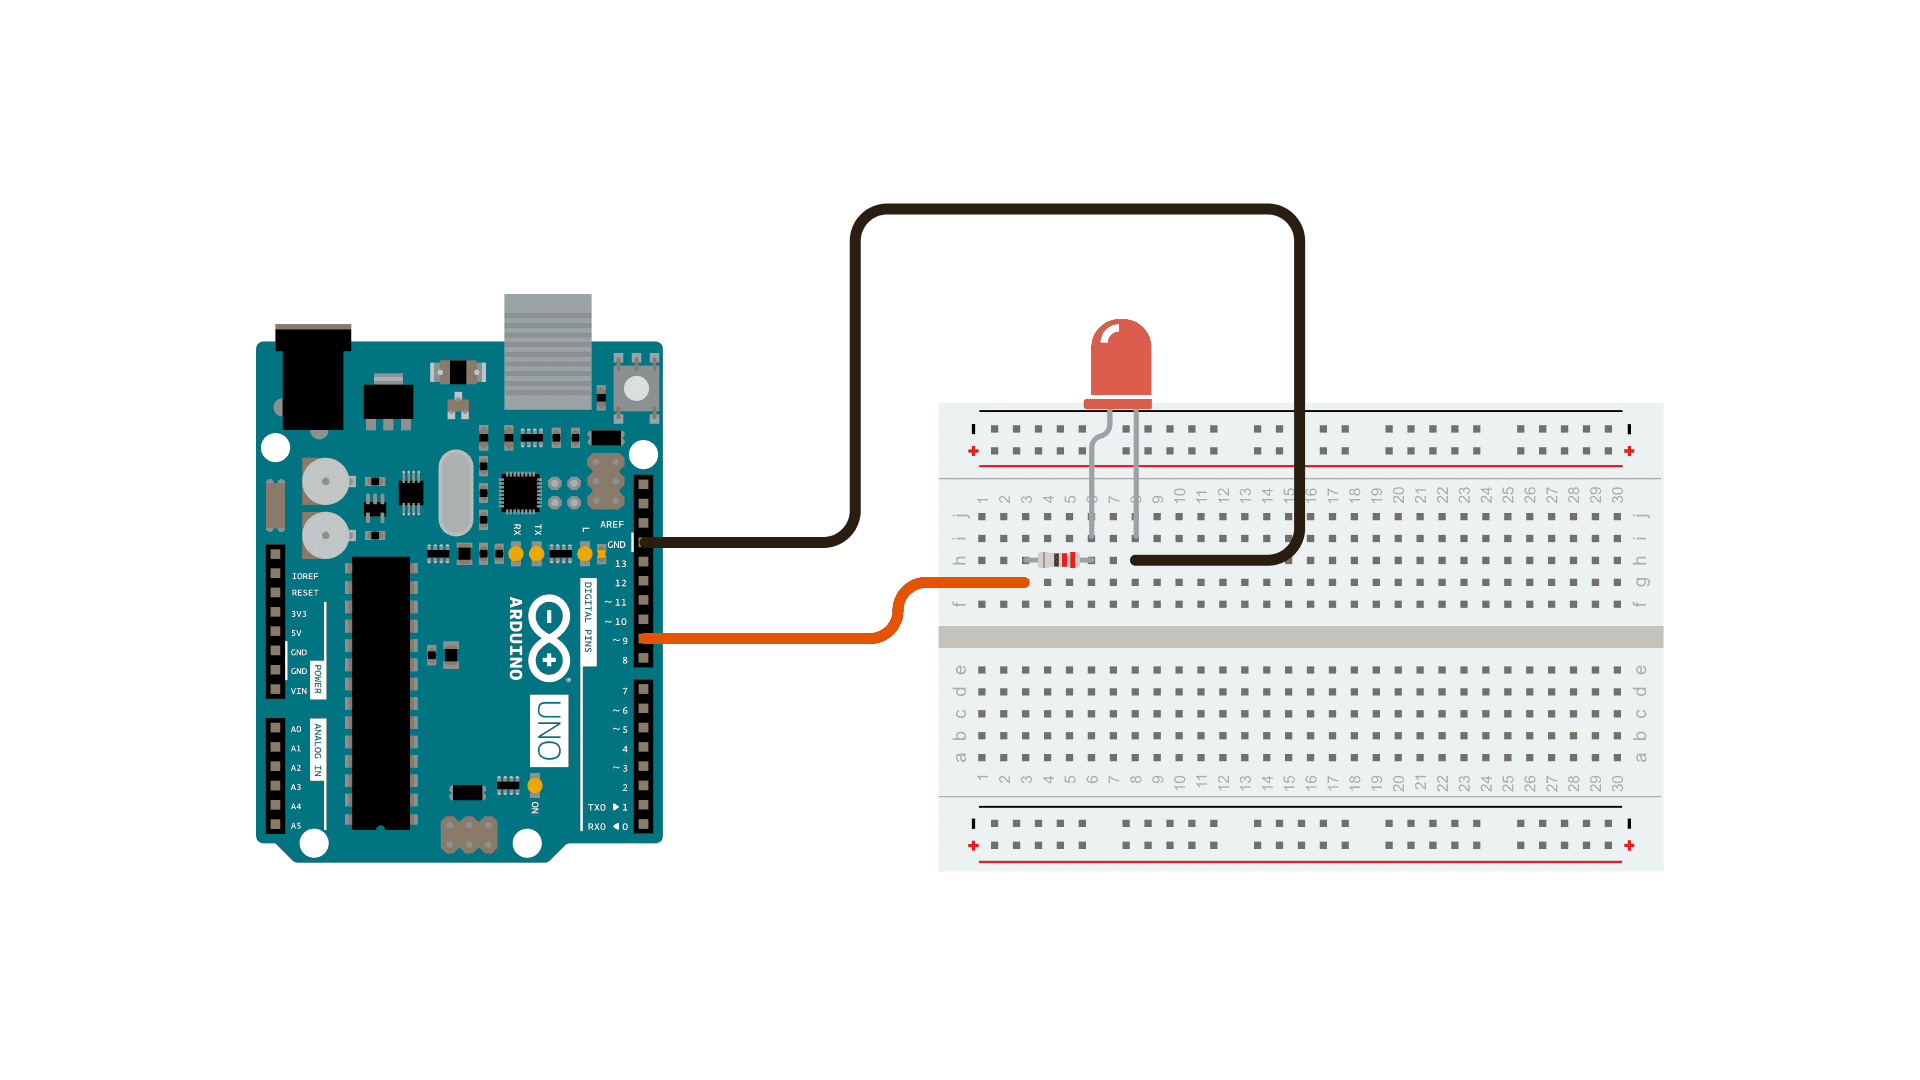
Wiring:
Button
Detecting button pressed STATE
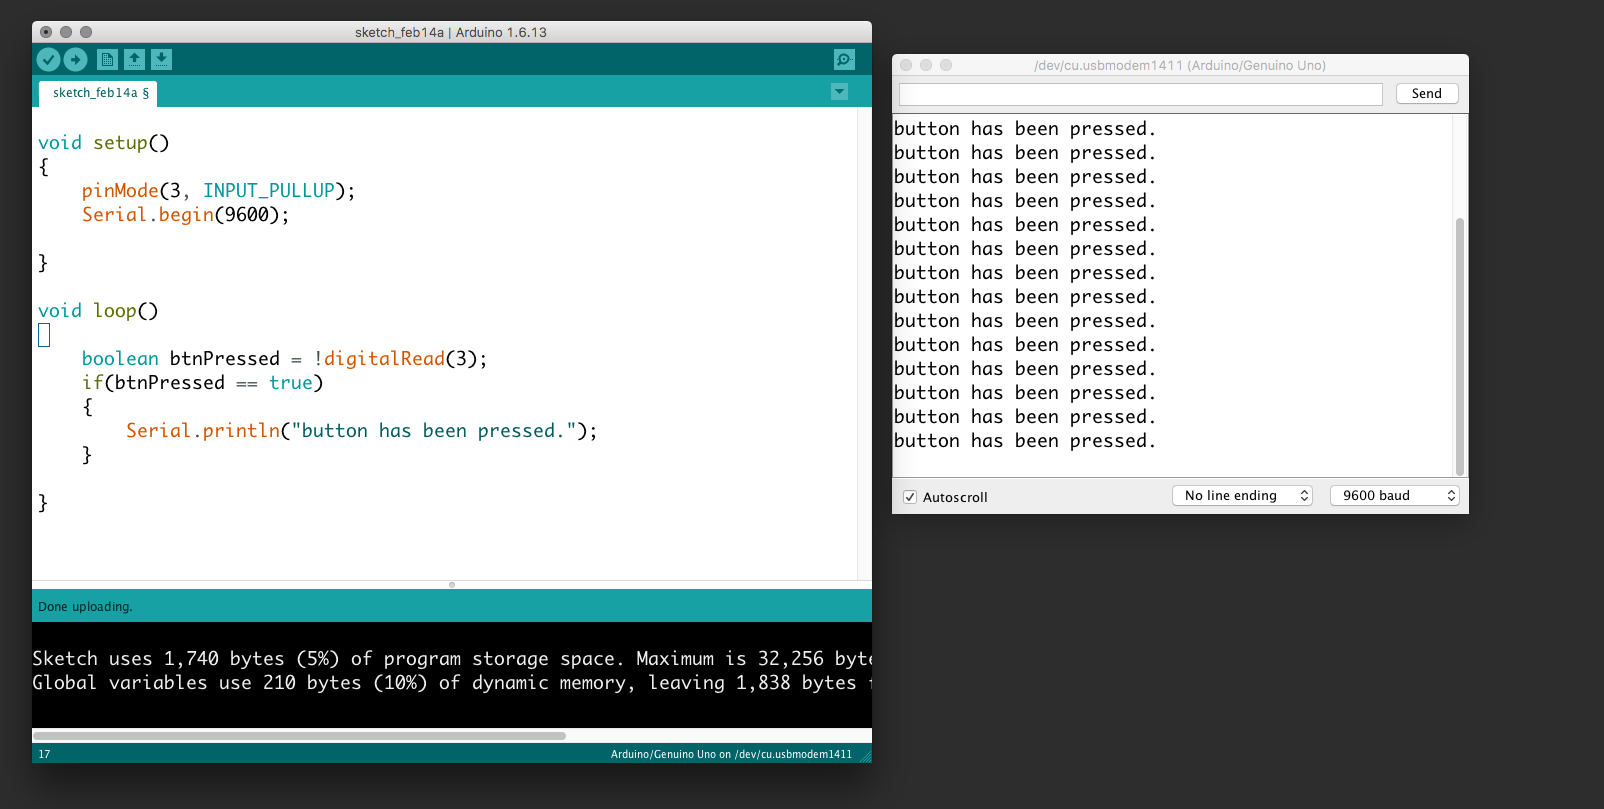 In the following example, we connect a button to the Arduino and send a message repeatiatly somebody presses it. Be aware that we use the internal pull-up so the button has to be connected to the ground. Further, we use the serial communication to receive the messages to our prompt. Use the "search icon" (upper right corner) to view the serial prompt.
        void setup()
        {
            pinMode(3, INPUT_PULLUP);
            Serial.begin(9600);

        }

        void loop()
        {
            boolean btnPressed = !digitalRead(3);
            if(btnPressed == true)
            {
                Serial.println("button has been pressed.");
            }

        }
Detecting button single press - An EVENT
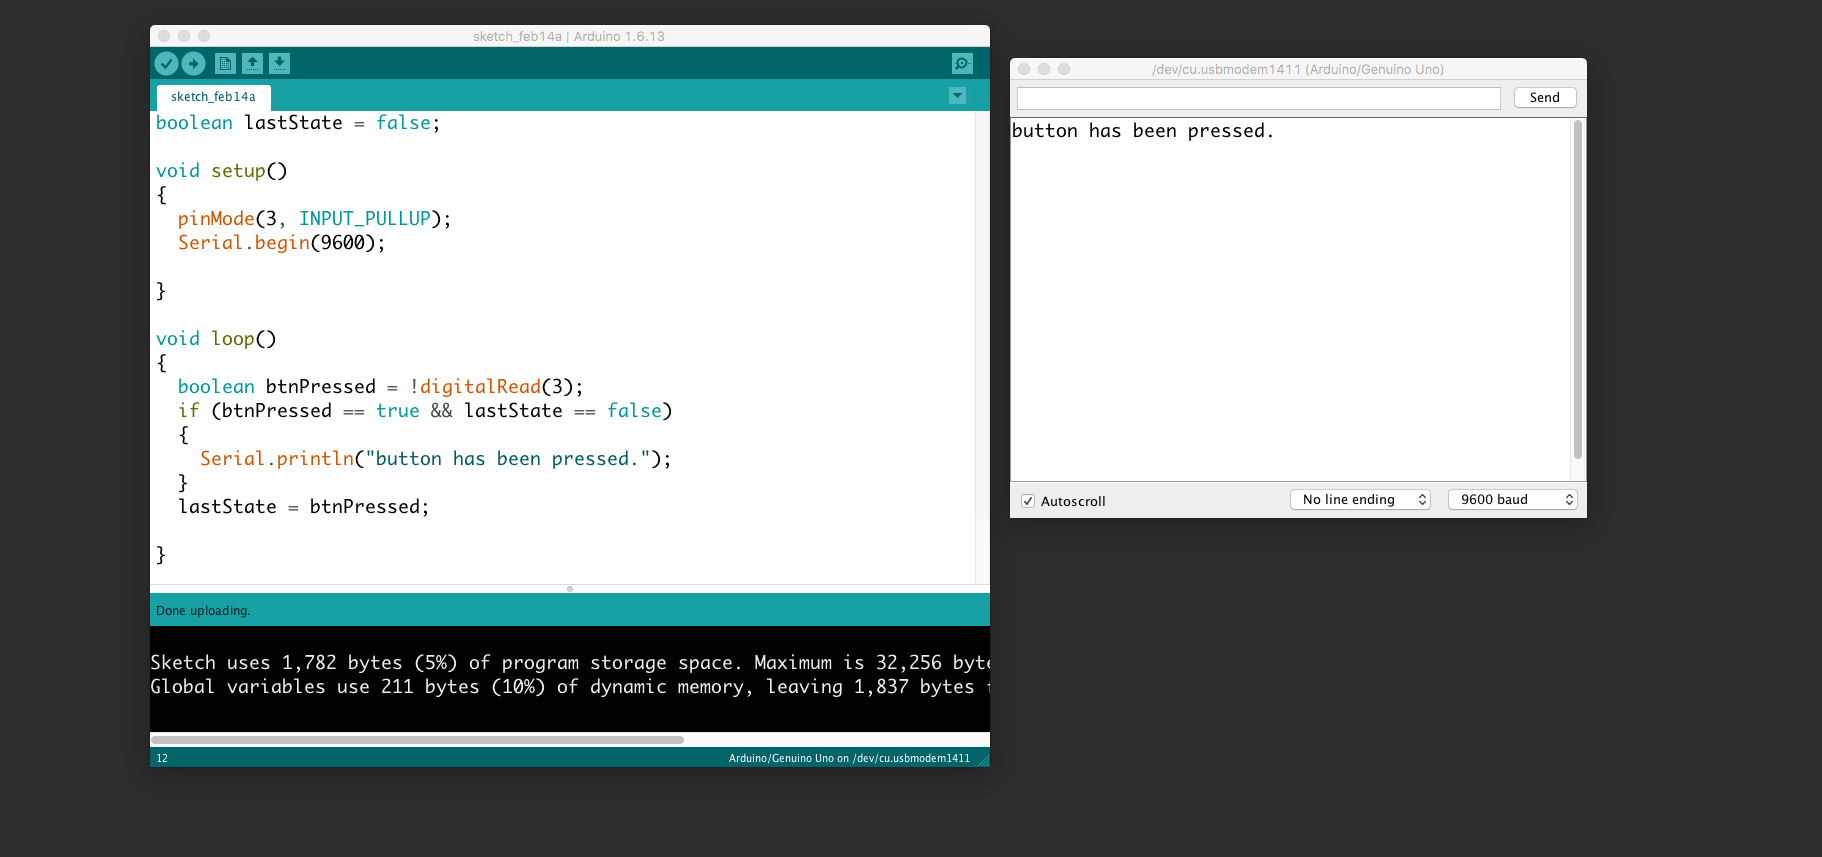
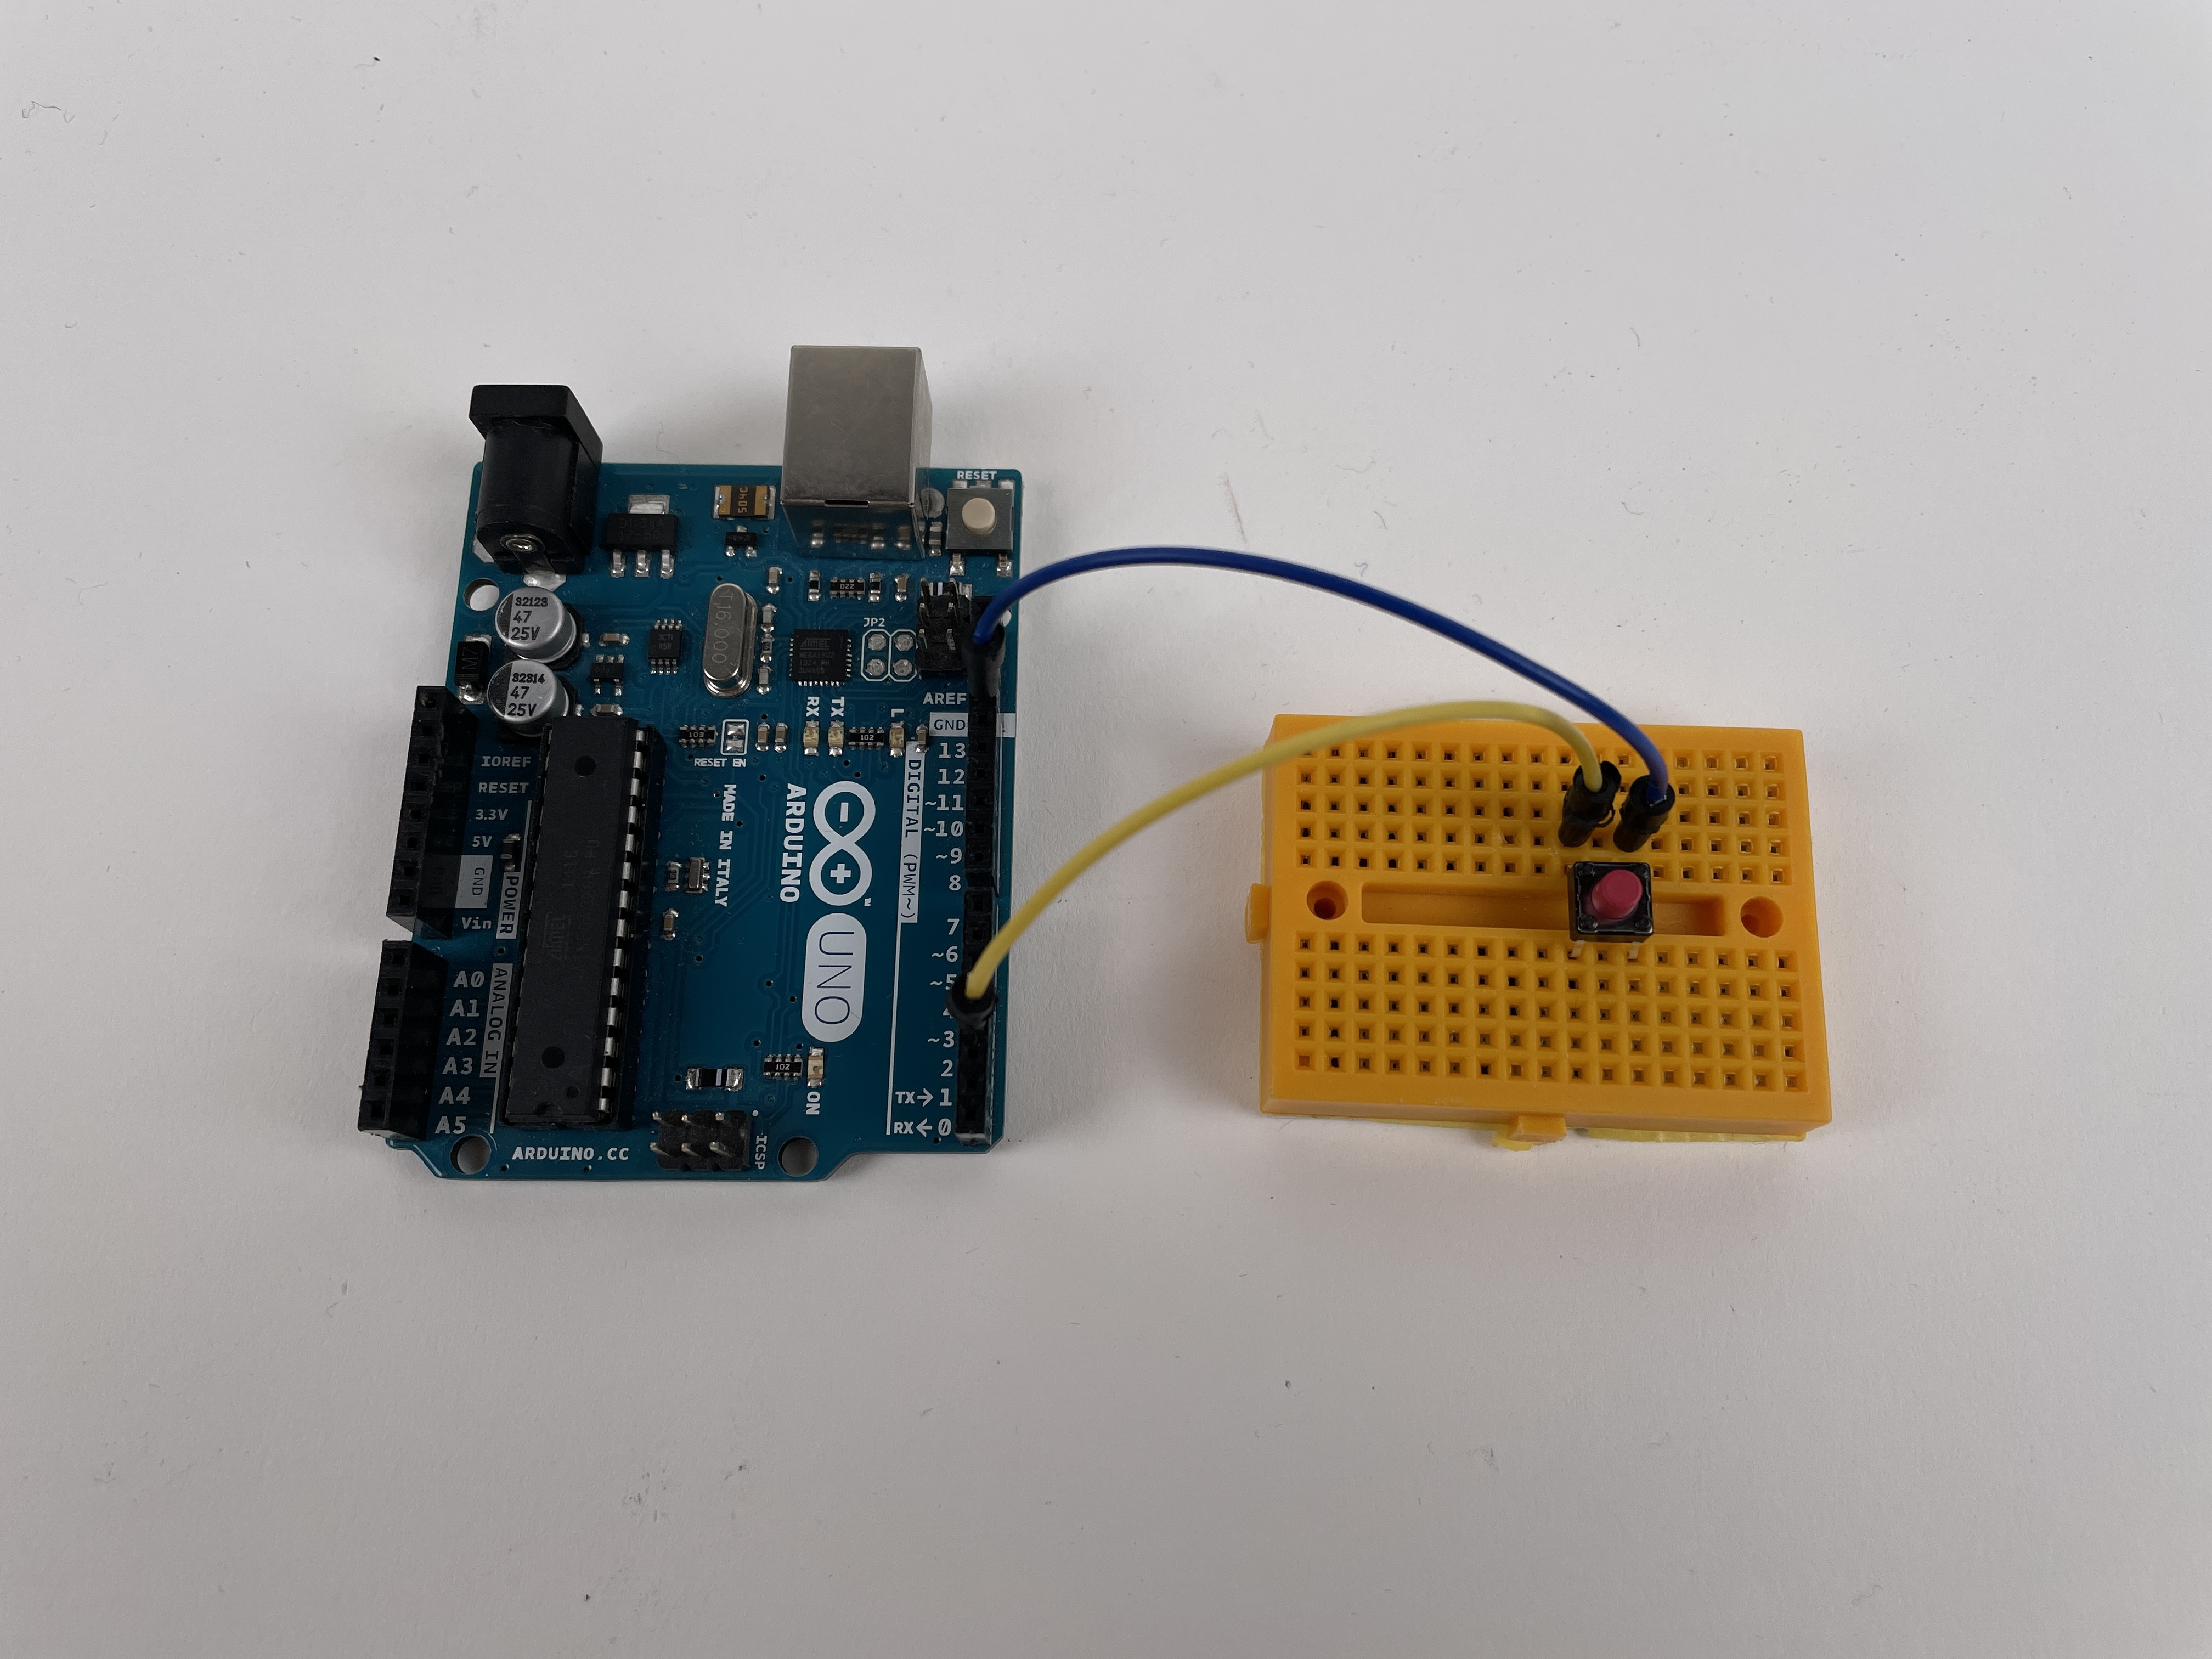
The event of pressing the button. Use the same wiring as above.
  boolean lastState = false;

  void setup()
  {
    pinMode(3, INPUT_PULLUP);
    Serial.begin(9600);

  }

  void loop()
  {
    boolean btnPressed = !digitalRead(3);
    if (btnPressed == true && lastState == false)
    {
      Serial.println("button has been pressed.");
    }
    lastState = btnPressed;

  }
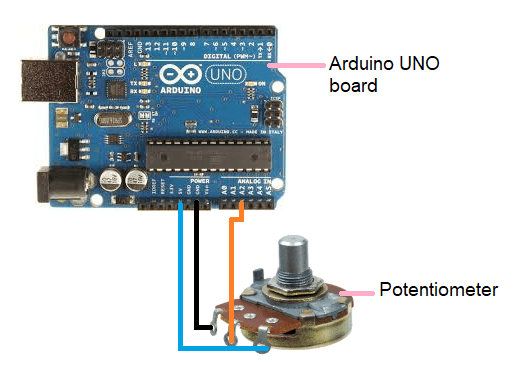
Potentiometer
A potentiometer is a simple mechanical device that provides a varying amount of resistance when its shaft is turned. By passing voltage through a potentiometer and into an analog input on your board, it is possible to measure the amount of resistance produced by a potentiometer (or pot for short) as an analog value. In this example you will monitor the state of your potentiometer after establishing serial communication between your Arduino and your computer running the Arduino Software (IDE). (Text from: https://docs.arduino.cc/built-in-examples/basics/AnalogReadSerial)
Wiring:
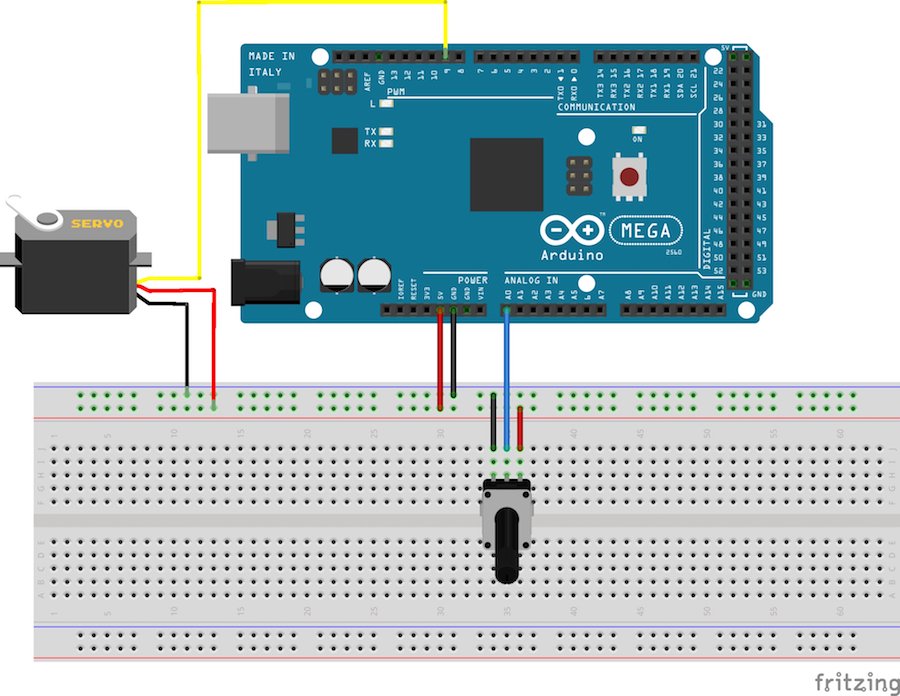
Servo
Using a potmeter to control a servo
Now the input is a potmeter which is a "volume knob" - a variable resistance, which we can read into the Arduino board as an analog value (read more here).
Servos are motors in which their position can be controlled. They have an action radius of 0 to 180 degrees. Some servos are "hacked" to be continuous. They will rotate 360 degrees, but cannot be positioned. They are then able to move in a controlled speed and direction. Orange and white wire is signal and should be connected to pin digital pin9.
Circuit
Code
/*
 Controlling a servo position using a potentiometer (variable resistor)
 by Michal Rinott <http://people.interaction-ivrea.it/m.rinott>

 modified on 8 Nov 2013
 by Scott Fitzgerald
 http://www.arduino.cc/en/Tutorial/Knob
*/

#include <Servo.h>

Servo myservo;  // create servo object to control a servo

int potpin = 0;  // analog pin used to connect the potentiometer
int val;    // variable to read the value from the analog pin

void setup() {
  myservo.attach(9);  // attaches the servo on pin 9 to the servo object
  Serial.begin(9600);
}

void loop() {

  val = analogRead(potpin);            // reads the value of the potentiometer (value between 0 and 1023)
  val = map(val, 0, 1023, 0, 90);     // scale it to use it with the servo (value between 0 and 180)
  Serial.println(val);
  myservo.write(val);                  // sets the servo position according to the scaled value
  delay(15);                           // waits for the servo to get there
}
