Controlling the Mi Light from Arduino or NodeMCU
The Mi Light bulbs are one attempt on the intelligent home in which you control our devices through your smart phone. Hacking the protocol enables us to start eperimenting with internet of things and smart homes in new ways. Henryk Plötz did a good job of reverse enginering the protocol and write some basic code to control it. Unfortunately the code is not well documented at the moment. We took the time to trace his steps and write some beginner friendly code.
Update we have now ported the code to NodeMCU as well. Se below.
This is a basic guide for setting things up. You will need:
- Milight rgbw bulb.
- Milight wifi bridge.
- Arduino Board.
- nRF24L01 breakout board (can be found on ebay).
Steps:
- Pair your milight with the gateway so you can control the light with your phone.
- Wire the nRF24 to the Arduino board (see diagram below).
- Install nrf24 library through the "add library feature" of Arduino.
- Upload Arduino code to the board.
- Download guino from this instructables
- Run Guino.
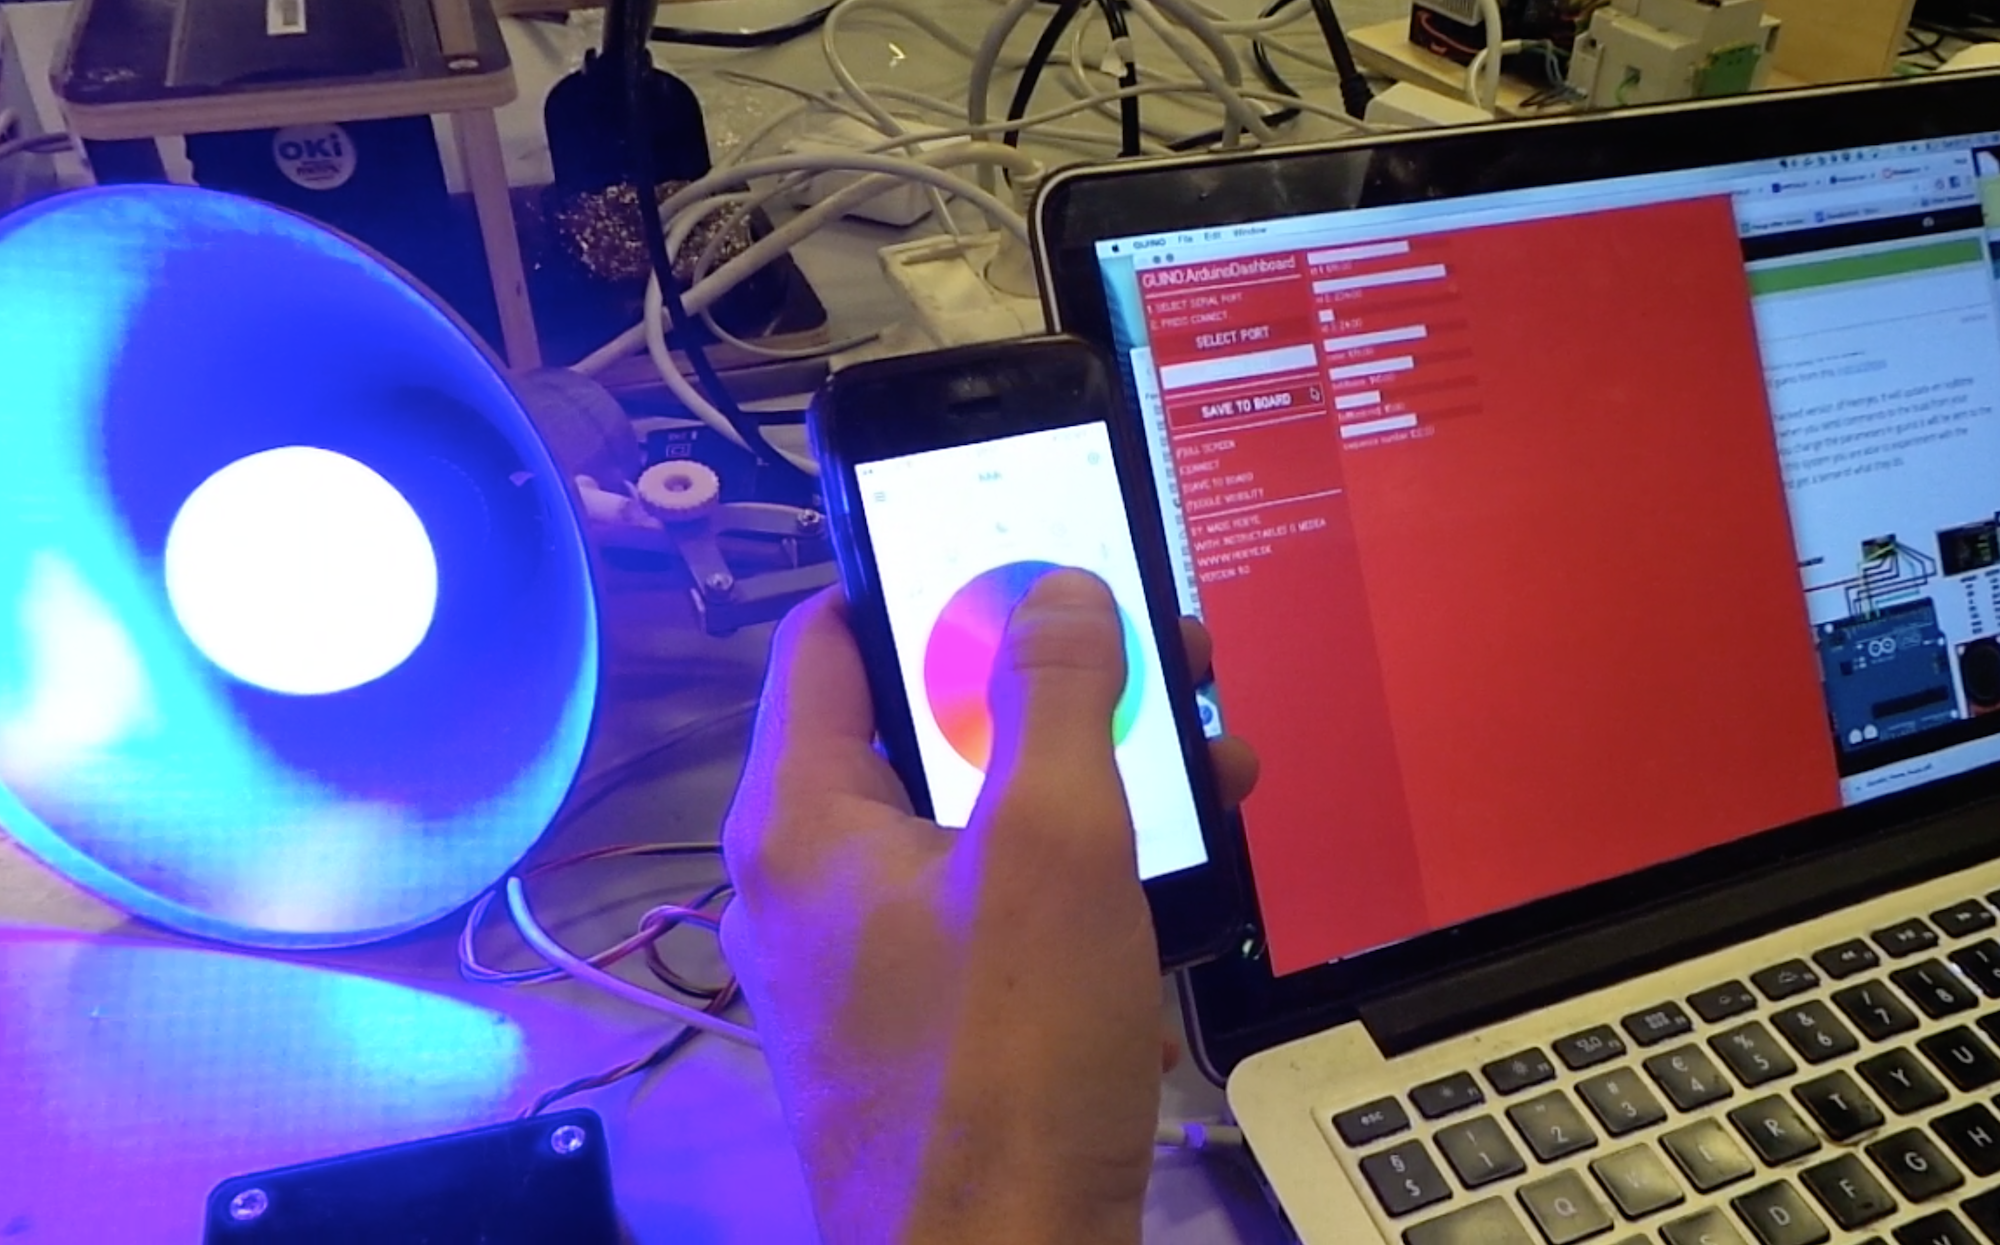
- Use your phone to change the light and watch the parameters change.
- Change the parameters in Guino to verify that you can control the data from Arduino.
This code is a hacked version of Henryks. It will update en realtime through guino when you send commands to the bulb from your phone and if you change the parameters in guino it will be sent to the buld. Through this system you are able to experiment with the parameters and get a sense of what they do.
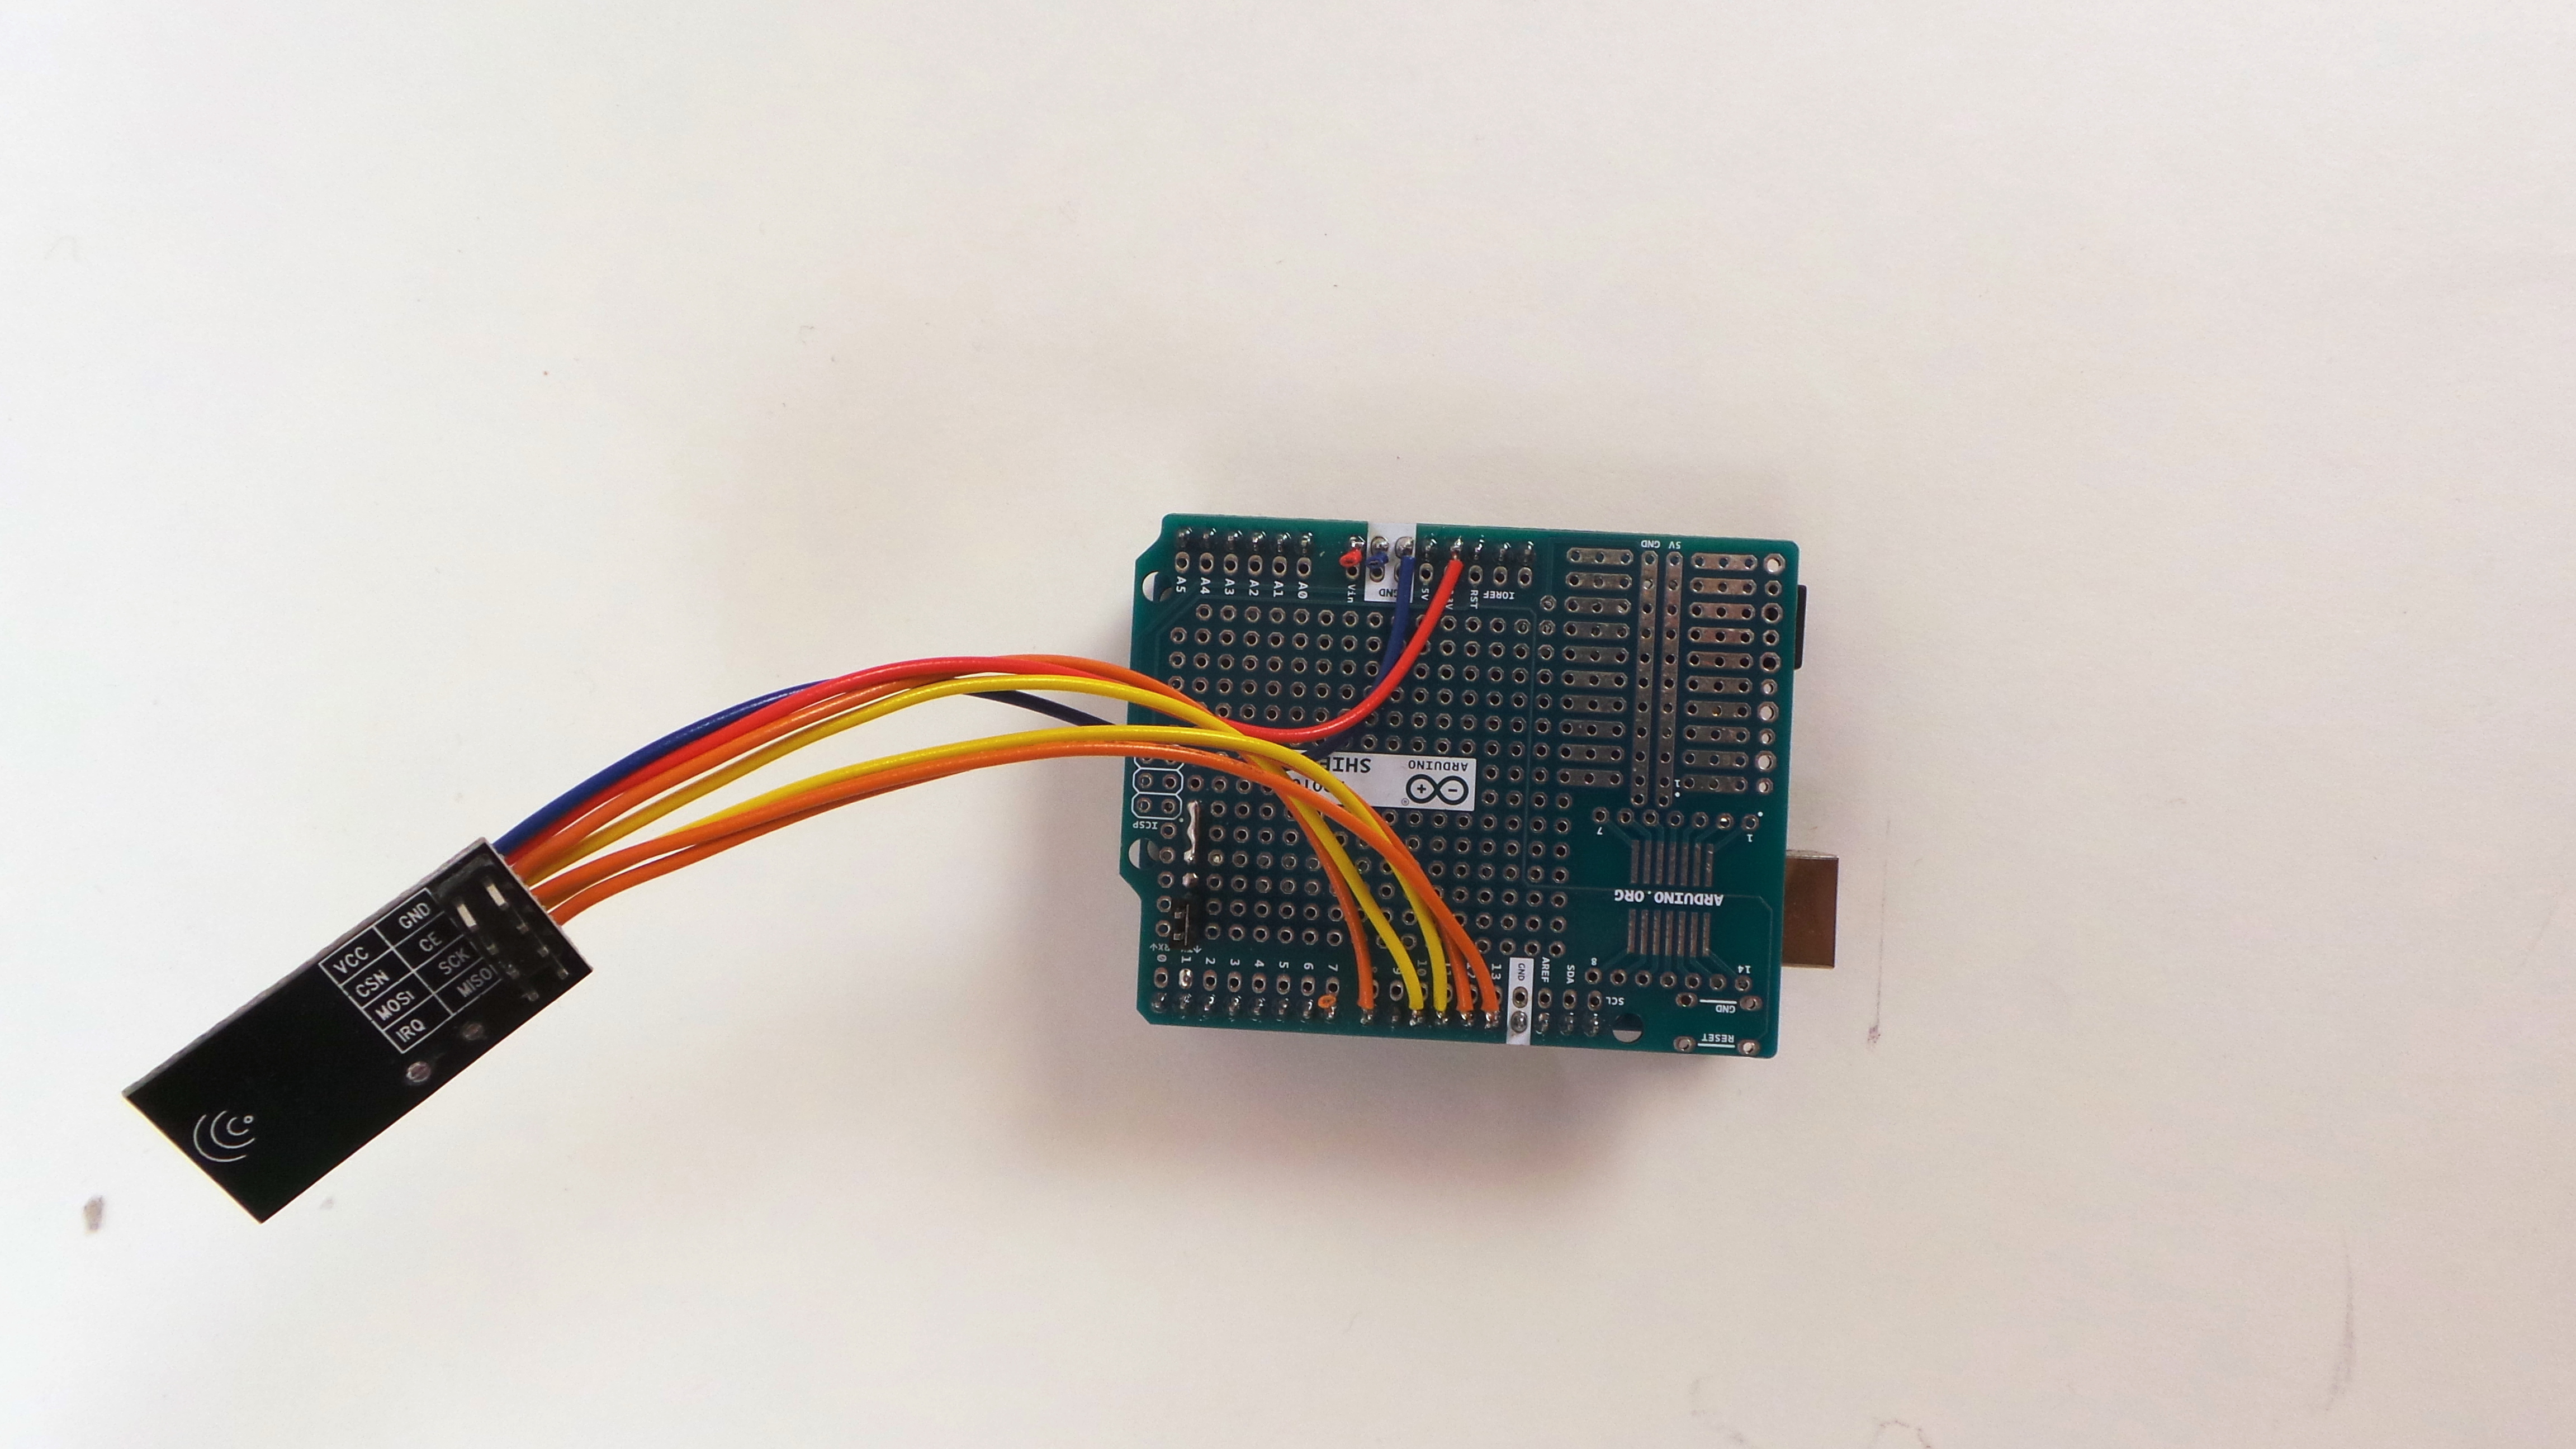
Wiring
![]()
Diagram from. Compared to the diagram and our code the CE pin and CSN pin is different - change the wiring or change the code:
#define CE_PIN 8
#define CSN_PIN 10
This is our setup:
Limitations
The design of the bulbs seems really good for a cheap china product. The protocol is however limited to color and brigthness (saturation is missing) which means that it is not 16 million colors as advertised. There might be a trick to control RGB through the protocol that we have not found. If you figure this out - please let us know :)
The protocol is completely unsecure. Anybody can hook up the Arduino board as described above and start to control the light.
Protocol
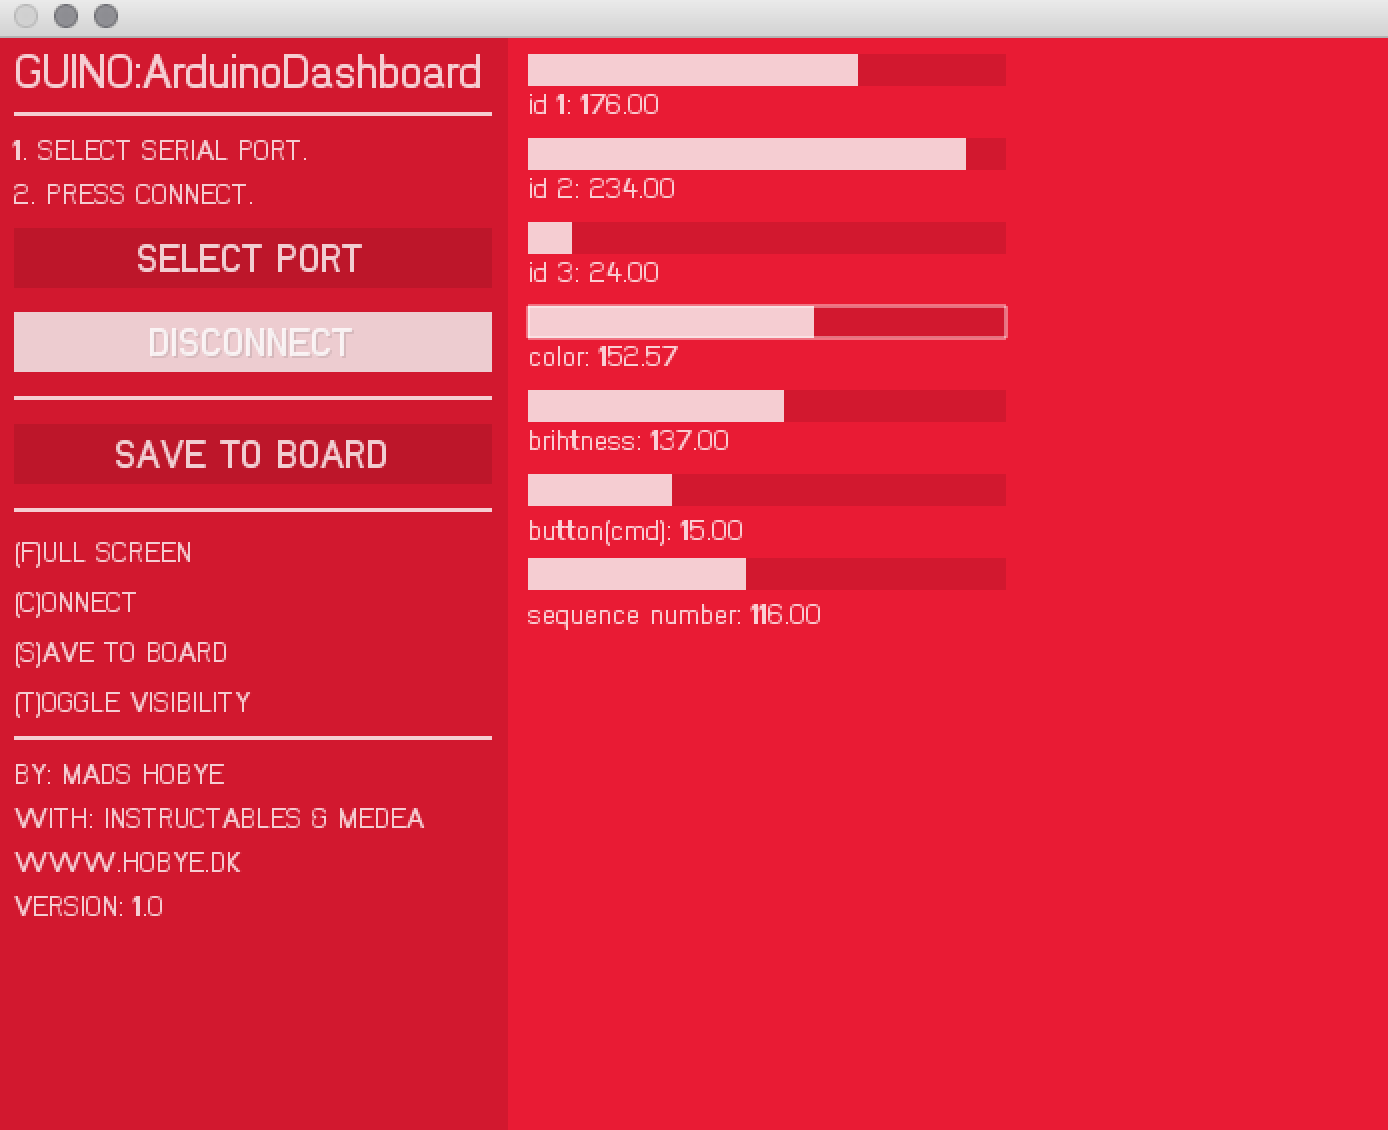
The protocol in Henryks case consists of 7 bytes. Each byte has a different purpose:
 "B0 F2 EA 6D B0 02 f0"
   |        |  |  |  |
   |        |  |  |  sequence number
   |        |  |  Button_of_Remote
   |        |  brightness
   |        color
   ID_of_Remote (3 byte)
In our example we have converted the hex values to integers. Be aware that the id of the remote (the first 3 bytes) are crucial for the light to respond.
Links
Links to other peoples progress and other solutions:
https://hackaday.io/project/5888-reverse-engineering-the-milight-on-air-protocol
http://torsten-traenkner.de/wissen/smarthome/openmilight.php
https://github.com/henryk/openmili
https://github.com/Xento/node-milight-rf24
NodeMCU/esp8266 version
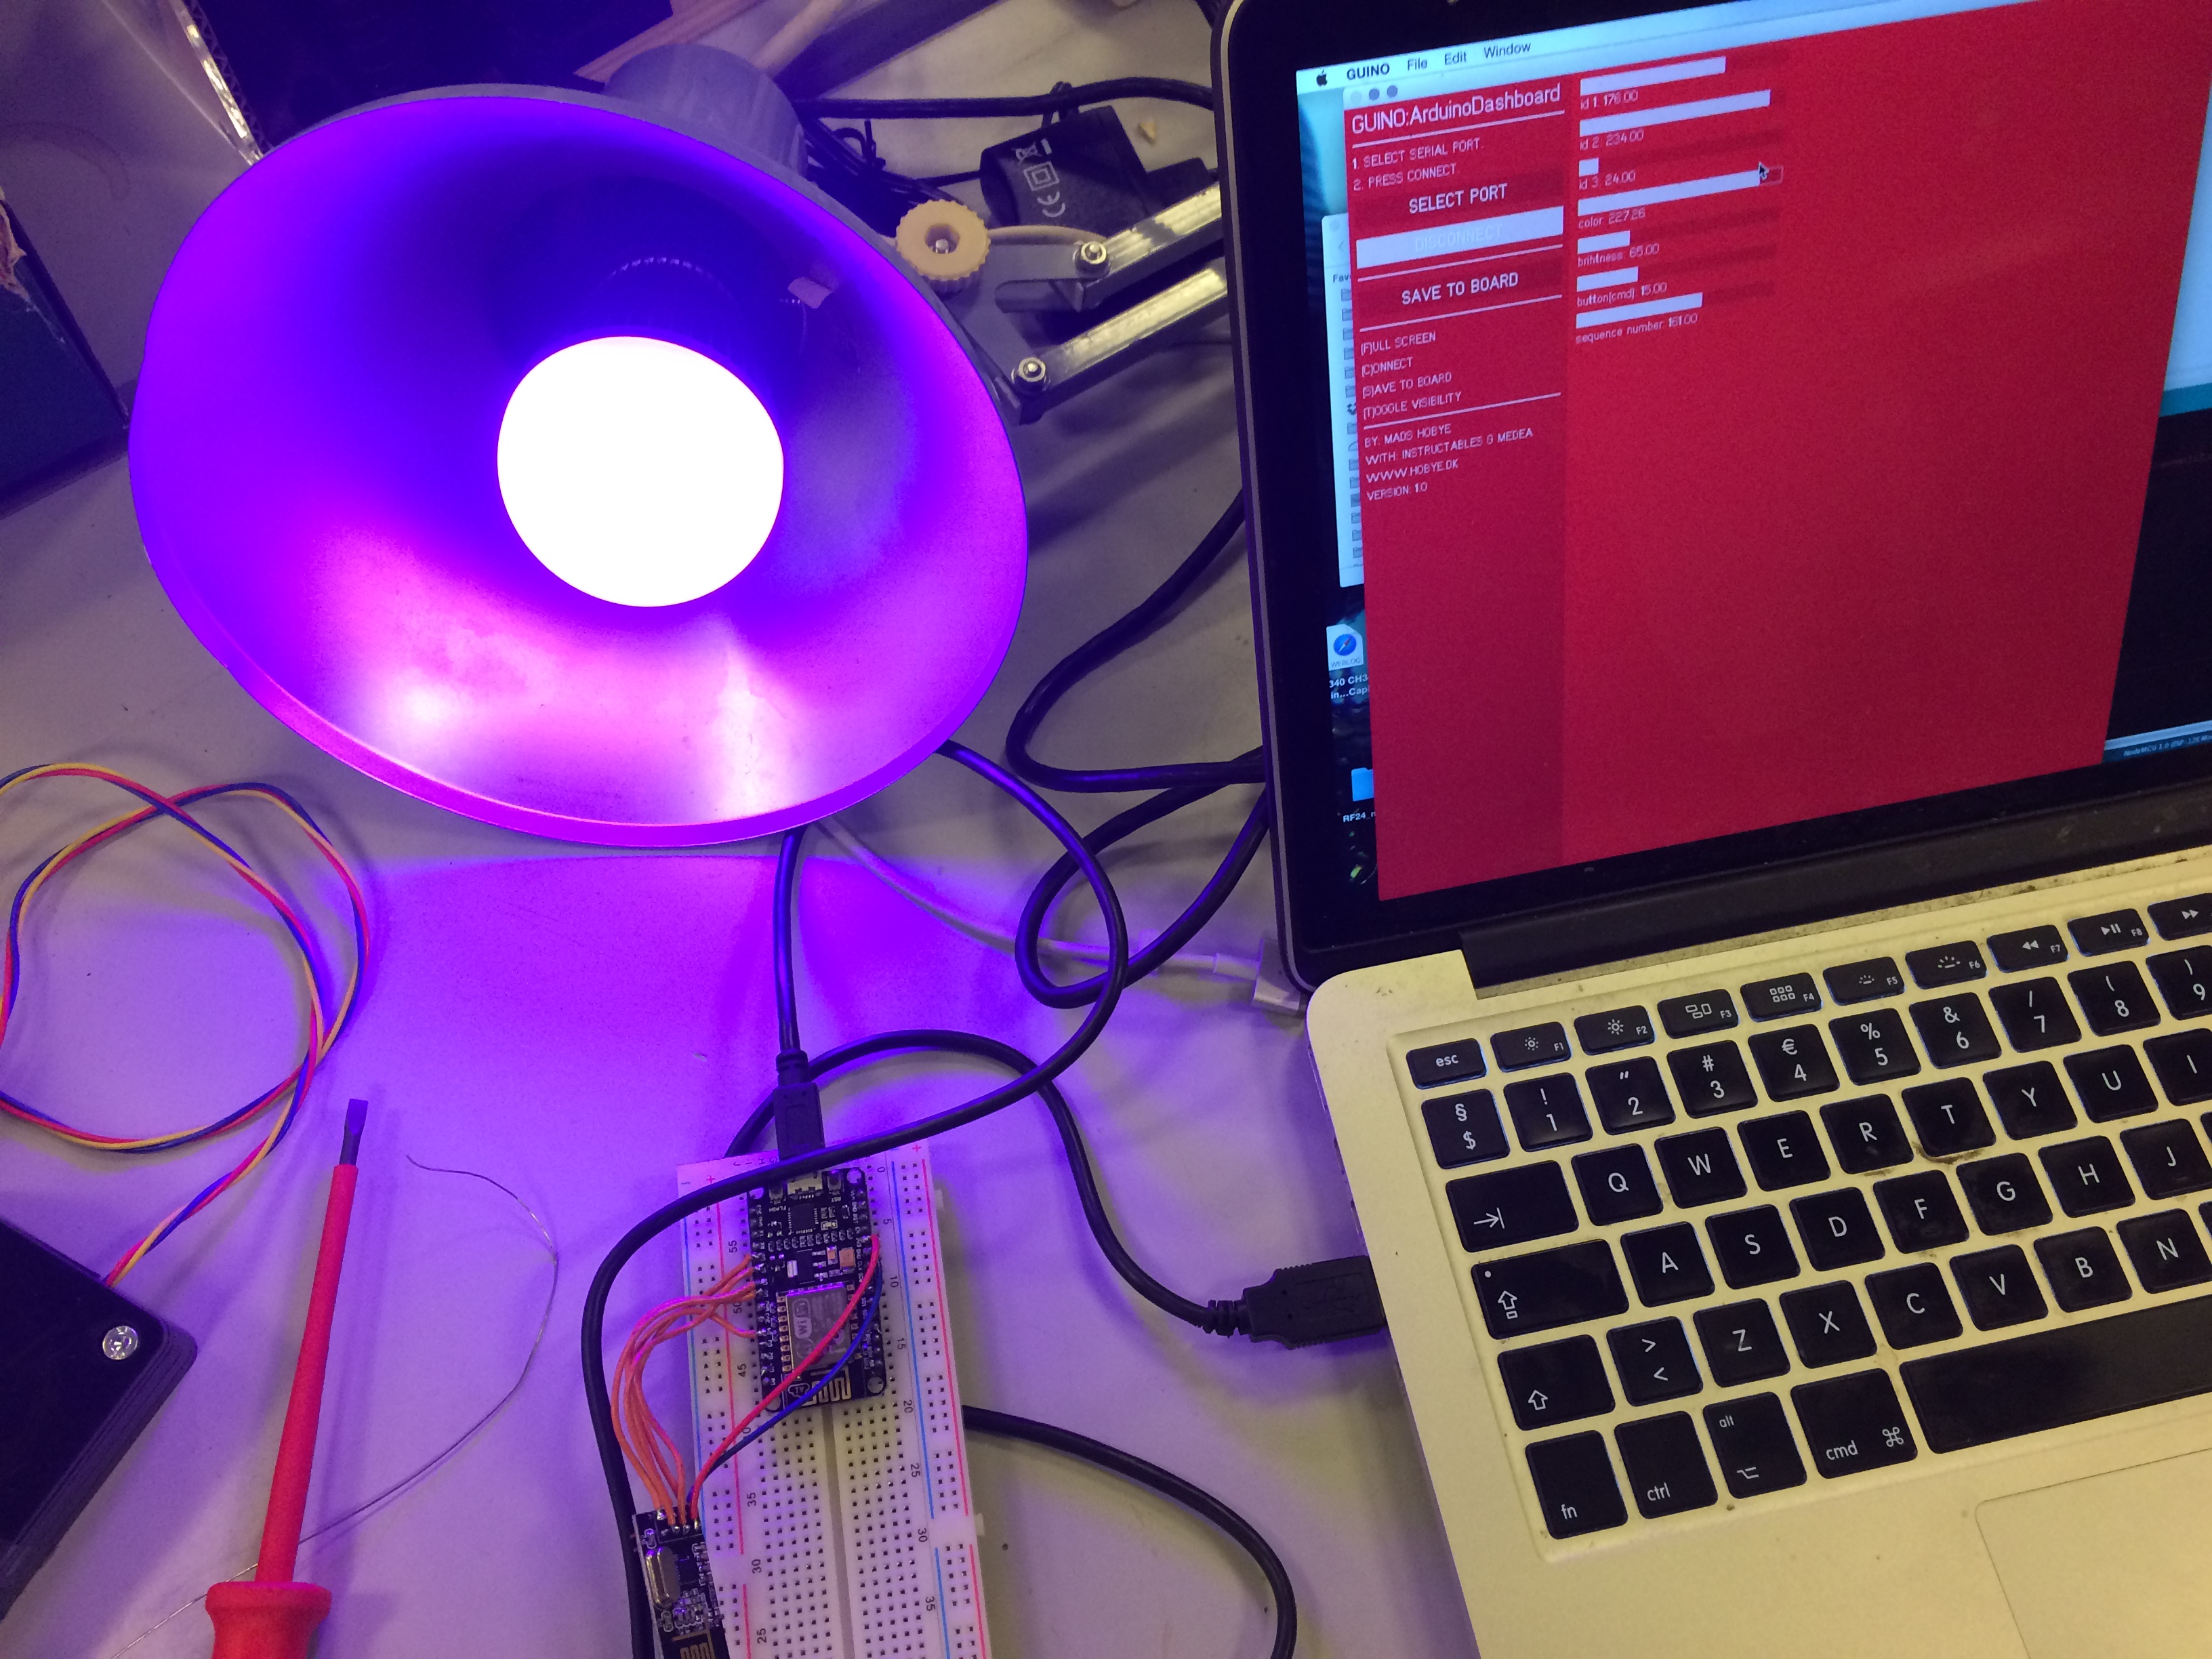
The solution is pretty much the same.
- Use Esp Arduino.
- Download the latest NRF24 library from github
- Download the code
- Upload it to your NodeMCU board.
Diagram for wiring the SPI connections:
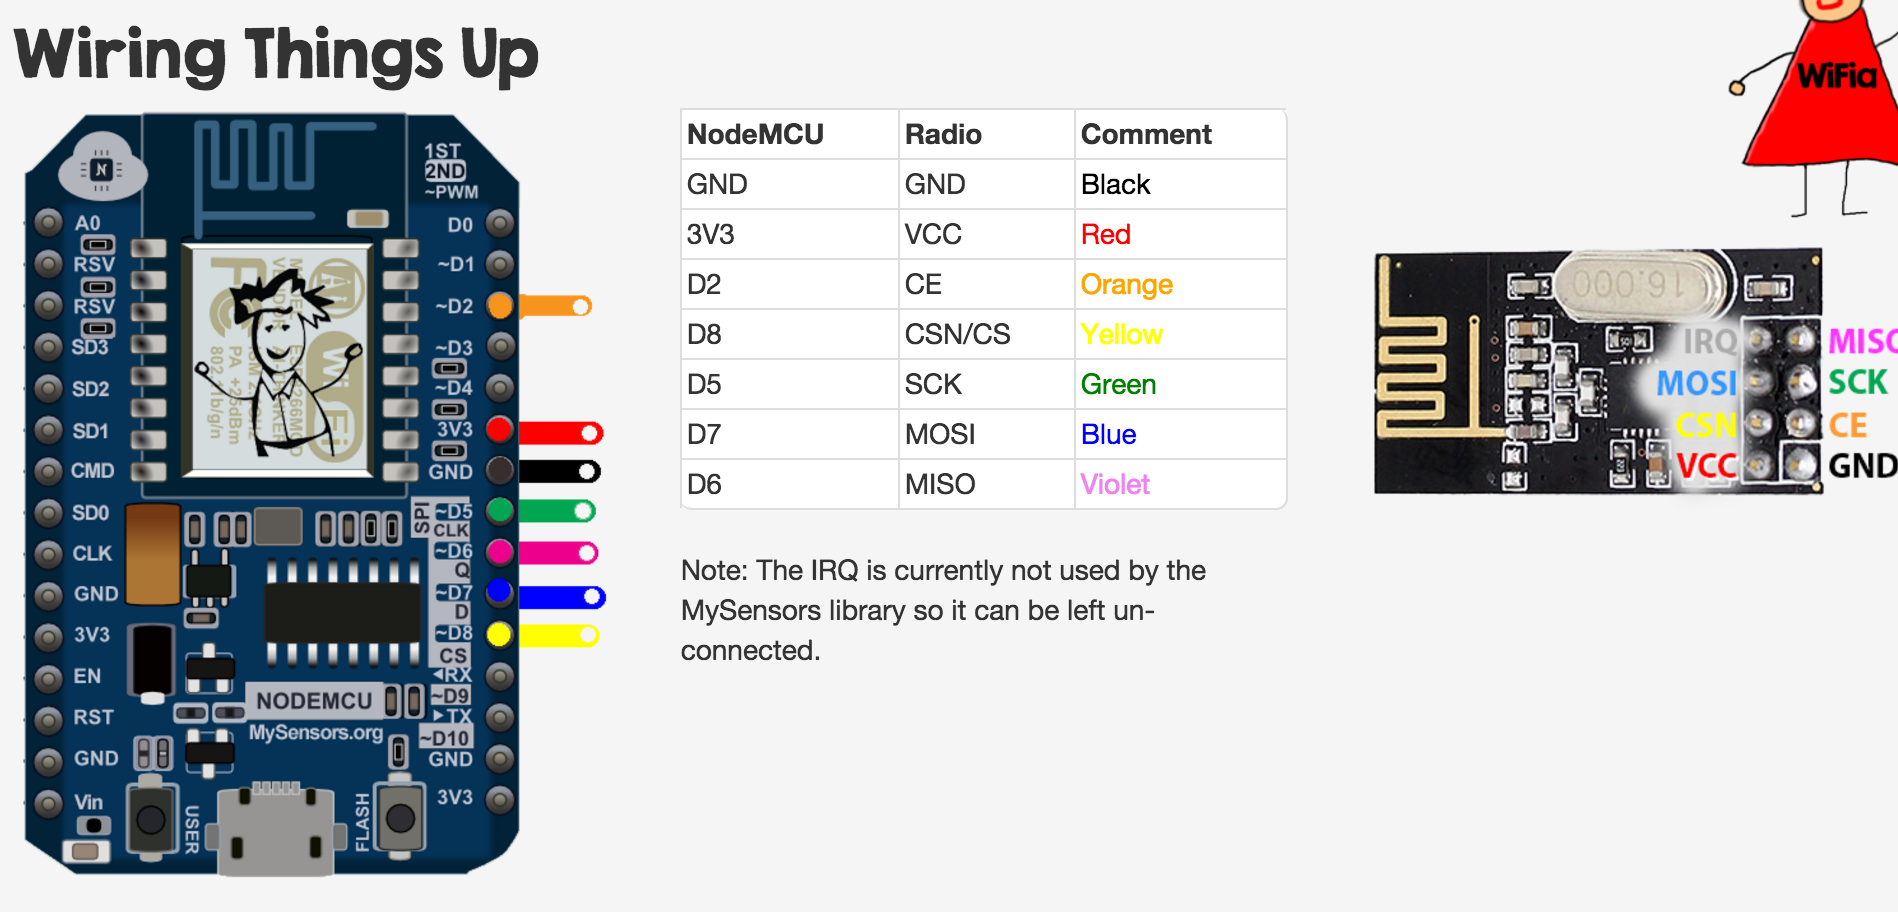 Image/wiring credit: http://www.mysensors.org/build/esp8266_gateway
