Yeastogram
This is adopted from the Yeastogram project, by Pavillion 35, an "bioart" group in Vienna. You can find their complete recipe here. See photos on the yeastogram tumblr blog.
Content
Growth medium
Cultivating Yeast
Stensils
UV_light box
Growth medium
Making and sterilising growth medium and agar plates.
Presentations / theory
Slide show with Mediums, Nutrients & Sterilisation presentation
DIYagar medium for yeast/fungi cultivation
- Sugar 20-100 g/L
- Malt extract 20 g/L
- Agar-Agar 15 g/L
Variations
- Yeast extract marmite instead of malt extract 10-20 g
- Milk powder 10-20 g (To make it white, for dark bacteria and as lactose carbon source)
- Active coal to make it black 0,45-2 g /L
- Food colors
Preparation:
- Mix all ingredients several 500 ml pickling jars.
- Final ph should be 5,5. If not titrate with a bit of acid or base.
- Sterilise them in a pressure cooker or autoclave at approx 120 C in 20 min.
- poor the agar plates into petri dishes, using sterile techniques. Thus next to a flame at a clean table or in a laminar flow bench (LAF-bench) if available. To create the best prints, fill the agar plates quite a lot, such that the print and the agar is close to each other.
You can by commercial ready mix media from laboratory supplier companies. you can get media specialised for fungi, yeast and bacteria.
Equipment list:
- Microwave Oven
- Kitchen Gloves
- Pressure Cooker / pot
- Cooker Hotplates
- Log Book (Establish a quality control scheme by using the power of protocols.)
- Precision Scale
- Drigalski-Spatula (or similar)
- Spoons
- Gas burner or Camping Gas Cooker (Beware of carbon monoxide and open fire, make sure that the room is sufficiently ventilated and that there is a fire extinguisher prepared!)
- Rubbergloves
- Measuring Cup
- Pickling jars (500 ml) / Bluecap flasks (Laboratory Bottle)
- Funnel
Lab spendables
- Ethanol for cleaning and sterilisation of working surfaces and equipment.
- Kitchen Roll
- Petri dishes
Cultivating Yeast
When the agar plates have cooled down. Dissolve some fresh bakers yeast in a little sugar water and spread it on the entire surface of the agar plates, using a Drigalski-Spatula, or just a bend piece of metal sterilised on a flame.
Incubate the plates at 20-35 degrees celcius.
Stensils
How to rasterise or trace an images in Inkscape Based on an inkscape tutorial
Find the trace bitmap function under the Path menu, and play around with the settings. Read the tutorial if needed.
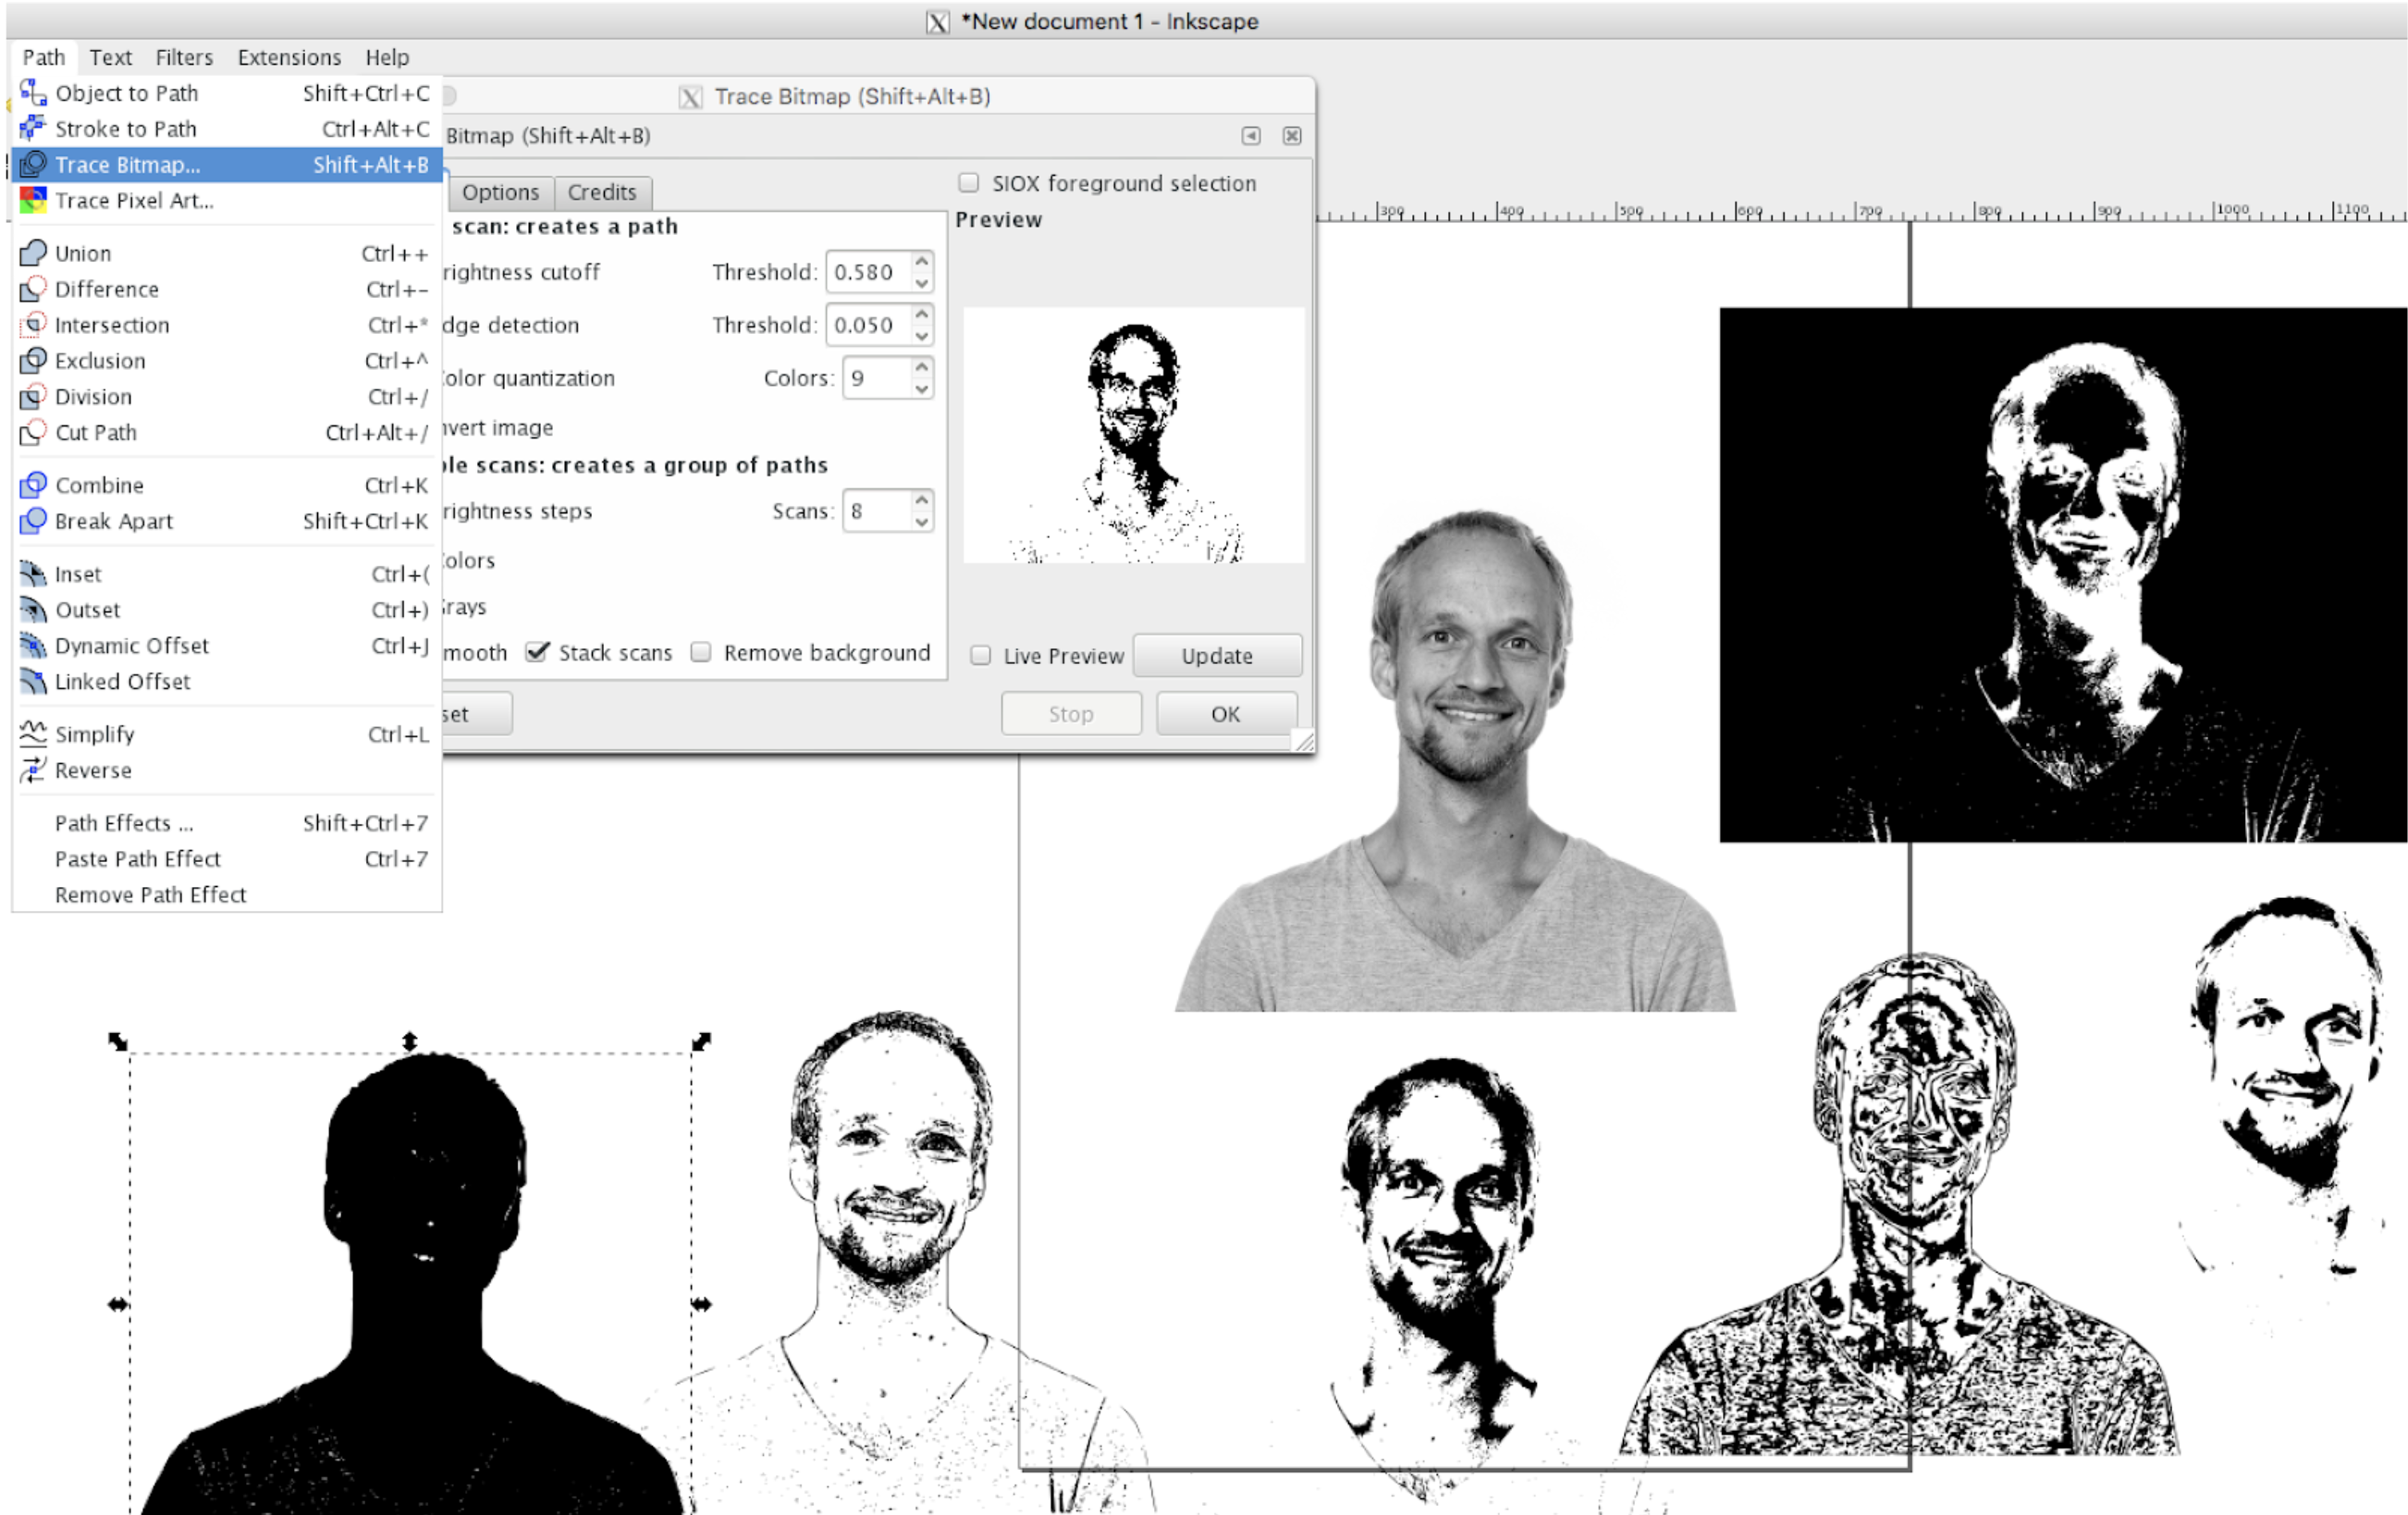
To create the best image you rasterised print, not gray scale.
UV_light box
The screen print is made by mounting a UV-LED on top of the agar plate with the mounted artistic design.
We use the LED: PM2L-1LLE-LC use 4V. It's 410 nm and 350 mA, approx 500 mW with a light angle of 130 degrees.
See the design and mounting from the images below.
IMAGE OF BOX
IMAGE OF LED mounted on the print
ADD BOX FILE FROM USB KEY
ADD VECTOR Surface mount DESIGN FILE FROM USB KEY
Incubating
Mount everything and leave the agar plate with yeast exposed with the UV light for 24h at 25-30C. and then leave to incubate with out the UV-ligt.
[Header photo @yeastogram on instagram]
