More elegant CNC dogbones
By Nicolas Padfield nicolasp (at) ruc.dk Fablab RUC
fusion 360 dogbone script, cnc box joints, dog bone joint, cnc joinery, cnc sharp inside corners,
cnc router inside corners, cnc router box maker, undercut, mickey mouse ears, tbones, t-bones
Several people asked us how we do the finger joints without visible dogbones - and almost all the users who come here with pre-designed dogbones seem to make them really big and obvious - we wondered why.
When cutting materials with the CNC, a known problem is that while the CNC can make a perfect outer corner, the inner corners can never be more sharp than the diameter of the cutting tool. So if you are e.g. using a 6mm mill, all the inside corners will not be perfect right angles, but will instead have an inside diameter of 3 mm (half the cutting tool's diameter) Sometimes these small rounded corners don't matter, but they are almost always an issue with joints - where often another piece of plywood, which by nature is square, must fit precisely in a hole or slot. If the hole or slot has very rounded corners, the mating piece just isn't going to fit in.
An example is the above finger box, lots of joints with inside corners that have to be square, not round.
There is a solution to this, called dogbones. You can see why they are called this below.
Many people (and software) make very obvious dogbones, but it is in fact (with a 3 mm mill) possible to make almost invisible dogbones.
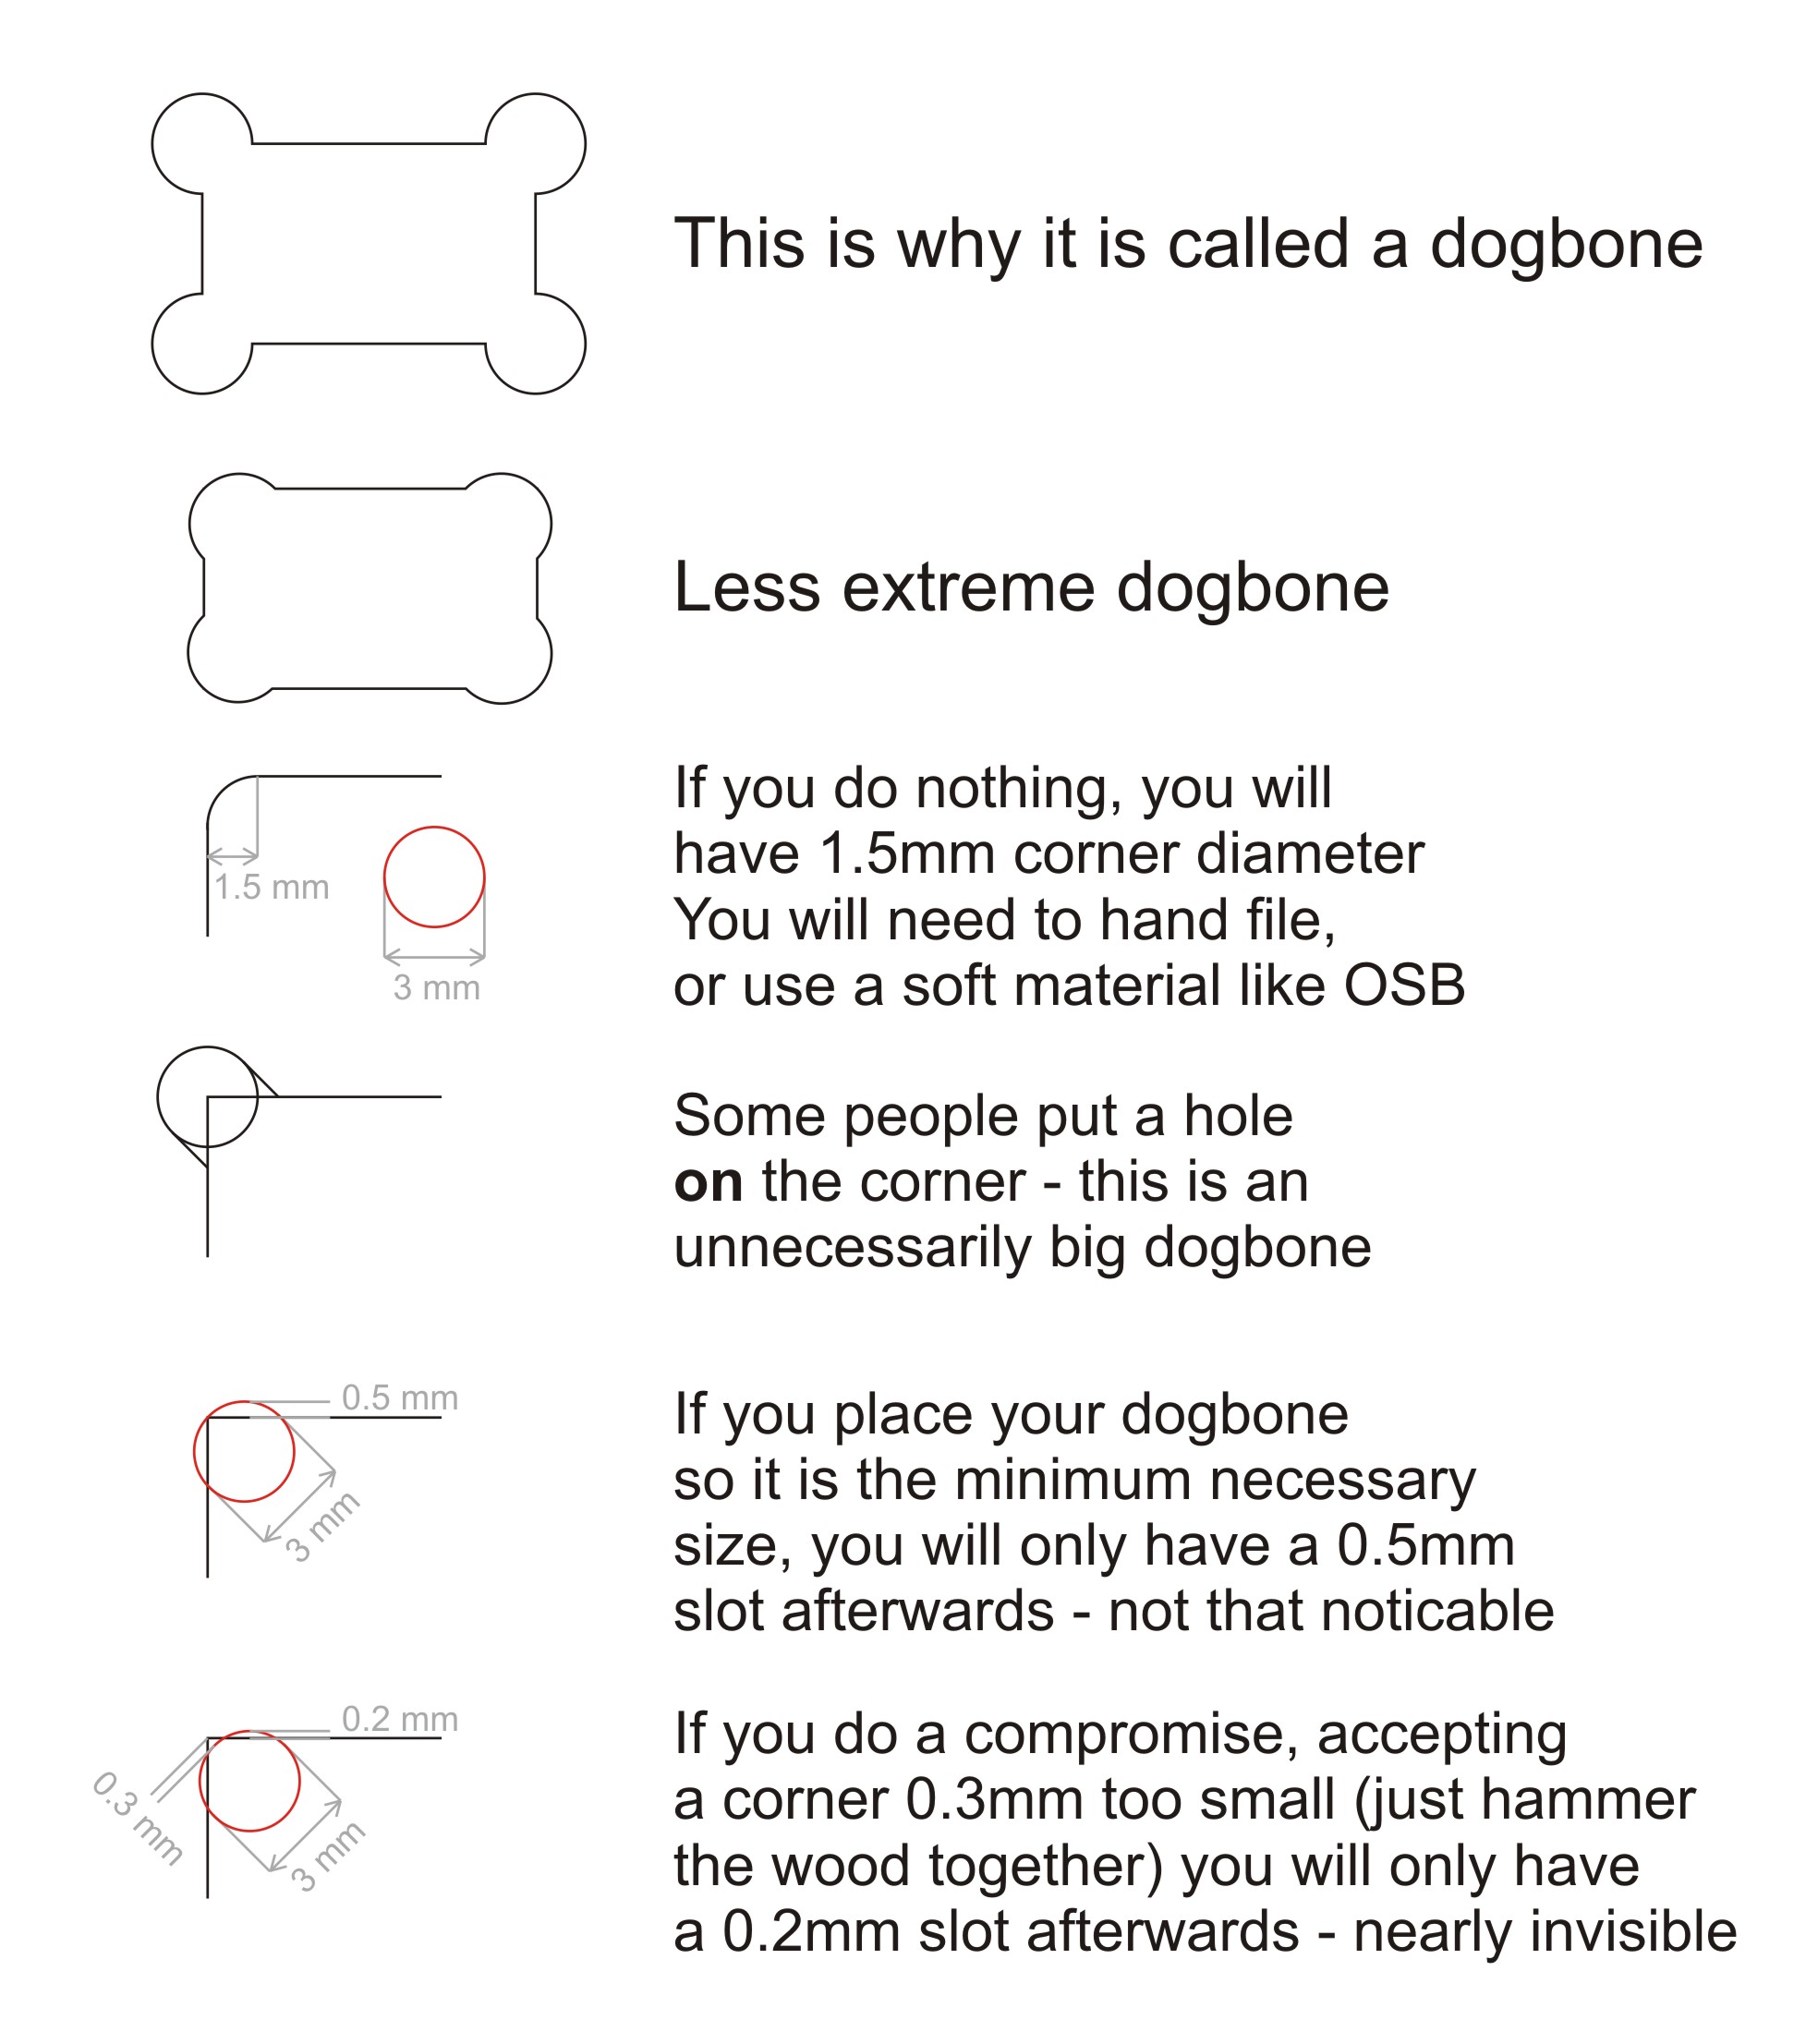
As we show above, by taking the tool just to the corner, you can make quite unobtrusive dogbones. If you take the tool just 0.3 mm shy of the corner, you can make almost invisible dogbones - this no one else seems to be doing. It often even has the advantages that the friction holds your join well enough that you do not need to glue it, or can hold while you are gluing it.
Another solution is to hand file the inner corners square (we do that quite often - it is quite quick - if one is only making one of something, it takes no longer to file the 1.5mm radius inner corners square than it takes to draw the dogbones). So we mainly draw dogbones if we are doing several of something and manufacturing time is an issue.
Another solution is to use soft materials - OSB is soft enough that one can just hammer it together without worrying abount inner corner radius (with a 3mm mill).
At Fablab RUC, we use a 3 mm mill for almost all wood work. We only go up in size if we need to cut something so thick (over 12mm) that a 3 mm tool in that length is not available. So above 12 mm, we use a 5 mm mill, which can cut up to 24 mm thickness, and we don't cut anything thicker than that. The only process we support as painless for new users is max 12 mm thick, with a 3 mm mill.
OBS if you are using LazyCAM, make sure to make your dogbones with 3.2 mm diameter, not 3 mm or LazyCAM may remove them.
 Different looks, modeled in Fusion 360.
1: minimal dogbones (that go all the way to the corner)
2: the unnecessarily large dogbones we see other people making
3: hiding the dogbones by making the joint "blind" - leaving 2-3mm material to hide the dogbones from the outside
4: another placement of the dogbones, called T-bones, which many find aesthetically pleasing as a "style"
The compromise minimal dogbones with 0.2 mm gap are not shown modeled, as the point is that in the real world one can't really see them.
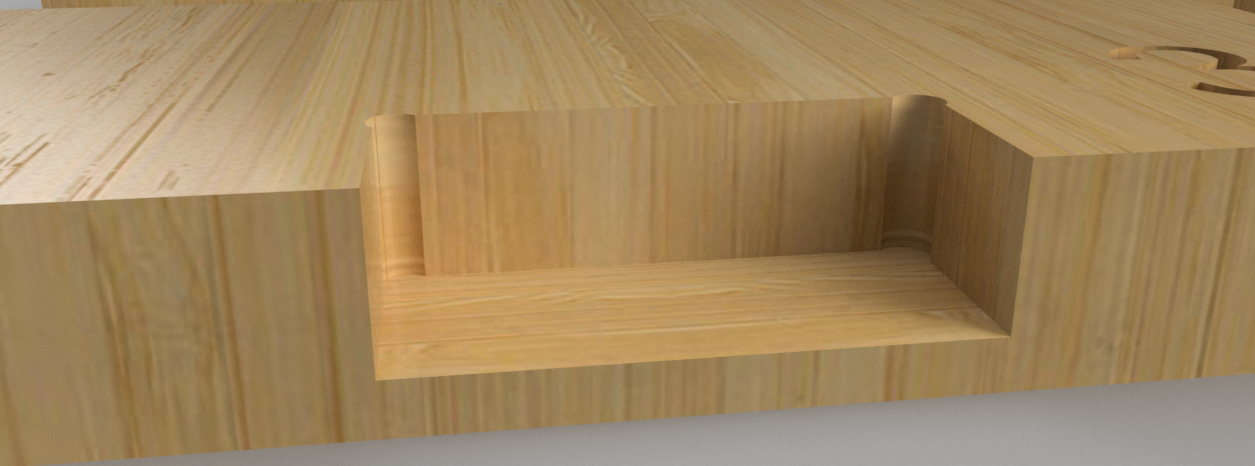 A "blind" box joint (rendered, Fusion 360)
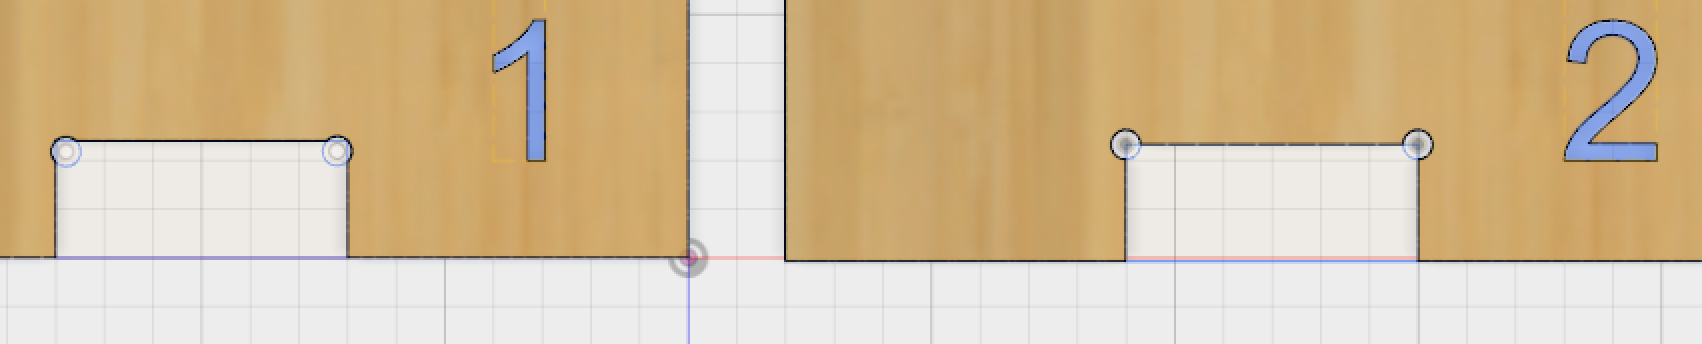 Difference seen from above
If you want to try software that automatically adds dogbones, the best bet at the moment is this plugin for Fusion 360:
https://github.com/DVE2000/Dogbone
(previous solutions: youtube video | recent fork of the plugin | original plugin )
