Laser Cutter Rotary Tool
The rotary tool can be used in conjunction with any of the CO2 lasers to engrave glass bottles, vases, or anything cylindrical. Essentially, it works by converting movement in the laser cutter's y-axis from translational to rotational motion, without the need to change the machine at all! The only limitation is that it can only be used in scan mode.
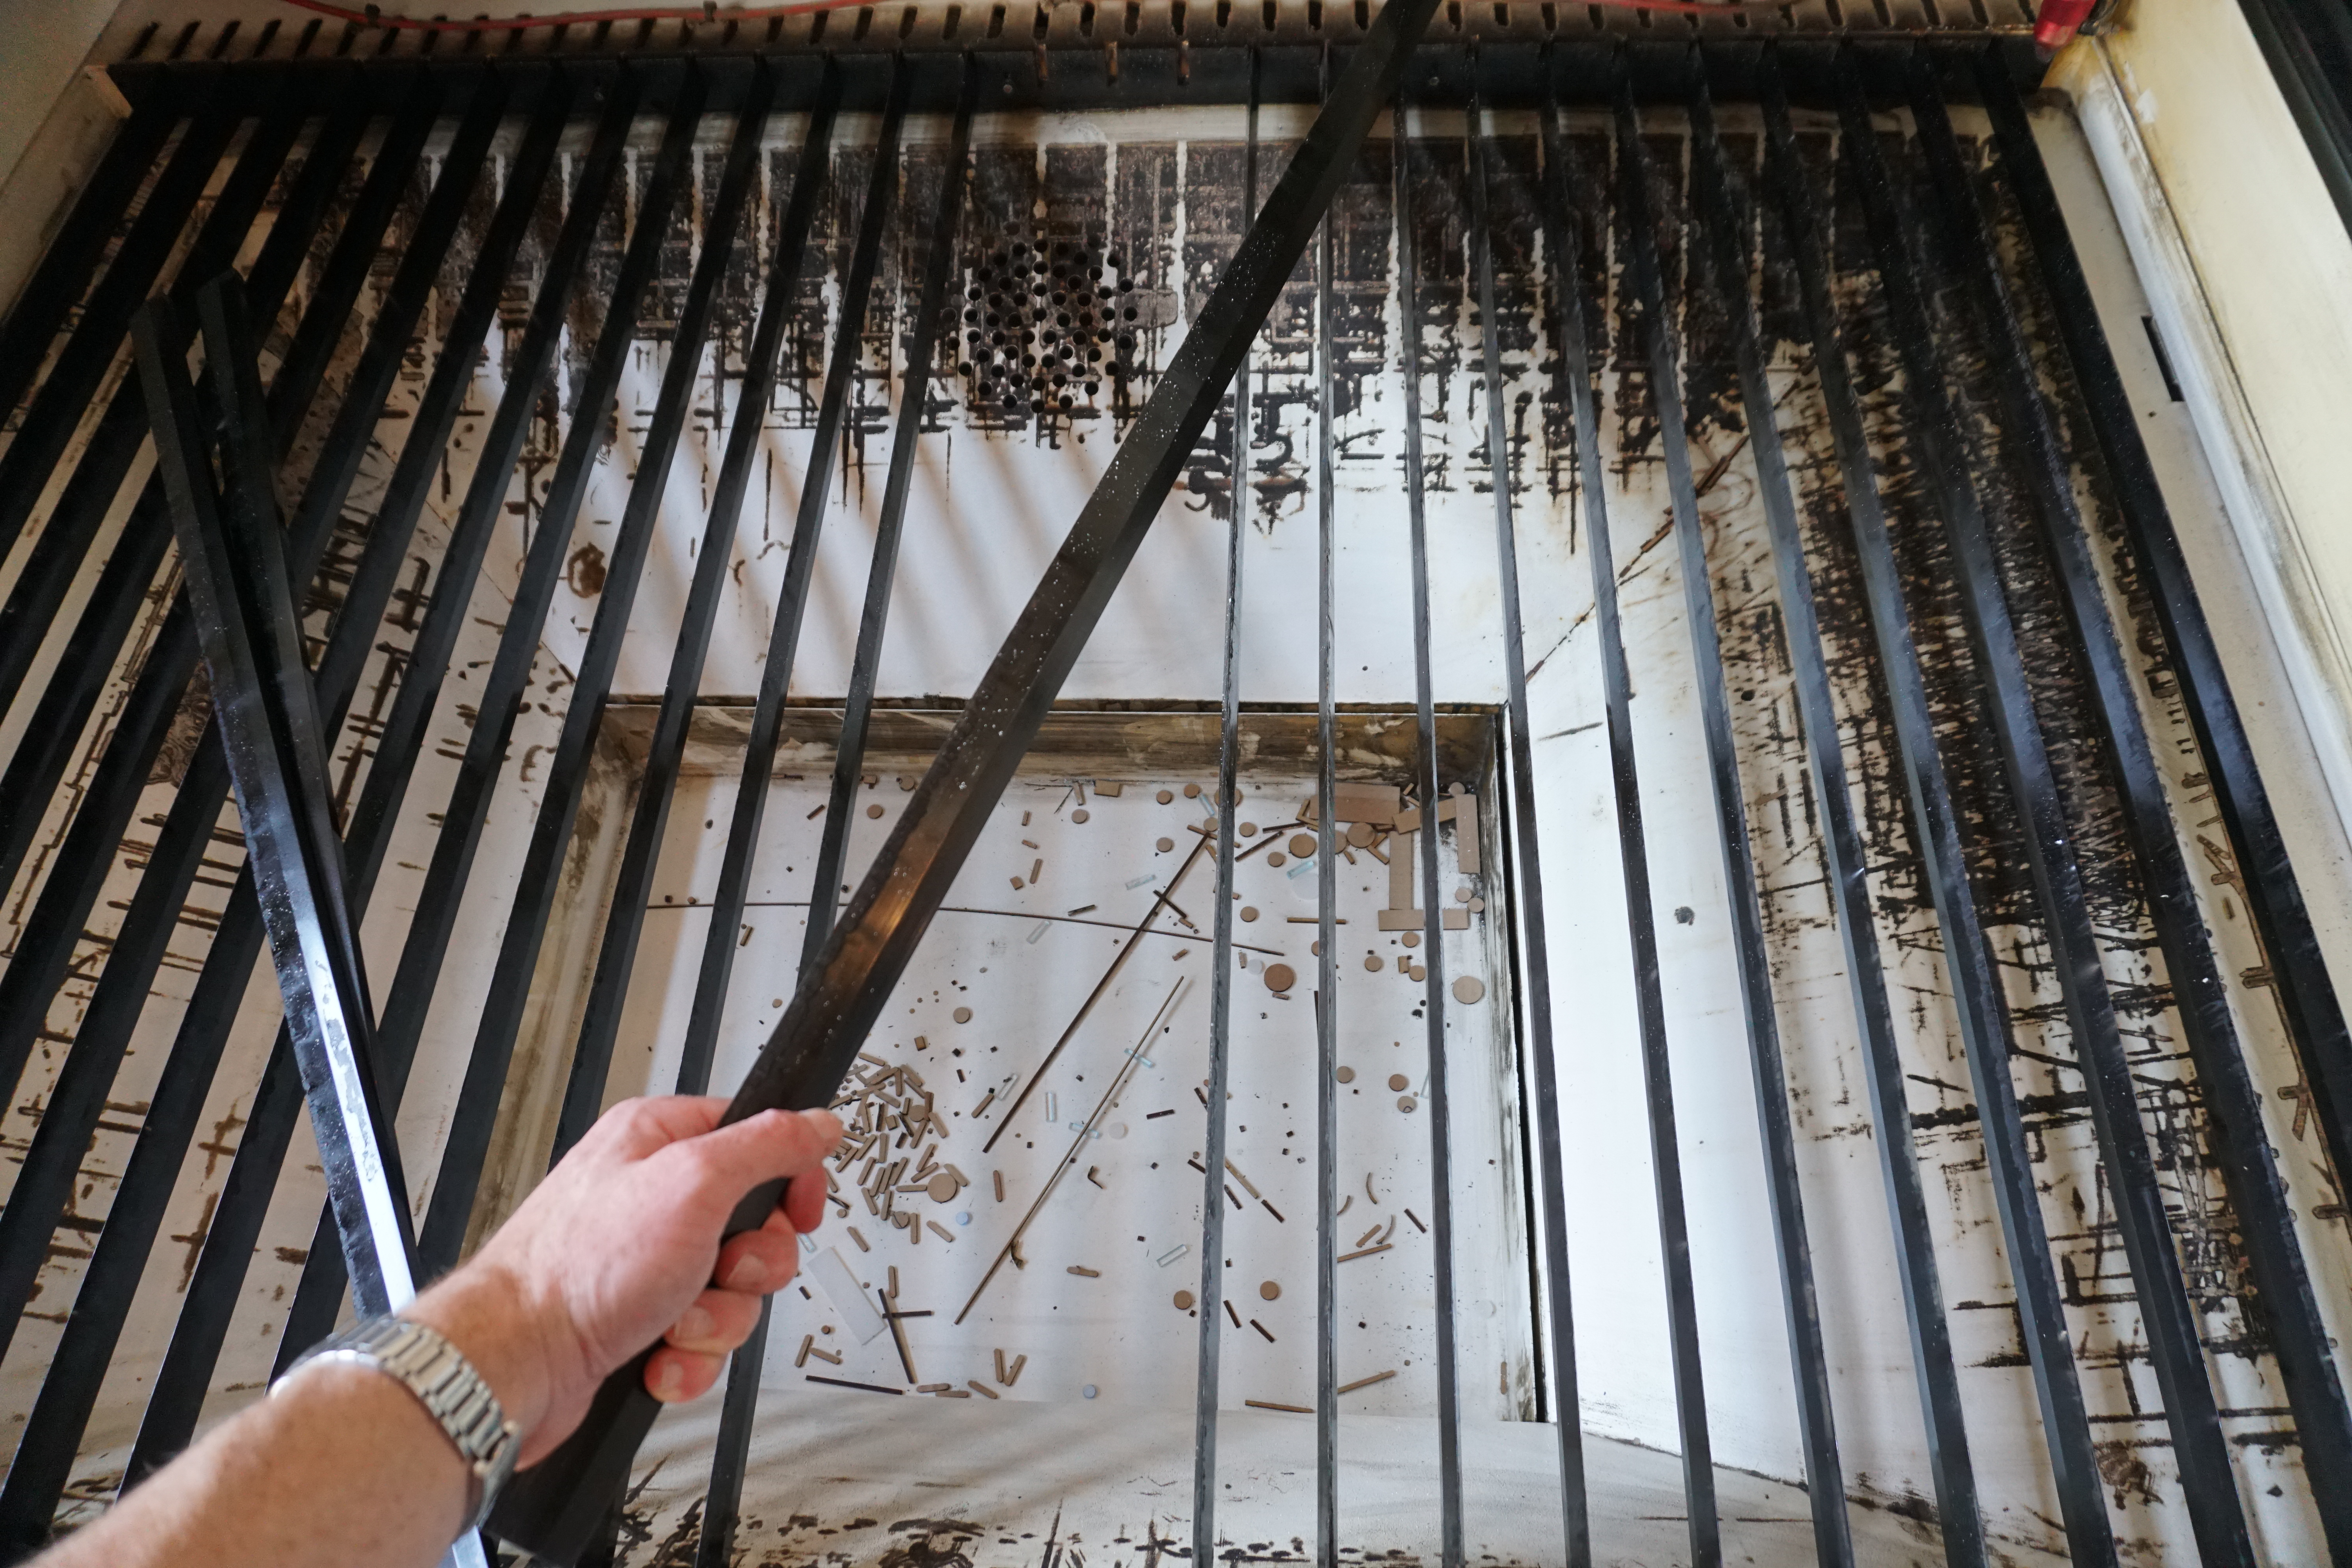
Unfortunately the laser beds need some adjustment before the tool can be used. Start by removing most of the bars from the laser cutter base as seen below.
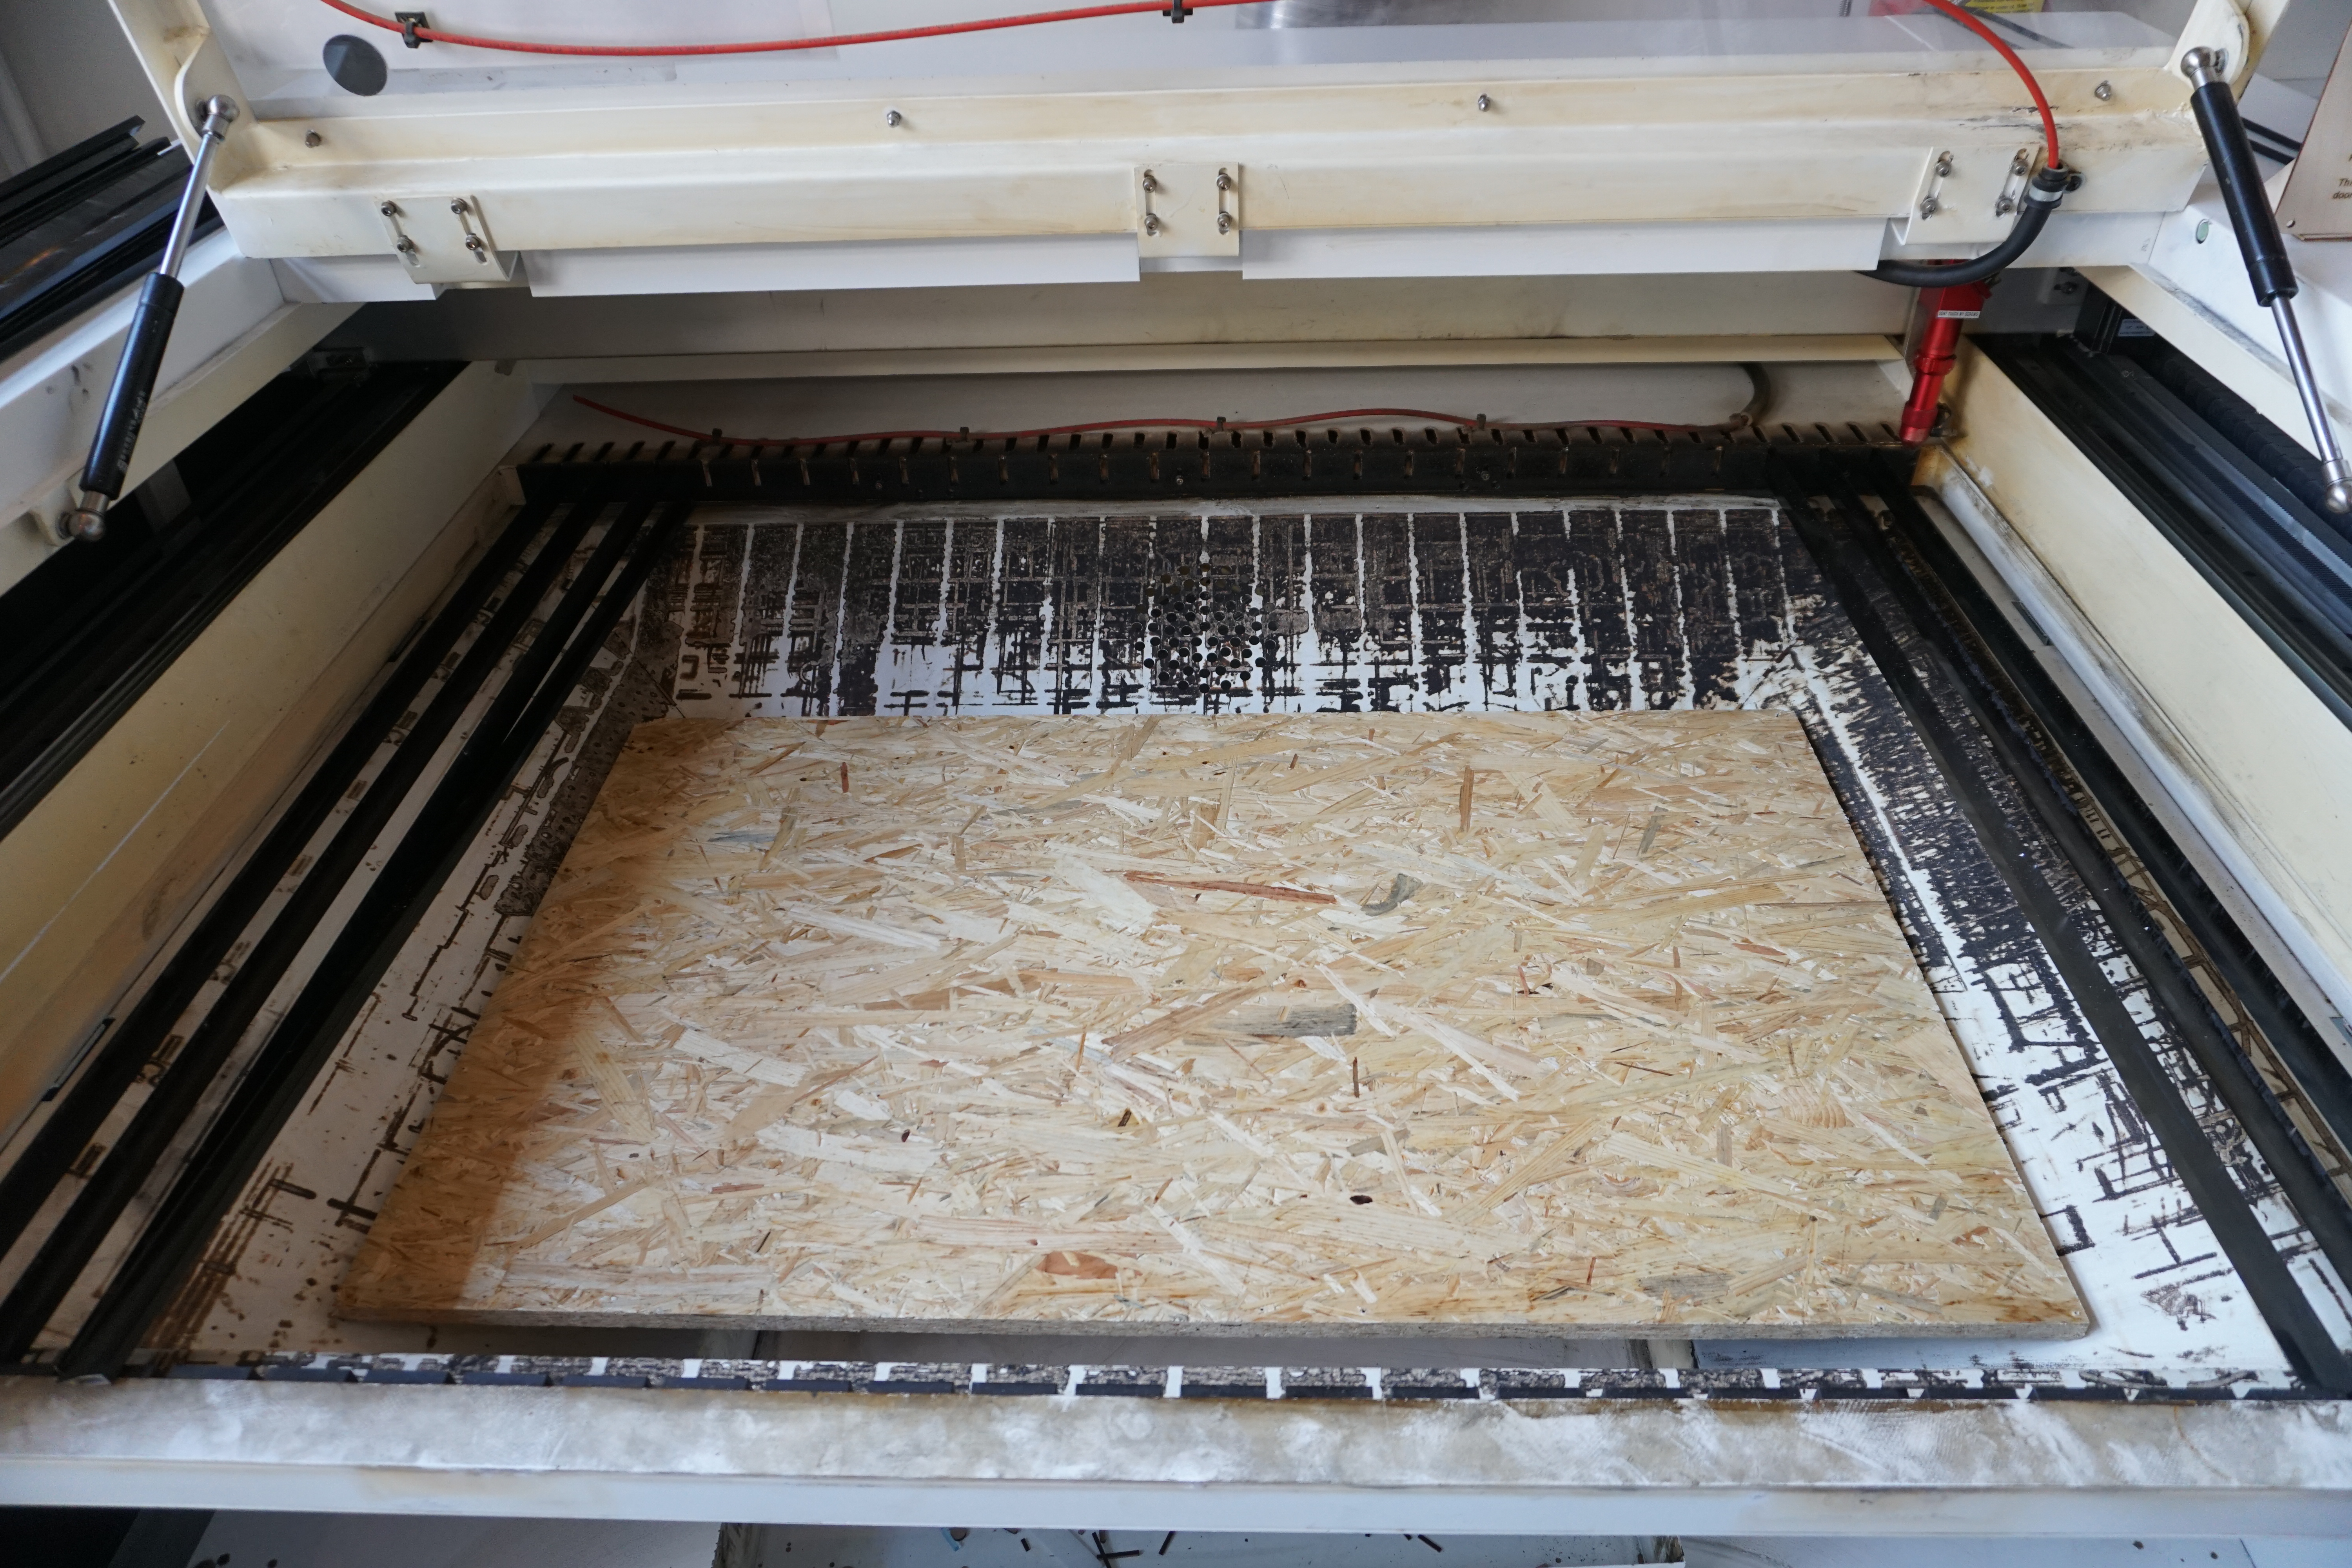
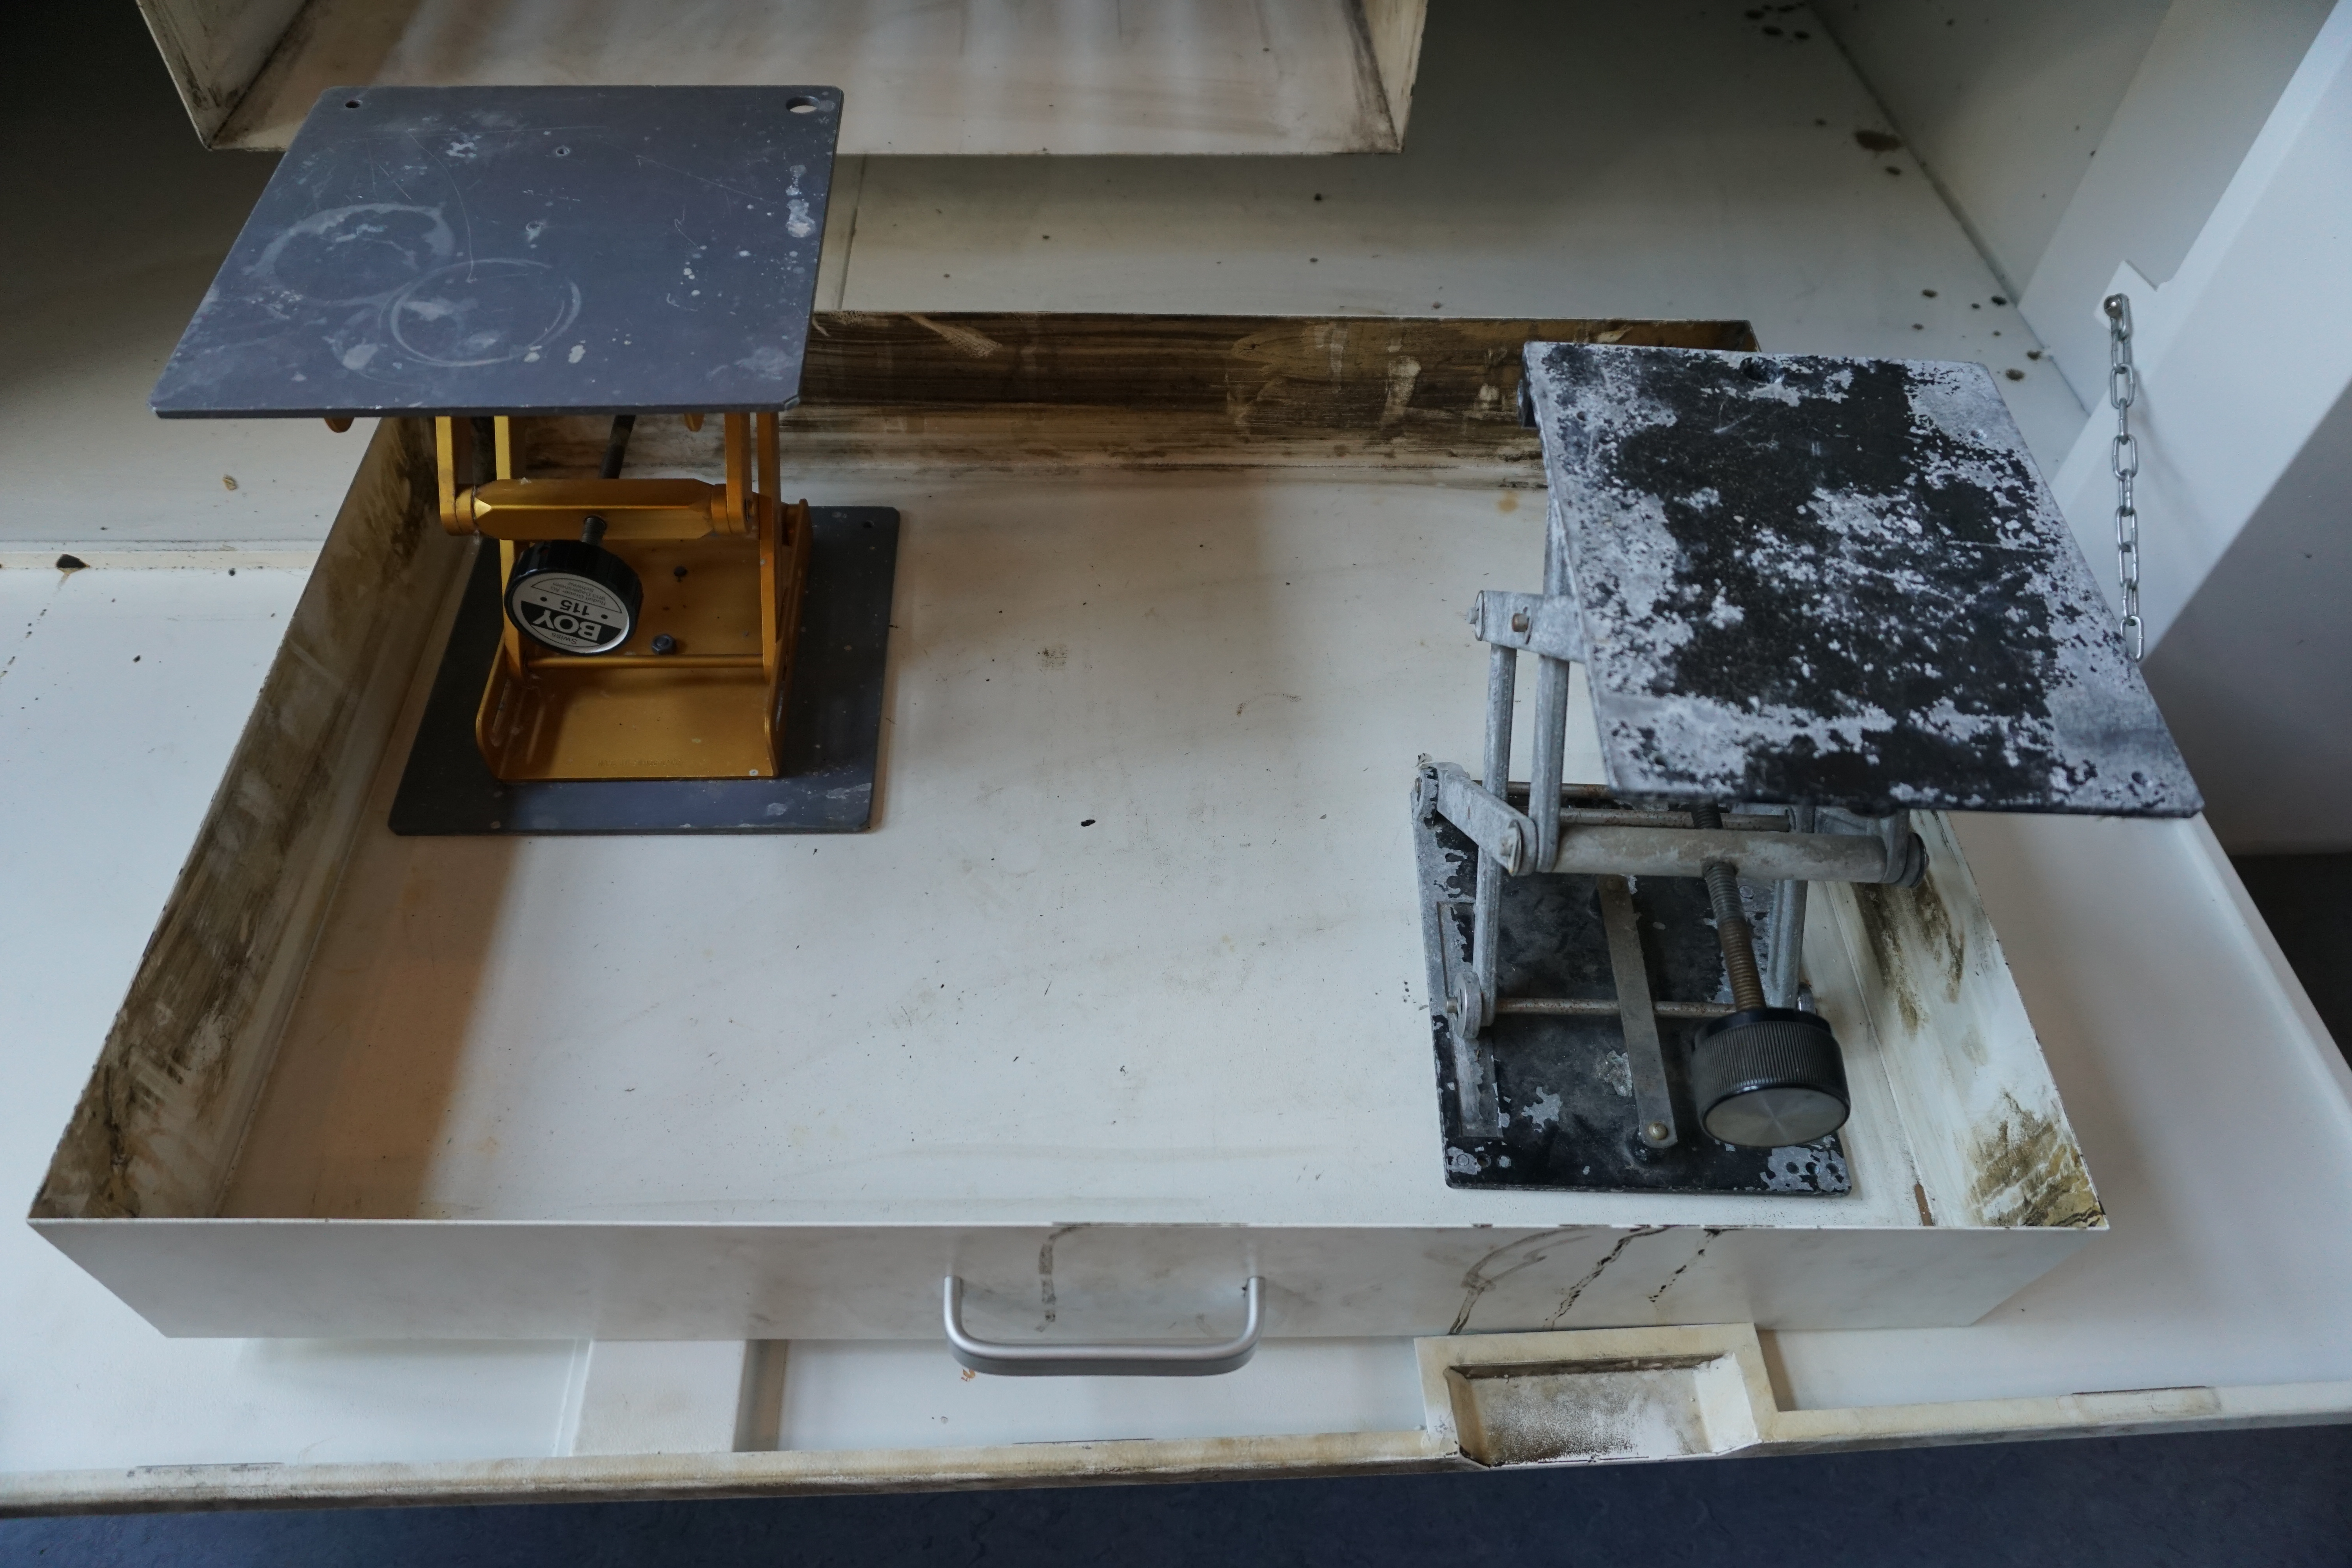
 Then, a flat surface is needed for the rotary tool to roll over. The smoother the better. Here we have used a piece of chipboard (not ideal) and adjusted to be level using some small scissor lifts on the base below it.
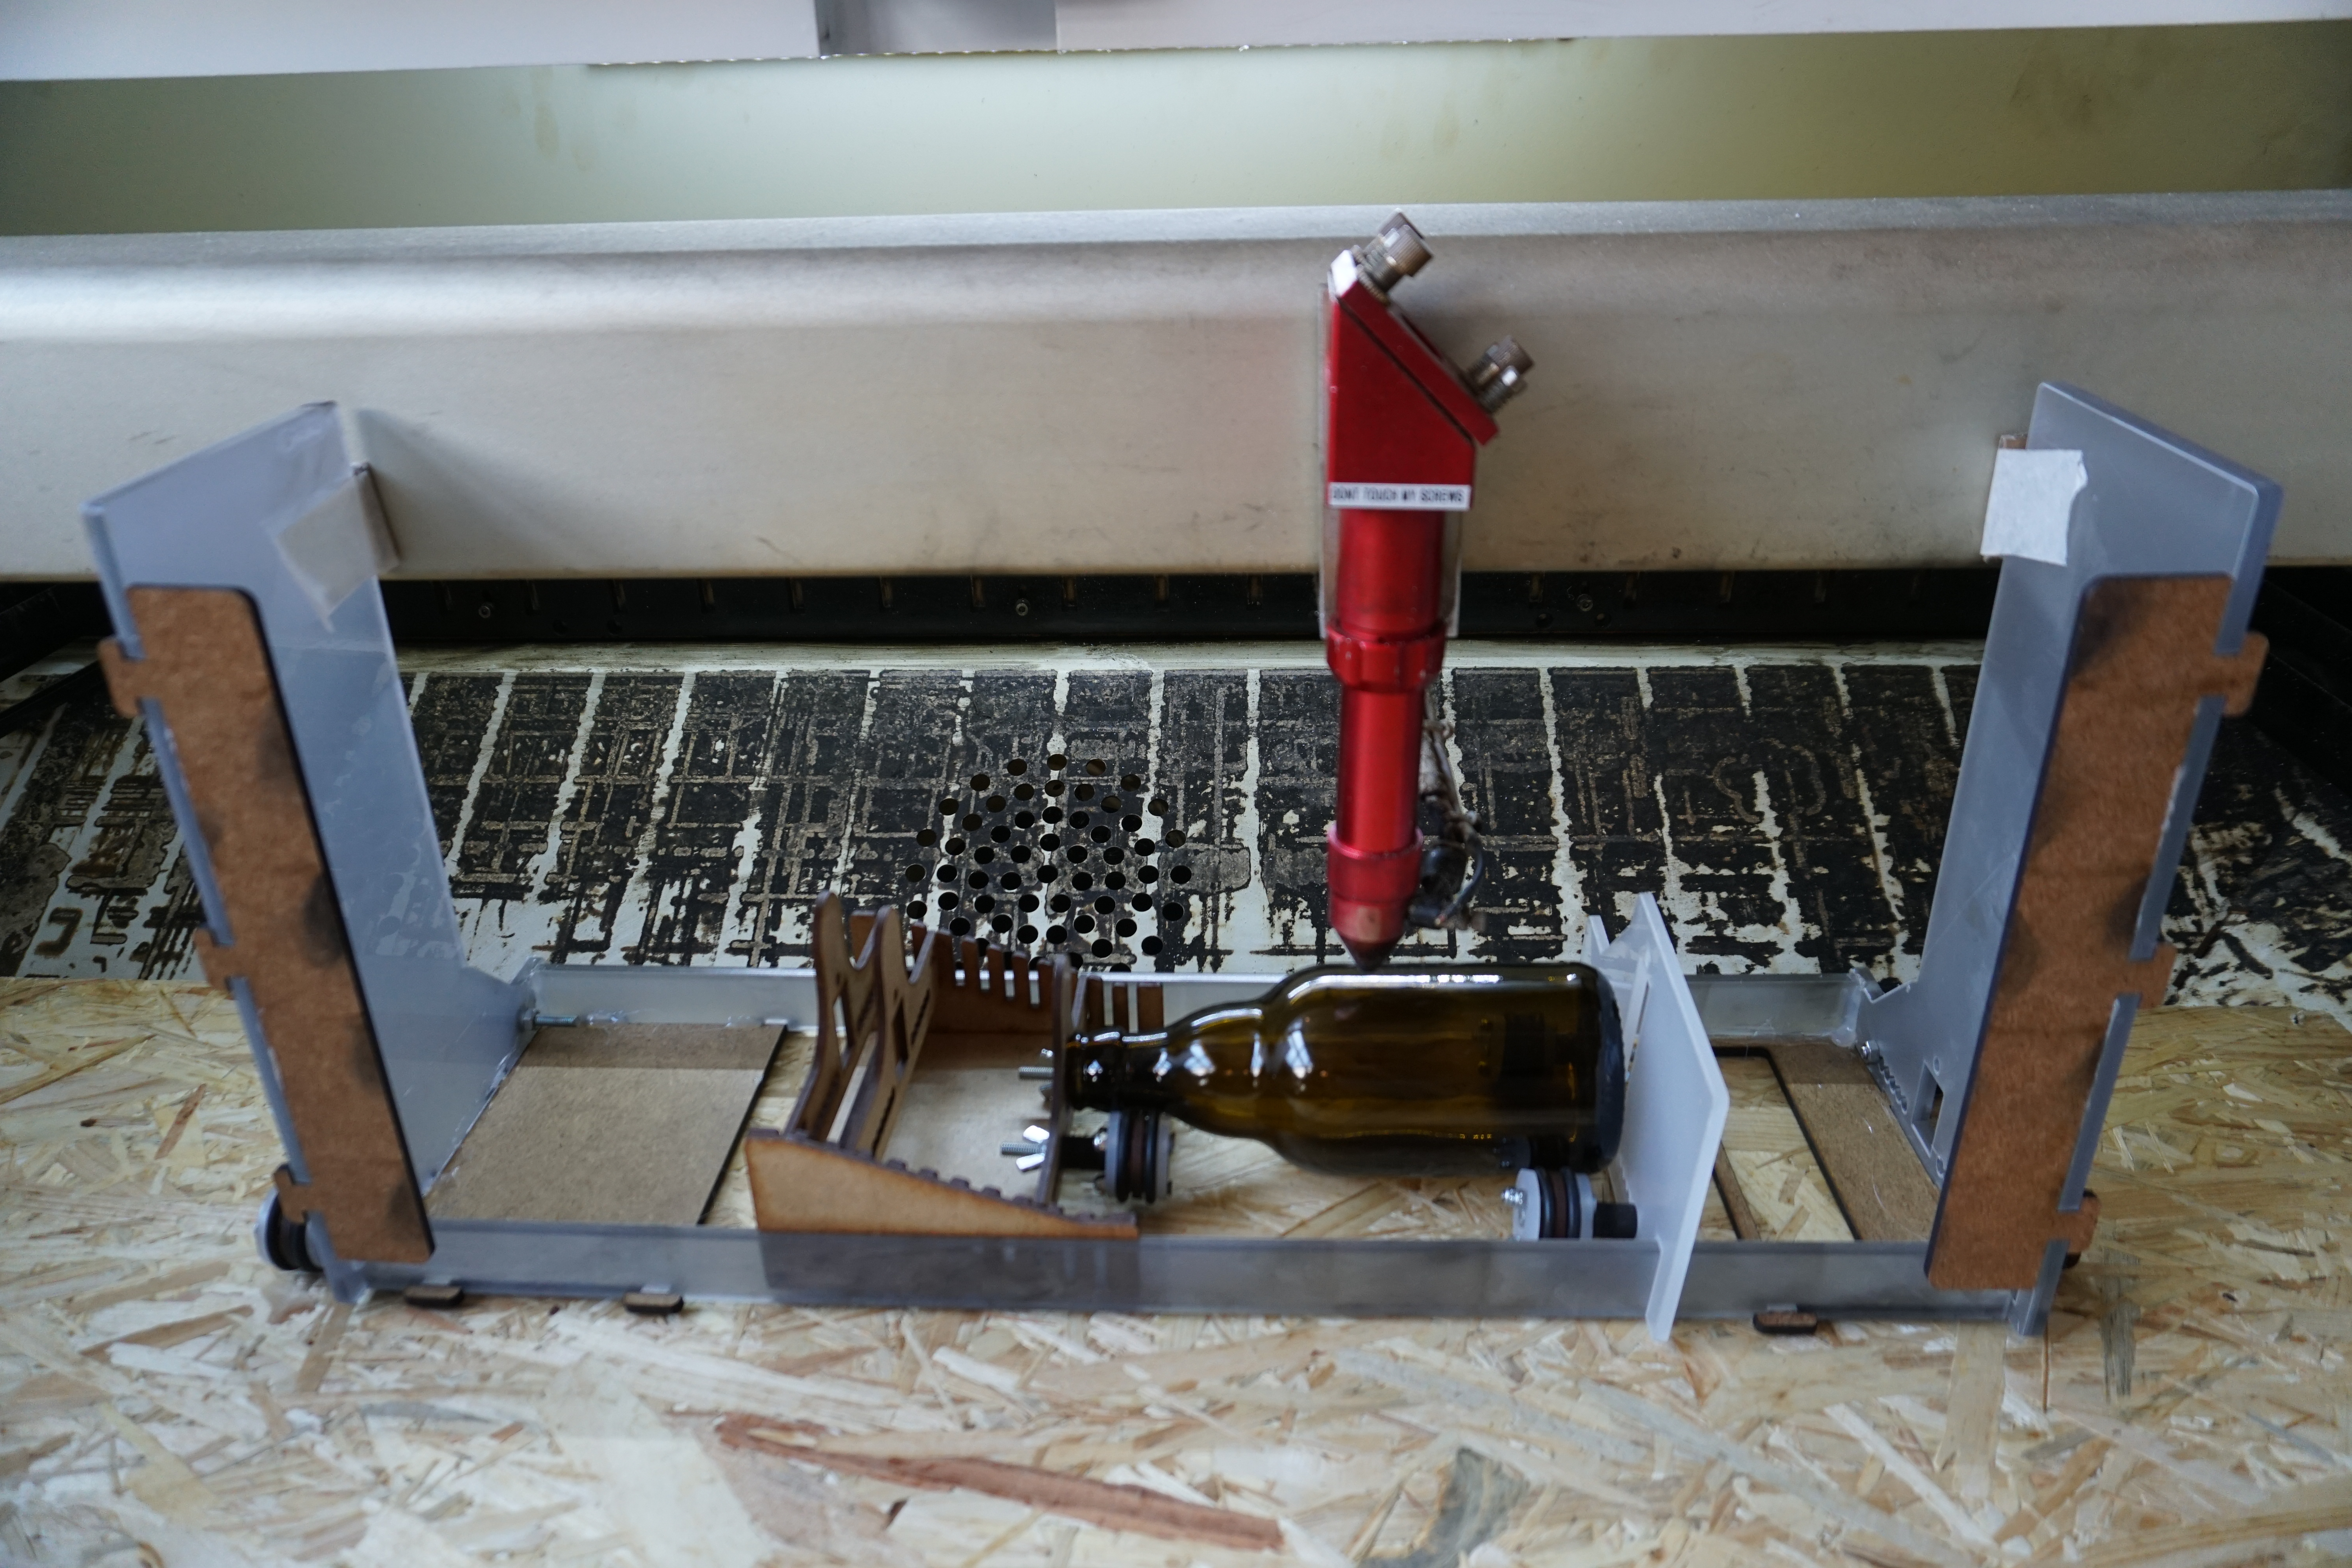
 The laser head can then be moved into a convenient position and the tool placed up against the arm. It is important that the indented side is pressed closely against the arm. Manually move the laser slowly a little bit towards you to ensure that it is pressed evenly. The tool can be adjusted to the bottle's shape by changing the spacing and height of its rollers. The surface meant for engraving should be approximately level.
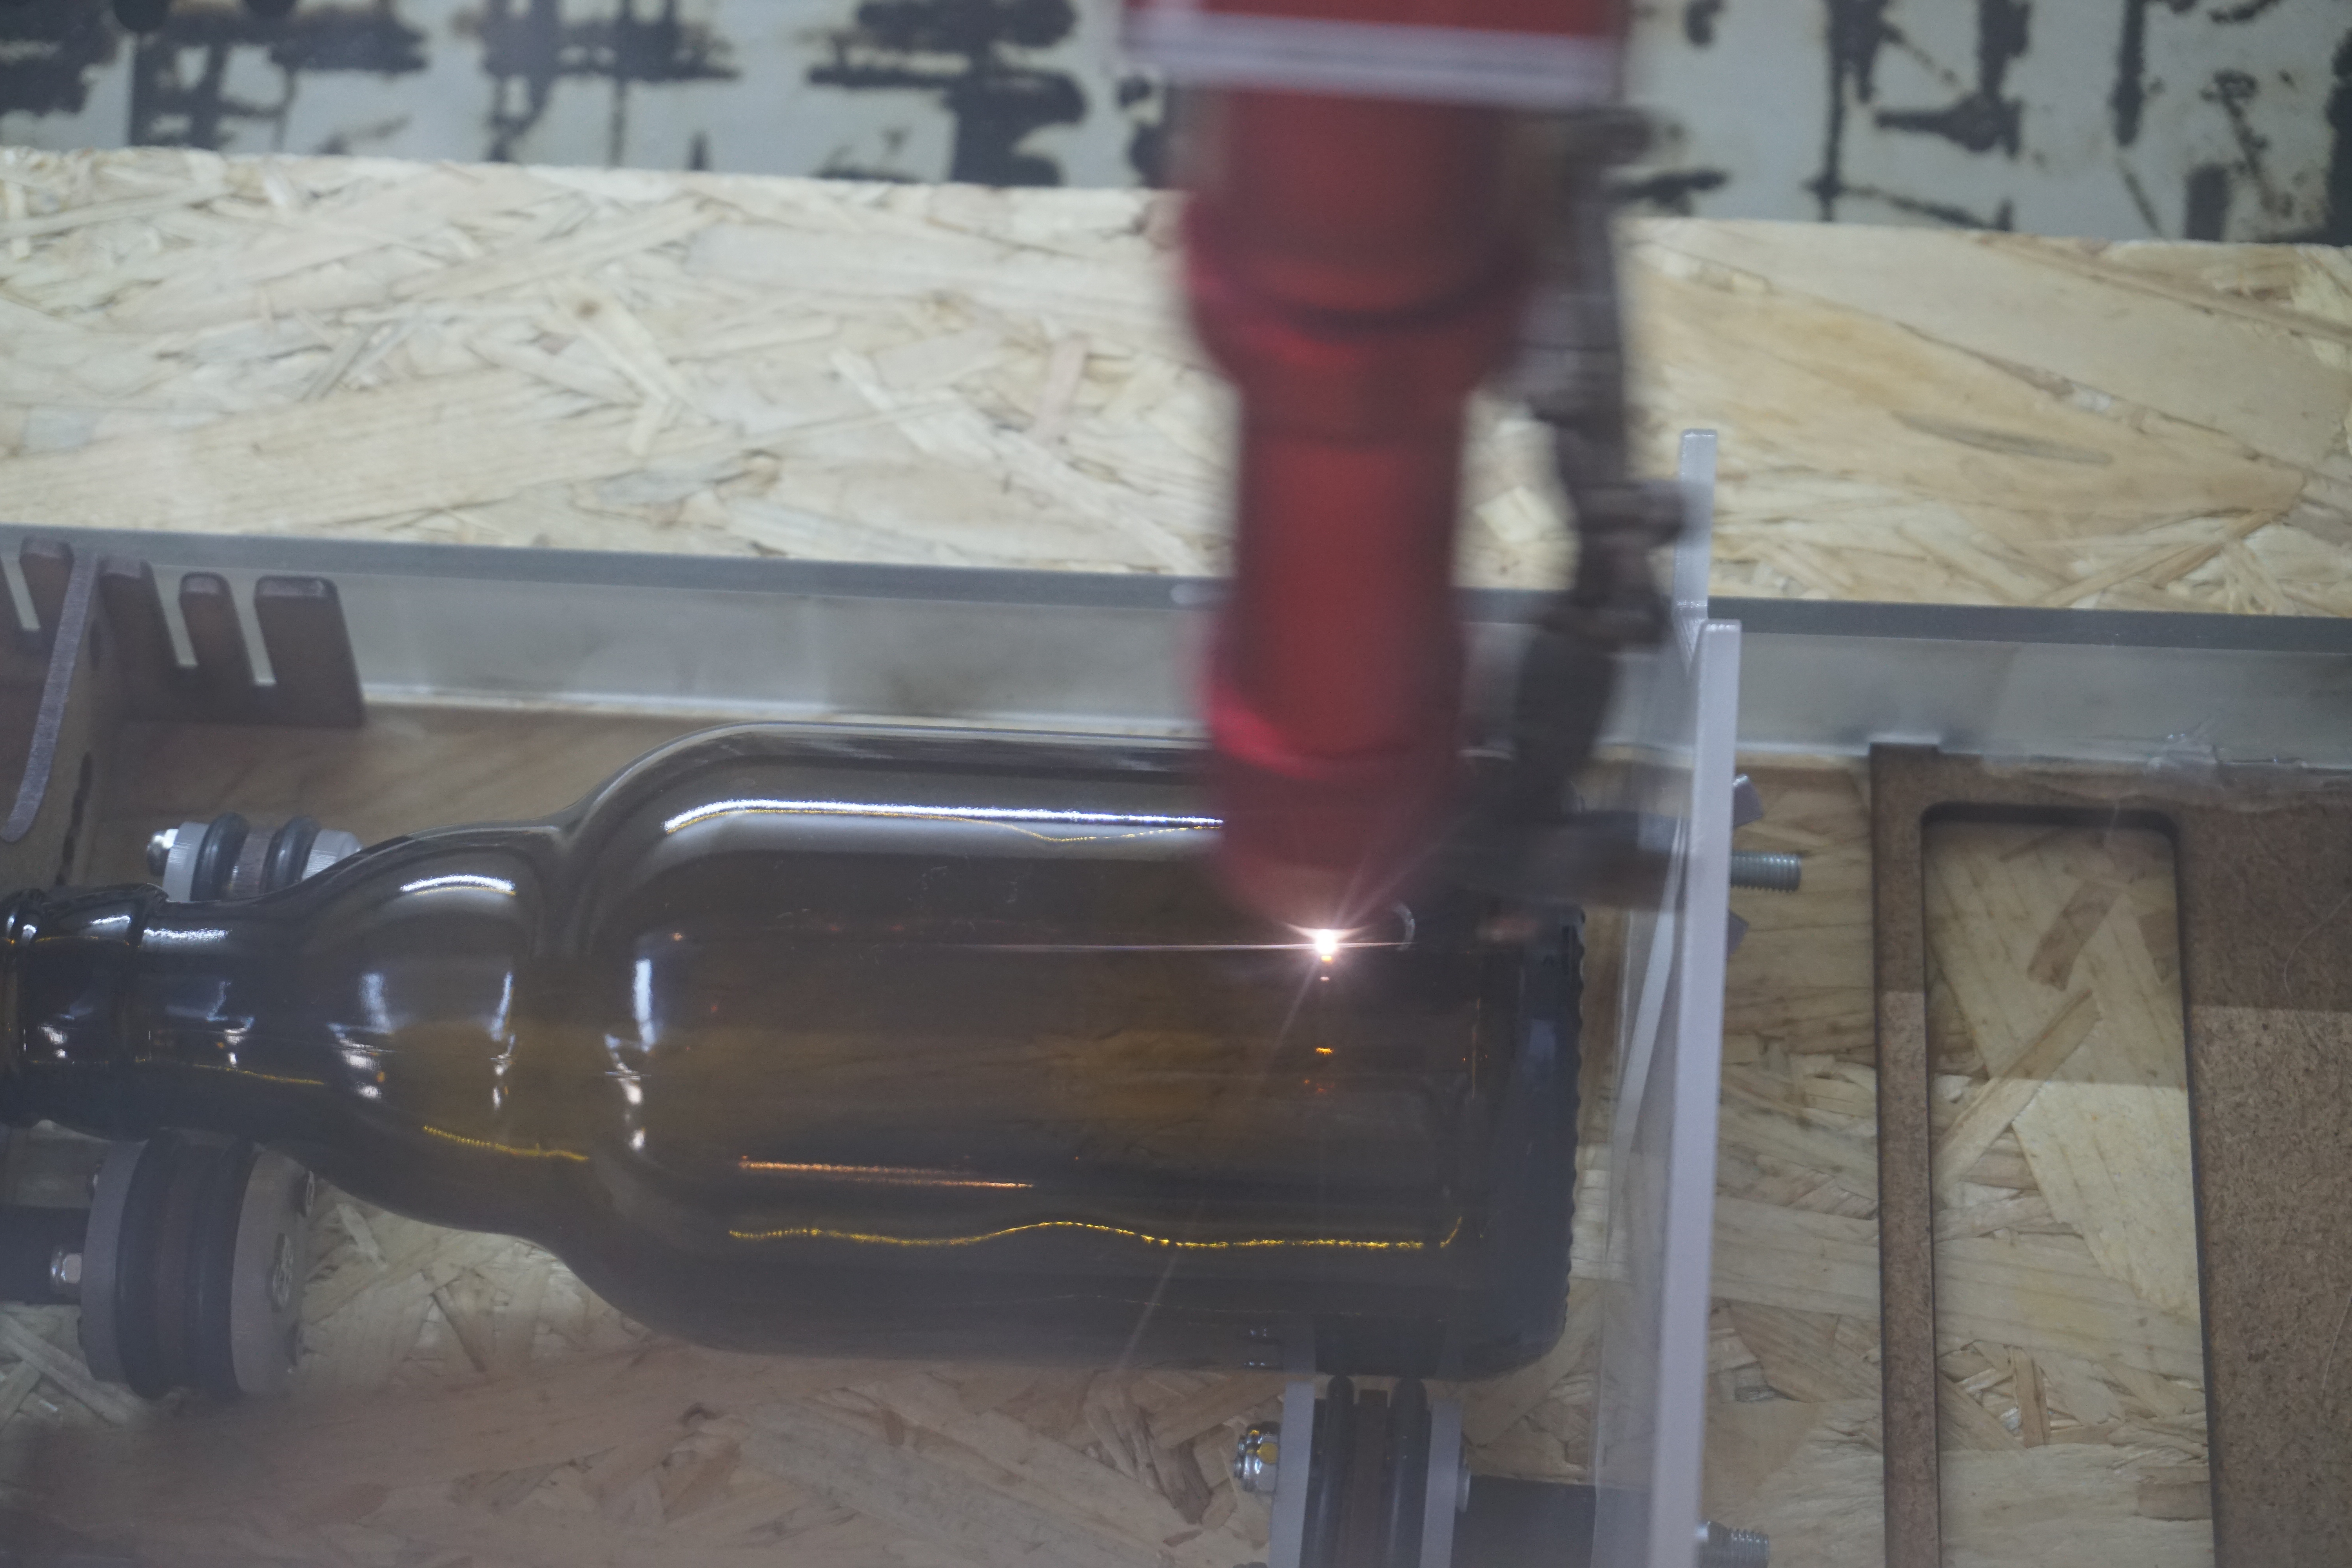
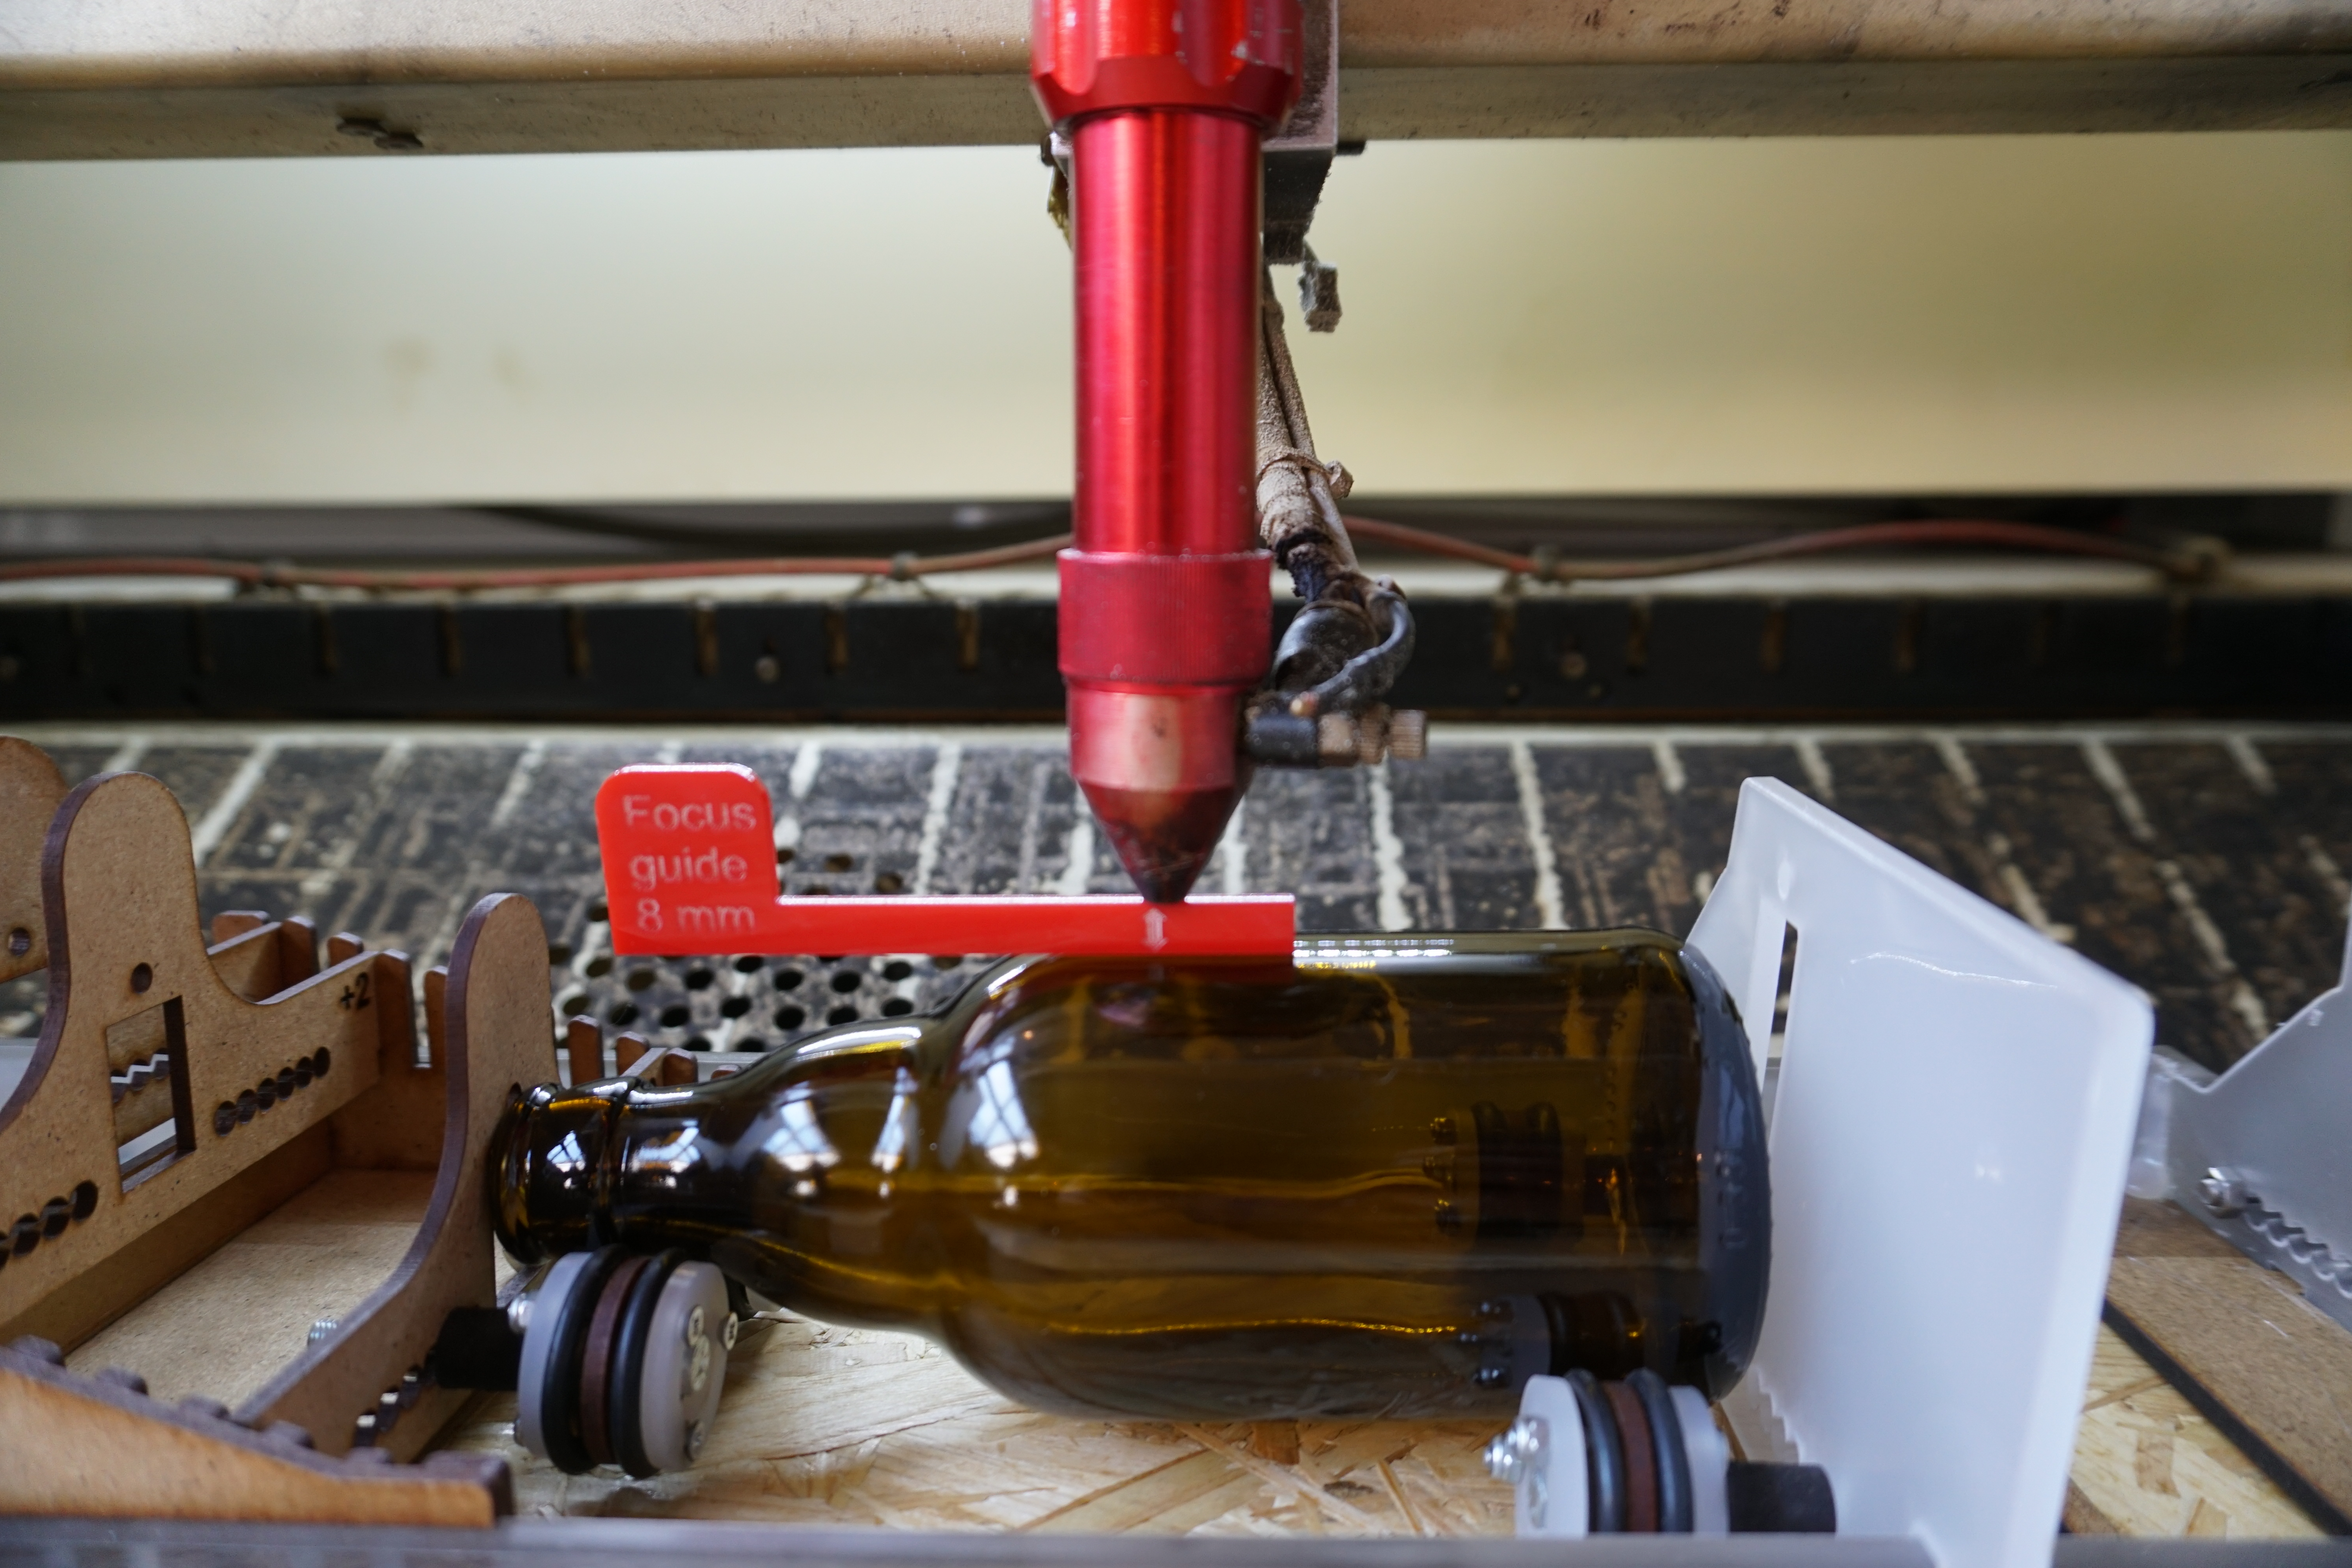
 Move the laser to the top right corner of where you want the drawing to be (this is the bottom right corner if the bottle is standing facing you), and focus the laser using the guide tool. Note: the laser is not at the starting position in the picture.
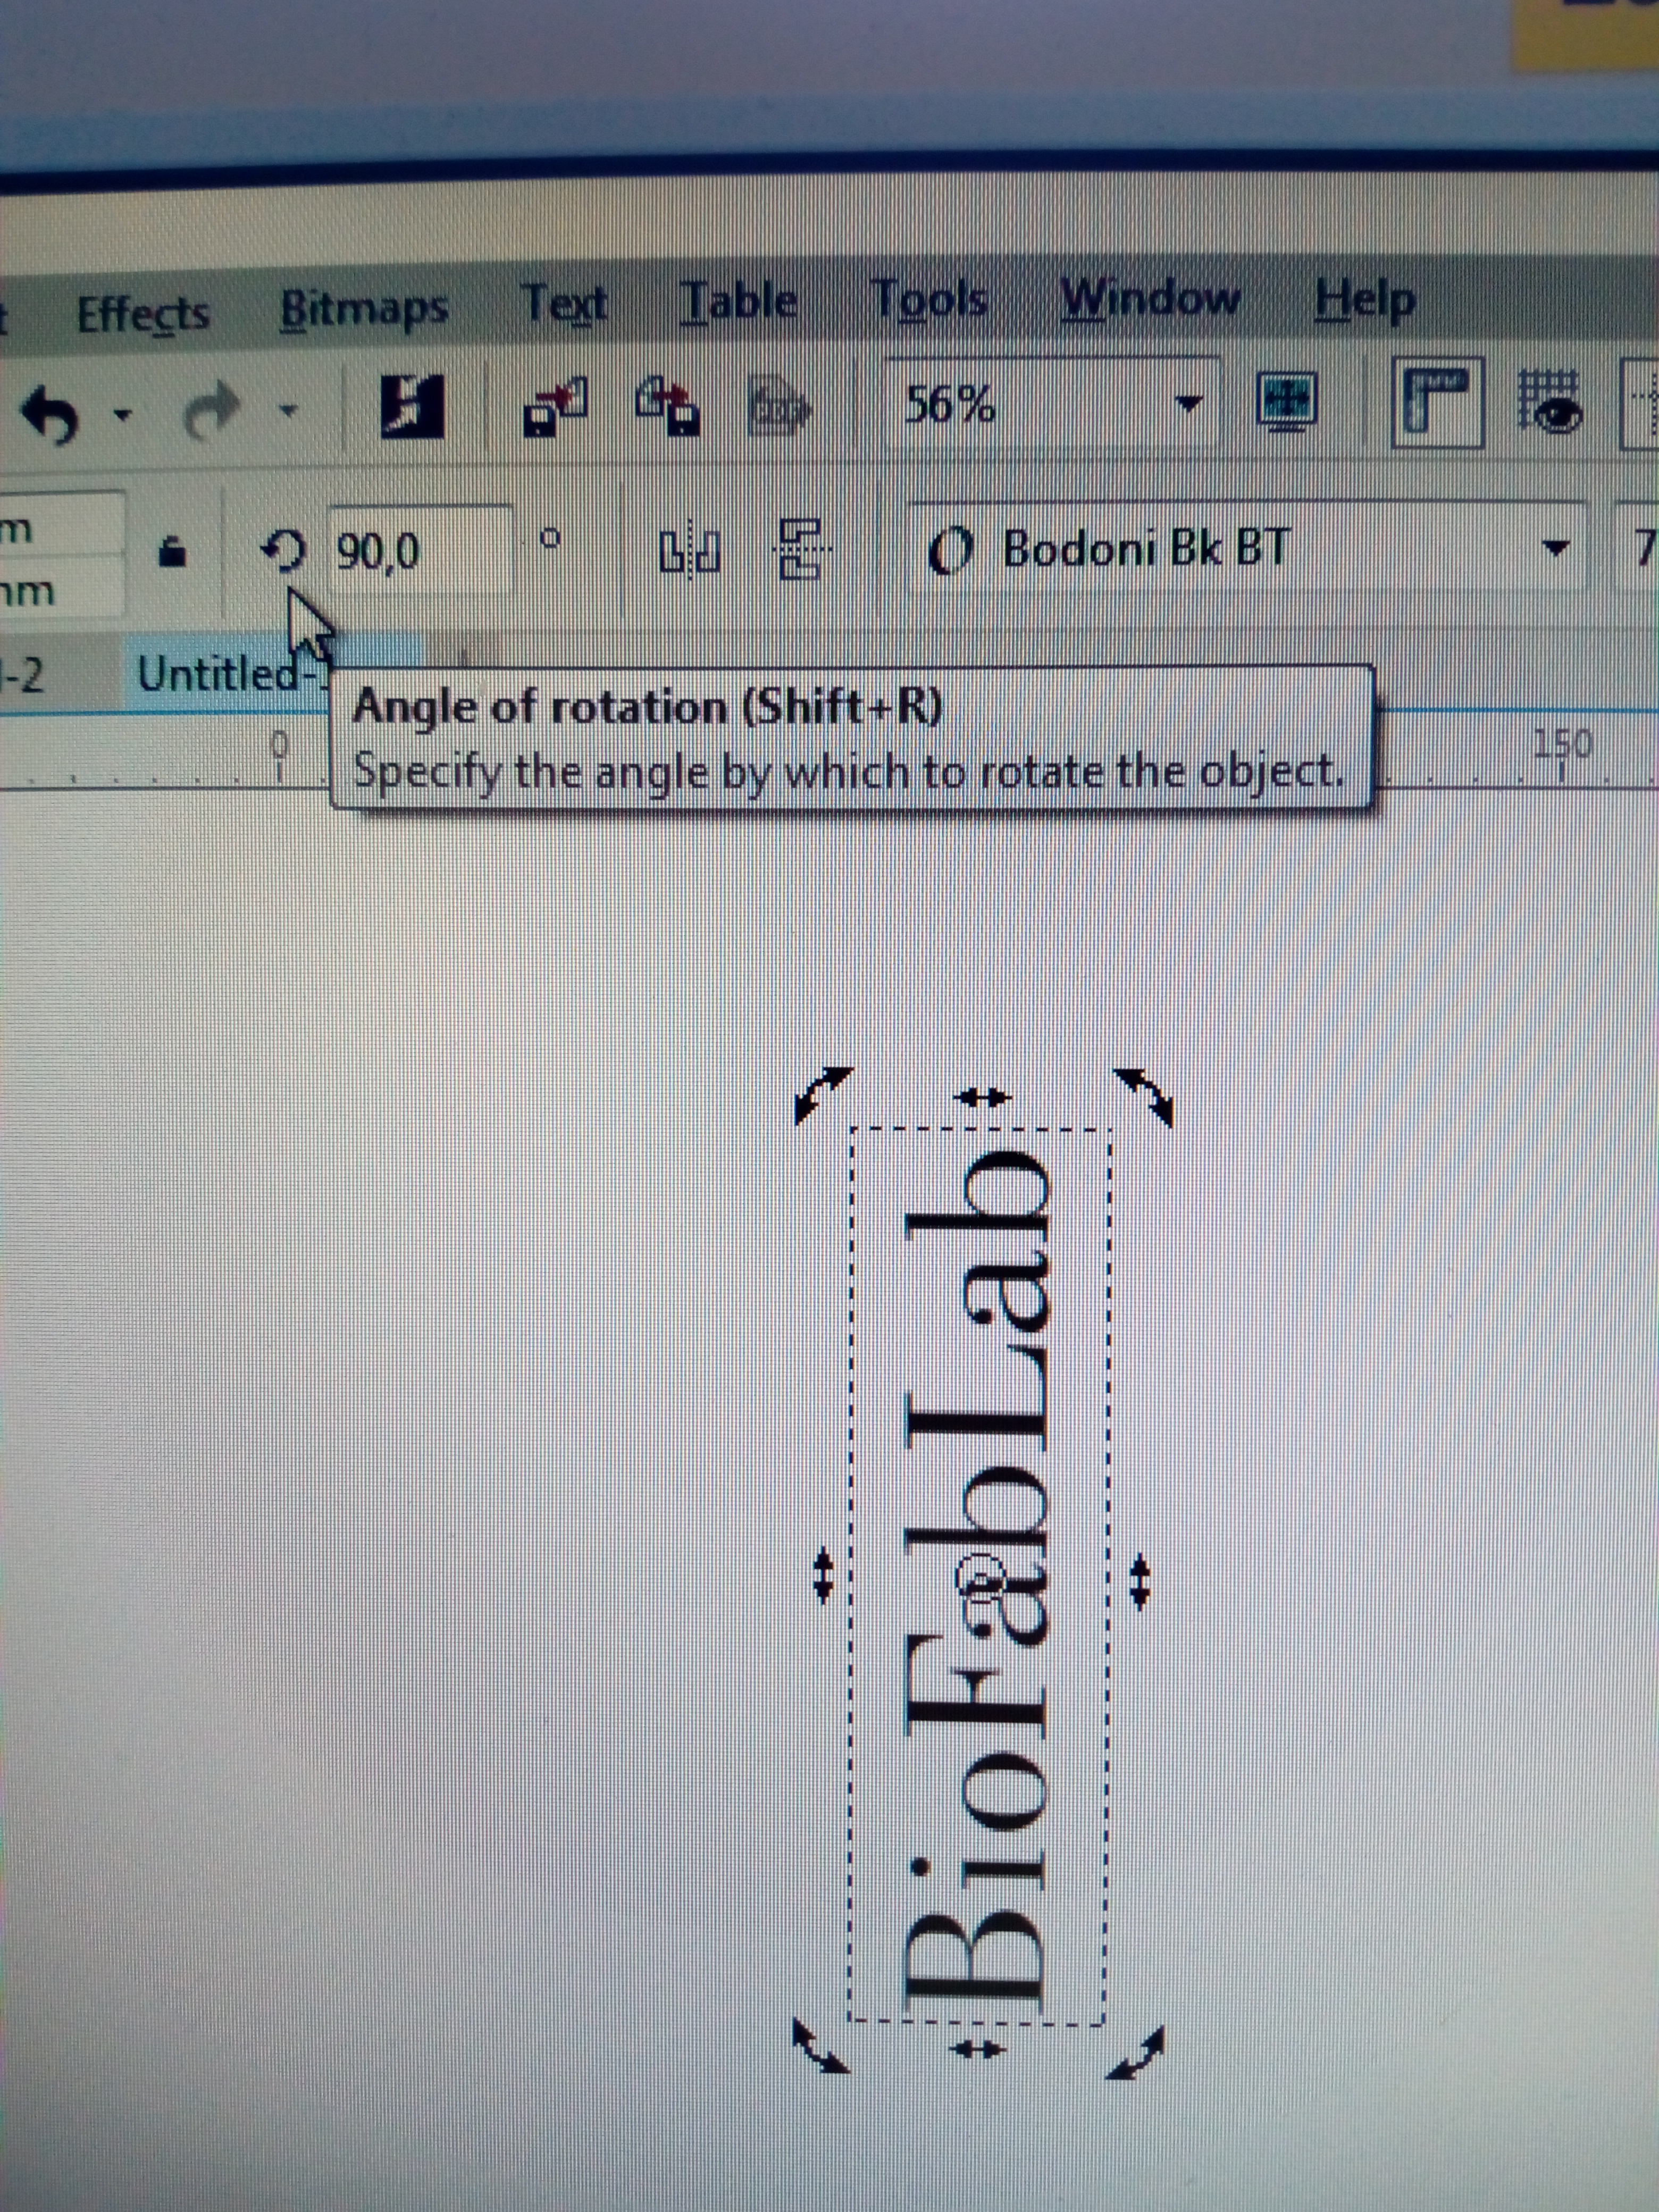
 Then the drawing can be prepared and loaded into the plotter program as normal (see laser cutter guide 2.0). The only difference is that the drawing must be rotated left by 90 degrees.
 Remember to use only the scan setting, as none of the other modes will work with this tool yet. The scan parameters for glass can be found attached to one of the computers in the laser cutter room.
Everything should now be ready. Happy engraving!