DIY DMX tester with Arduino


A professional DMX tester costs about $300. With an Arduino board and a DMX shield you can make your own for a fraction of the price. Súni Joensen and Christoffer Gulløv from the Lighting Programme at The Danish National School of Performing Arts made simple version that Visualizes the traffic happening on the DMX Channel. A blue light will show when the program is running. A green light will show when one or more channel is more than 0. A green light signifies that a value has changed. This rather crude visualization designed for specifically their needs. They often want to know if anything is going on at all and they want to know if noise is transmitted through the DMX chain.
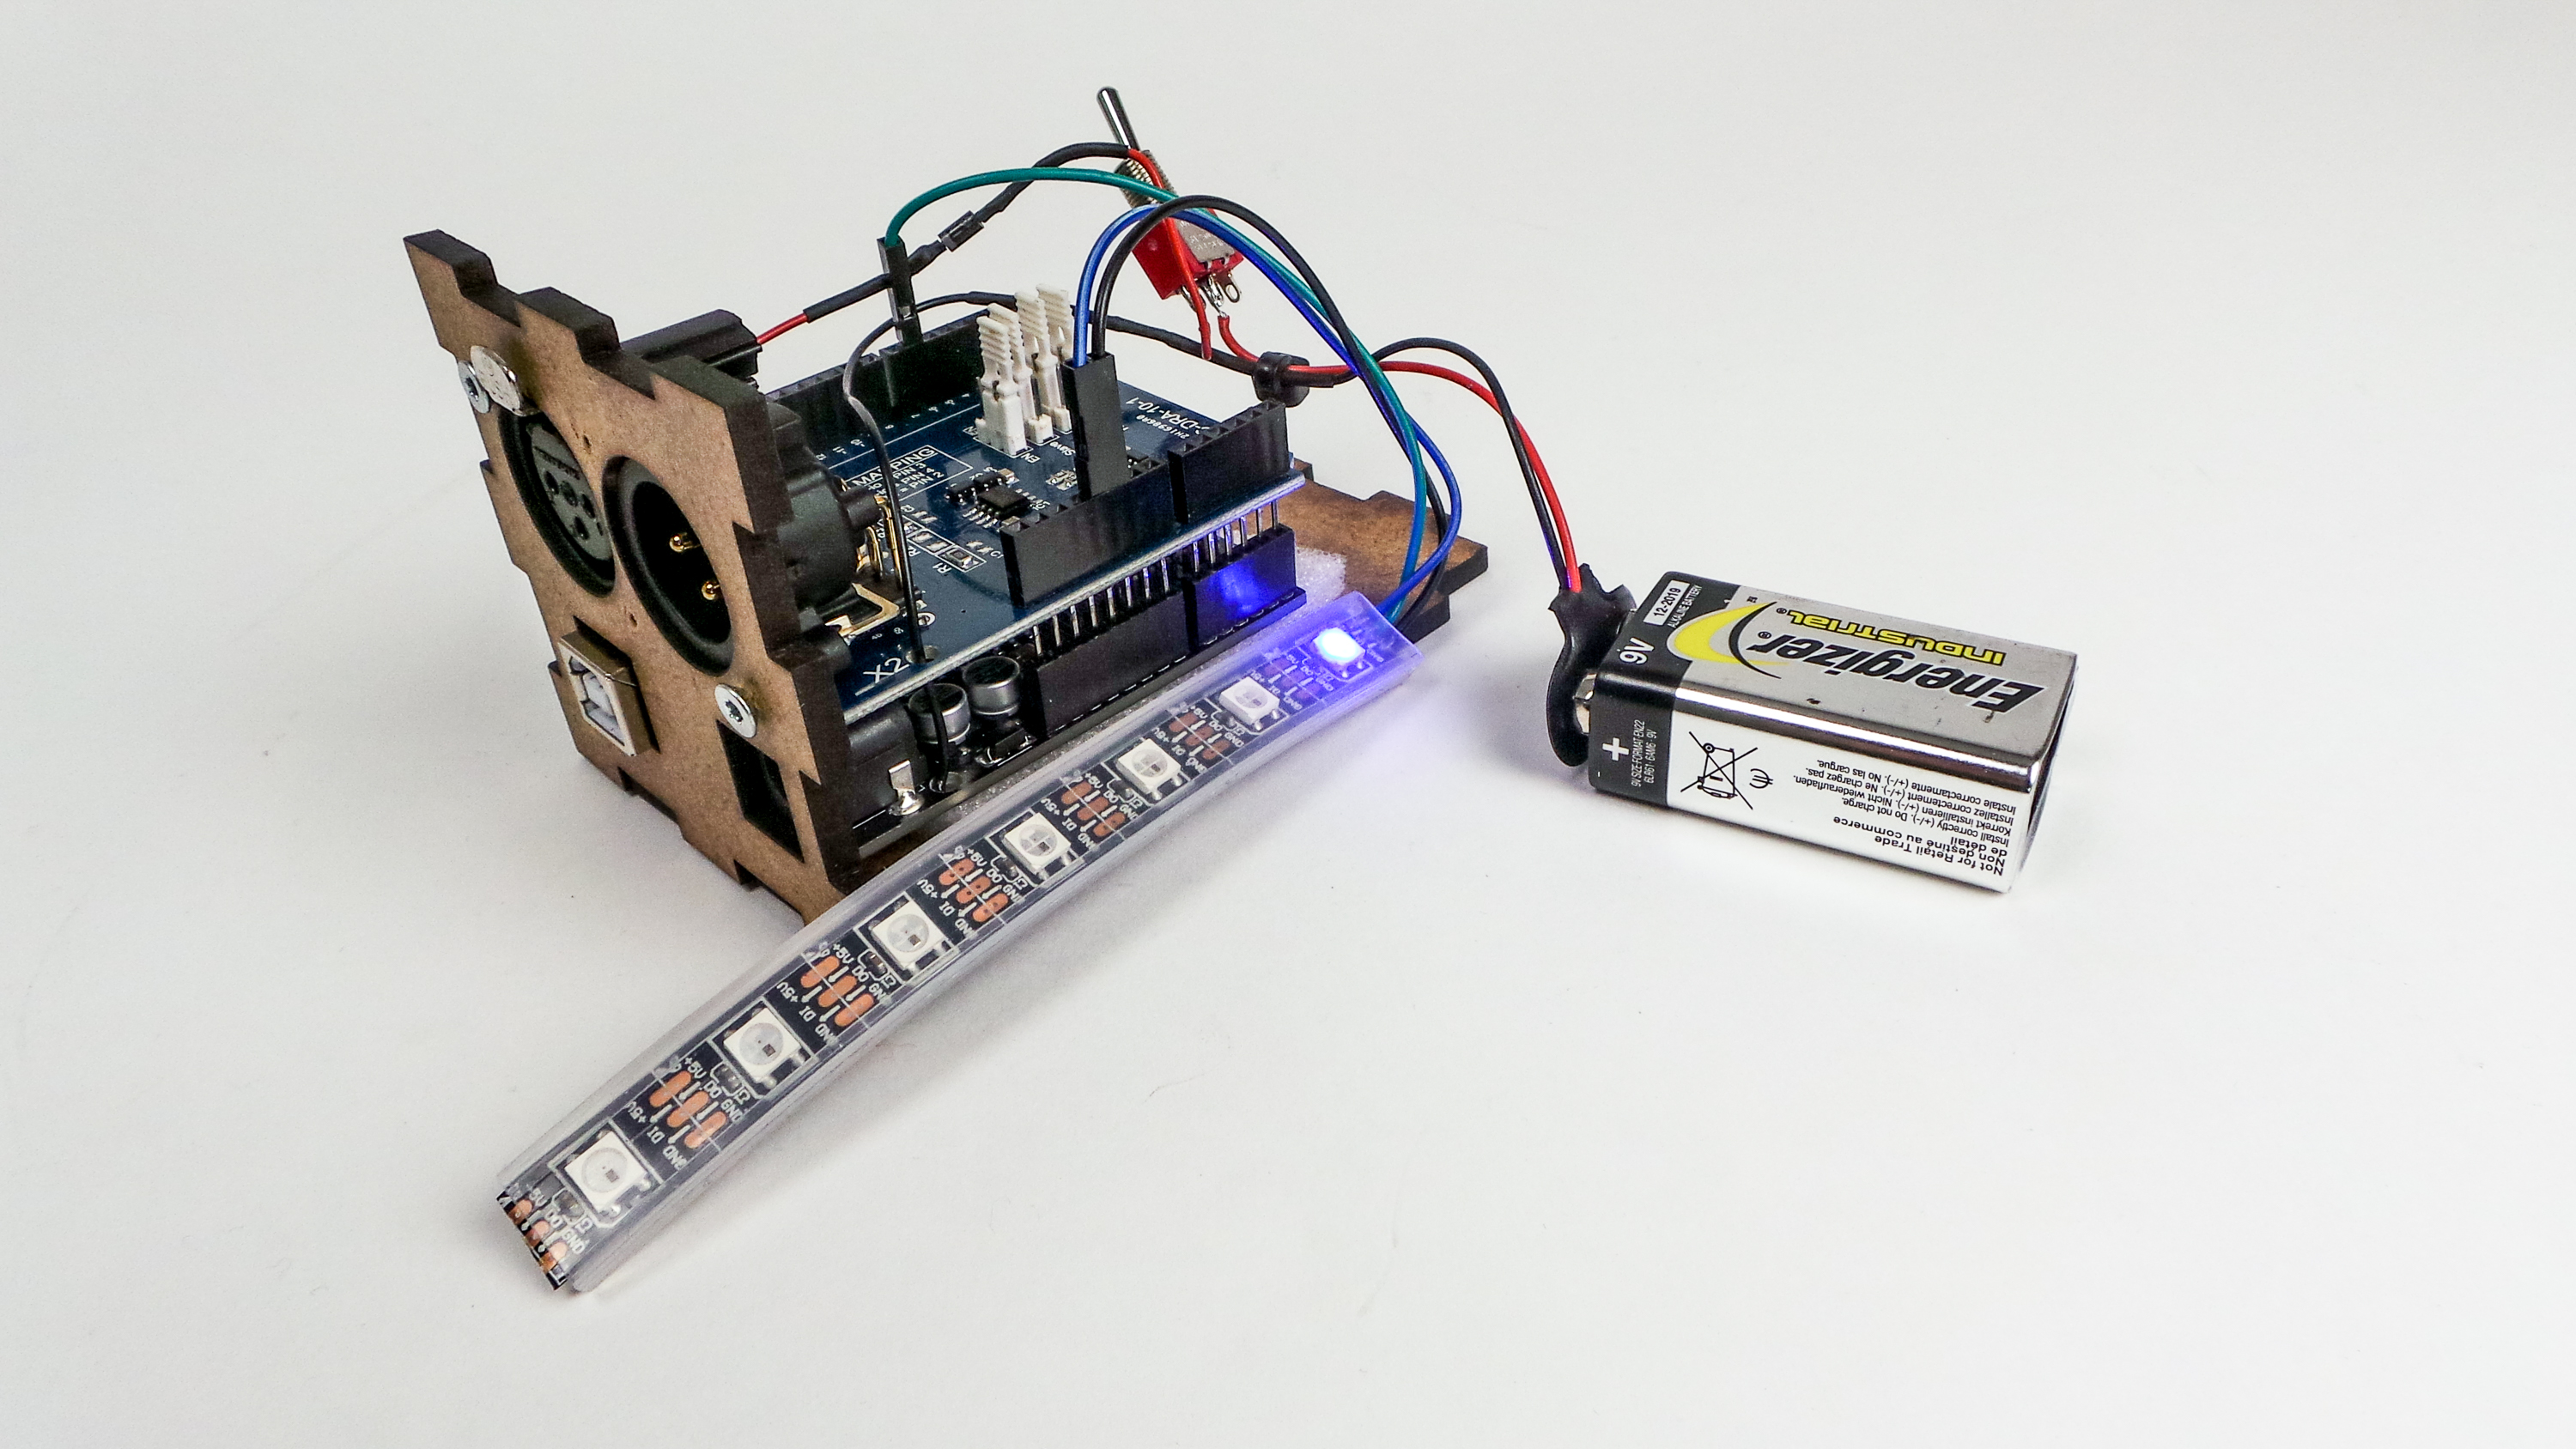
To build this project you will need the following:
- An Arduino Board.
- A DMX Shield with DMX in e.g. CTC-DRA-10-1.
- A string of Neopixels (they used 7 pixels).
- 4mm HDF and 3mm Milkwhite acrylic.
- 9V battery.
- A switch.
- A diode.
- A 9V battery connector.
If you want to add a 9V battery then add a diode as well. This prevents the scenario in which you connect a powersupply and a 9V battery at the same time. Without the diode the power supply will charge the batttery. Since the battery is not rechargeable this is not a good scenario. The diode should be in series of the + line of the battery.
Libraries needed:
* For DMX use: http://sourceforge.net/p/dmxlibraryforar/wiki/Home/
* For Neopixels: http://www.adafruit.com/category/168

Download the diagrams here.
The code:
#include <Conceptinetics.h>

#include <Adafruit_NeoPixel.h>
#ifdef __AVR__
#include <avr/power.h>
#endif

#define PIN            6

#define NUMPIXELS      7

Adafruit_NeoPixel pixels = Adafruit_NeoPixel(NUMPIXELS, PIN, NEO_GRB + NEO_KHZ800);

unsigned long sumOfDMX = 0;
unsigned long sumOfDMXOld = 0;

//
// The slave device will use a block of 10 channels counting from
// its start address.
//
// If the start address is for example 56, then the channels kept
// by the dmx_slave object is channel 56-66
//
#define DMX_SLAVE_CHANNELS   512

// Configure a DMX slave controller
DMX_Slave dmx_slave ( DMX_SLAVE_CHANNELS );

// the setup routine runs once when you press reset:
void setup() {

  pixels.begin();
  pixels.show(); // Initialize all pixels to 'off'

  // Enable DMX slave interface and start recording
  // DMX data
  dmx_slave.enable ();

  // Set start address to 1, this is also the default setting
  // You can change this address at any time during the program
  dmx_slave.setStartAddress (1);

}

// the loop routine runs over and over again forever:
void loop()
{

  // isDMX bliver brugt til tjekke om der nogen dmx kanaler som er mere end 0.
  boolean isDMX = false;

  // sumOfDMX og OLD bliver brugt ti lat tjekke om der er sket endringer
  sumOfDMXOld = sumOfDMX;
  sumOfDMX = 0;


  // Her lober vi alle kanaler igennem og summerer mangden af vardierne og tjekker om nogle er storre end 0
  for (int i = 1; i < 513; i = i + 1)
  {
    sumOfDMX = sumOfDMX + dmx_slave.getChannelValue(i);

    if (dmx_slave.getChannelValue(i) > 0)
    {
      isDMX = true;
    }

  }

  // Set farver til sort hvis der ikke er noget dmx ellers set til groen.
  for (int i = 1; i < NUMPIXELS; i = i + 1)
  {
    if (isDMX == true)
    {
      pixels.setPixelColor(i, pixels.Color(0, 255, 0));
    }
    else
    {
      // Set alle pixels til grøn hvis der er DMX signal
      pixels.setPixelColor(i, pixels.Color(0, 0, 0));
    }
  }


  // Tjeck om der sket en ændring
  if (sumOfDMX != sumOfDMXOld)
  {

    // Set alle pixels til rød
    for (int i = 1; i < NUMPIXELS; i = i + 1)
    {
      pixels.setPixelColor(i, pixels.Color(255, 0, 0));
    }

    // delay så vi kan nå at se at de er røde
    delay(40);
  }

  pixels.show();
  // blå farve på pixel 0 så vi kan se at programmet er startet
  pixels.setPixelColor(0, pixels.Color(0, 0, 255));
}
