Design a closed ecosystem (terrarium)
In this guide, we will look at how to build a closed ecosystem consisting mostly of plants, known as a terrarium.
Backstory time: Terrariums have been a thing ever since 1829, when Dr. Nathaniel.B Ward found a fern seed growing inside a glass bottle holding a moth he was studying. They became very trendy in Victorian times, and that trend has come back to an extent in recent times. Easy to see why... the glass case provides a frame for the plants that allows for a miniature form of landscaping, which is of course an art in itself.
 The basic scientific principle behind terrariums is that the glass enclosure traps moisture produced by evaporation from the soil or by transpiration done by the plants, which then condensates and renters the soil, creating a closed water cycle. Additionally, it acts as a greenhouse by allowing sunlight in but limiting the escape of infrared radiation given off by the terrarium's contents. All this serves to create a relatively humid and warm environment, allowing some plants to survive when the surrounding climate might not normally allow them to. Also pretty convenient is the fact that you may never need to water these plants, depending on the degree to which the terrarium is actually 'sealed'.
Open terrariums, which are used for succulents and plants that don't tolerate high soil moisture or humidity, are far more forgiving in terms of finding the right balance between overwatering and underwatering, but of course these need much more regular maintenance.
Here we will build a terrarium that is mostly sealed, but not airtight, meaning that it will largely have the characteristics of a closed ecosystem, but there is still some diffusion of gasses such as carbon dioxide, oxygen and water vapour with the outside environment. This allows a bit more room for error in the design.
Container and foundation
Since here we will be making a rather large terrarium, a fish tank provides the ideal container in terms of size and water-tightness. To keep it closed but not airtight, I have simply lasercut a piece of clear acrylic to go act as loose lid.
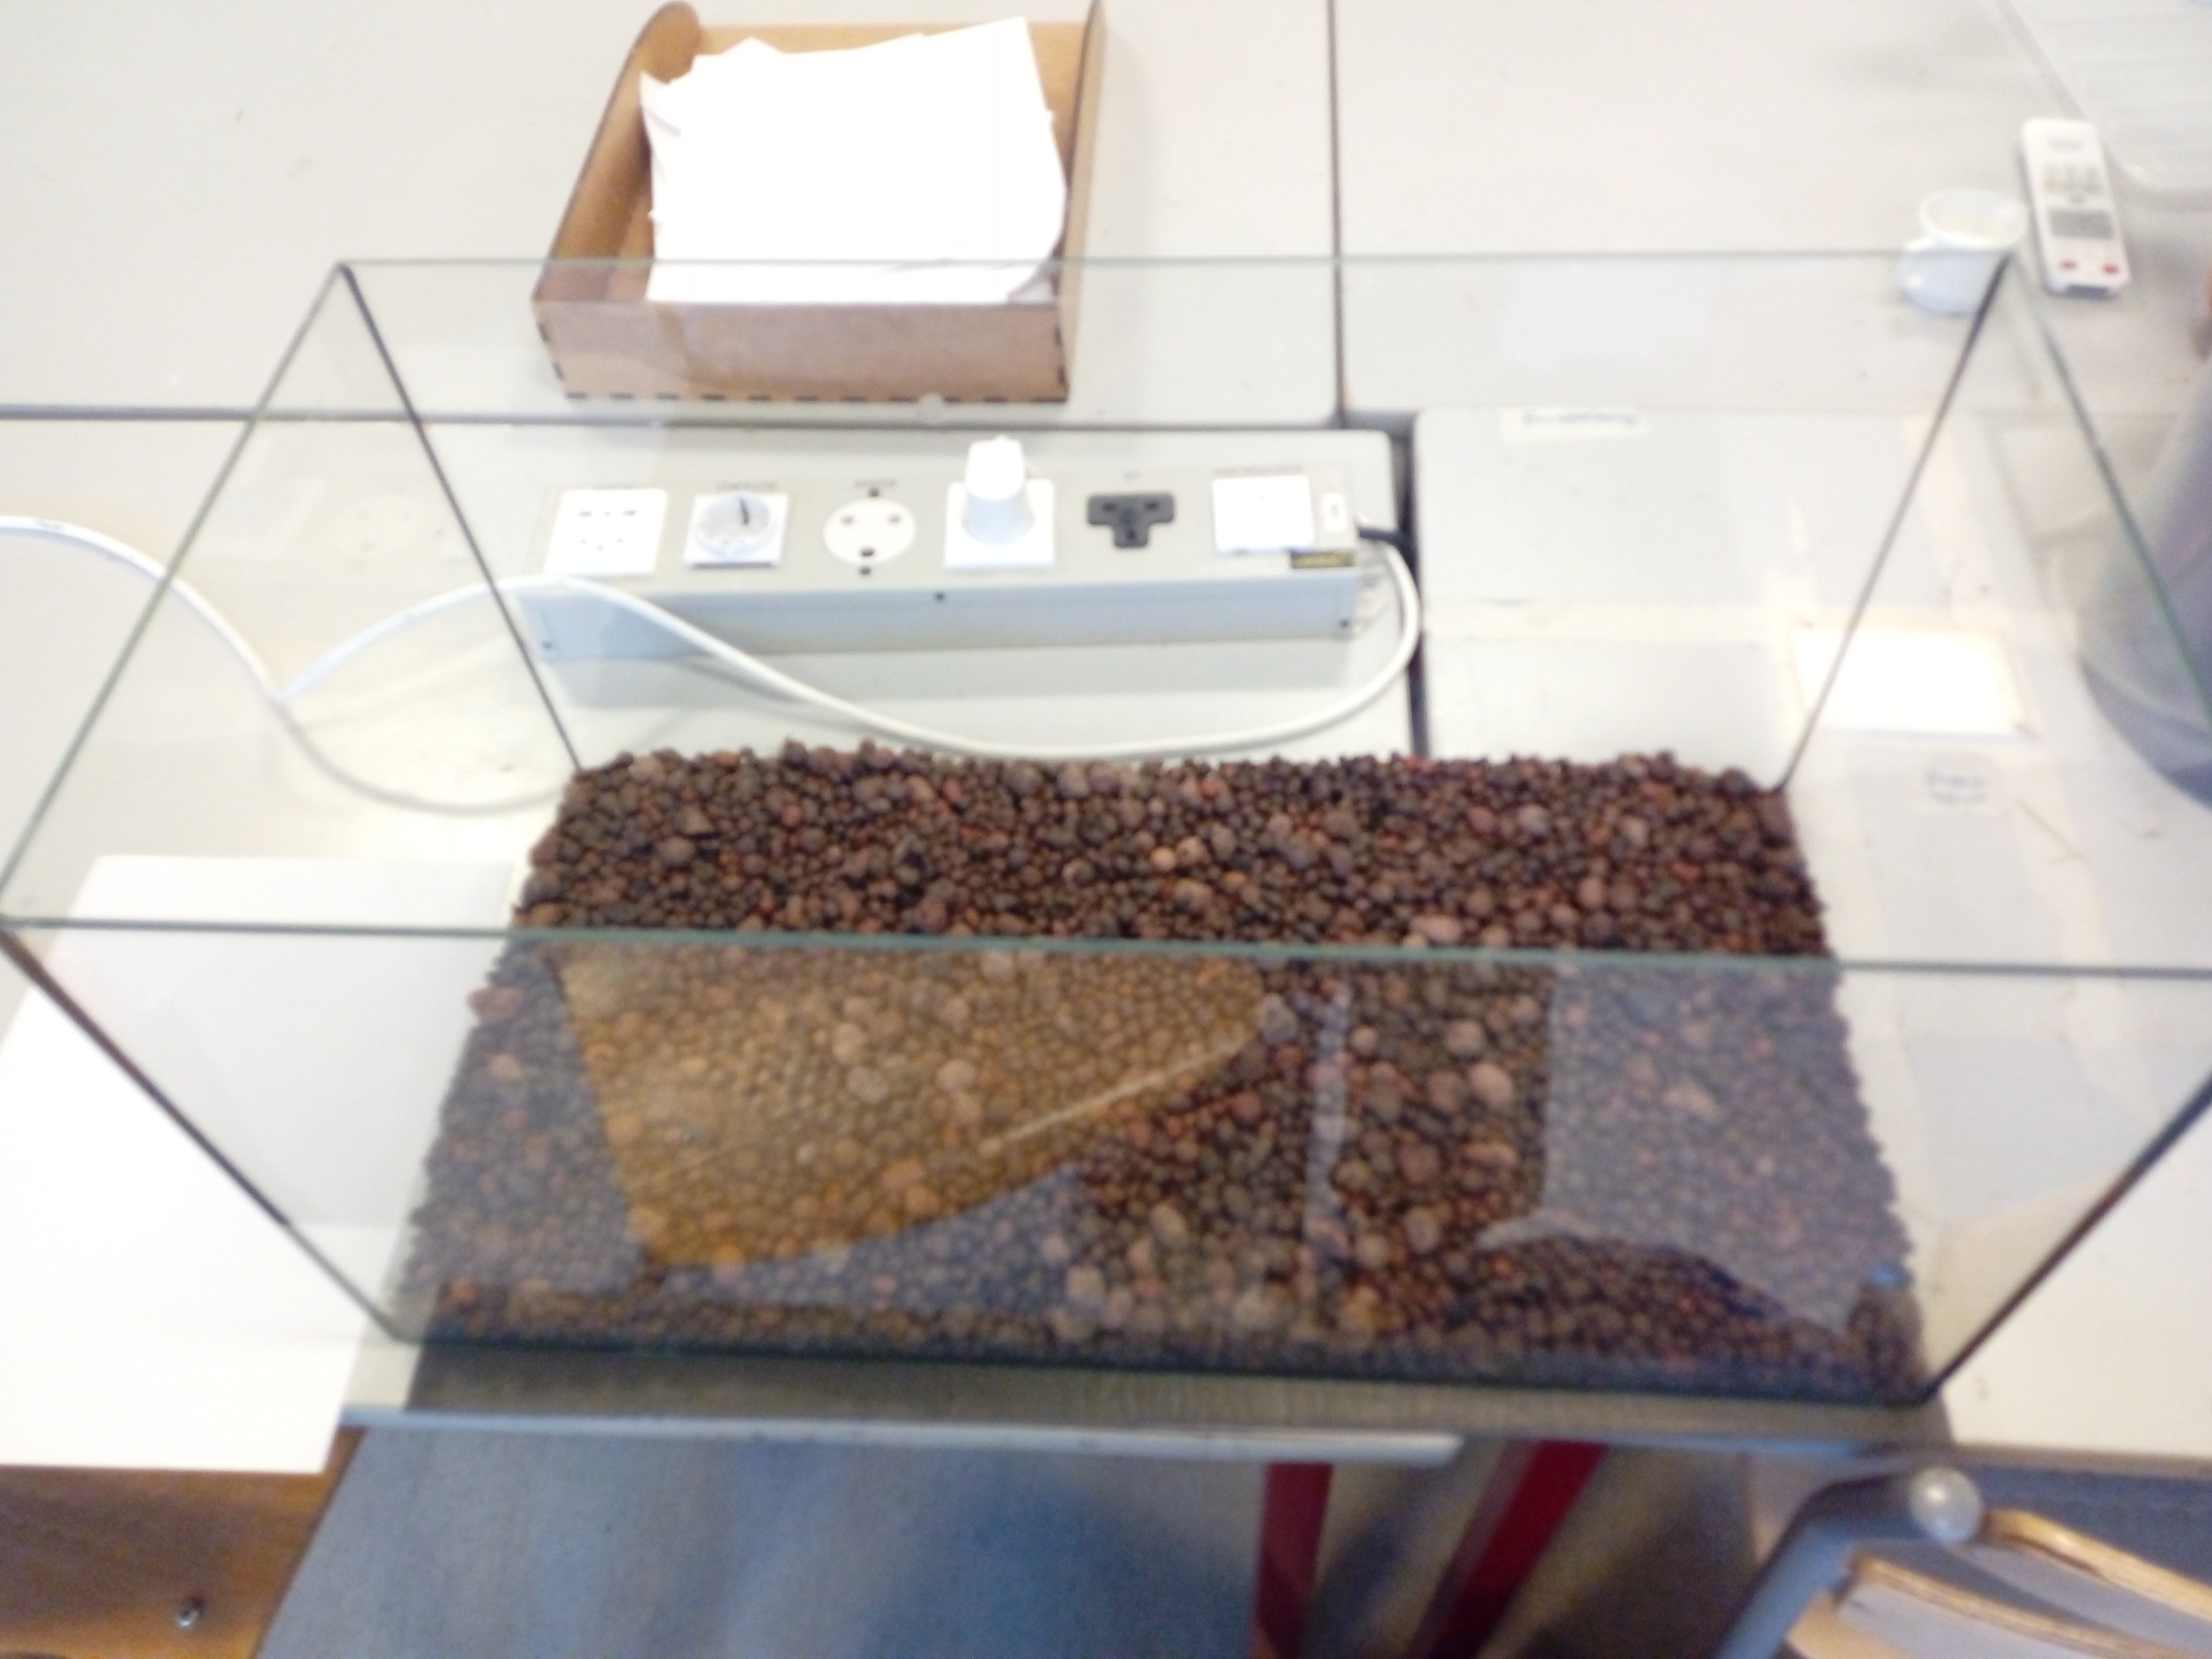
Additionally, the container has been given a slope by placing it at an angle, as can be seen in the first picture. This should cause condensation to run towards the lower side, creating a moisture gradient in the terrarium.
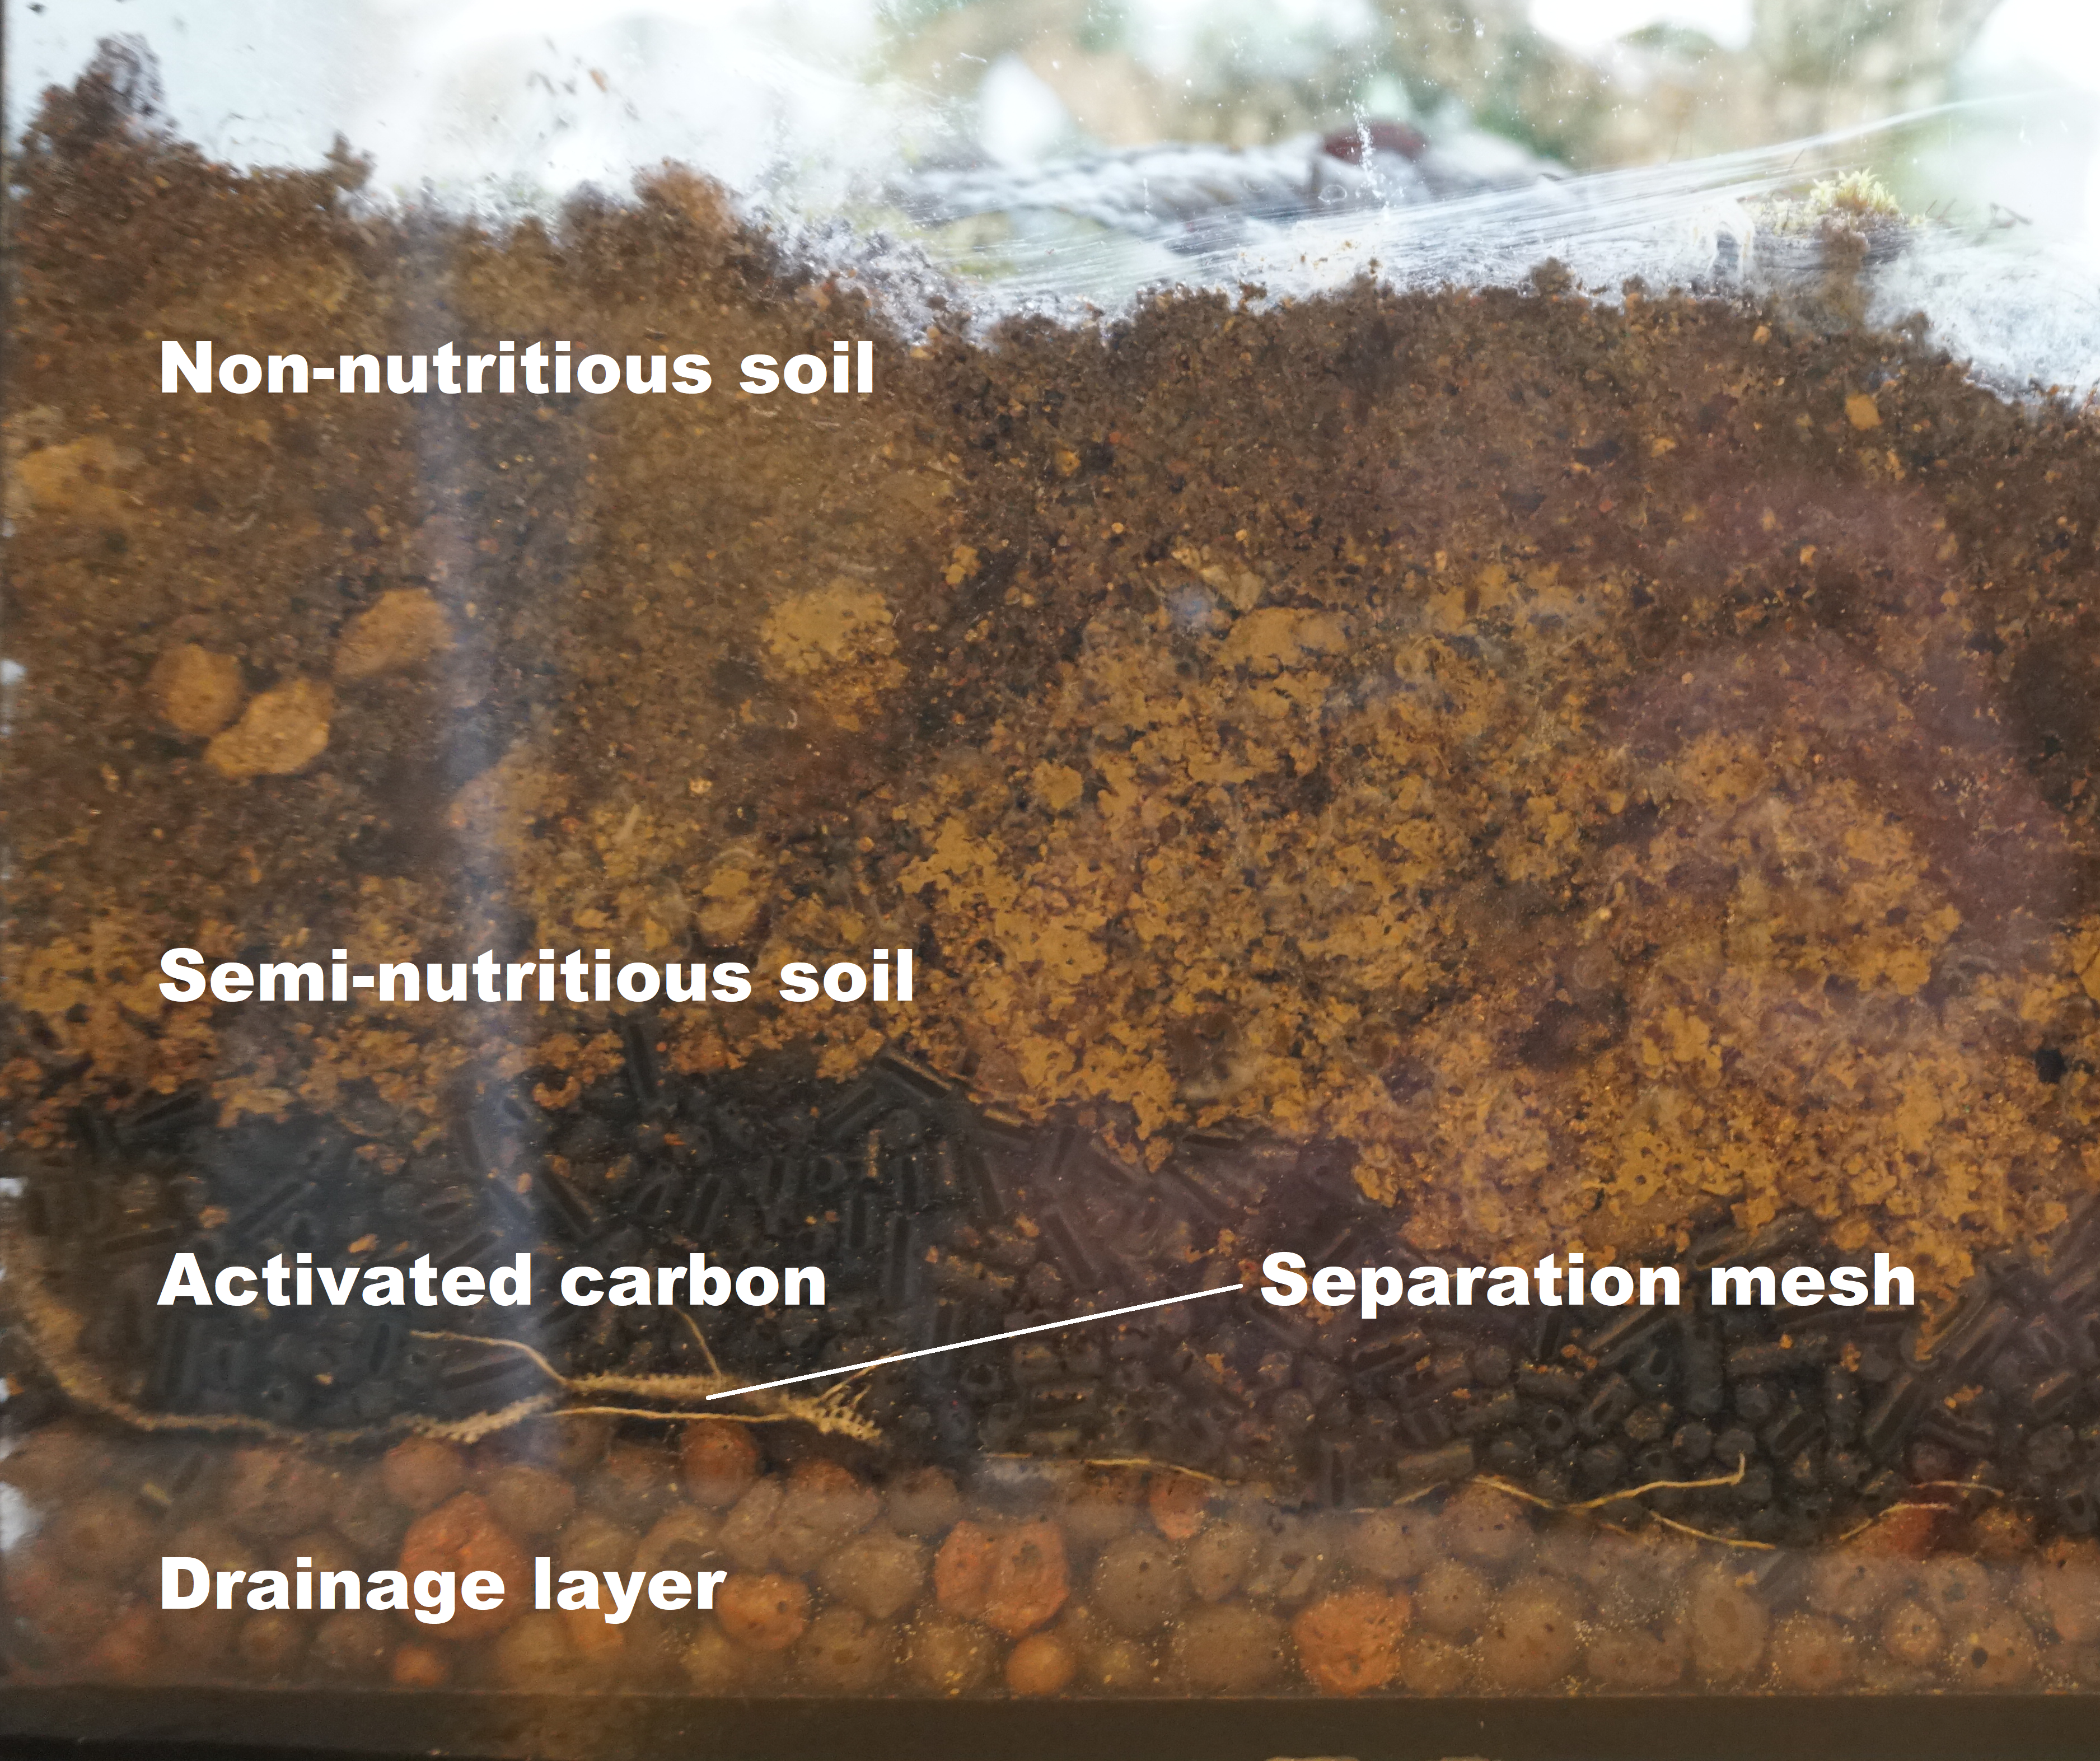
To start with, it is important to have a drainage layer at the bottom, which acts as a water reservoir and prevents the soil from staying too wet and stagnating. Here I have used a decent layer of expanded clay tablets. Sand, gravel or a mixture of both can also be used.
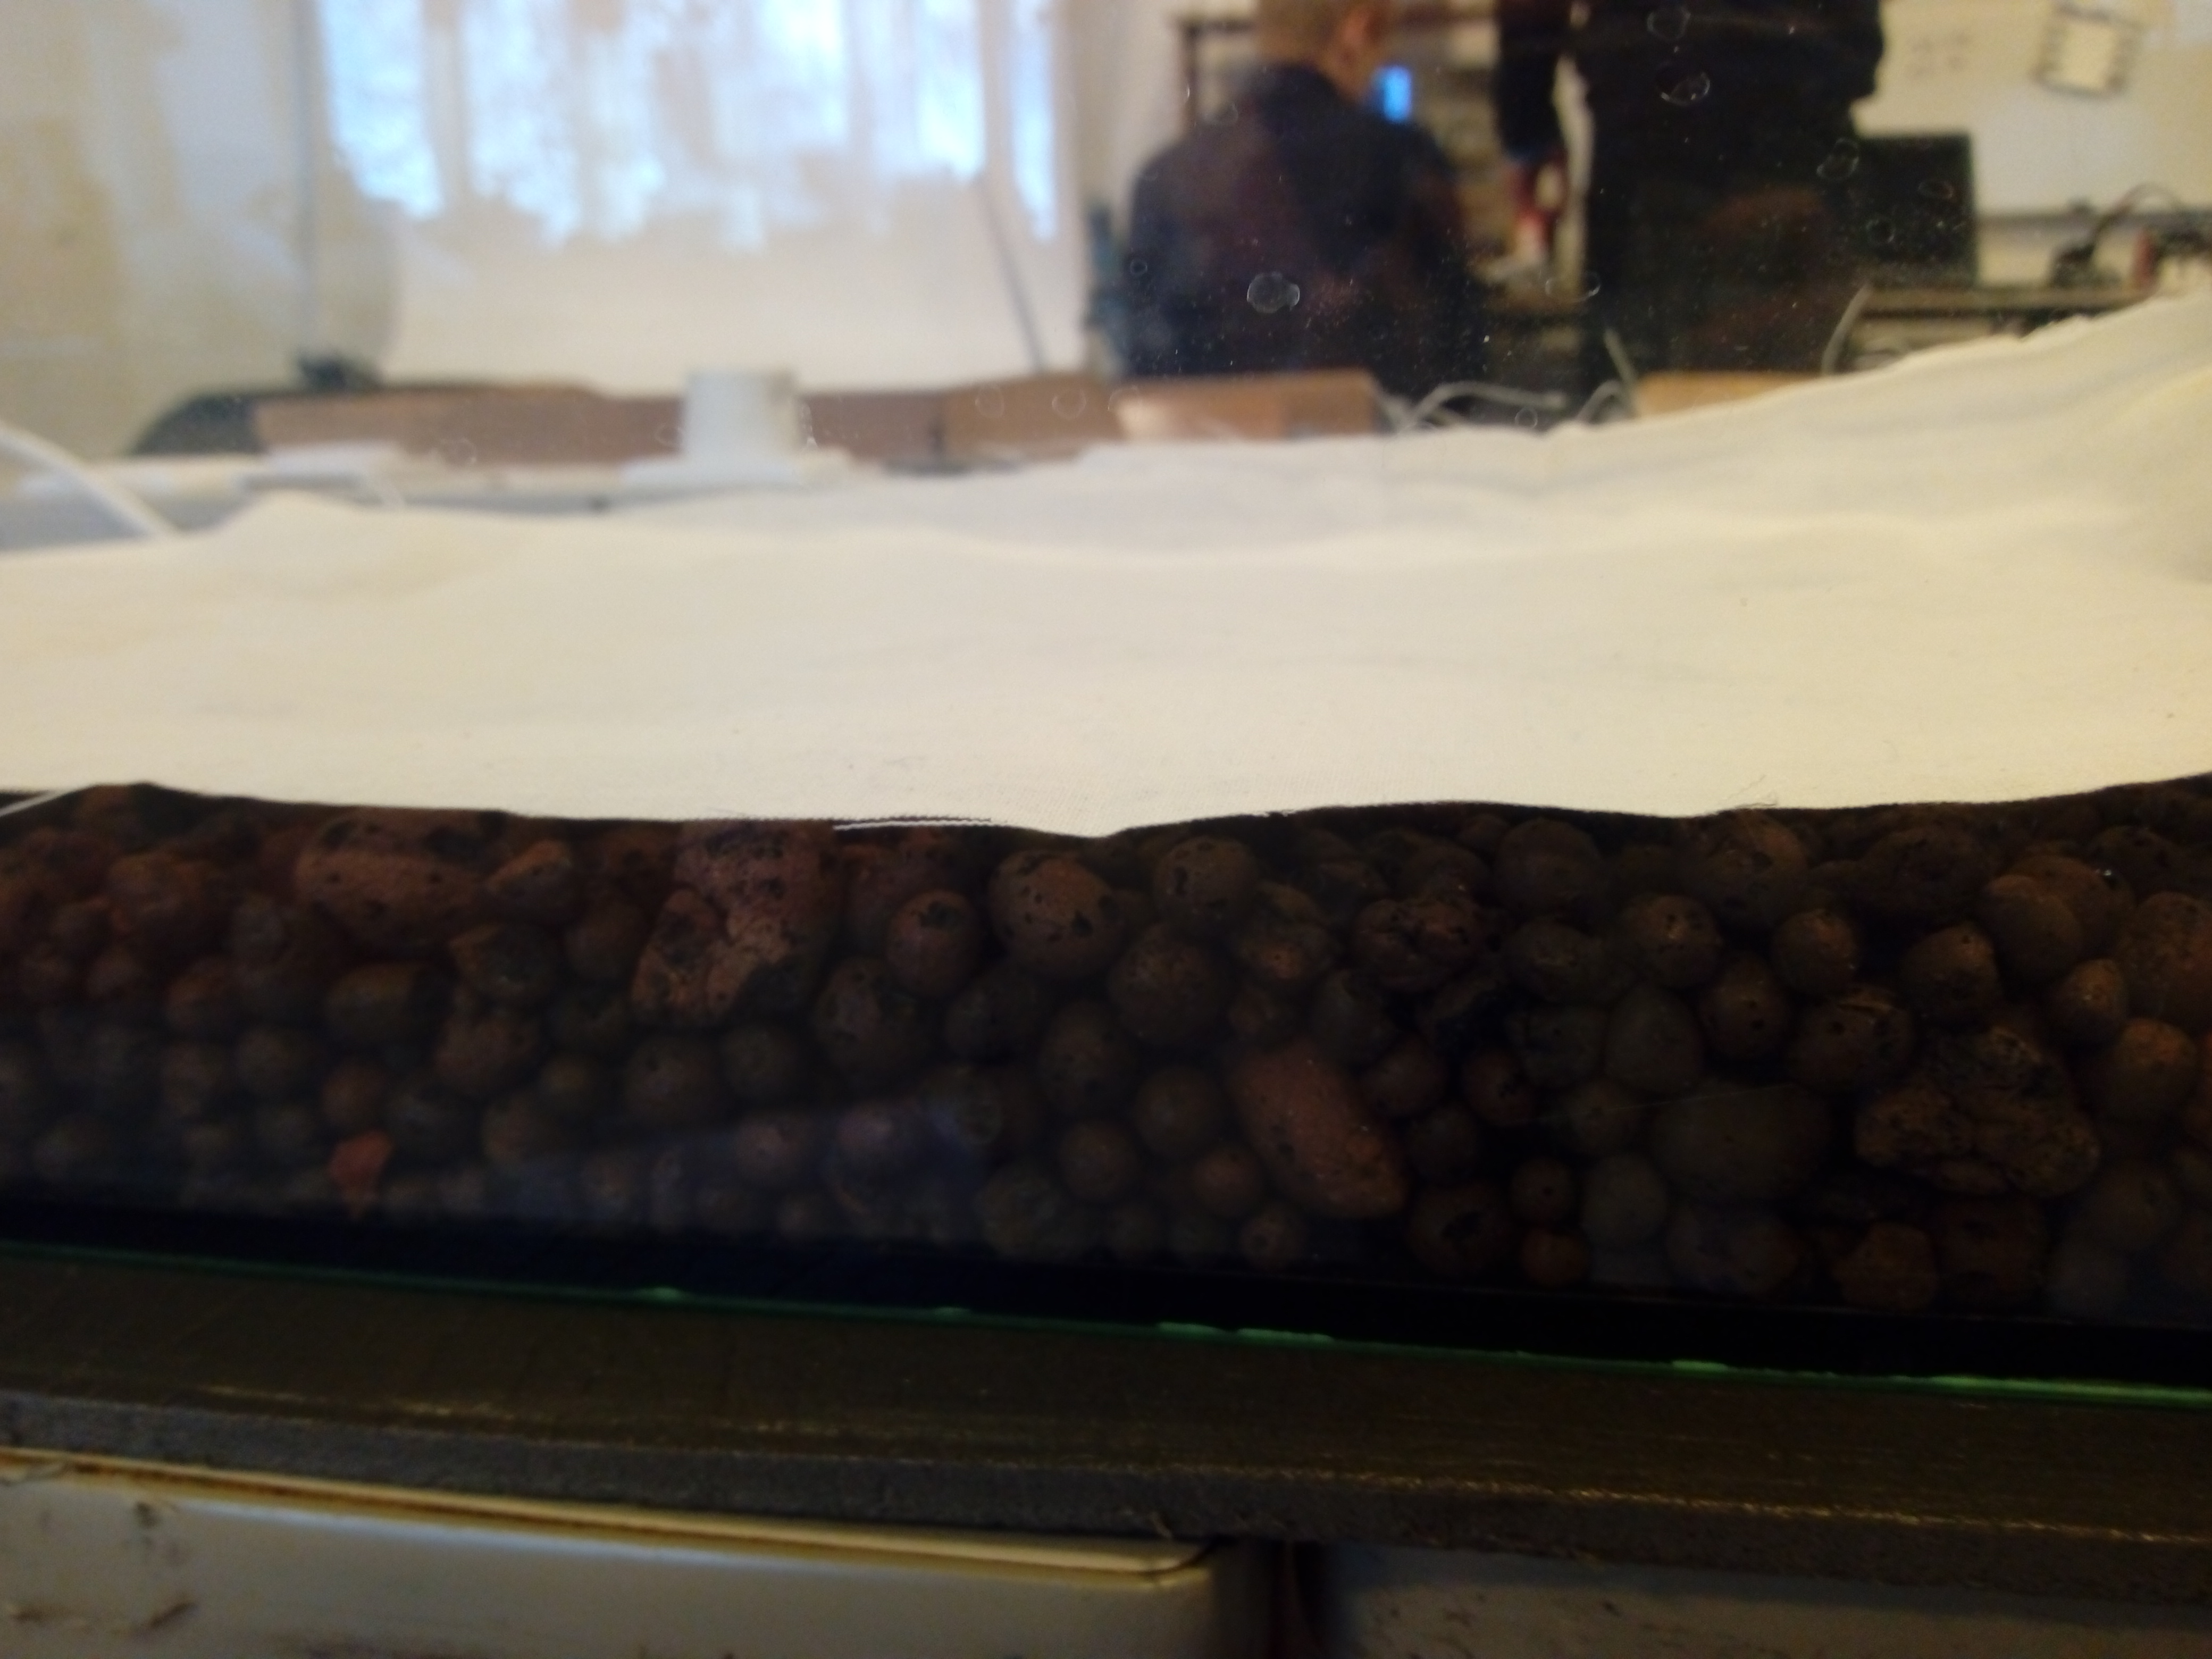
 Next, a separator is needed to stop finer particles above falling down between the gaps of the coarser clay tablets. This is a simple coarse cotton sheet, which will eventually degrade.
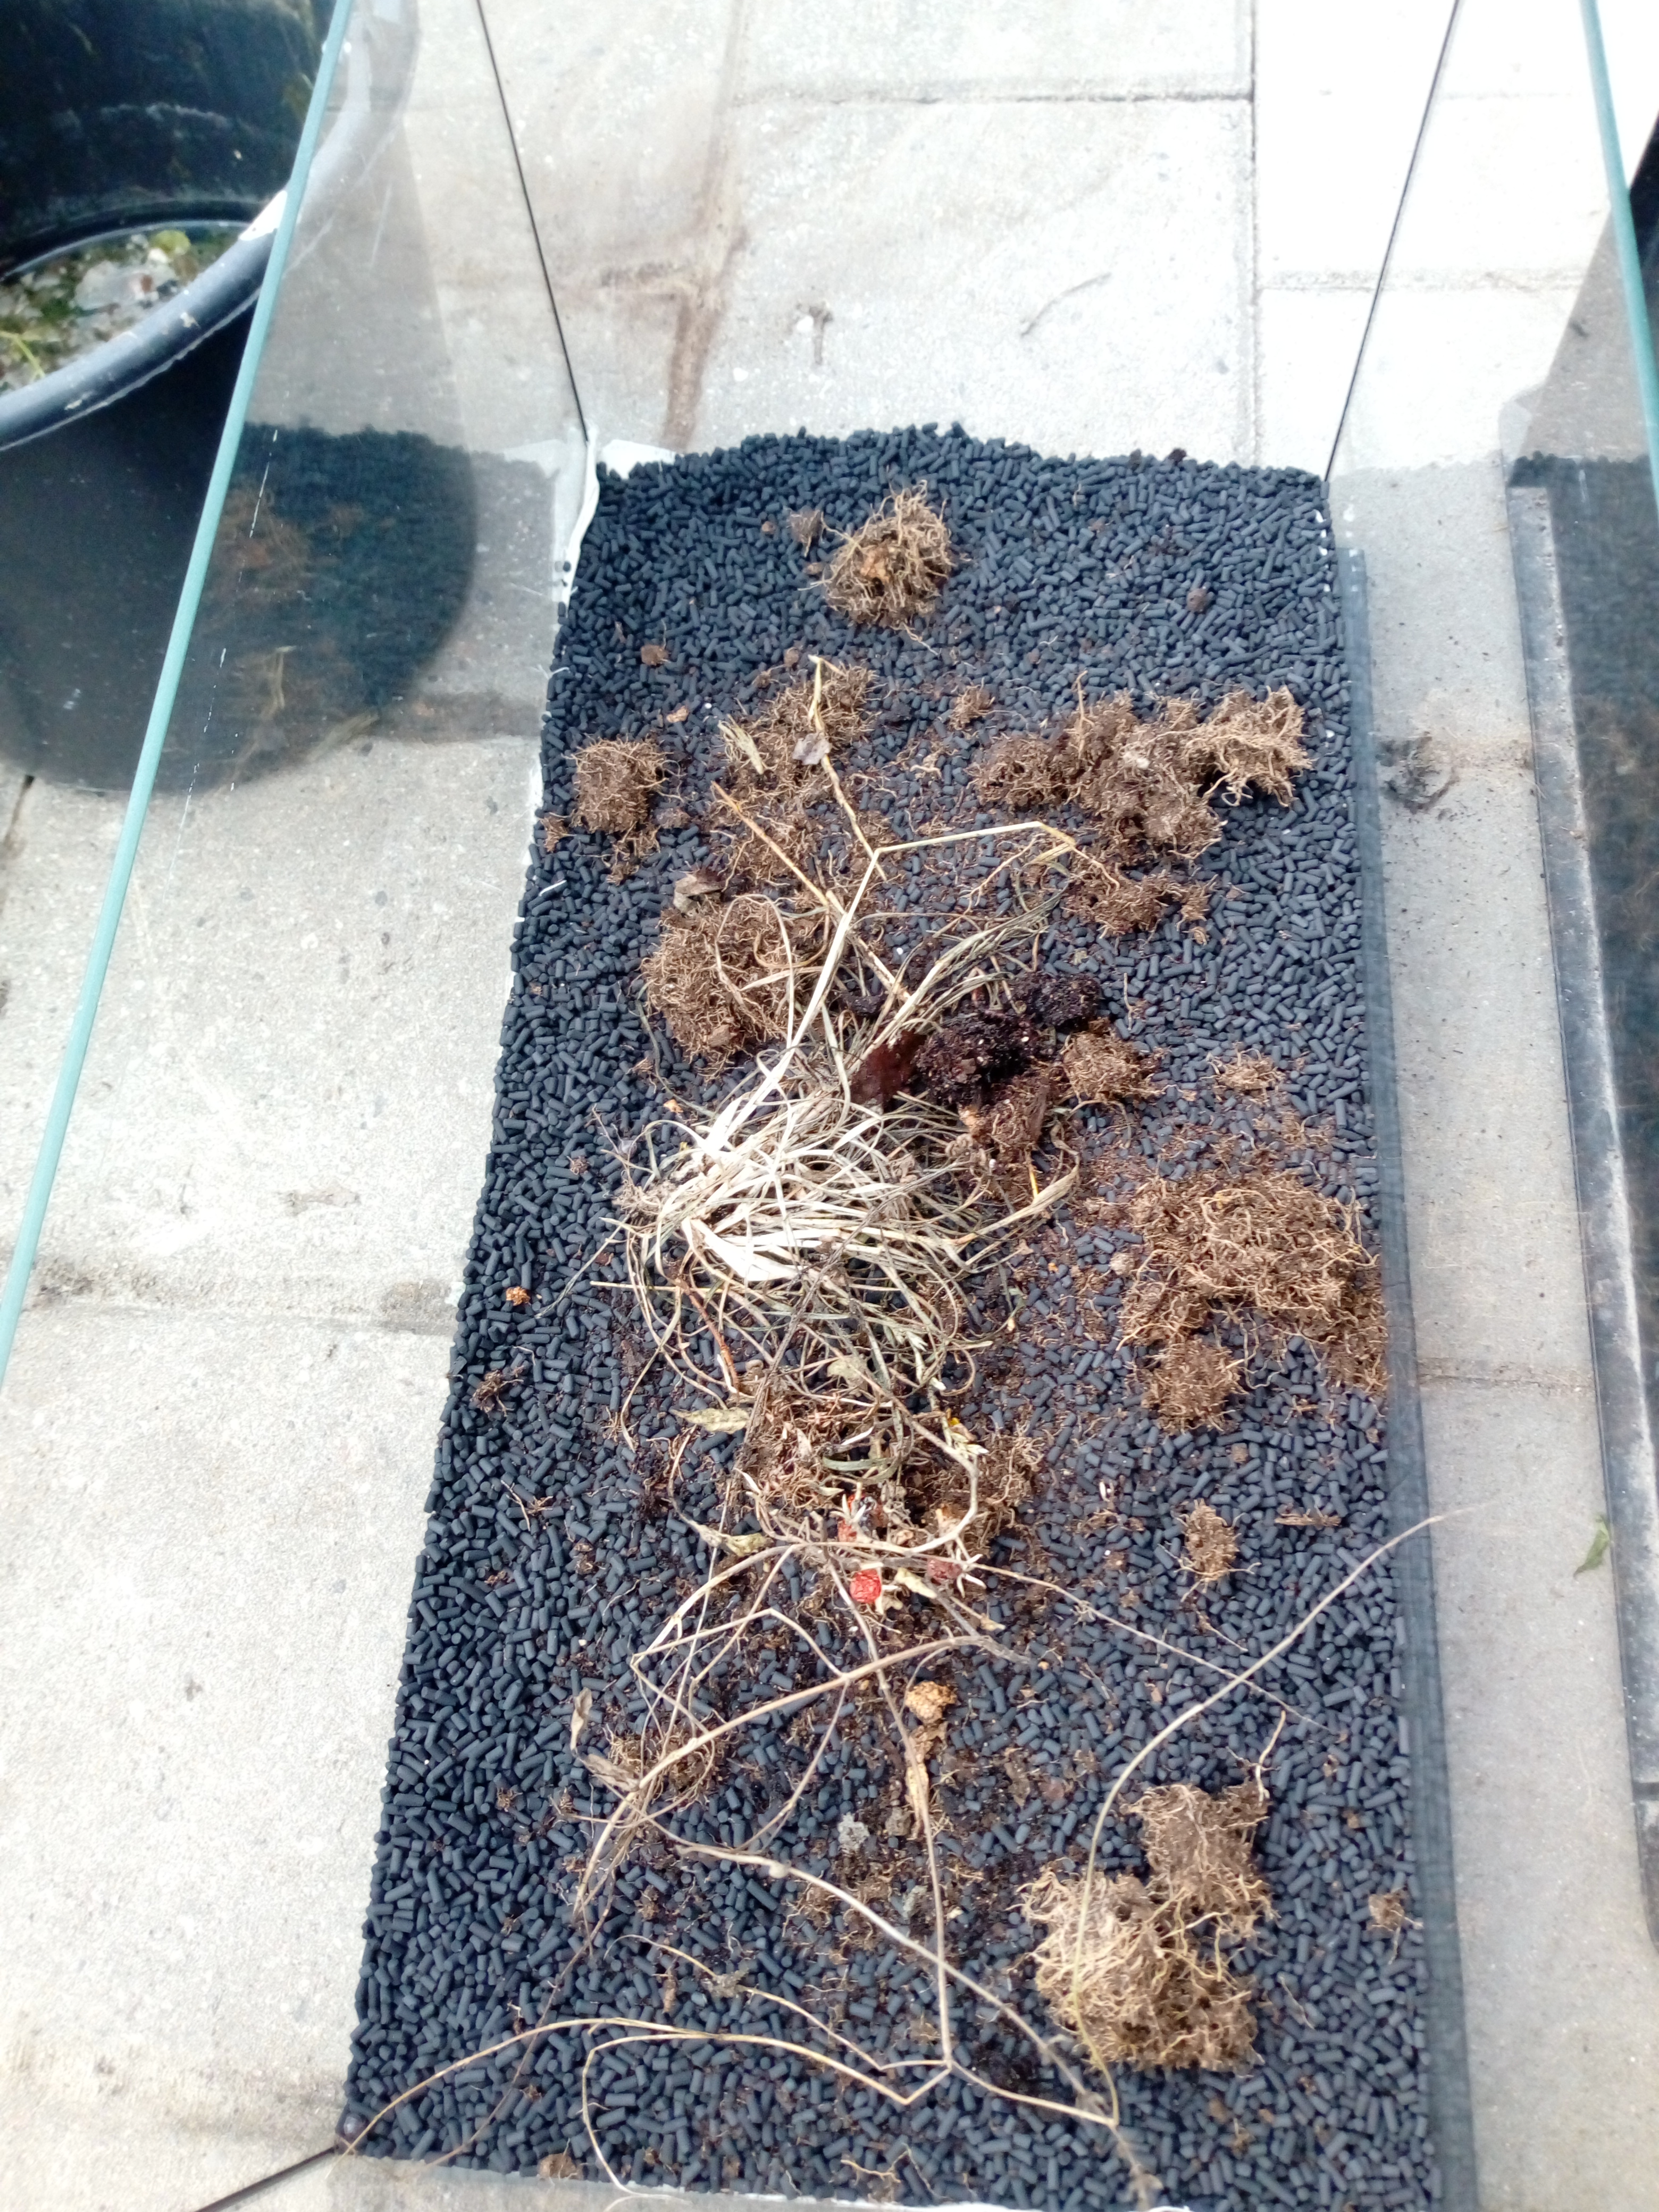
 Now a thin layer of activated carbon is spread on top.
 This serves to filter the water that passes through it, and absorb some excess moisture in the soil. It's also used in most aquarium filters and can be found in almost any pet store.
When that's done, place some lignocellulosic waste like wood chips, dead grass etc on top. This will serve as a slow-release fertiliser for the plants.
 A quick-release fertiliser with a high nitrogen content could lead to a boom in plant-growth, followed by sudden death when the nutrients run out and anaerobic conditions as decomposers flourish on the resulting organic debris.
Finally there comes the soil. A good idea is to use two different soil types: something more nutritious like potting soil on the lower layer and an inorganic layer like building sand on top. Here, the lower layer was soil dug up from an area with lots of plant growth, and the upper was obtained from a well-leached river bank.
 In theory, this should provide nutrients for the plants, which have roots extending throughout the soil structure, while not encouraging too much respiration by aerobic microbes on the surface.
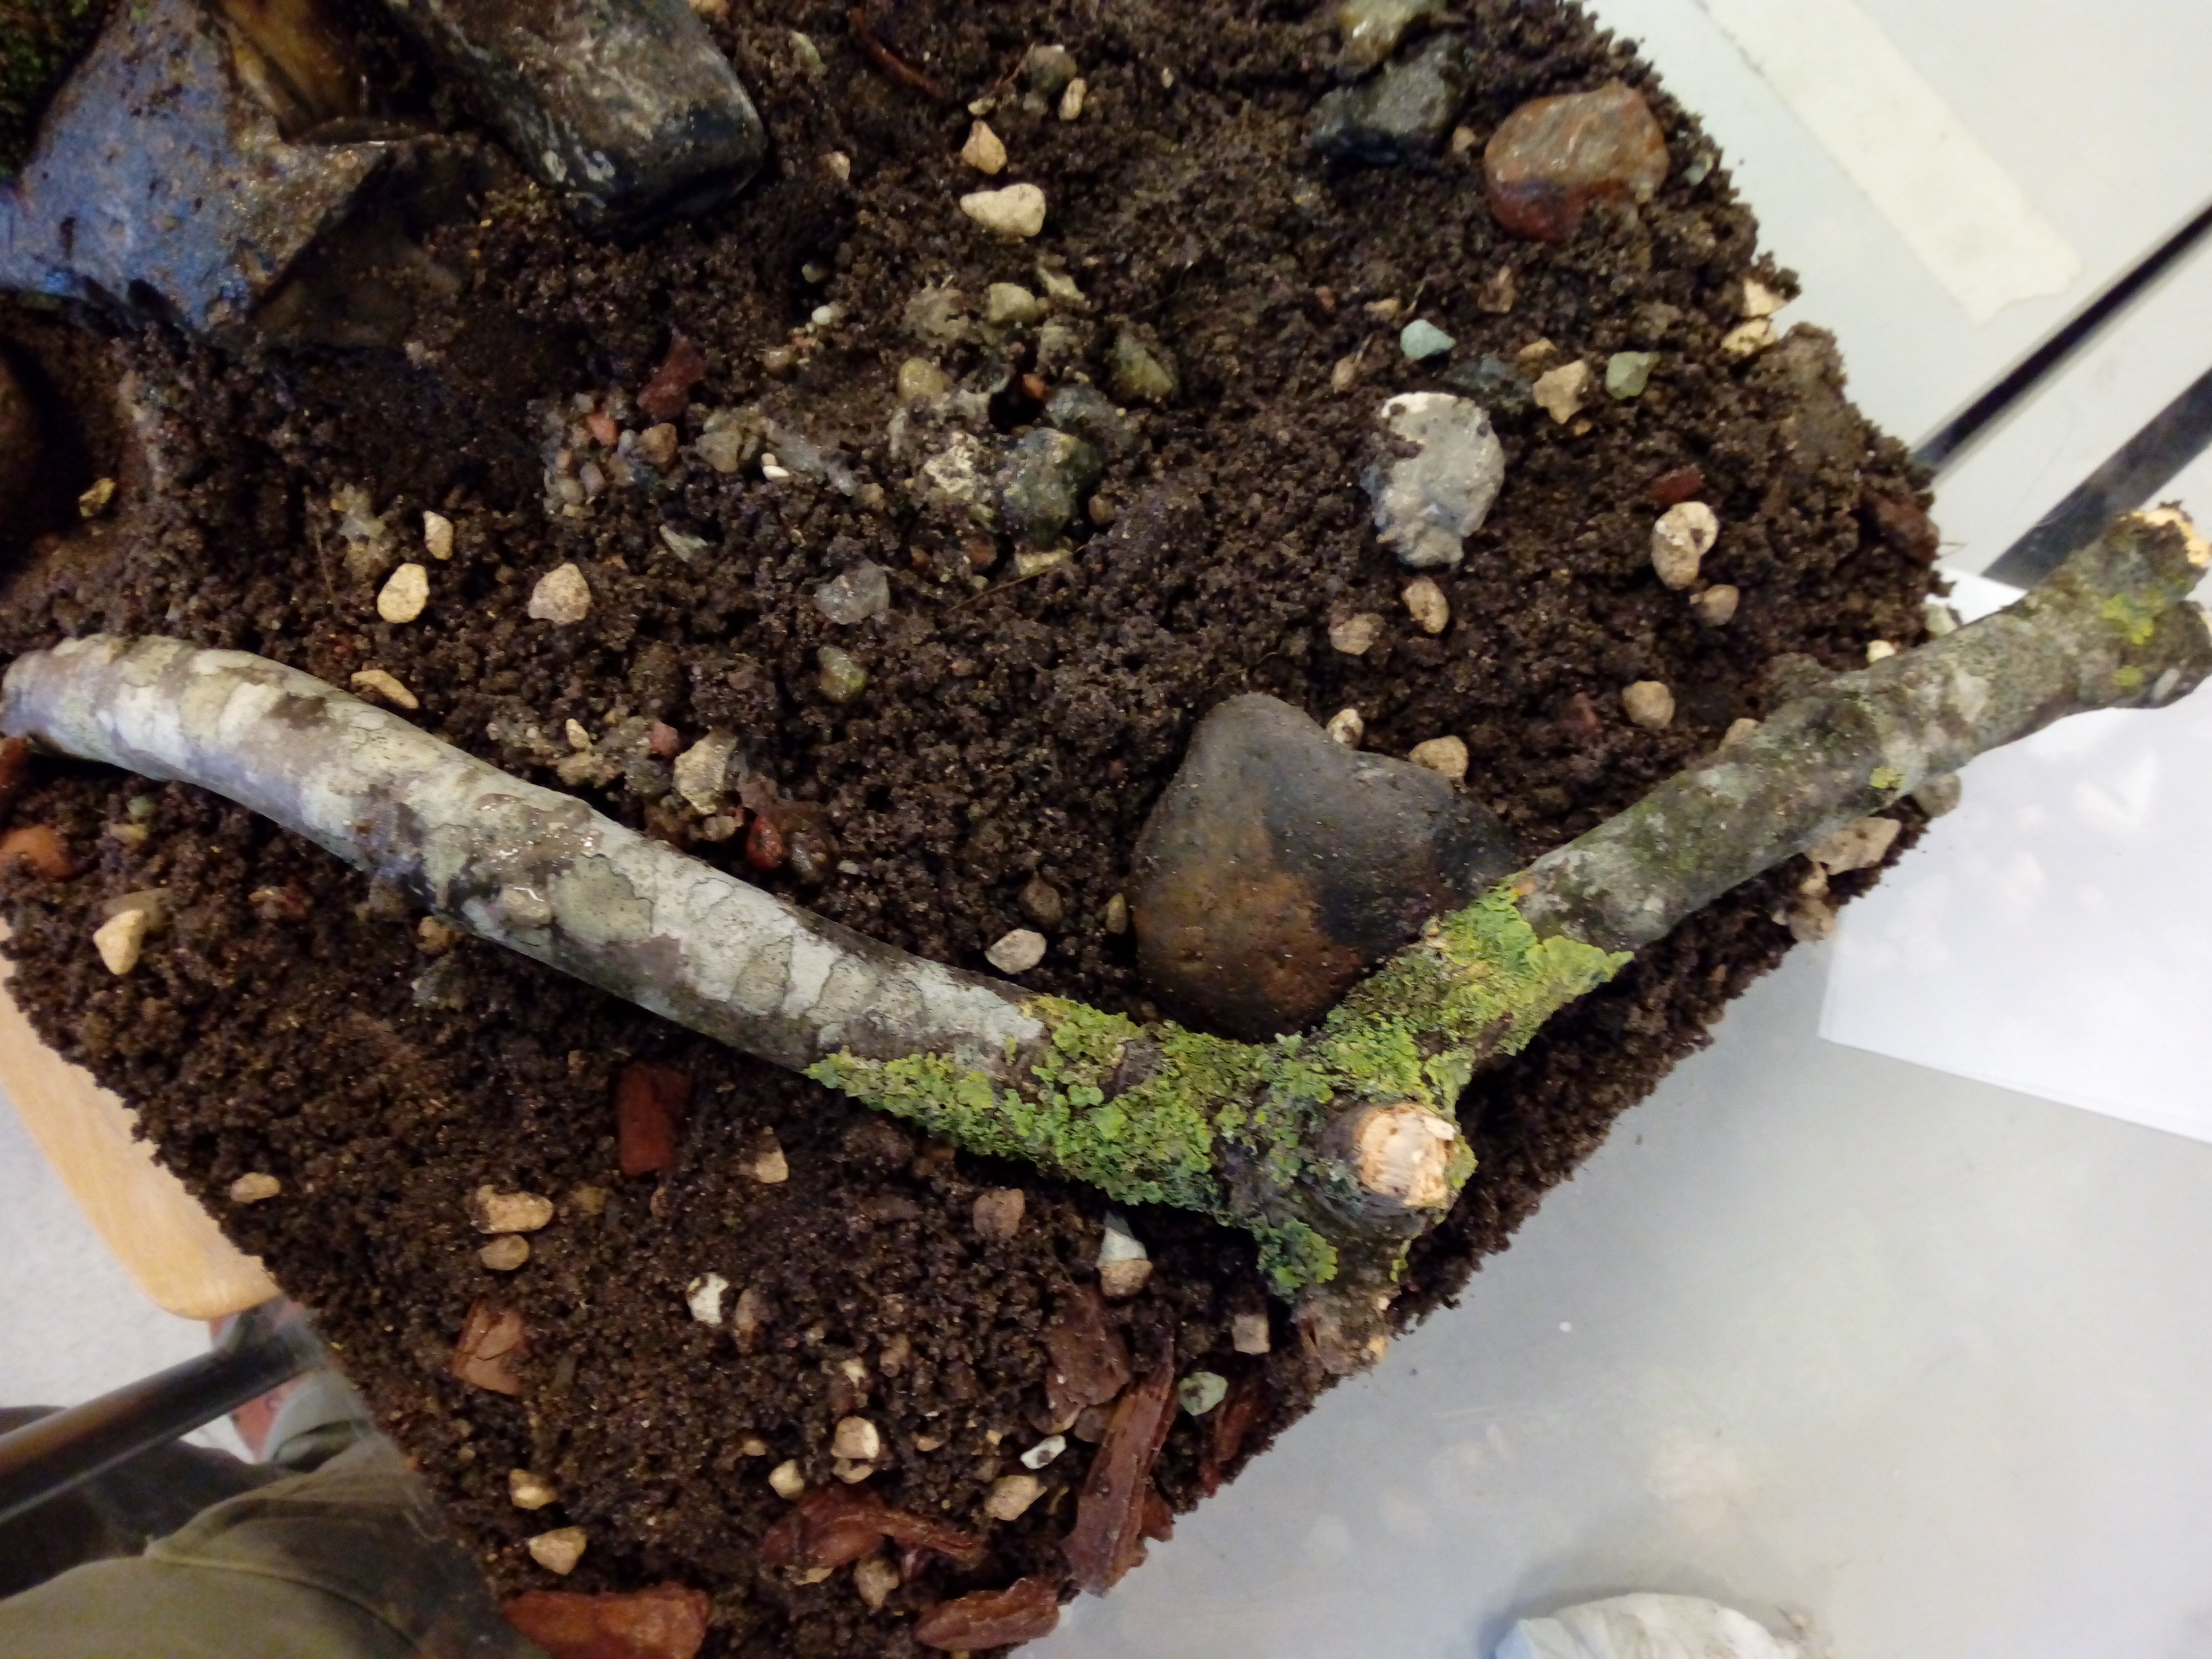
The fact that the soil used here was simply dug up from the surroundings means that it likely contains many insects and microbiota already, which can be beneficial to the plants. There is, however, the chance that it contains pests which may pose a threat to the plants, but that's a risk we will take here.
In total, the solid foundation of the terrarium should only take up about a third of the available space, leaving plenty of room for air.
Add some natural objects like stones and pieces of wood (or whatever you like) for aesthetics.
Plants
At last, the plants. These should be decided on according to what type of terrarium you build. As said, closed terrariums need moisture and humidity-loving plants, whereas succulents need drier conditions and plenty of airflow more suited to an open design.
In this build there are the following species:
- Asplenium nidus (Bird's-nest fern)
- Hypoestes (Polka dot plant)
- Croton codiaeum
- Asparagus setaceus (Asparagus fern)
- Pilea involucrata (Friendship plant)
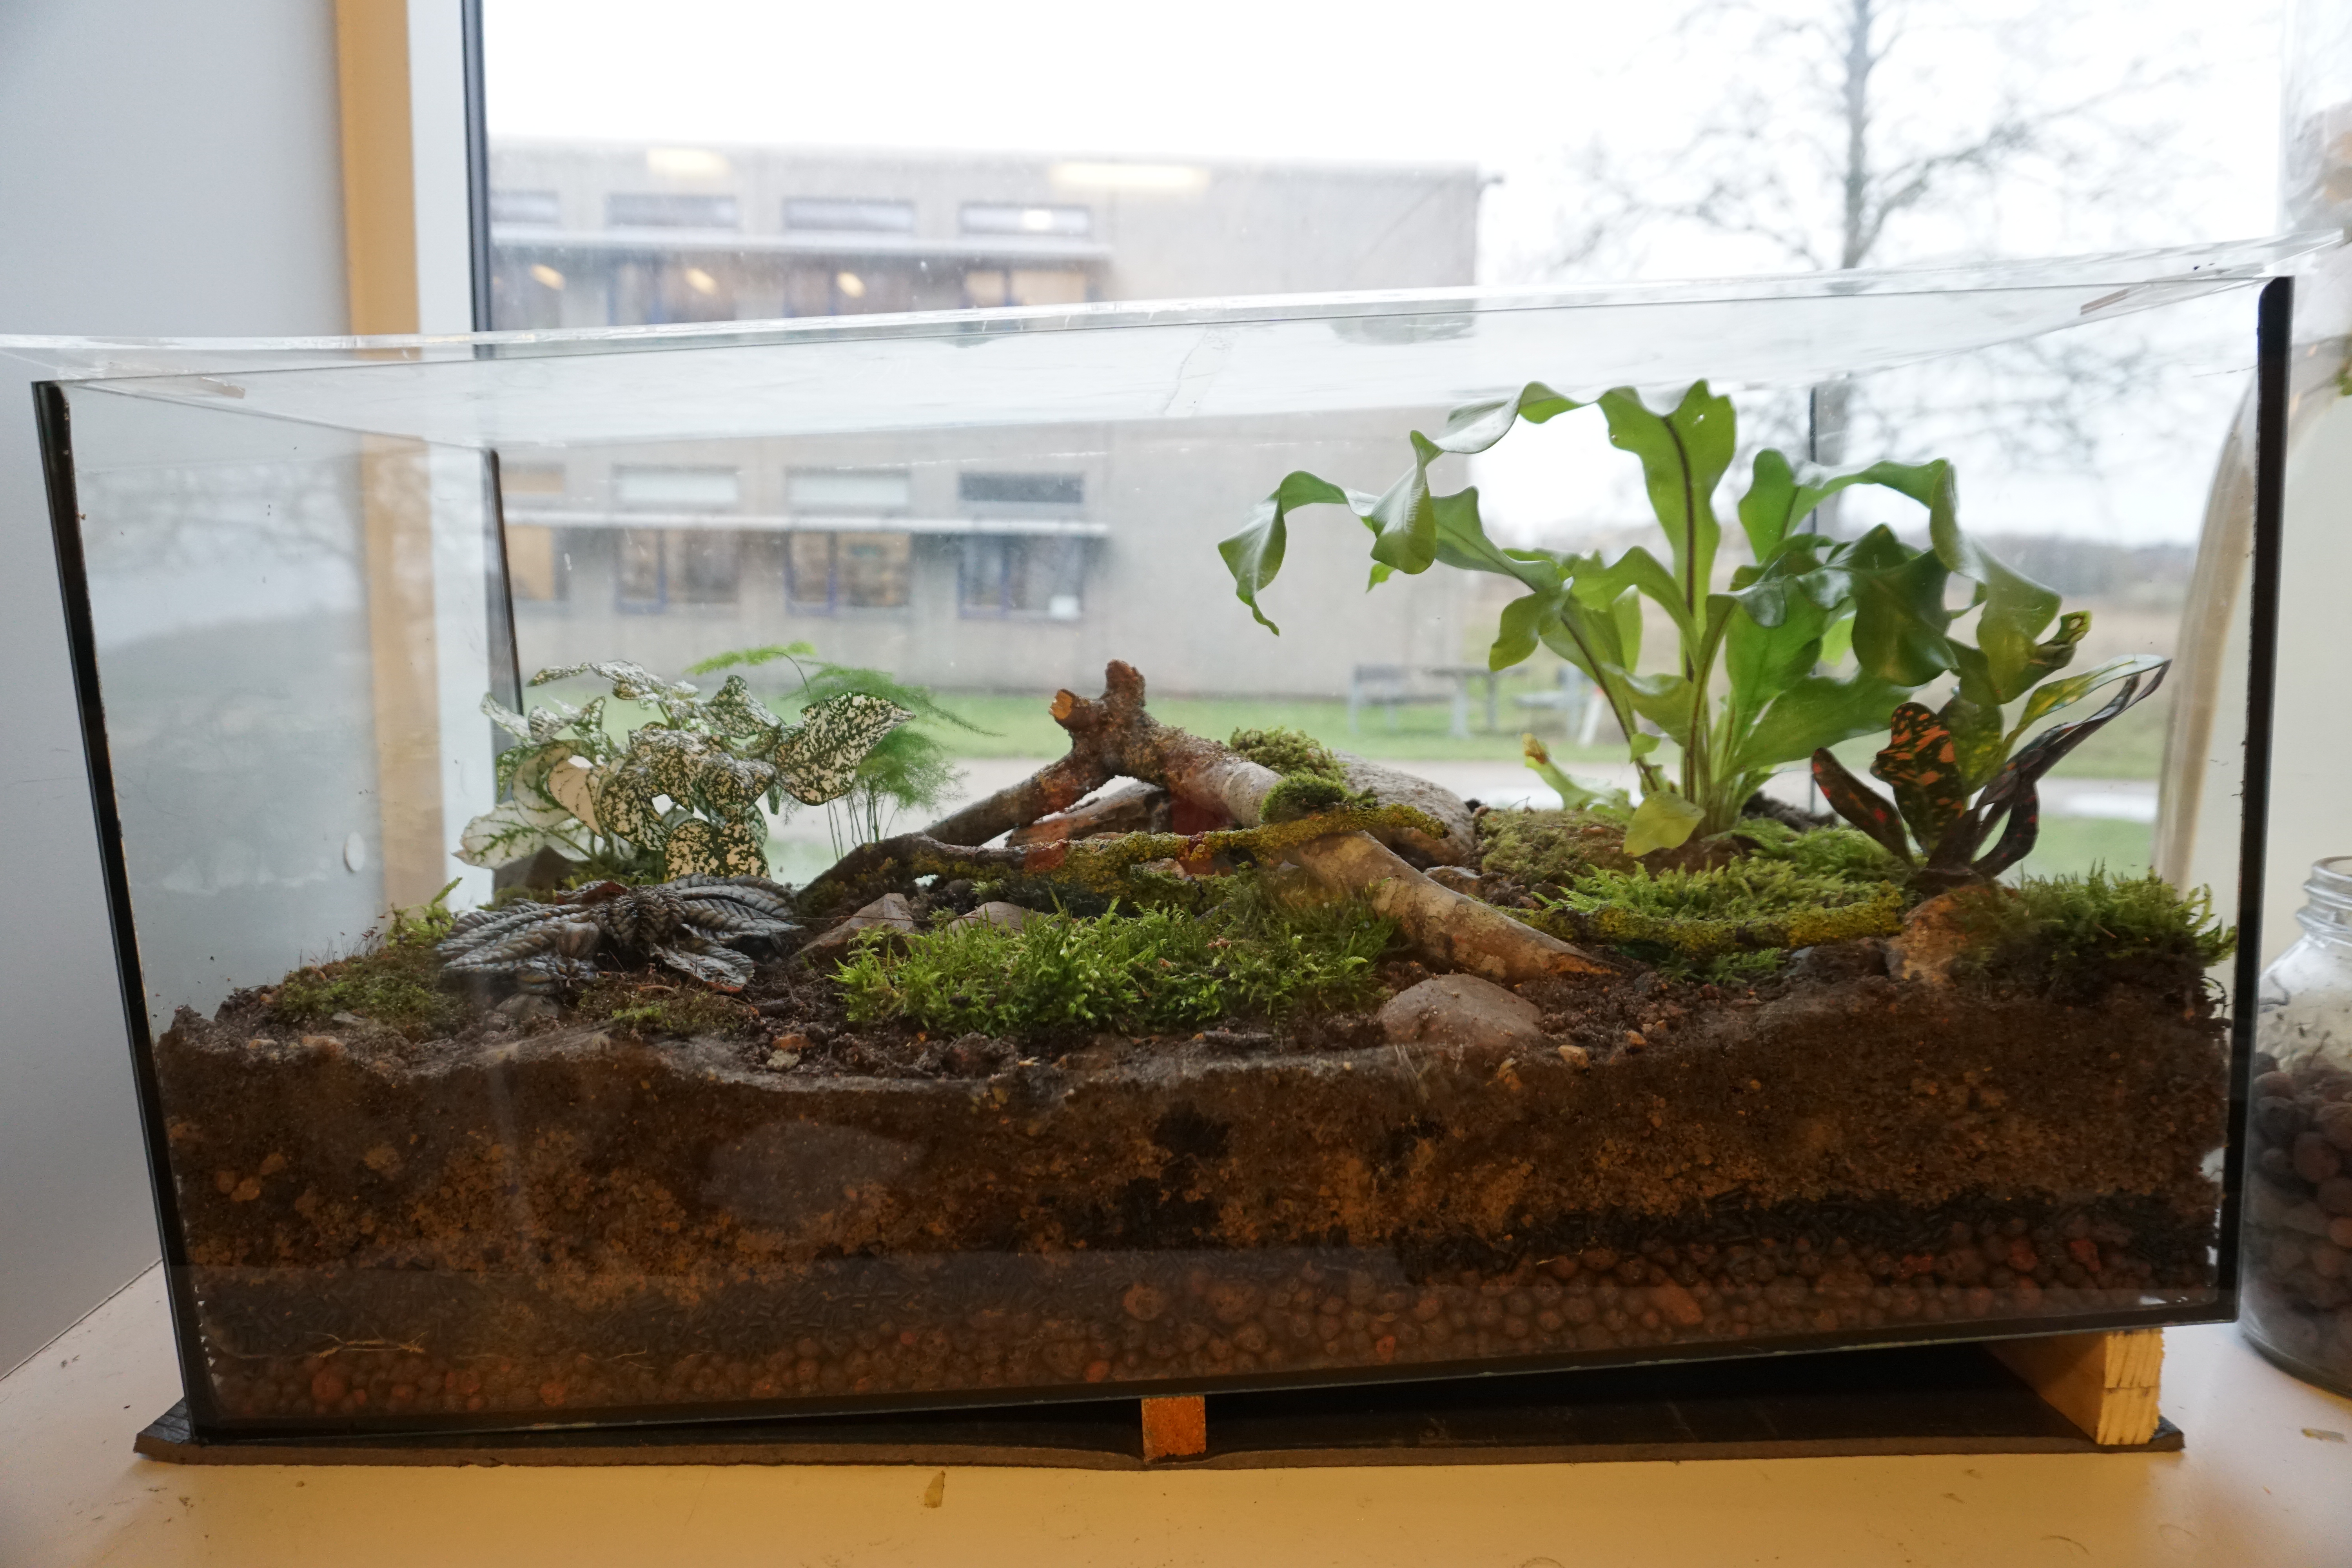
And various bits of moss taken here and there from the ground outside.
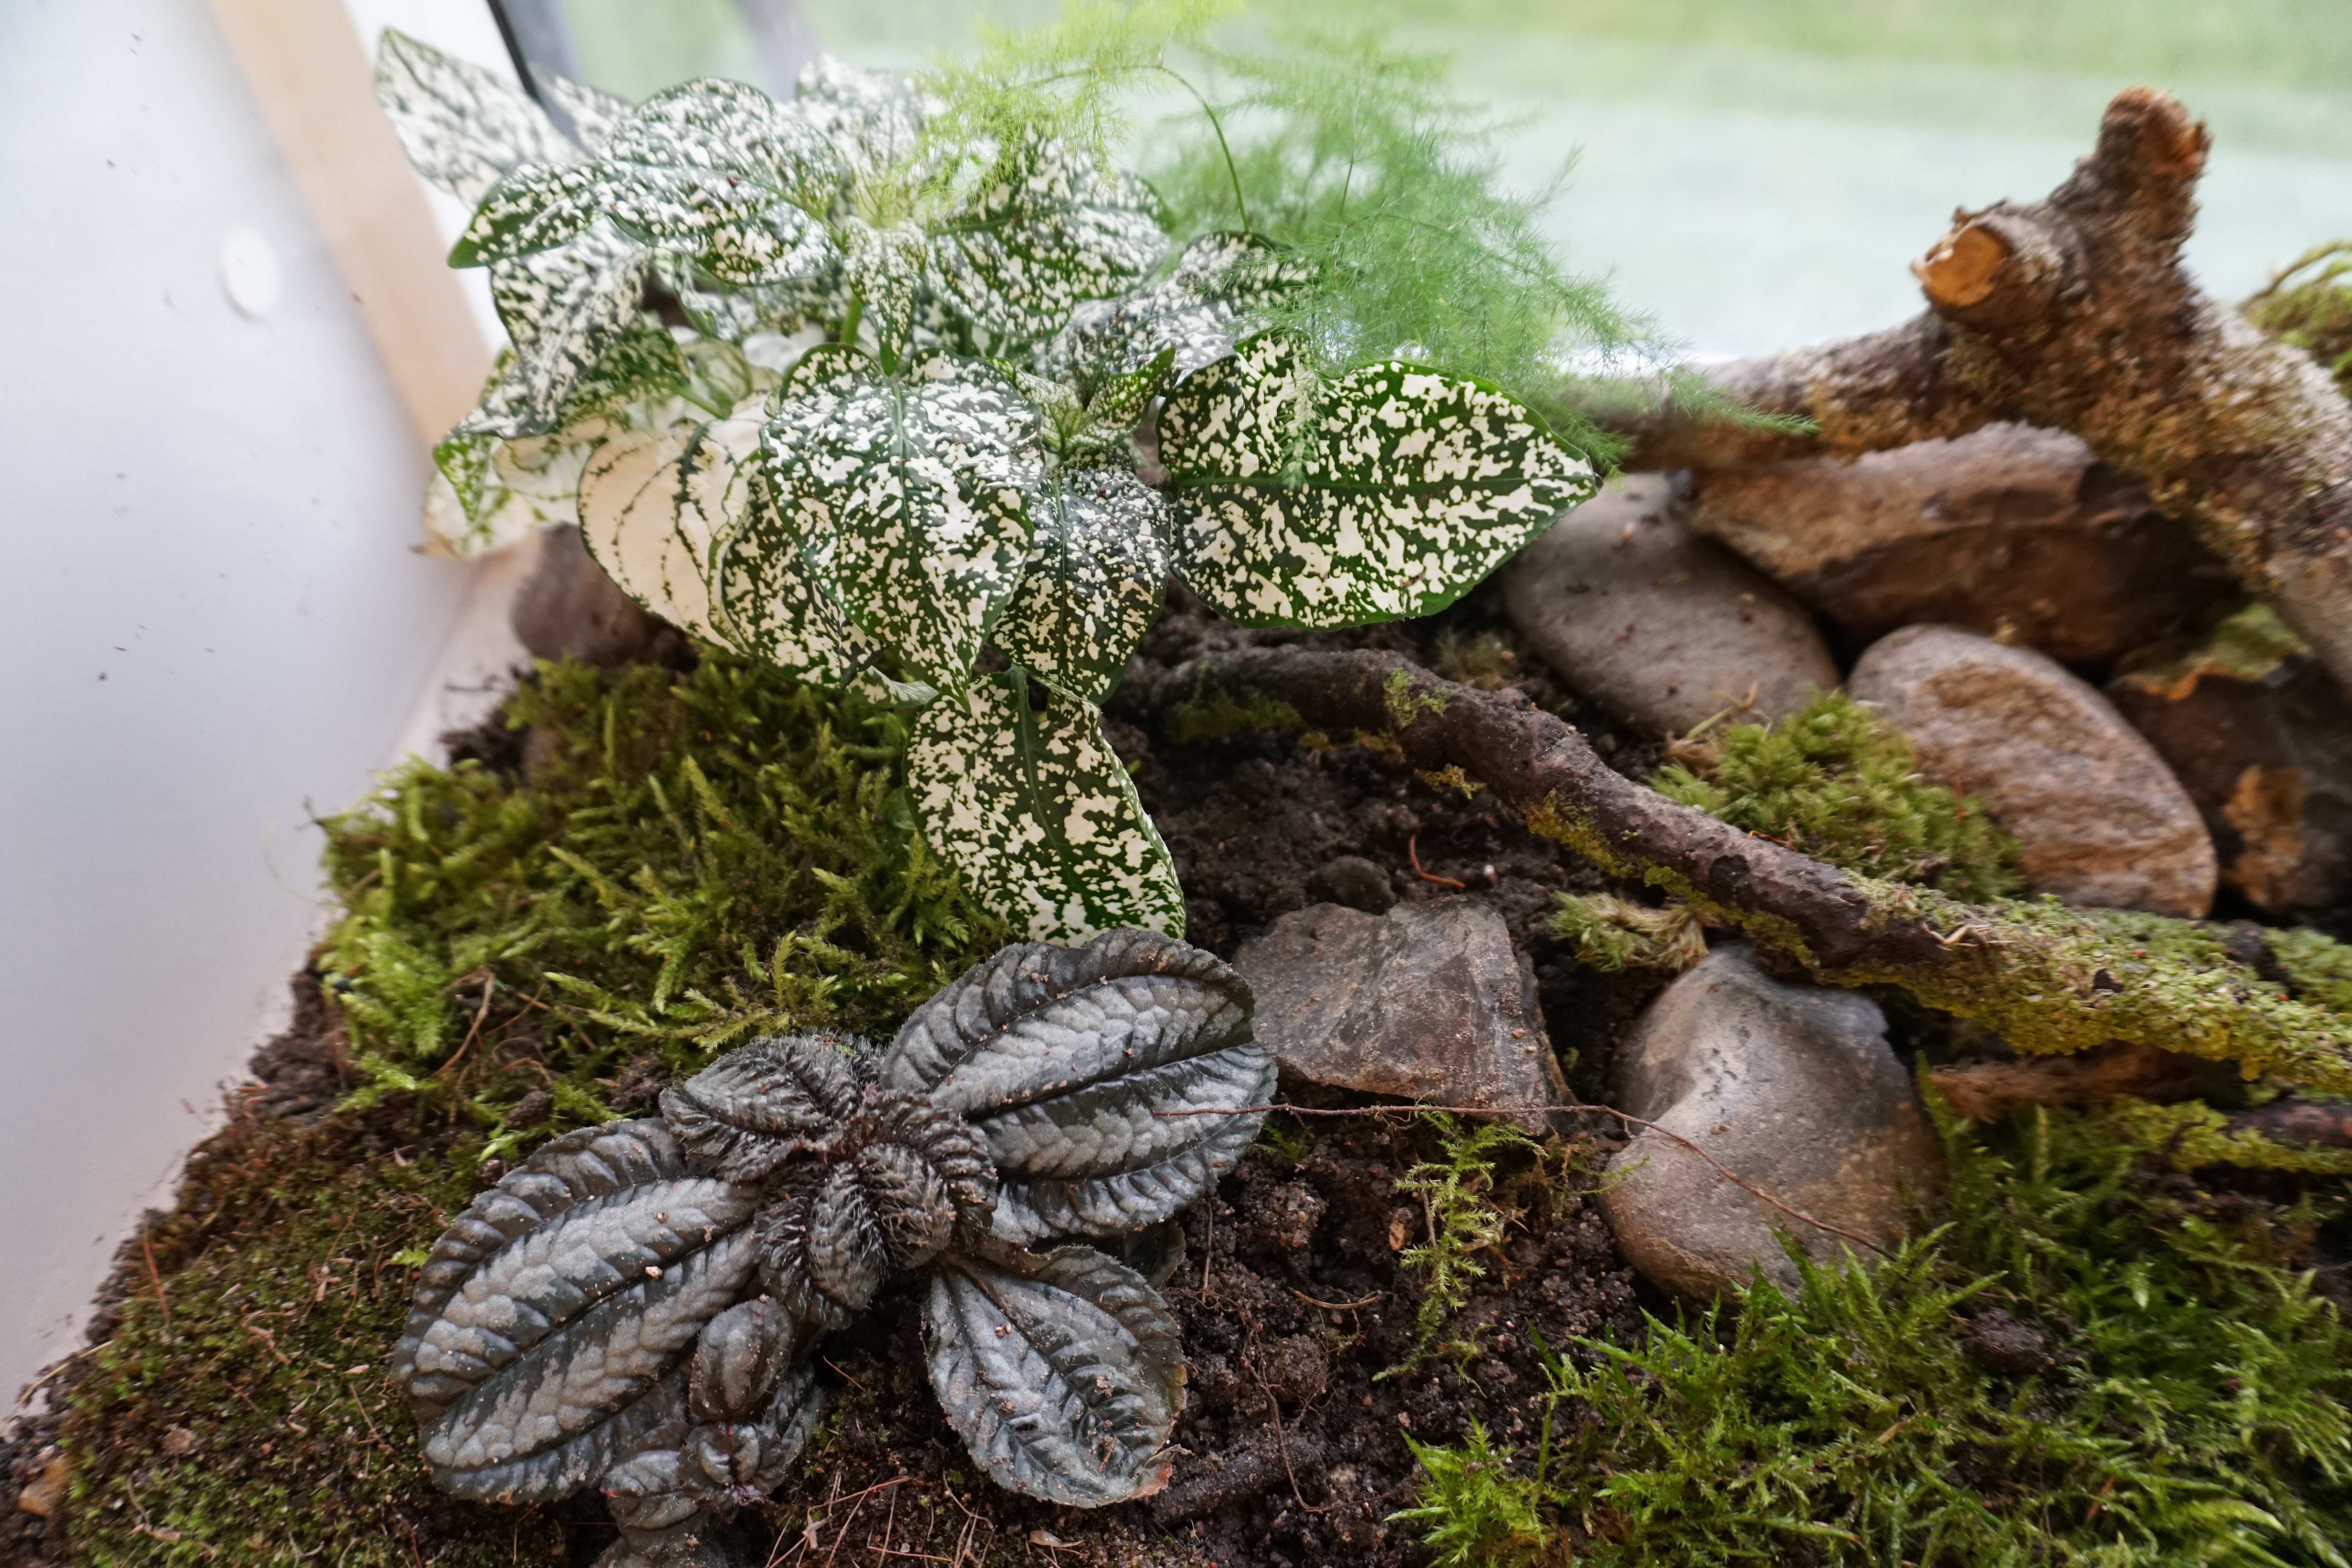 A polka dot plant (white and green leaves) with a baby asparagus fern hiding behind it and a friendship plant with silver-black leaves in the foreground.
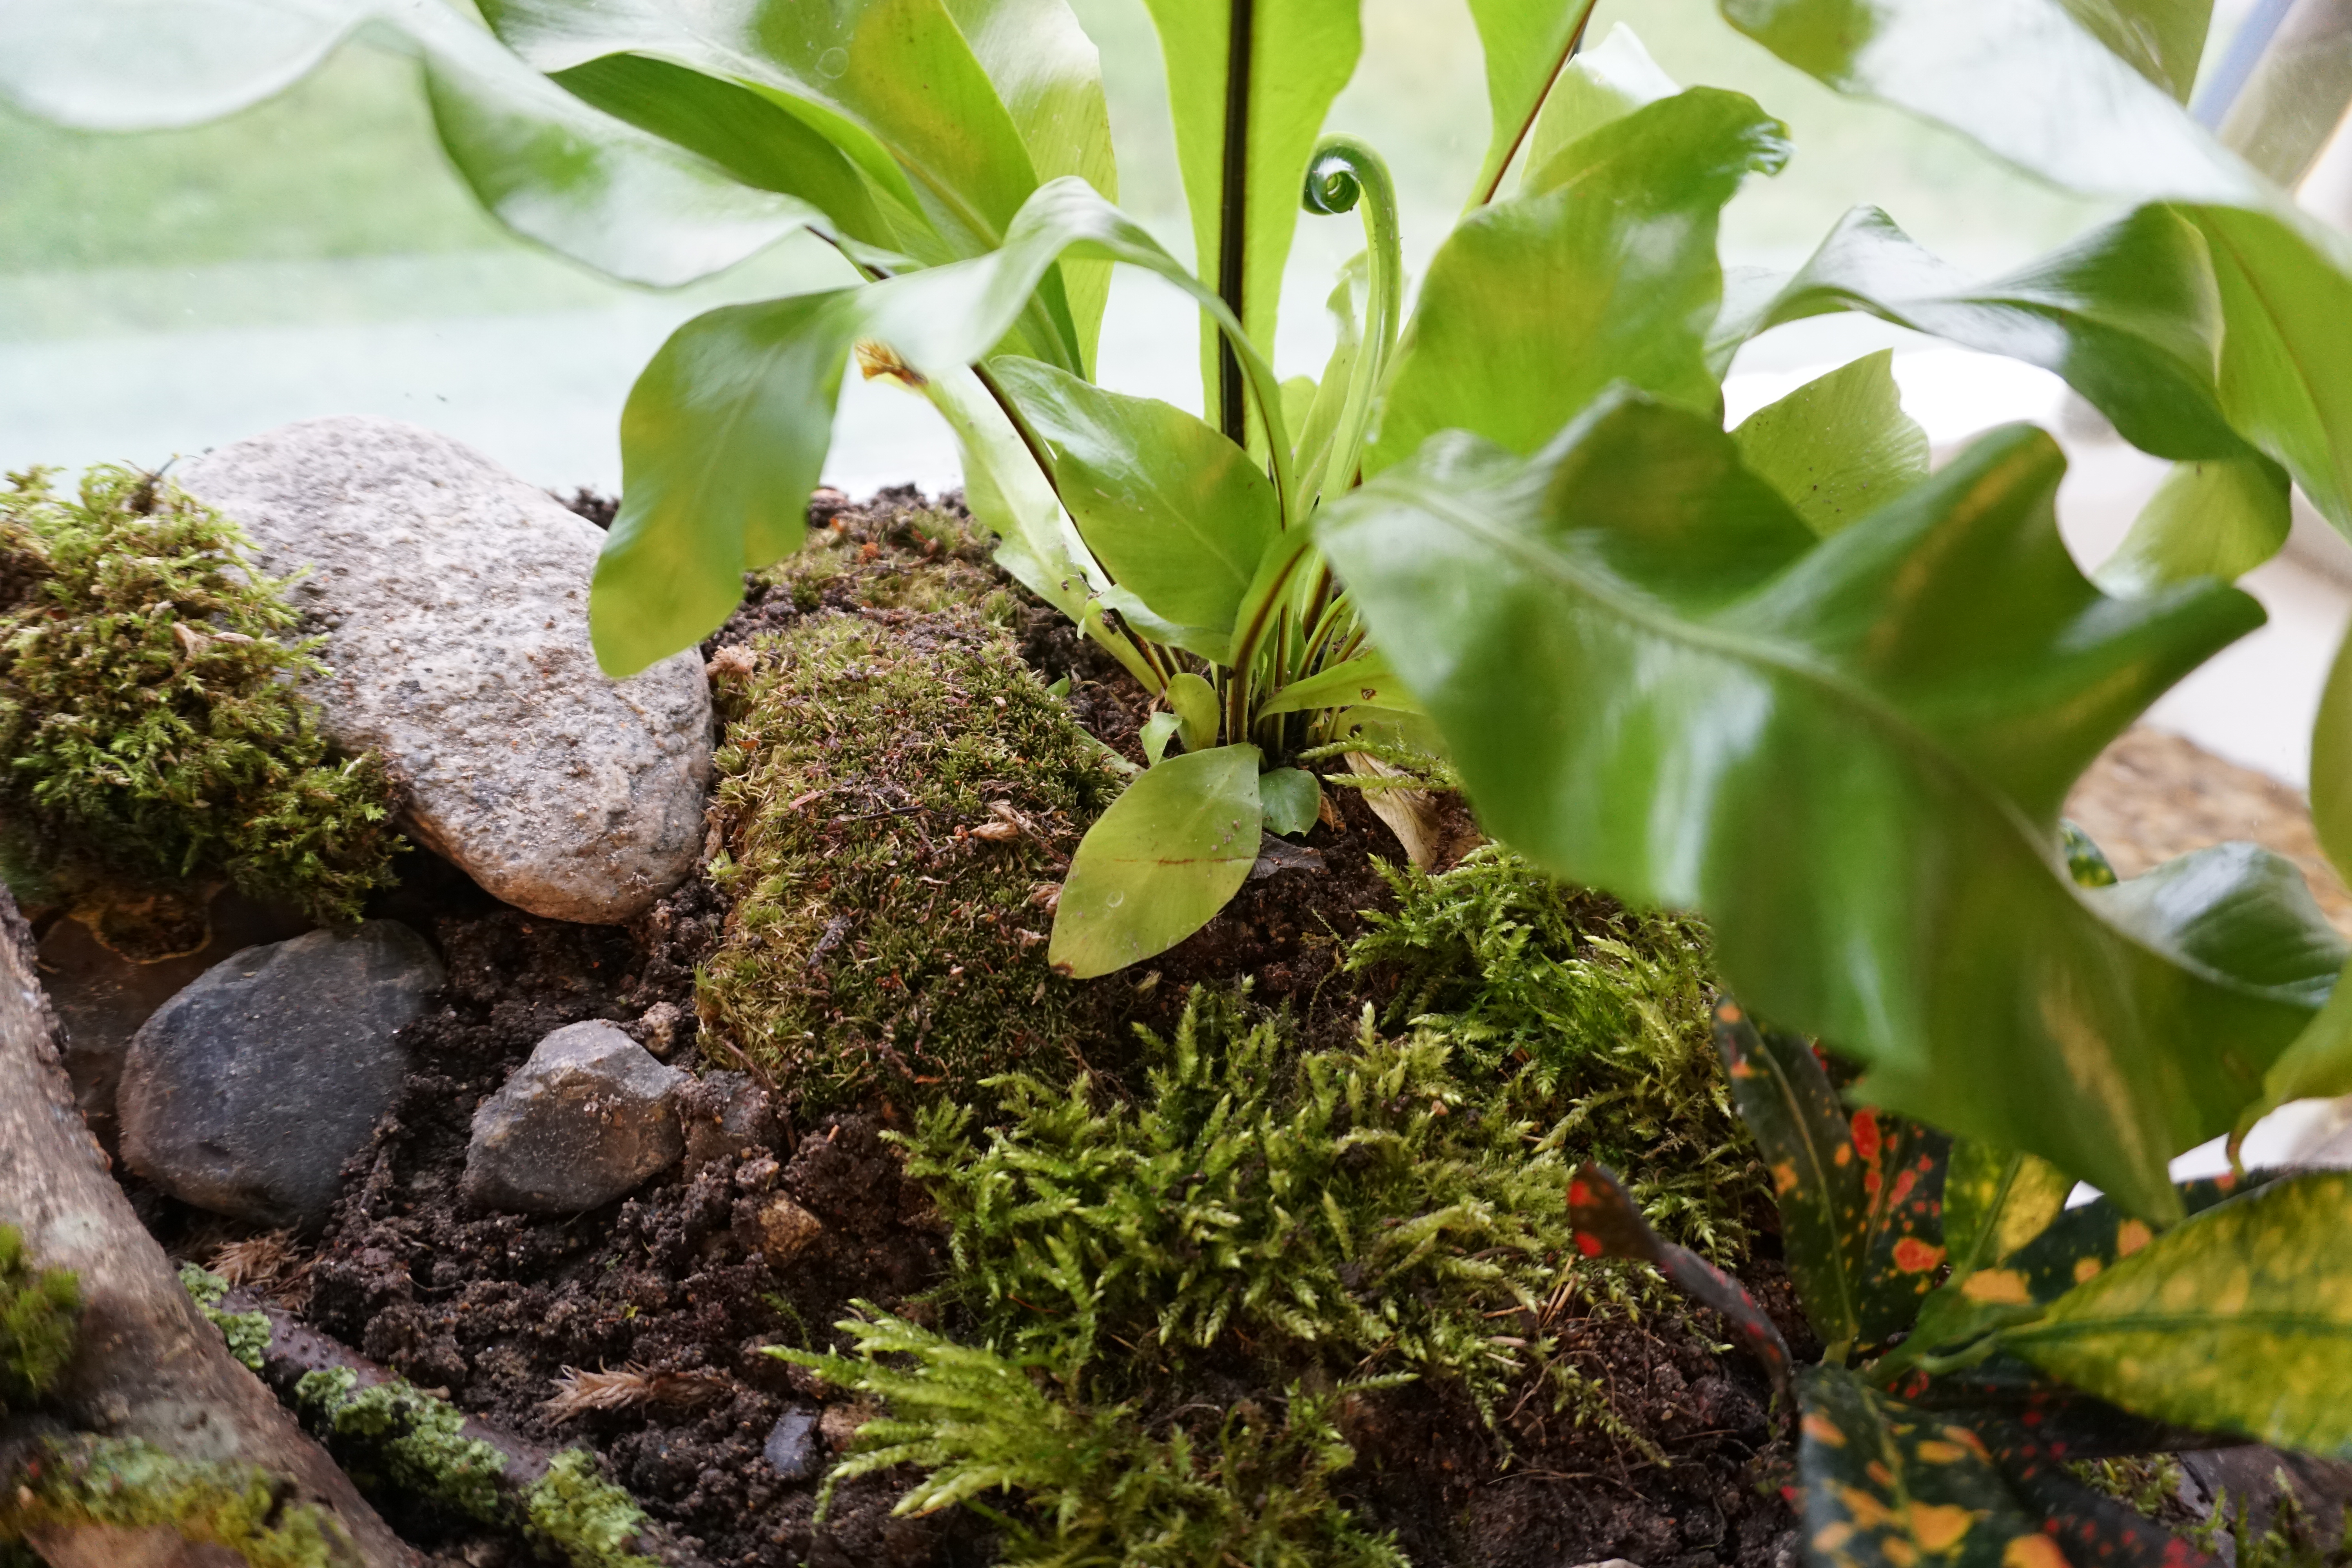 A big bird's-nest fern at the back and a small Croton codiaeum (orange-spotted leaves) in the bottom-right.
Final thoughts
This design is fairly basic, and simply serves as a general proof-of-concept terrarium. Through use of different containers, materials, organisms and designs, terrariums can be used to model a great variety of ecosystems, and built into infinitely many aesthetic designs. The only thing to do is experiment!
